Four crates, three pieces of wood, a handful of nails, a tube of liquid nails and vintage wheel casters: the ingredients I used for my first attempt at carpentry. I will tell you this, it was not easy, and I was quickly frustrated by the frequency of my mistakes. But the end product is something I will always treasure.
This is how I built a bookshelf out of wooden crates (along with the lessons I learned from doing it wrong).

Lesson #1: It is stupid to paint the wood before you start building.
Just stupid. Before I even bought nails, I painted two of the wooden crates, which proved futile. I ended up having to sand and paint them again once the bookshelves were assembled.

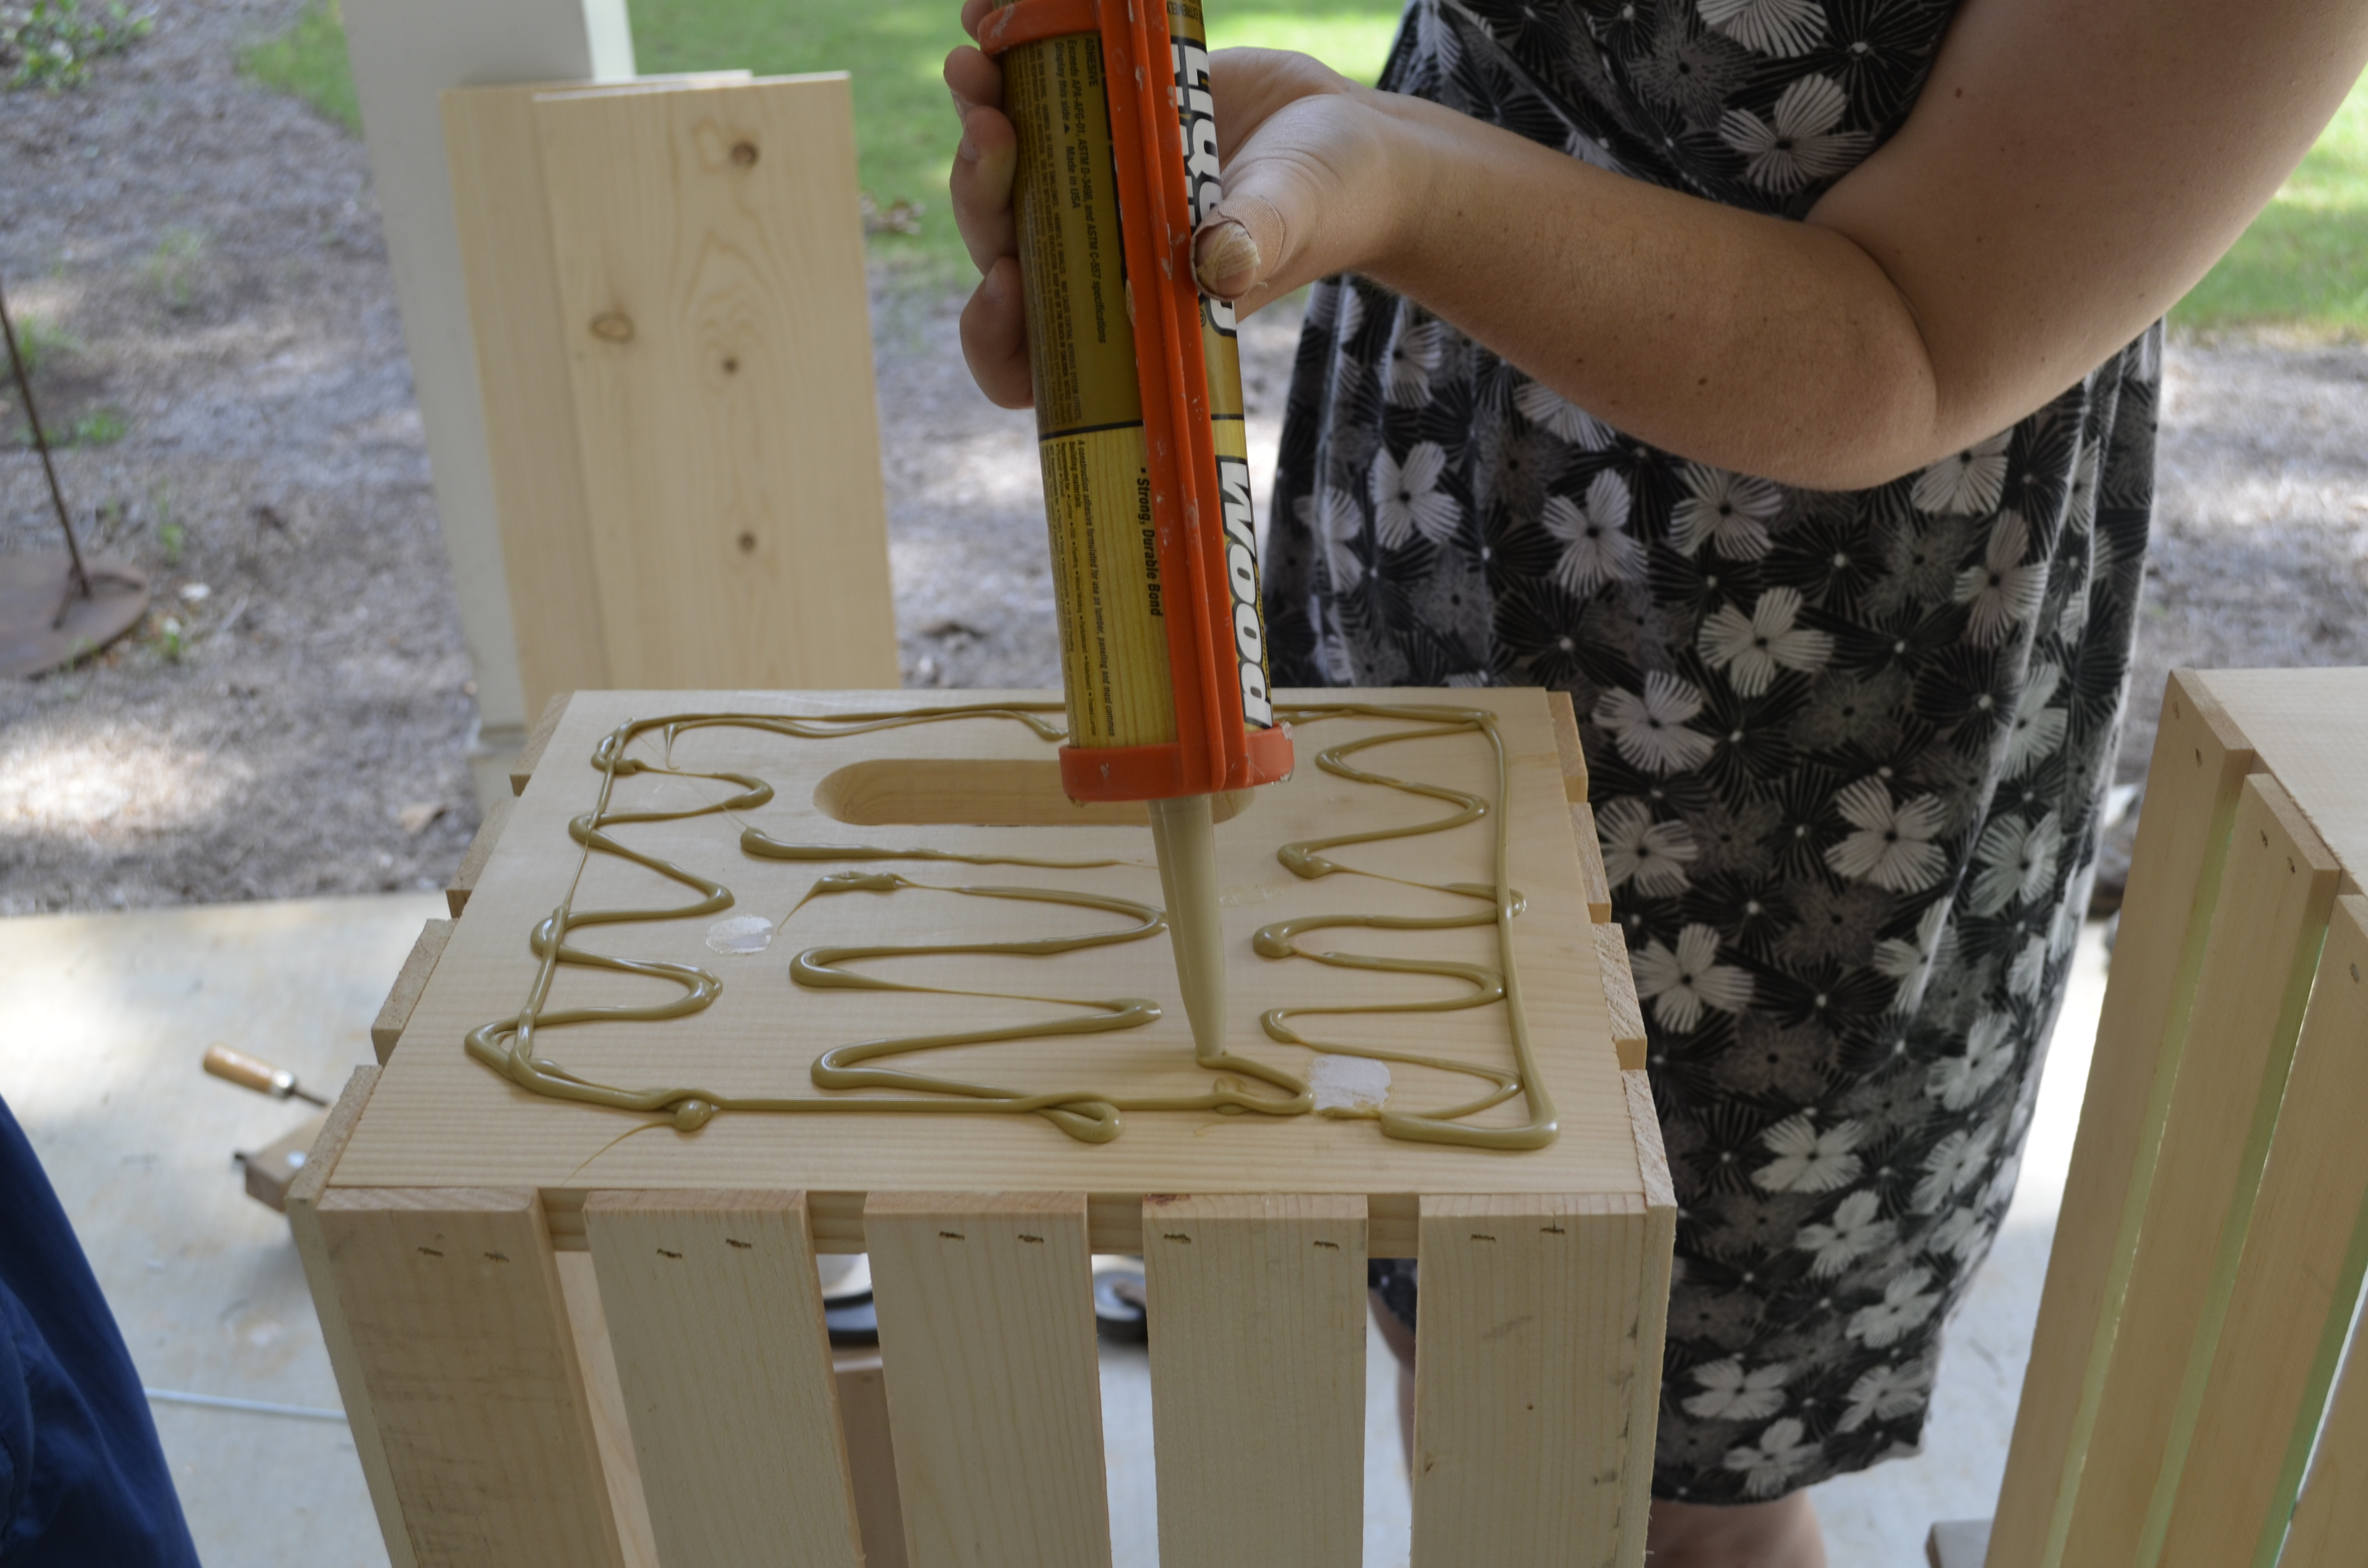
Lesson #2: Liquid Nails are great, but make sure you have several wood clamps if you decide to use it.
Being new to the world of power tools, I saw Liquid Nails as an easier option – compared to learning how to use the power drill my father gave me. And yes, Liquid Nails are super easy. Using a caulking gun, I evenly distributed the glue, leaving an inch margin around the edge.
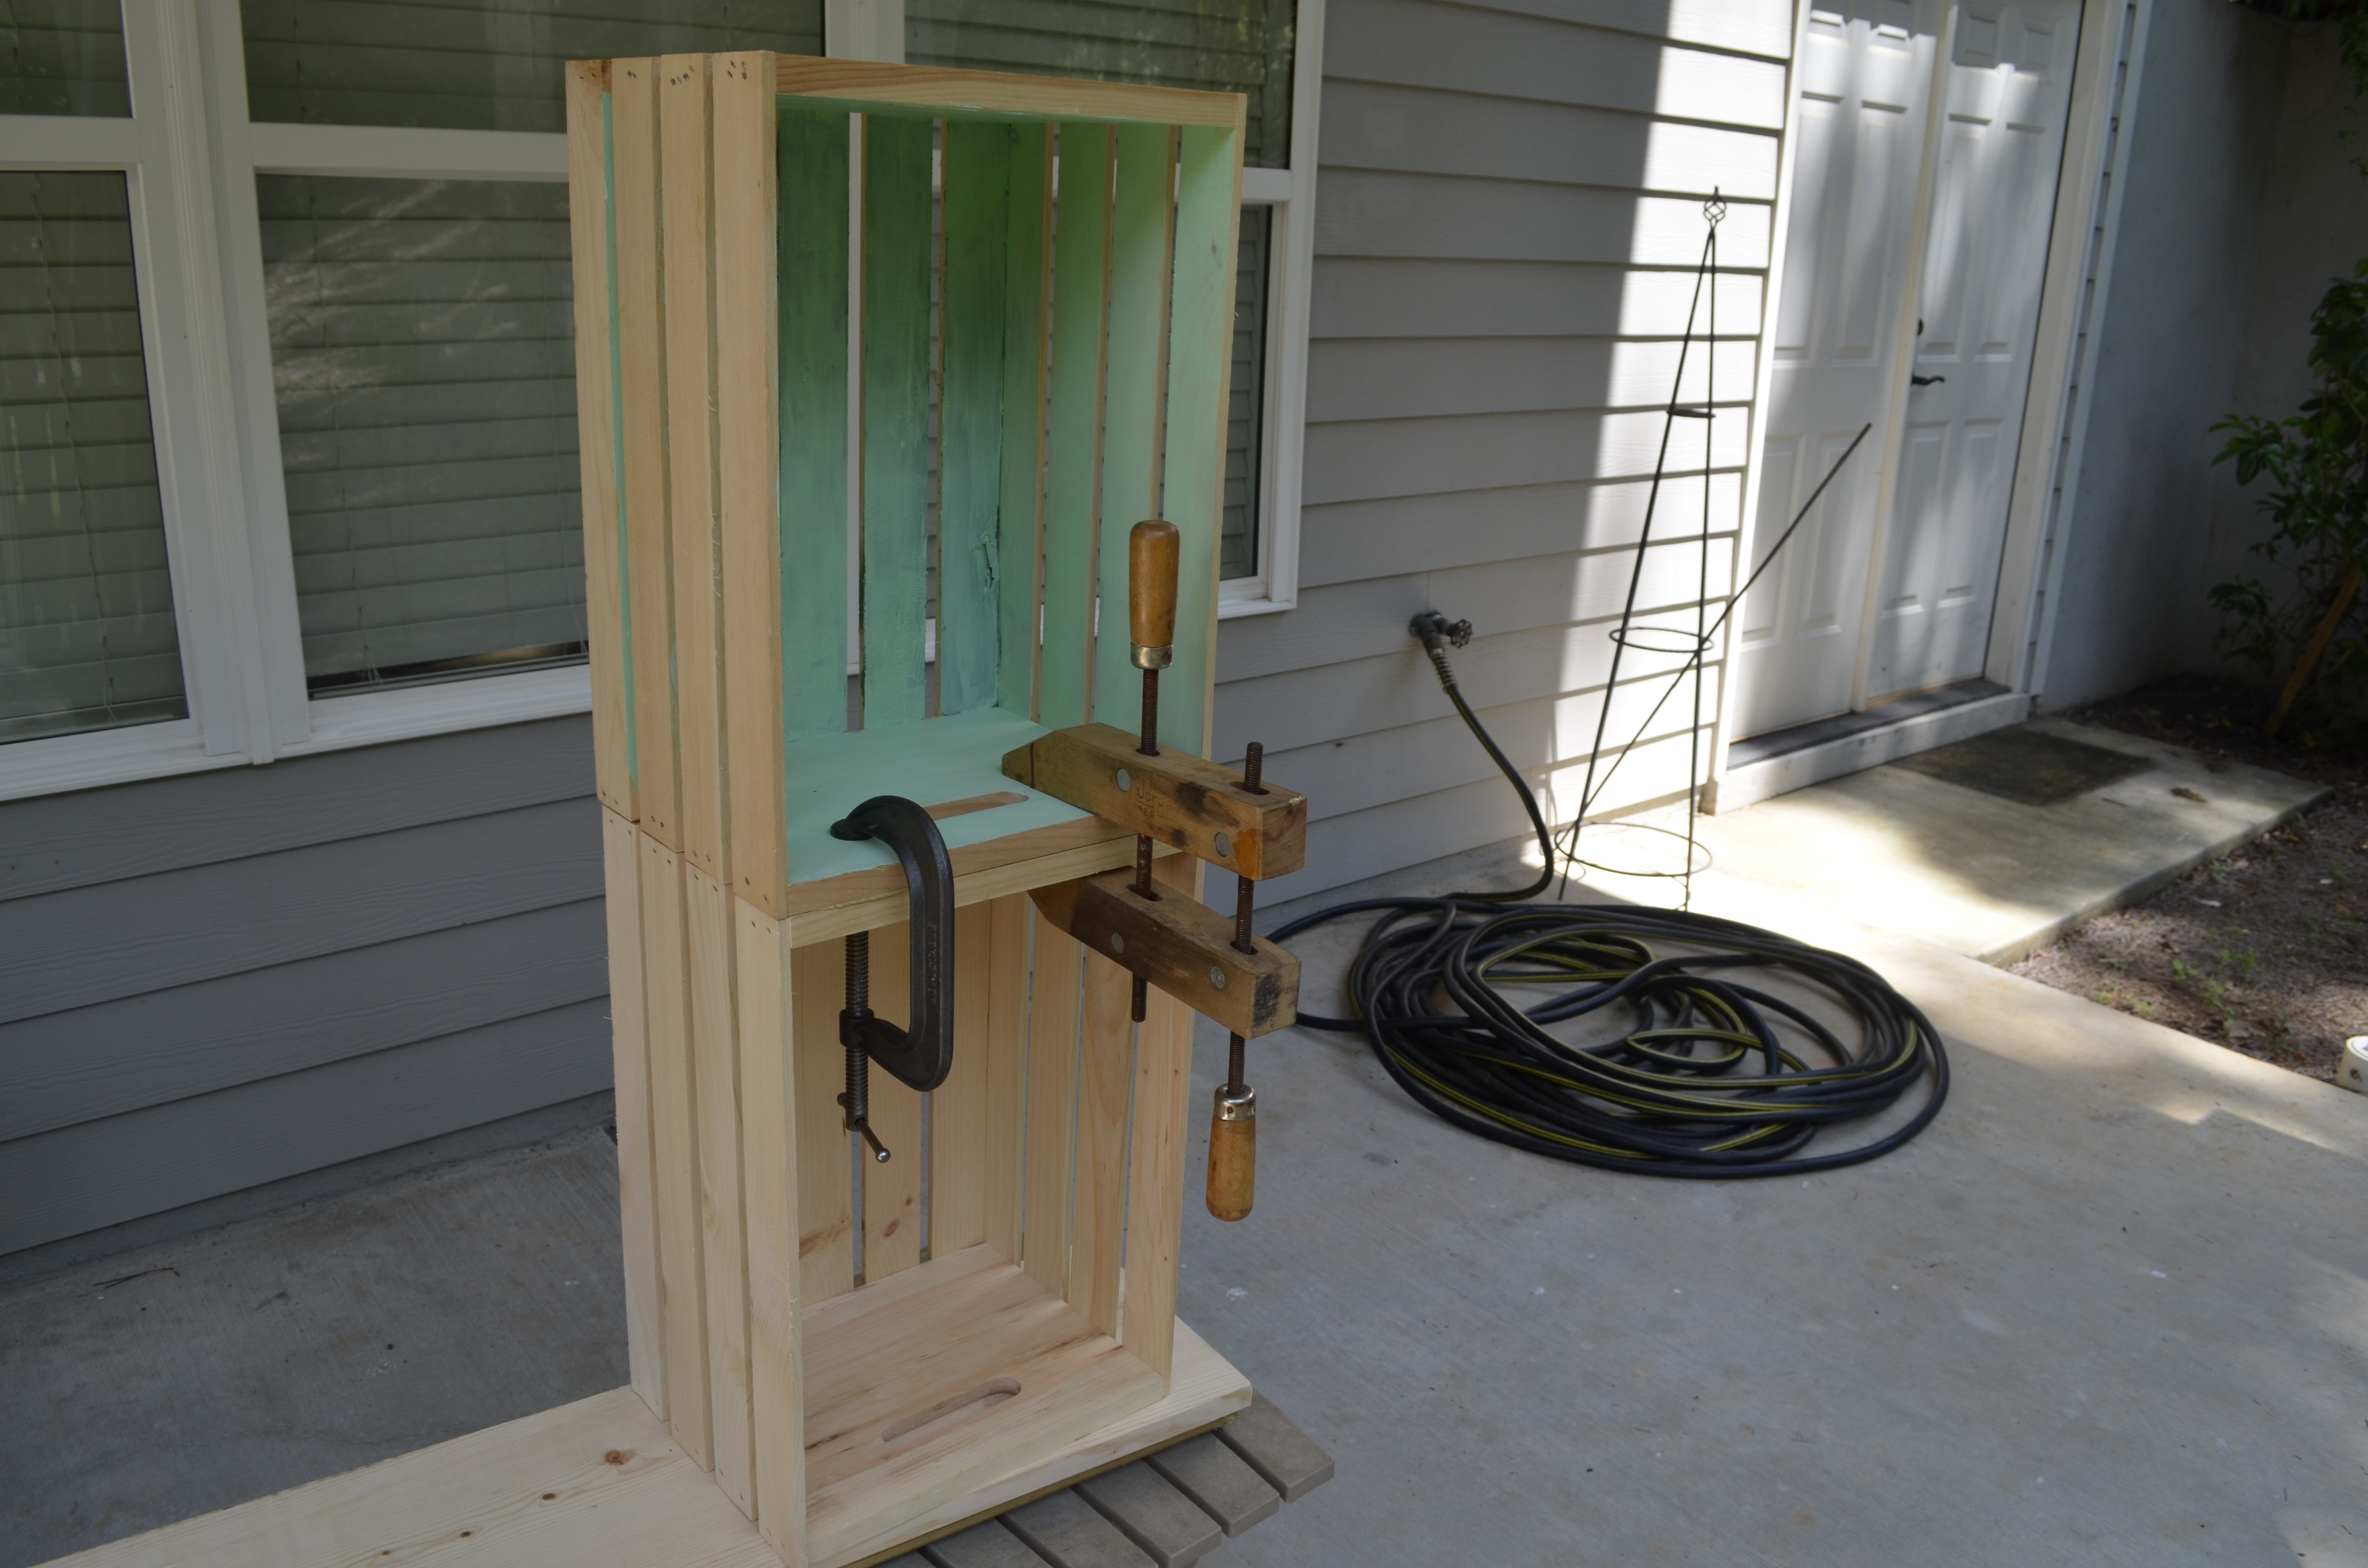
I had two clamps (see the picture below). The wooden clamp on the right worked great, distributing pressure relatively evenly. The problem is, I needed like four more. The metal clamp did not apply pressure evenly. It really wasn’t that helpful. The other issue I faced was separation on the back side of the crate.
Lesson #3: Wood sizes are not the same as the advertised measurements.
To make the bookshelves more sturdy, I decided to use three planks of wood – one below, between and on top of the crates. To do this, I purchased one 10-foot long 1×10 wood board. When I went to the cutting station at Home Depot, I had him cut the board into three 3-foot long pieces. And because the width of the crates is 9 inches, I needed him to cut one inch off of the width of the boards. Sadly, the Home Depot employee said he cannot do such a shallow cut.
I felt defeated. I do not own a saw – of any sort. These planks were going to jet out a whole inch. The perfectionist inside of me was going crazy. The Home Depot employee must have seen my face. “Well,” he said, “you know wood is not the exact size we advertise. It’s a known thing”
I look him in the eyes. Obviously, I did not know that. Sure enough, we measure the wood, and it is exactly 9 inches in width. The wood turned out to be perfect.

Lesson #4: Don’t be lazy. Use painter’s tape.
I love the look of natural wood, but I wanted these bookshelves to have a pop of color. So my goal was to paint only the interiors, leaving the edges and outsides raw wood. I started out being a little overly confident, thinking I could paint within the lines. But quickly, I made a few mistakes here and there. Luckily, sanding the wood once it drys can remove the paint, but I learned that painter’s tape is the easiest, time-saving solution.

Lesson #5: Craft paint is not ideal for this type of project.
Though the small bottles of paint were nice to test paint colors, they definitely did not provide enough paint for the entire project. I had to go back to the store to buy several more bottles, proving to be less cost-efficent than if I bought a small can of paint from Home Depot.
I decided to use two different color to create an ombré effect (because Pinterest tells me it’s so trendy). I was hesitate about it at first, but the two colors I chose ended up being a perfect combination.

Lesson #6: It’s important to buy the right size screws.
Though I did not make this mistake, I recognized that this is an important thing to consider. In my case, I did not need the screw to connect with the second piece of wood. I just needed to attach the wheel casters. With a 1 inch-thick piece of wood, I used 3/4 inch-long screws.
I found my wheel casters at construction warehouse sale – 4 wheels for $5. They were rusty and had flattened sides. (I liked how it provided some character.) But you can purchase brand new wheels at Home Depot for around $5 each.

Securing the wheels in place, I made sure to measure off their placements first. (No one wants an uneven bookshelf.) I used a 1 inch margin from the edge.

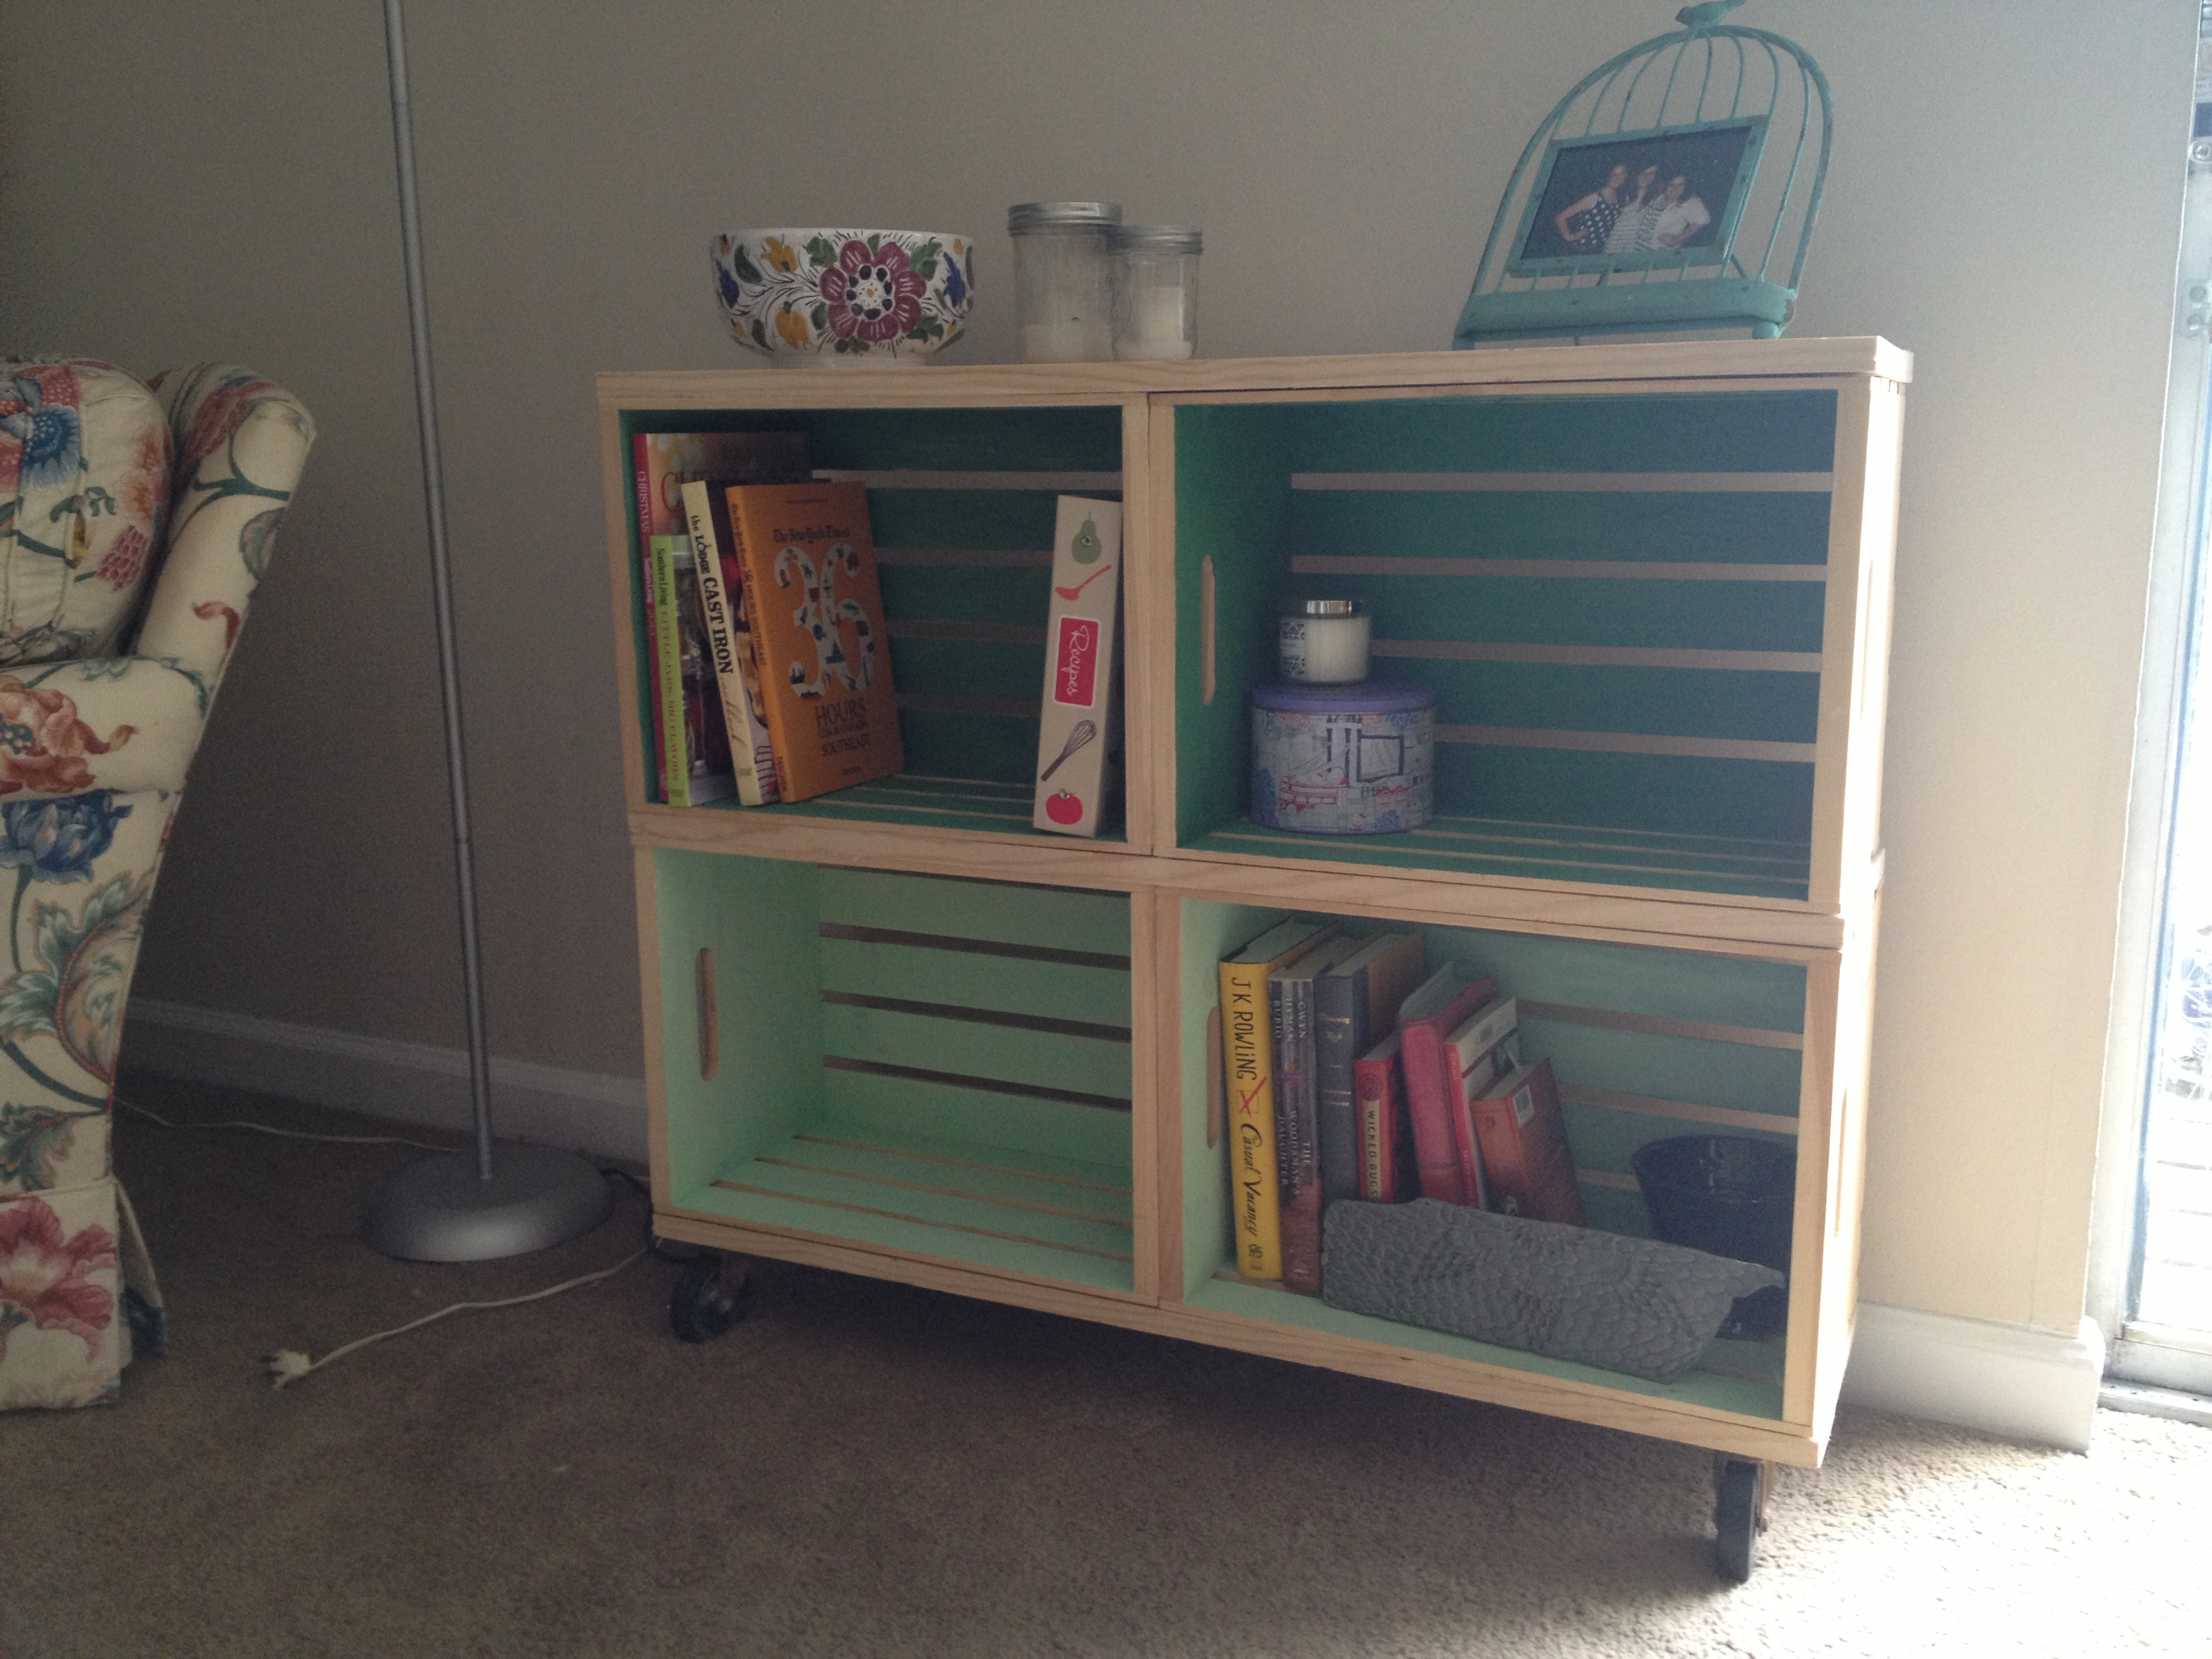
Finally, after a weekend and a few weeknights, the bookshelves came together to be the perfect addition to my apartment’s living room. And with my college days behind me, I’m sure it won’t be long until they are full of all the books I am reading “for fun!”