A Charleston Birthday Soiree

Yesterday, I arrived home from the most amazing weekend on Kiawah Island, about 40 minutes from Charleston, South Carolina. My family gathered together to celebrate my aunt’s 50th birthday in one of the most beautiful homes I’ve ever had the opportunity to stay in. We kayaked on the marsh, enjoyed time on the beach, and on Saturday night, threw a proper birthday dinner for my aunt. Naturally, I asked if I could be in charge of decorations.

IMG_1744.jpg

Since the setting was naturally beautiful, I kept the decorations simple and easy. I used the theme of magnolias and pineapples (because we’re in Charleston, of course). For the tables, I ordered a blue “painted check” paper table runner online at Hester & Cook, and we purchased three pineapples with good tops. My mother already had gold candle votives that she brought from home, and she also cut a few magnolia branches from her neighbor’s yard.

IMG_1748.jpg

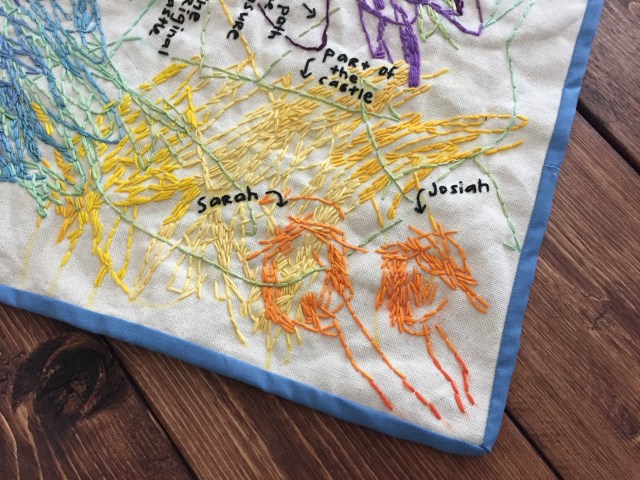
To add a personal touch, I created this banner with pictures of my aunt over the years. I saw the idea of adding paper hats on Pinterest. (I mean, it does make it really cute.) And I added a line of rick rack for an extra touch.

IMG_1755.jpg

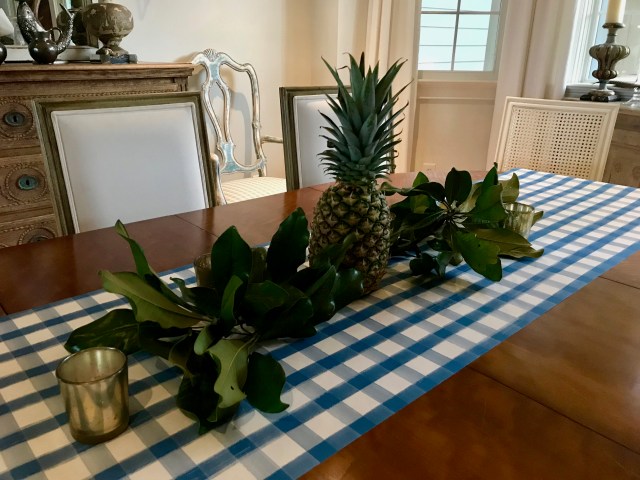
By keeping the table simple, it was so easy and quick to set up, and by using a paper runner, it made it extra easy to take it down. (Plus, you can cut up the pineapple and have it for breakfast the next day.)

IMG_1758.jpg

Because every birthday party needs a good “Happy Birthday” banner, I made this one with pineapples to really drive home the theme. I simply used yellow and green card stock. I also used a ruler and a gold paint pen to create the criss-cross detail.

IMG_1757.jpg

As a final detail, I set out a tray of pictures that people could pick up and flipped through when they were grabbing a drink. My grandmother helped collect them together, even finding a picture of my aunt at her first birthday… which I framed for the occasion.

IMG_1764.jpg

The party was a grand success! But let’s face it, when you are in such a beautiful place like Kiawah Island, South Carolina, it would have been hard to not have a wonderful time.

IMG_0501.jpg

Advertisement

Felt Daily Activity Schedule

IMG_3145

This visual activity schedule for kids was a custom order for a friend of a friend, and looking back over these images, I realize that the person who purchased this got quite the deal. (Aka I charged way too little… which is the story of my business life.)

I am beyond proud of this project. I love how it’s colorful. I love that it’s made out a felt. And I love that I took the extra time to make this banner sturdy—with the hopes that it not only survive one child but could possibly be passed down for the use of a second or a third.

img_2833

The idea was provided by the customer. Her son thrived under a routine, and she found that their days progressed better when he understood, to a point, what to expect. She provided the individual prompts—signs for lunch, playtime, bedtime, snack, etc. We made sure there were enough signs to make it through the hours of the days, plus extras… because obviously, you need some variation within the week.

She asked for the day to start at 7 and end at 7, and then I came up with the rest from there. The trick was trying to figure out how to visualize 13 hours on a banner without making it enormous. Though the problem quickly resolved itself when I realized I would need to create some sort of pocket to store the little signs. I created two columns with seven panels each.

img_3096

Before finishing the banner—using quilting techniques like binding—I attached magnet snaps to the banner along with the signs. Since felt is a soft fabric, I worried that the act of pulling the signs off the banner each day would quickly wear on the fabric, so I made sure each magnet had a backing of thick cardboard.

IMG_3162

I designed the banner so it could be hung on the wall and easily used by a child. Plus, I just wanted it to look good. Knowing it was for a boy, I used lots of blues and greens. But you could easily use different color palettes, like purple and blue, yellow and navy, pink and more pink!

IMG_3155

All of the signs were hand sewn, but I did use a sewing machine for the banner.

… Yeah, I definitely should have sold this for four times the price I charged. Oh well.

IMG_3157

Embroidered Treasure Map

IMG_4149

My nephew Josiah is just the coolest kid because he has the most amazing imagination. When he was like three or four years old, I really wanted to create a podcast where it would be just me and him talking about stuff. At the time, you could bring up any topic and he would have an opinion about it—despite knowing nothing about it. His imagination would just run wild.

One day the idea came to me—I would ask Josiah to draw a treasure map on a square piece of canvas fabric, and in the weeks that followed, I would embroider over the lines, making his map a permanent, one-of-kind piece.

IMG_4151

Together we sat down at my parents’ dining room table. I started by drawing the treasure chest, and I let Josiah take it from there. Though I didn’t want to be too influential in his drawing—as I wanted it to truly capture Josiah’s imagination at the time—I did encourage him to change colors every once in a while. (Selfishly I had envisioned this being a colorful piece.)

After he finished drawing, I had him identify everything, which turned out to be the cutest part of the whole thing.

IMG_3951

When I started this project, I thought the embroidery aspect would only take me a few weeks. Well, despite my best intensions, it ended up taking me several months.

One thing I decided early on is I wouldn’t care about being consistent with the embroidery floss. I easily could have stock piled the same color of blue embroidery floss to use throughout the project, but I decided I didn’t want to buy anything for this. Instead, I just used the collection of thread I already had.

I think this choice added to the overall adorableness of the map.

IMG_4153

I also didn’t fret too much about my stitching. For the most part, I kept the stitches short, and I didn’t worry about completely covering all of Josiah’s drawing. I was okay if a few ink marks peeked through.

IMG_4160

To finish it, I cut a piece of blue fabric as the back piece, and I used the quilting technique of binding to create a solid edge. While I created this piece for Josiah to play with—thinking he would roll it up, carry it around and use it in his pretend play—I also think it would be an adorable idea to frame the piece and use it as decoration in your house.

IMG_4155

Cookie Monster ‘Trunk or Treat’

Earlier this year, my mom accepted a position as a director of children’s ministries at a church near their house. With Halloween approaching, she began planning her first-ever Trunk or Treat event. And since Mom was in charge—and Dad and I are people who don’t like to be outdone—we brought our A-game by creating a monster-sized idea.

We used his truck to create a larger-than-life Cookie Monster display. (And I’ll go ahead and spoil the ending for you, we took home the top prize!)

IMG_8365.JPG

I love creating projects with my Dad because he always brings out the power tools. We started the display by creating the wood frame. His truck bed had two notches along the top that could fit the legs of our frame, helping it stand up. (I’m not sure what the technical name or use of these notches are. Sorry, I’m not a car person.)
IMG_8343IMG_8345


IMG_8348.JPG

Once the frame was complete, we wrapped it with cheap blue fabric we found at Walmart. (The key to creating Cookie Monster is all about finding the right color blue.) We ended up letting the blue fabric hang low to cover up more of the truck.

Note: I love the picture below because it shows how exacting my dad is. We couldn’t just cut out a circle. We had to use an Xacto knife.

IMG_8352.JPG

I used black fabric (the same cheap fabric as the blue) to cut out a mouth, and we used poster boards to create the eyes. We decided to not attached the eyes until we actually got to the event because we thought there was a high risk they could be damaged in the drive to the church. But I attached the black fabric mouth with spray fabric adhesive.

IMG_8355.JPG

With the display complete, the next step was to create the corresponding game. In the church’s storage room, my dad found a wooden bean bag toss board. He brought it home and covered it with blue felt. I create a similar black mouth out of fabric, and we created another pair of the eyes.

Finally, I made felt cookies as the bags kids would toss into Cookie Monster’s mouth. At the local Walmart, we found 1-pound bags of beans, and I stuffed the felt cookies with the bags as-is. (Aka I didn’t open the plastic, keeping it as the container for the beans.)

IMG_8357.JPG

IMG_8368.JPG
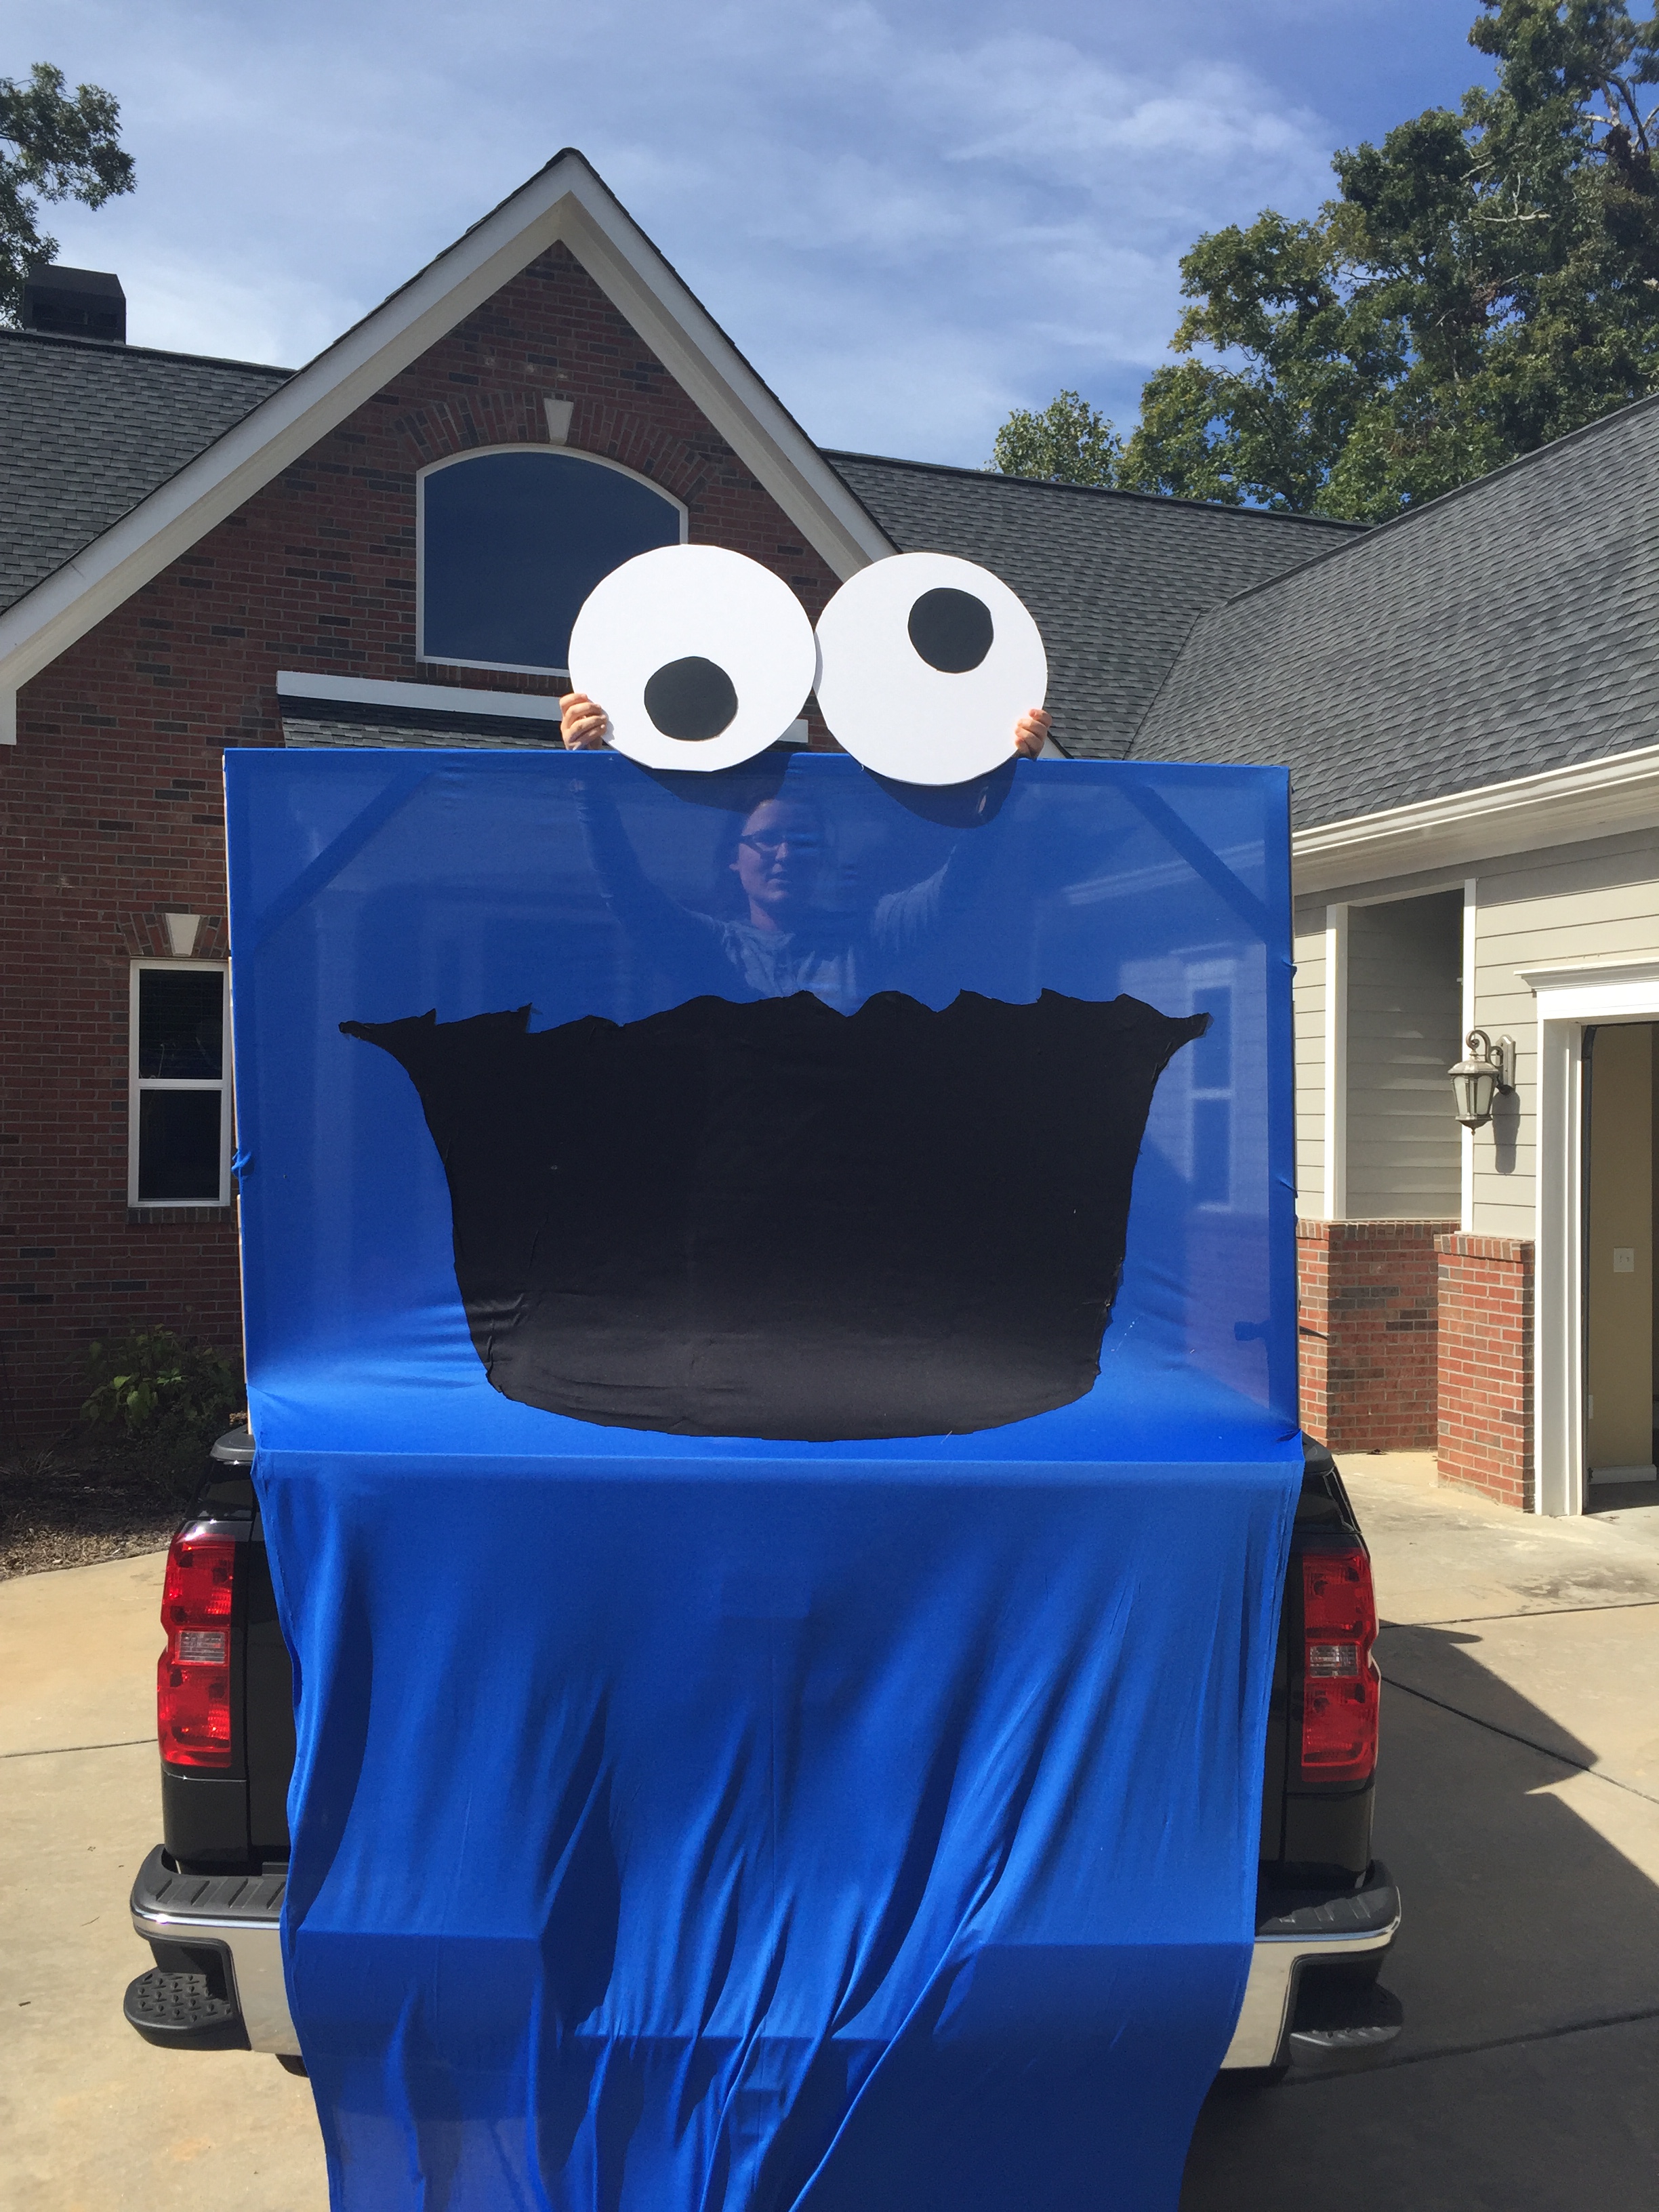
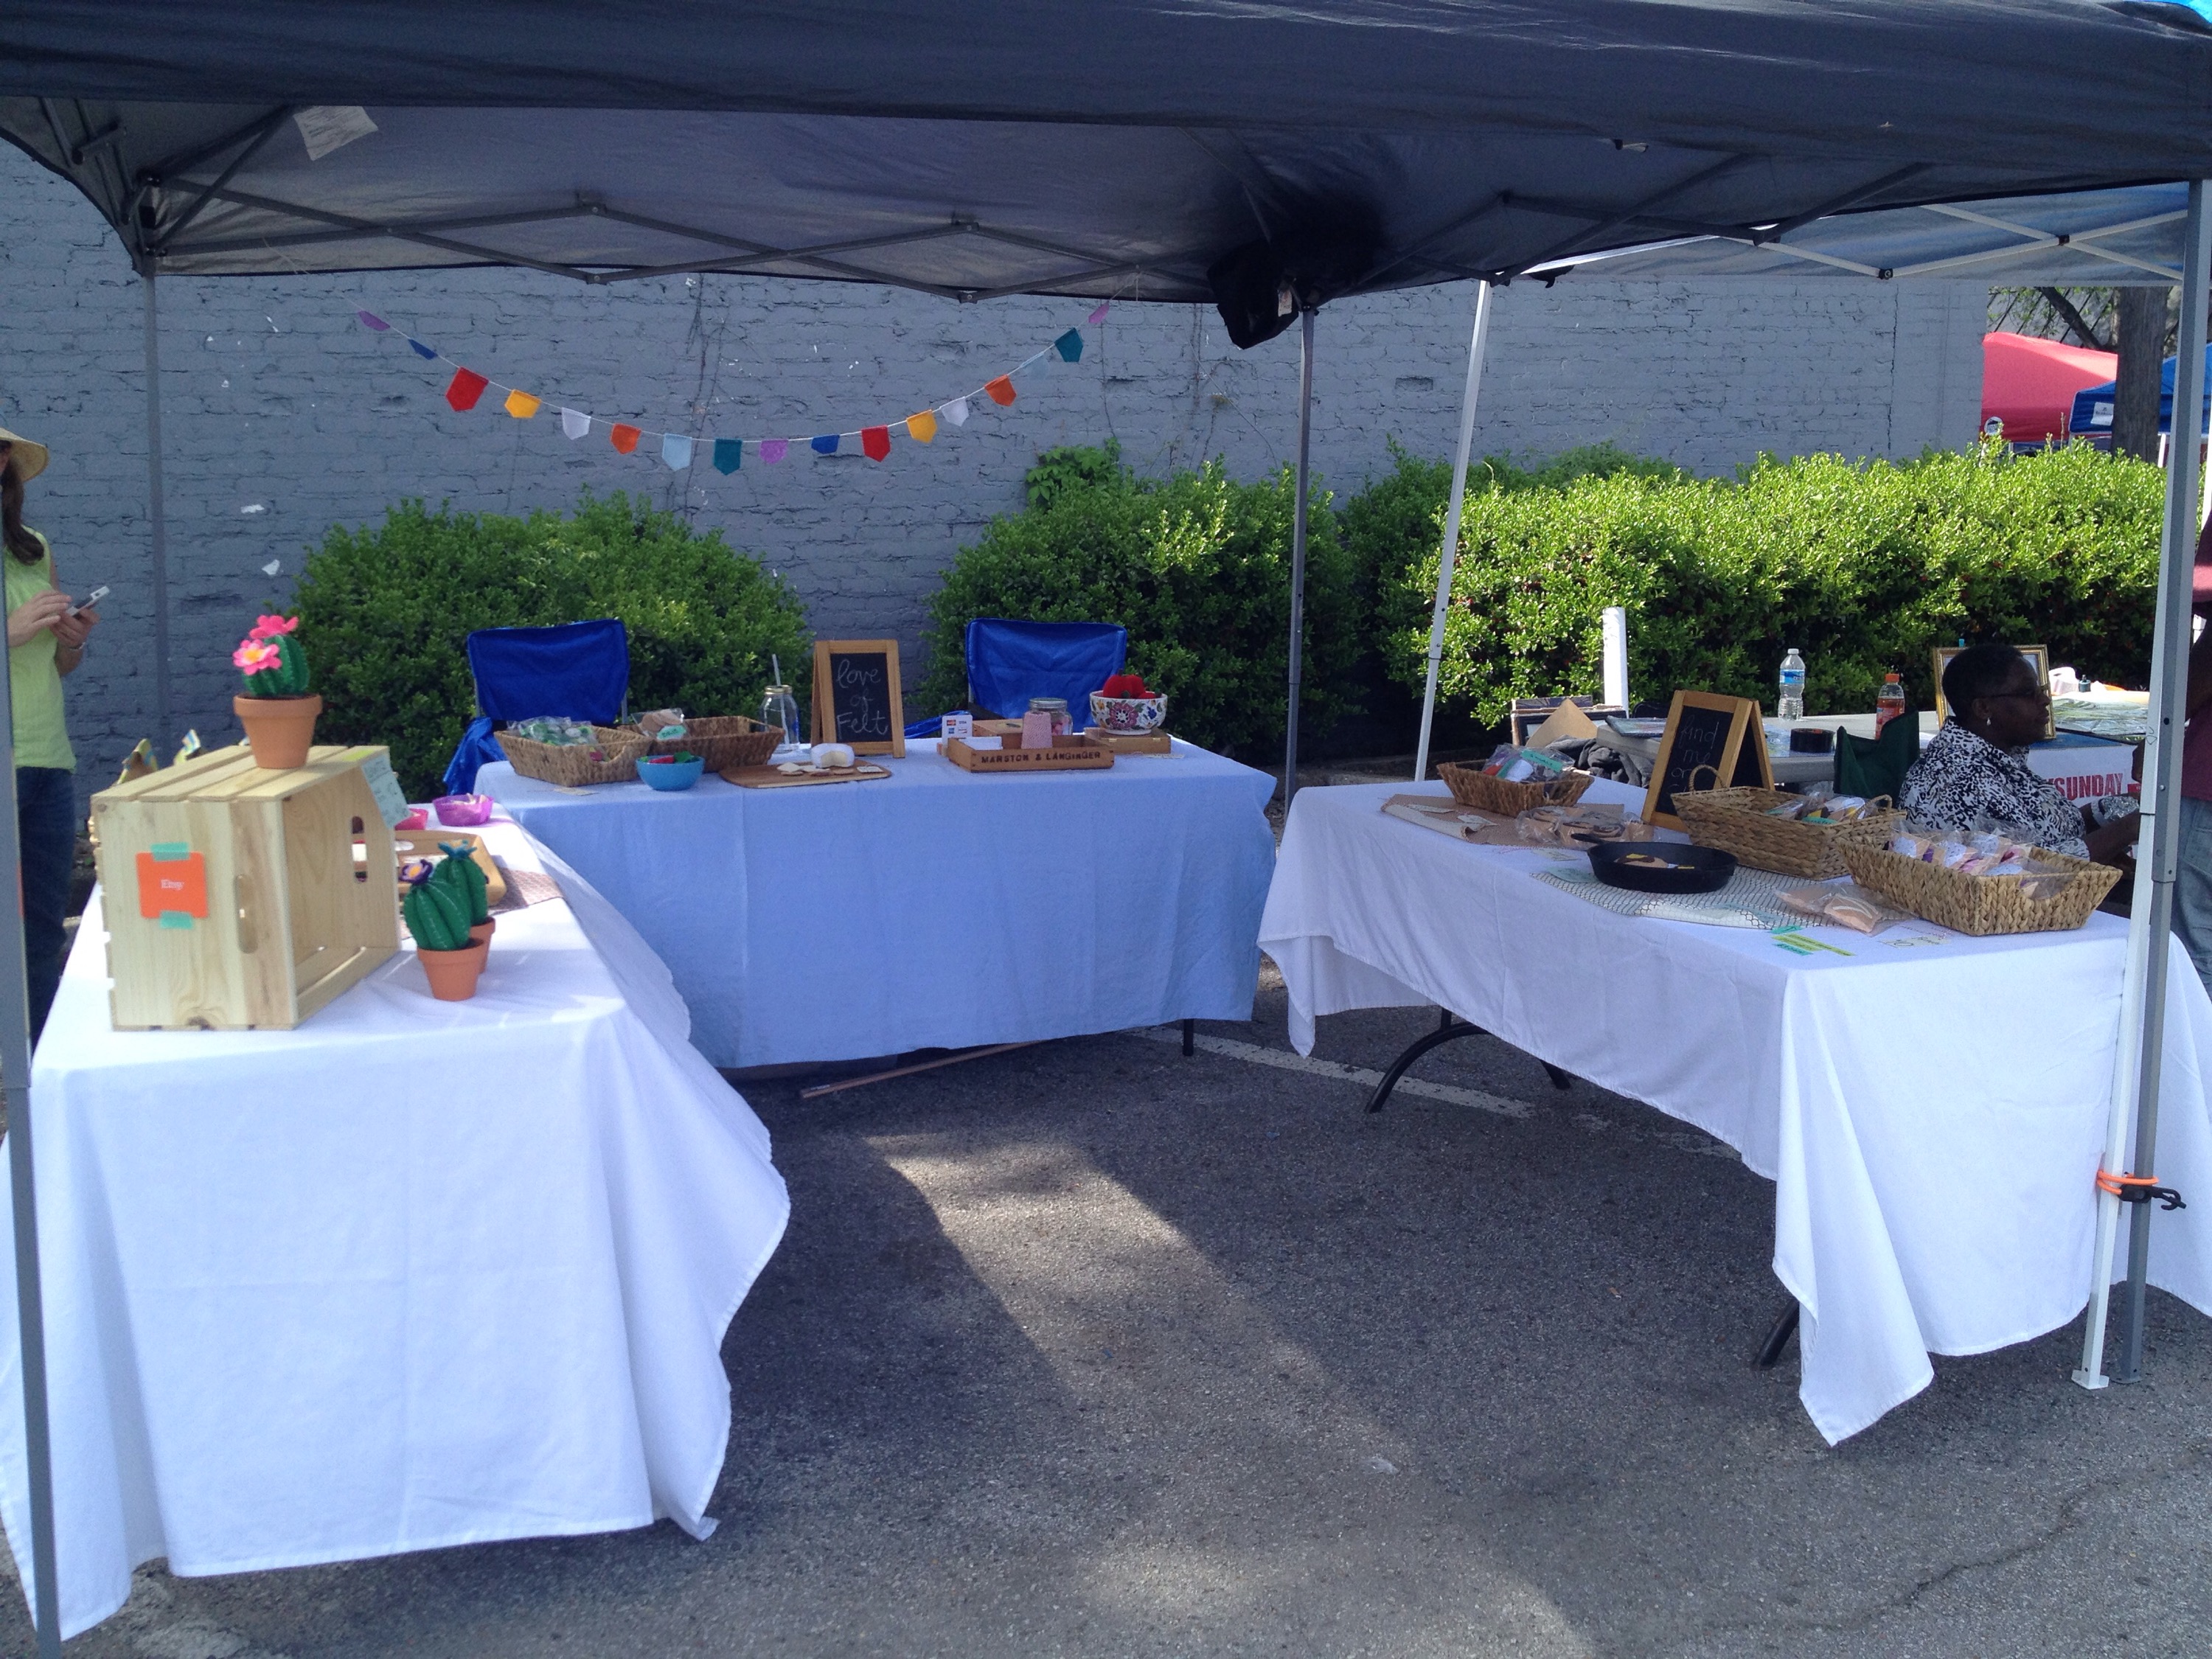
Like I said at the top of the blog post, there was a contest for the best display at the Truck or Treat. We won!

Homemade invitations for a pineapple-themed dinner party


IMG_0888

I firmly believe that one’s 25th birthday should be celebrated in a big way.  Not only does 25 years mark a quarter of a century, but I see it as an important mile marker in the transition into “adult.” Postgrad life can be tough learning how to handle big-time jobs, real-life bills and grown up relationships. By turning 25, you have a couple of these years under your belt, and you’re no longer considered a rookie.

So when I made plans to visit my best friend in Florida for her birthday celebration weekend, I knew a party had to be planned. First stop, the invitations!

IMG_0870

I wanted to pick a theme for the party – mainly for the decorations – that was simple. The party is going to be a casual event with friends: dinner, cake and a few games. I wouldn’t be surprised if after dinner we simply sit around, tell stories and laugh. So I decided to pick a simple icon that would stand as the theme of the party, and I selected the pineapple.

For the invitations, I made flat, felt pineapples to place like a letterhead. I cut out the two pieces of felt by hand, and then using black thread, I stitched the design (as well as attached the two pieces together). Once complete, I used Elmer’s glue to glue the felt piece to the card stock.

IMG_0892

I bought the card stock at Paper Source, and simply wrote out the information by hand. I’m so happy with how it all turned out. Now with these in the mail, it’s time to plan a party!

IMG_0885

Fabric “Fishing” Set for Pretend Play

Let’s talk about how cute this is for a second.

IMG_0641
One of my favorite memories from my childhood was going to the Fernbank Museum in Atlanta. My mom must have loved that place because it seemed like we went all the time (to my joy). Though the dinosaur in the lobby was cool, I adored this children’s exhibit dedicated to nature (I mean, it had a tree right in the middle of the room!)  And though my memories are vague in the details, I distinctly remember “fishing” in the room’s pretend pond. I could have played there all day, everyday.

This memory came to mind when I was trying to come up with a gift for my 3-year-old nephew, and it couldn’t be more perfect. He loved fishing when he was at my parents’ house earlier this year, and I can see it providing hours of endless playtime.

IMG_0624  IMG_0626
Another pro: I can use scrap fabric. I made my own template by free-handing the fish shape on card stock and cutting it out. I didn’t take the time to make sure the template was perfectly symmetrical, but it all worked out in the end.

IMG_0627
After using the template to cut out the fabric, I sewed on two eyes, one on each piece.  Then keeping right sides together, I sewed the two pieces of fabric together with a 1/4-inch seam allowance, stopping short to leave a hole for stuffing.

IMG_0625Once complete, I flipped the fabric right-sides out, and used polyfil to stuff the fish. Now the keys to “fishing” are the magnets. I found mine at Hobby Lobby, including these magnet hooks. I added a little stuffing to the fish’s “nose” before adding the round magnet. Using the hook magnet, I made sure the right side was facing out for the two to attract. (If the magnets repel each other, just flip the round magnet to the other side.

IMG_0628

With the magnet in place, I finished stuffing the fish and used a whipstitch to close the hole. I then repeated this process with three more fish. I didn’t create a fishing pole. My mom is actually delivering this gift for me, and I knew a pole would not fit in her suitcase. But I found this cool idea online. But let’s face, poles can turn into swords, and all you really need is a piece of string.

IMG_0634

Celebrating Christmas in July with Yarn-Wrapped Ornaments

The folks over at Patience Brewster reached out to me last week with a question: How are you celebrating Christmas in July?

I loved the line they used in their email, “Though we do flourish when the sun is high in the sky and the flowers are blooming, our minds are always on Christmas!”

I’ll admit, I have a hard time thinking about Christmas when it’s 100 degrees outside, but looking through Patience Brewster’s Christmas line, I was inspired by the colors she uses. Despite winter being a cold, dark-colored month, Patience uses bright, bold colors that remind me of summer.

So I reconsidered the question, and I have an answer.  I celebrate Christmas in July by making the projects I ran out of time to make last year, like these yarn-wrapped Christmas ornaments.

IMG_0549

I had all of the materials to make this project because I had purchased the Styrofoam balls last December. Alas, you can only do so many Christmas crafts before the magical days finally arrives. (I understand why Santa needs all year to prepare.)

This project is also a great way to use leftover yarn (which I have by the basketfuls). Otherwise, you’ll need Mod Podge, a paintbrush (for the glue) and a knitting needle (which I used to poke a hole through the ball.)

IMG_0532

Using the knitting needle, I guided a long piece of yarn through the hole, and then brought it back around the ball to knot at the top. And as you go about gluing on the rest of the yarn, try to keep these pieces out of the glue. When you’re done, tie the two loose pieces together to be the string that attaches the ornament to the tree.

IMG_0534

Starting in the middle, I painted the Mod Podge along the circumference, and then I slowly wrapped the yarn around the ball, gently pressing the yarn into the glue. Though you can continually work until you’re done, I think it’s beneficial to occasionally stop and let the glue dry, especially if you get too much glue on your fingers. (I find it helpful to let them dry as they hang. My chandelier proved to be the perfect drying spot.)

IMG_0538

For the more colorful ornament, I applied the yarn in pieces instead of continuing wrapping it. This version definitely takes longer (and if you’re like me and dislike glue, it definitely requires more patience).

IMG_0547

I think I’ll let these decorate my gardenia bush for a little bit before I store them away with other Christmas ornaments. But thanks to Patience, I definitely have Christmas on my mind. Once you start to think of Christmas ideas, it feel like the opportunities are endless.

My Farm-to-Table Birthday Dinner Party

The word that best describes the night is magical, and it really, really was.

IMG_9542a

Last week, I turned 24, and to celebrate, I hosted a farm-to-table with a group of wonderful friends in my own backyard. It was the best birthday I’ve had in my adult life.

IMG_9556a

My roommate Elizabeth and I have been talking about hosting a farm-to-table dinner for weeks. To serve a meal sourced exclusively from local ingredients. And then when my birthday entered the horizon, we decided it was the perfect occasion to turn our idea into reality. With the tables I had purchased for the Woodlawn Street Market, we turned our backyard into the most magical place on earth.

IMG_9550

We kept the decorations simple and embraced a mixed-matched theme. I had purchased the white tablecloths for the street market, and the burlap table runners came from my grandmother’s 80th birthday party. I have an assortment of cloth napkins that I had purchased from prop sales at work. And we used every chair in our house (plus a few from Elizabeth’s mom).

My dear friend Stephanie arranged the flowers using jars I had lying around the house. I love how elegant the simple arrangements look, using only sunflowers, spray roses and baby’s breath.

IMG_9543a

I don’t know what this says about Elizabeth and I, but we had to borrow plates, knives and chairs to accommodate 16 people, yet we had more than enough wine glasses. We set out drinks and appetizers for when people arrived, keeping the main courses inside to avoid bugs. I made a yummy white wine sangria, my friend Leah brought rum to make Dark ‘n’ Stormys, and (since my mother always say you should have a yummy, nonalcoholic option) I had lemonade and cucumber-lemon water. And then several people brought a bottle of wine.

IMG_9566

As people arrived, we mingled on our back porch, and we have a nice stone patio at the base of the porch steps. To combat the bugs, we had tiki torches lit on the deck, and we set up a couple of these mosquito coils from Off. (We found ours at Target.) They worked great. Highly suggested.

IMG_9569a
The food – oh the food – was so crazy good! I prepared a bbq pork shoulder from Morning Song Farm in the slow cooker. Elizabeth made cheese grits with McEwen & Sons grits. We also enjoyed potato and green bean salad, yellow squash casserole, feta and artichoke tarts and so much more!

IMG_5634_2

We ate, drank and talked for hours. It was spectacular. And then we ended the meal with a personal favorite: Edgar’s strawberry cake. Perfection! I couldn’t have asked for a better night with wonderful weather, delicious food and amazing friends. I vote this becomes an annual tradition.

IMG_9581a

A huge thank you to Stephanie for taking these pictures throughout the night!

Woodlawn Street Market, Round 2

Love of Felt hit the streets once again at Woodlawn Street Market this spring. The market was a big success, thanks largely in part to my mother who drove over to Birmingham to spend the day with me.

IMG_5496

This time around, I actually made some investments. I purchased 6-foot long tables, table covers and baskets. I did some research online of other maker’s set ups. And I put some thought into where each item should be displayed. (Like one blog suggested placing your top selling items  closest to the aisle to better grab  the attention of a walker-by.)

I’m almost too embarrassed to post a link to my first market set up, but for the sake of learning from one’s mistakes, I’ll share. (Don’t judge too harshly.) I think it’s safe to say I’ve improved leaps and bounds at my second time at bat.

IMG_5497

Notes I made for next time:

  • Make a sign with the shop’s name to hang in the back. (This time around, I simply ran out of time. I wrote “Love of Felt” on one of my small chalk boards, but I think a bigger sign will make a huge difference.)
  • Use the back table to create a center of focus. Again, I think a sign will enhance this, but I may also purchase more crates to place on the back table to add different levels of height.

IMG_5498

Before this market, I spent a good amount of time seeking advice online. I really liked this post from Catshy Crafts. I took her advice about mocking up my display at home a few days before, and I’m so glad I did. It helped so much having a game plan going into the morning. Plus, it helped me realize details I was missing. I snapped a few pictures of the mock up to help me remember.

IMG_5490

Lettuce Turnip the Beet

IMG_5542

A friend recently gave me a card beautifully illustrated with a head of lettuce. It read, “Lettuce always be friends.” I laughed at this for an embarrassing amount of time. It then led to a Google search for “vegetable puns,” and my world was opened to the plethora of puns the world has to offer!

I then made this banner. My thought is that it can help decorate my display the next time Love of Felt goes to market. Who knows, I may even put it up for sale.