A Charleston Birthday Soiree

Yesterday, I arrived home from the most amazing weekend on Kiawah Island, about 40 minutes from Charleston, South Carolina. My family gathered together to celebrate my aunt’s 50th birthday in one of the most beautiful homes I’ve ever had the opportunity to stay in. We kayaked on the marsh, enjoyed time on the beach, and on Saturday night, threw a proper birthday dinner for my aunt. Naturally, I asked if I could be in charge of decorations.

IMG_1744.jpg

Since the setting was naturally beautiful, I kept the decorations simple and easy. I used the theme of magnolias and pineapples (because we’re in Charleston, of course). For the tables, I ordered a blue “painted check” paper table runner online at Hester & Cook, and we purchased three pineapples with good tops. My mother already had gold candle votives that she brought from home, and she also cut a few magnolia branches from her neighbor’s yard.

IMG_1748.jpg

To add a personal touch, I created this banner with pictures of my aunt over the years. I saw the idea of adding paper hats on Pinterest. (I mean, it does make it really cute.) And I added a line of rick rack for an extra touch.

IMG_1755.jpg

By keeping the table simple, it was so easy and quick to set up, and by using a paper runner, it made it extra easy to take it down. (Plus, you can cut up the pineapple and have it for breakfast the next day.)

IMG_1758.jpg

Because every birthday party needs a good “Happy Birthday” banner, I made this one with pineapples to really drive home the theme. I simply used yellow and green card stock. I also used a ruler and a gold paint pen to create the criss-cross detail.

IMG_1757.jpg

As a final detail, I set out a tray of pictures that people could pick up and flipped through when they were grabbing a drink. My grandmother helped collect them together, even finding a picture of my aunt at her first birthday… which I framed for the occasion.

IMG_1764.jpg

The party was a grand success! But let’s face it, when you are in such a beautiful place like Kiawah Island, South Carolina, it would have been hard to not have a wonderful time.

IMG_0501.jpg

Advertisement

Fabric “Fishing” Set for Pretend Play

Let’s talk about how cute this is for a second.

IMG_0641
One of my favorite memories from my childhood was going to the Fernbank Museum in Atlanta. My mom must have loved that place because it seemed like we went all the time (to my joy). Though the dinosaur in the lobby was cool, I adored this children’s exhibit dedicated to nature (I mean, it had a tree right in the middle of the room!)  And though my memories are vague in the details, I distinctly remember “fishing” in the room’s pretend pond. I could have played there all day, everyday.

This memory came to mind when I was trying to come up with a gift for my 3-year-old nephew, and it couldn’t be more perfect. He loved fishing when he was at my parents’ house earlier this year, and I can see it providing hours of endless playtime.

IMG_0624  IMG_0626
Another pro: I can use scrap fabric. I made my own template by free-handing the fish shape on card stock and cutting it out. I didn’t take the time to make sure the template was perfectly symmetrical, but it all worked out in the end.

IMG_0627
After using the template to cut out the fabric, I sewed on two eyes, one on each piece.  Then keeping right sides together, I sewed the two pieces of fabric together with a 1/4-inch seam allowance, stopping short to leave a hole for stuffing.

IMG_0625Once complete, I flipped the fabric right-sides out, and used polyfil to stuff the fish. Now the keys to “fishing” are the magnets. I found mine at Hobby Lobby, including these magnet hooks. I added a little stuffing to the fish’s “nose” before adding the round magnet. Using the hook magnet, I made sure the right side was facing out for the two to attract. (If the magnets repel each other, just flip the round magnet to the other side.

IMG_0628

With the magnet in place, I finished stuffing the fish and used a whipstitch to close the hole. I then repeated this process with three more fish. I didn’t create a fishing pole. My mom is actually delivering this gift for me, and I knew a pole would not fit in her suitcase. But I found this cool idea online. But let’s face, poles can turn into swords, and all you really need is a piece of string.

IMG_0634

My Farm-to-Table Birthday Dinner Party

The word that best describes the night is magical, and it really, really was.

IMG_9542a

Last week, I turned 24, and to celebrate, I hosted a farm-to-table with a group of wonderful friends in my own backyard. It was the best birthday I’ve had in my adult life.

IMG_9556a

My roommate Elizabeth and I have been talking about hosting a farm-to-table dinner for weeks. To serve a meal sourced exclusively from local ingredients. And then when my birthday entered the horizon, we decided it was the perfect occasion to turn our idea into reality. With the tables I had purchased for the Woodlawn Street Market, we turned our backyard into the most magical place on earth.

IMG_9550

We kept the decorations simple and embraced a mixed-matched theme. I had purchased the white tablecloths for the street market, and the burlap table runners came from my grandmother’s 80th birthday party. I have an assortment of cloth napkins that I had purchased from prop sales at work. And we used every chair in our house (plus a few from Elizabeth’s mom).

My dear friend Stephanie arranged the flowers using jars I had lying around the house. I love how elegant the simple arrangements look, using only sunflowers, spray roses and baby’s breath.

IMG_9543a

I don’t know what this says about Elizabeth and I, but we had to borrow plates, knives and chairs to accommodate 16 people, yet we had more than enough wine glasses. We set out drinks and appetizers for when people arrived, keeping the main courses inside to avoid bugs. I made a yummy white wine sangria, my friend Leah brought rum to make Dark ‘n’ Stormys, and (since my mother always say you should have a yummy, nonalcoholic option) I had lemonade and cucumber-lemon water. And then several people brought a bottle of wine.

IMG_9566

As people arrived, we mingled on our back porch, and we have a nice stone patio at the base of the porch steps. To combat the bugs, we had tiki torches lit on the deck, and we set up a couple of these mosquito coils from Off. (We found ours at Target.) They worked great. Highly suggested.

IMG_9569a
The food – oh the food – was so crazy good! I prepared a bbq pork shoulder from Morning Song Farm in the slow cooker. Elizabeth made cheese grits with McEwen & Sons grits. We also enjoyed potato and green bean salad, yellow squash casserole, feta and artichoke tarts and so much more!

IMG_5634_2

We ate, drank and talked for hours. It was spectacular. And then we ended the meal with a personal favorite: Edgar’s strawberry cake. Perfection! I couldn’t have asked for a better night with wonderful weather, delicious food and amazing friends. I vote this becomes an annual tradition.

IMG_9581a

A huge thank you to Stephanie for taking these pictures throughout the night!

Applique Lake Lanier Pillow

DSC_0667

There is a point early on in a sewing project when you just know that the final product is going to be fantastic. This idea – a pillow with a map of the lake my parents live on – had been floating around in my head for months. And finally, back in December (yes, this is another overdue post) I finally put the plan into action. One day at work, I found a map online that I eventually used as my template. It was that early on – before I had even picked up a piece of fabric – that I knew in my heart this pillow was going to turn out awesome!

I think it turned out to be just that.

DSC_0634

I used the map I found online as a compass, pointing me in the direction I should take the project. The map’s size decided the dimensions, and its green outline inspired me to use layers of fabric.

DSC_0635    DSC_0636

The pillow’s map has 3 layers of fabric. The first (though it may be hard to see in the pictures) is a layer of light blue tulle. The second layer is a dark denim material someone gave me as scraps. Using heat n’ bond iron-on adhesive, I cut out a rough outline of the map without the worry of fraying edges.

DSC_0644    DSC_0645

Finally, the third piece is the most detailed. Again using heat ‘n bond iron-on adhesive, I pined the map to the fabric and cut out the map along the green border. (I thought if I cut any closer, some of those tiny coves would be crazy difficult to cut out.) This piece took awhile to cut because I went nice and slow. I didn’t want to make any mistakes.

DSC_0647

With the three layers made, I ironed the denim piece with the tulle underneath to the pillow. I then did the same with the light blue piece. With everything loosely attached, I used the embroidery foot on my sewing machine to sew everything down.

DSC_0657

With the map in place, I added a few details, embroidering the lake’s name and a small compass. I then attached the back piece, placing right sides together and sewing along the edge with a 3/4-inch seam allowance. Leaving a small hole, I stuffed the pillow with poly-fil, and hand sewed the hole closed.

DSC_0673

It’s been awhile since I used my embroidery foot with my sewing machine, and for me, it’s take a few minutes before I feel like I have the hang on it. But even in it’s imperfect moments, I love the free-form look of this sewing foot creates. For me, it just enhances the homemade quality.

DSC_0671

After attaching the lake map, I felt like the pillow still needed something extra. I knew I wanted to embroider the lake’s name, but the idea of the compass came to me at the last minute. It was the perfect finishing touch.

DSC_0674

Overall, this pillow is of great quality. I used canvas for the front of the pillow and a thick, blue cotton fabric for the back. Both pieces were in my collect of scrap fabric, so I don’t know about cost. But I do know the fabric choice helps make the pillow feels so sturdy.

DSC_0669The pillow now lives in my parents’ kitchen in a cute sitting area they created (instead of having a kitchen table). On a good winter day, you could stand up from this spot and see the lake through the windows. I couldn’t think of a better home.


Hosting my Grandmother’s 80th Birthday

DSC_0600

Several months ago, my mom and I sat down to brainstorm ideas for my Grandmother’s 80th birthday. Our initial ideas were grand: a four course meal and a string quartet. But as the weeks progressed and our ideas receive feedback from our financial backer (Dad) and the guest of honor (Grandma), we decided to tone down the party. It would be a simple cocktail party with heavy hor d’oruvres and lots of friends and family.

Screen shot 2014-11-05 at 4.19.45 PM

Let’s start by taking about this amazing invitation. A link on Pinterest led me to Tiny Prints, a custom card and invitation website owned by Shutterfly. Though I initially thought this template was rather plain, I was amazed at how well it complimented the picture. This is my grandmother’s engagement portrait. (Isn’t she stunning!) The template added a cool filter, which helped make the white text stand out. Unlike some templates, this invitation left plenty of room for all of the information we wanted to include. (And it was Mom who came up with the wording, “Please no gifts – only many good wishes.” I thought it was pretty clever!)

Fifty of Grandma’s dearest friends and family were able to make it. The party took place at the retirement community Grandma lives at in its grand ballroom (which was great because the room itself was already well decorated and beautiful).

DSC_0618

We coordinated with the staff beforehand, and they had the entire room set up when we arrived. All we had to do was set up the finishing touches. The facility even had its only helium tank, making it easy (and cheap) to have lots and lots of balloons. Despite it being a cocktail party, we had enough chairs for everyone to set down. My parents hired a piano player, and as you can see below, a few couples danced (so precious!).

DSC_0603

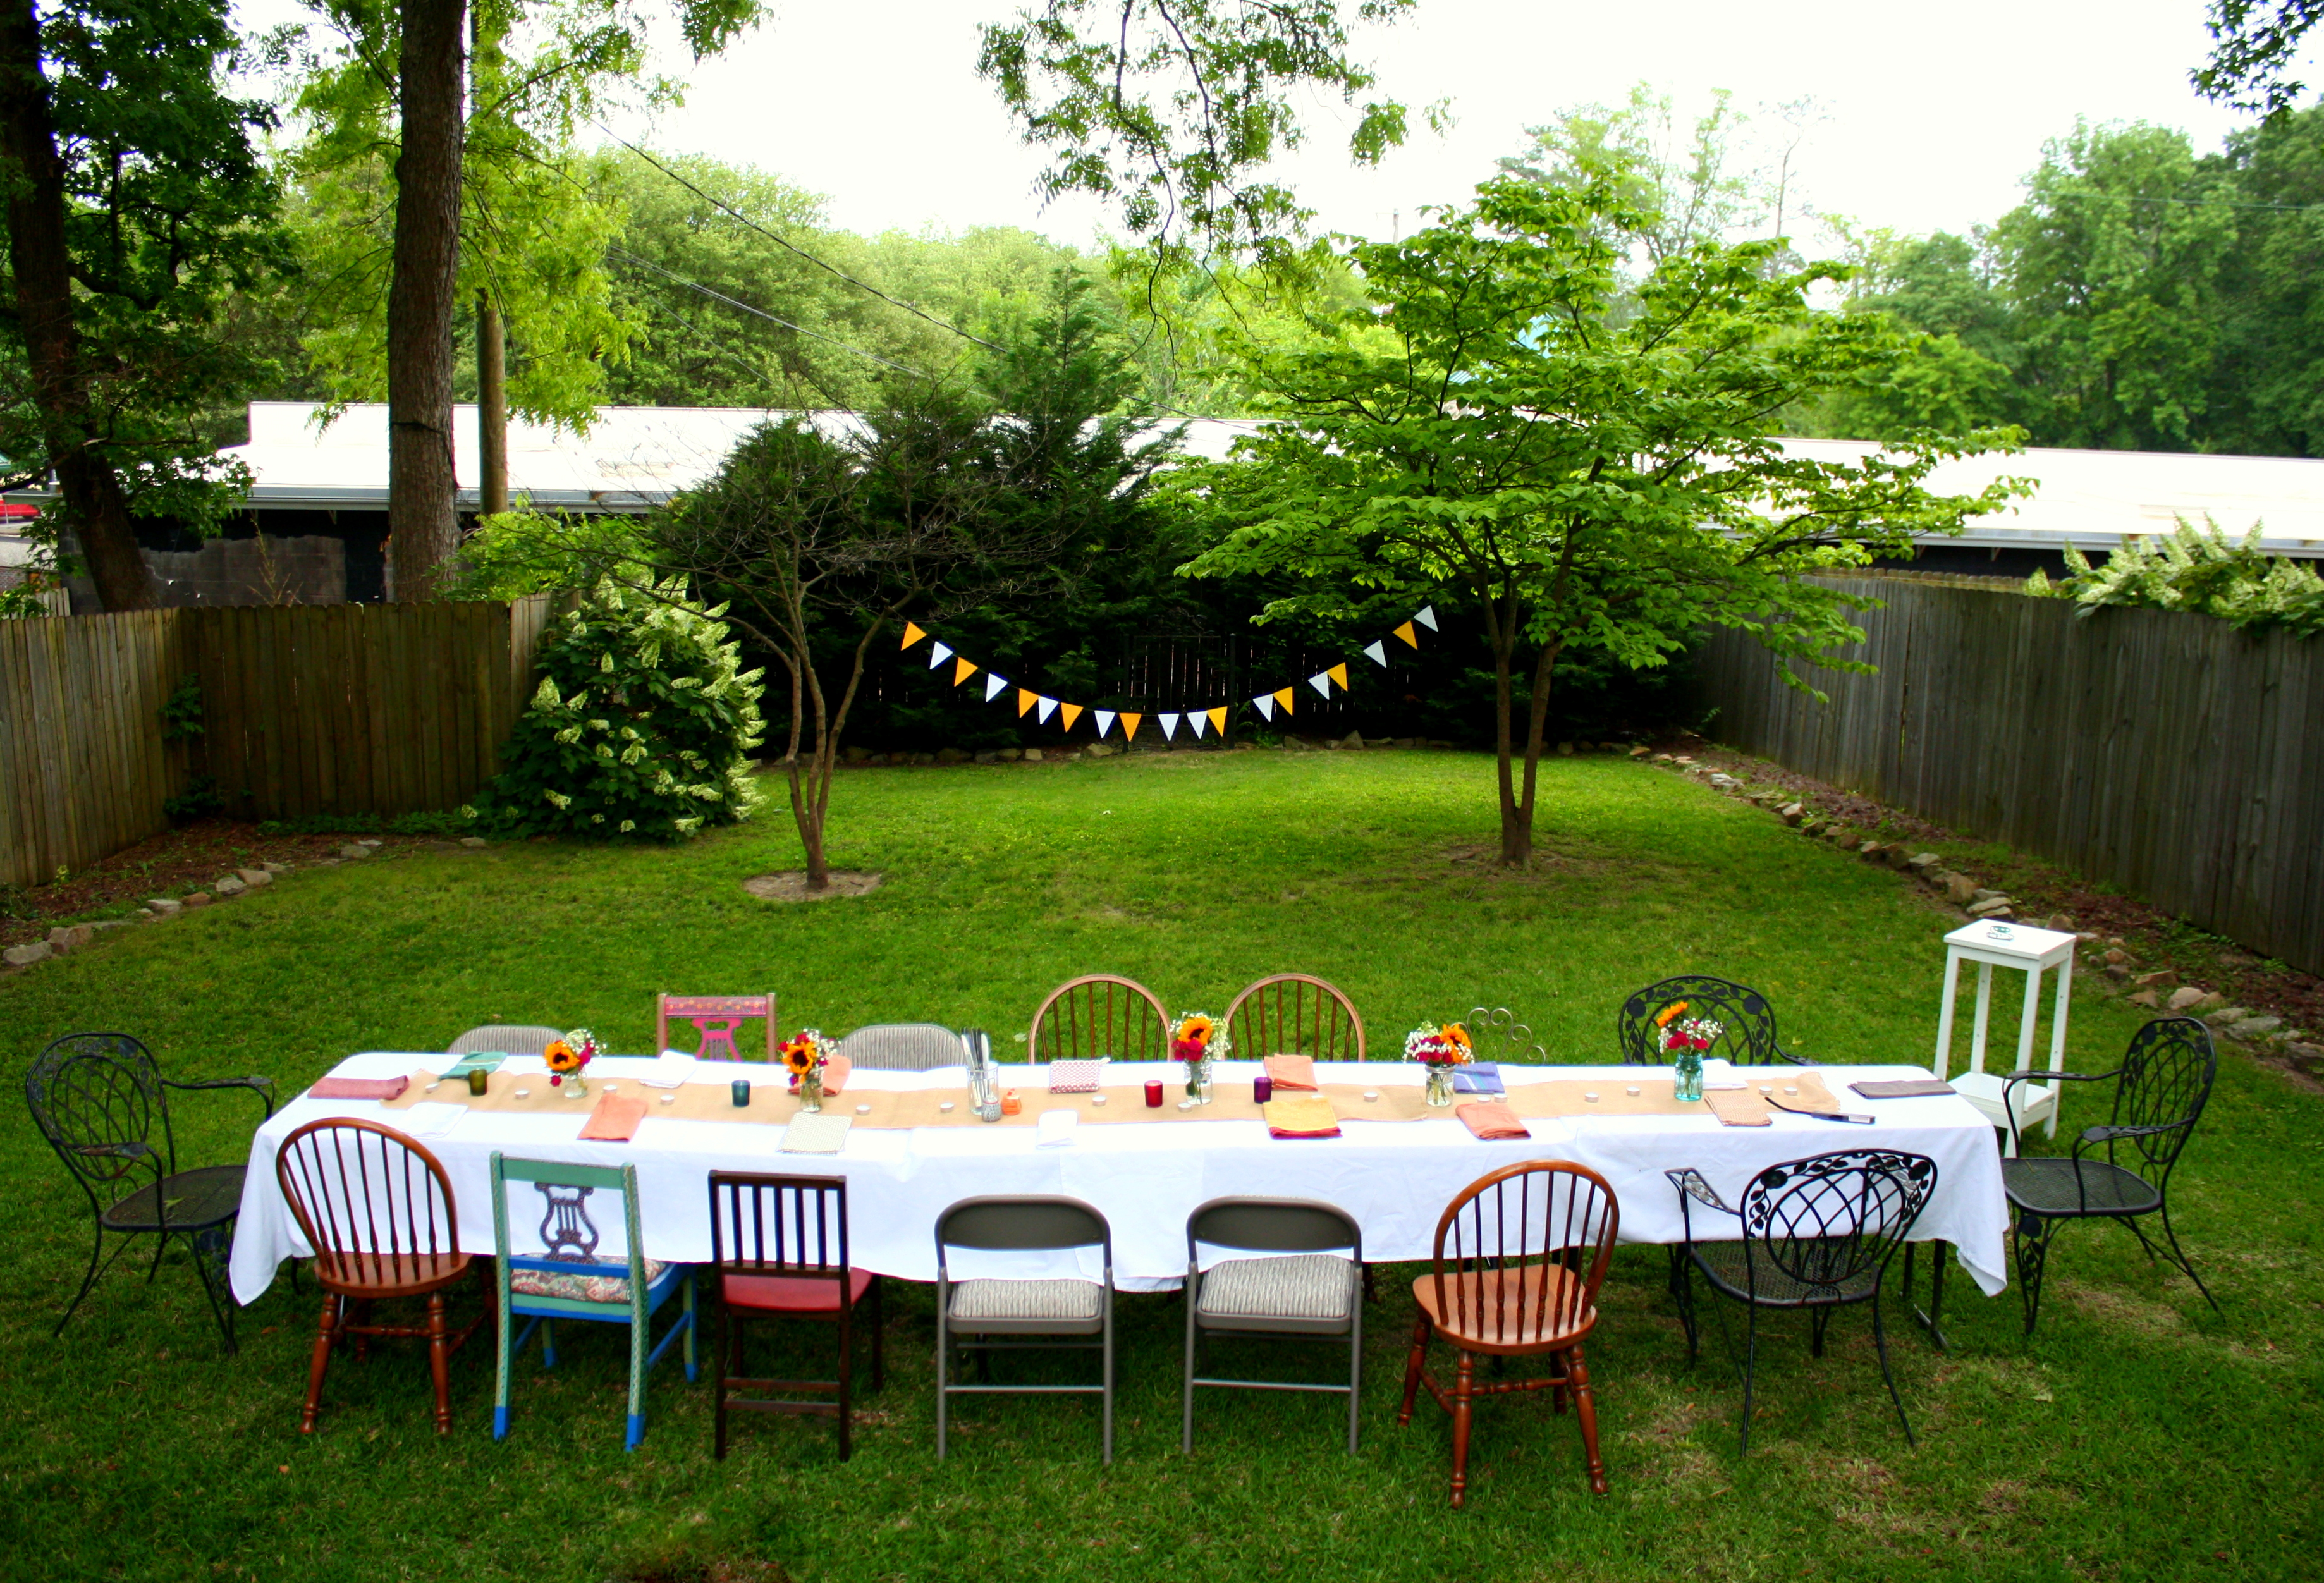
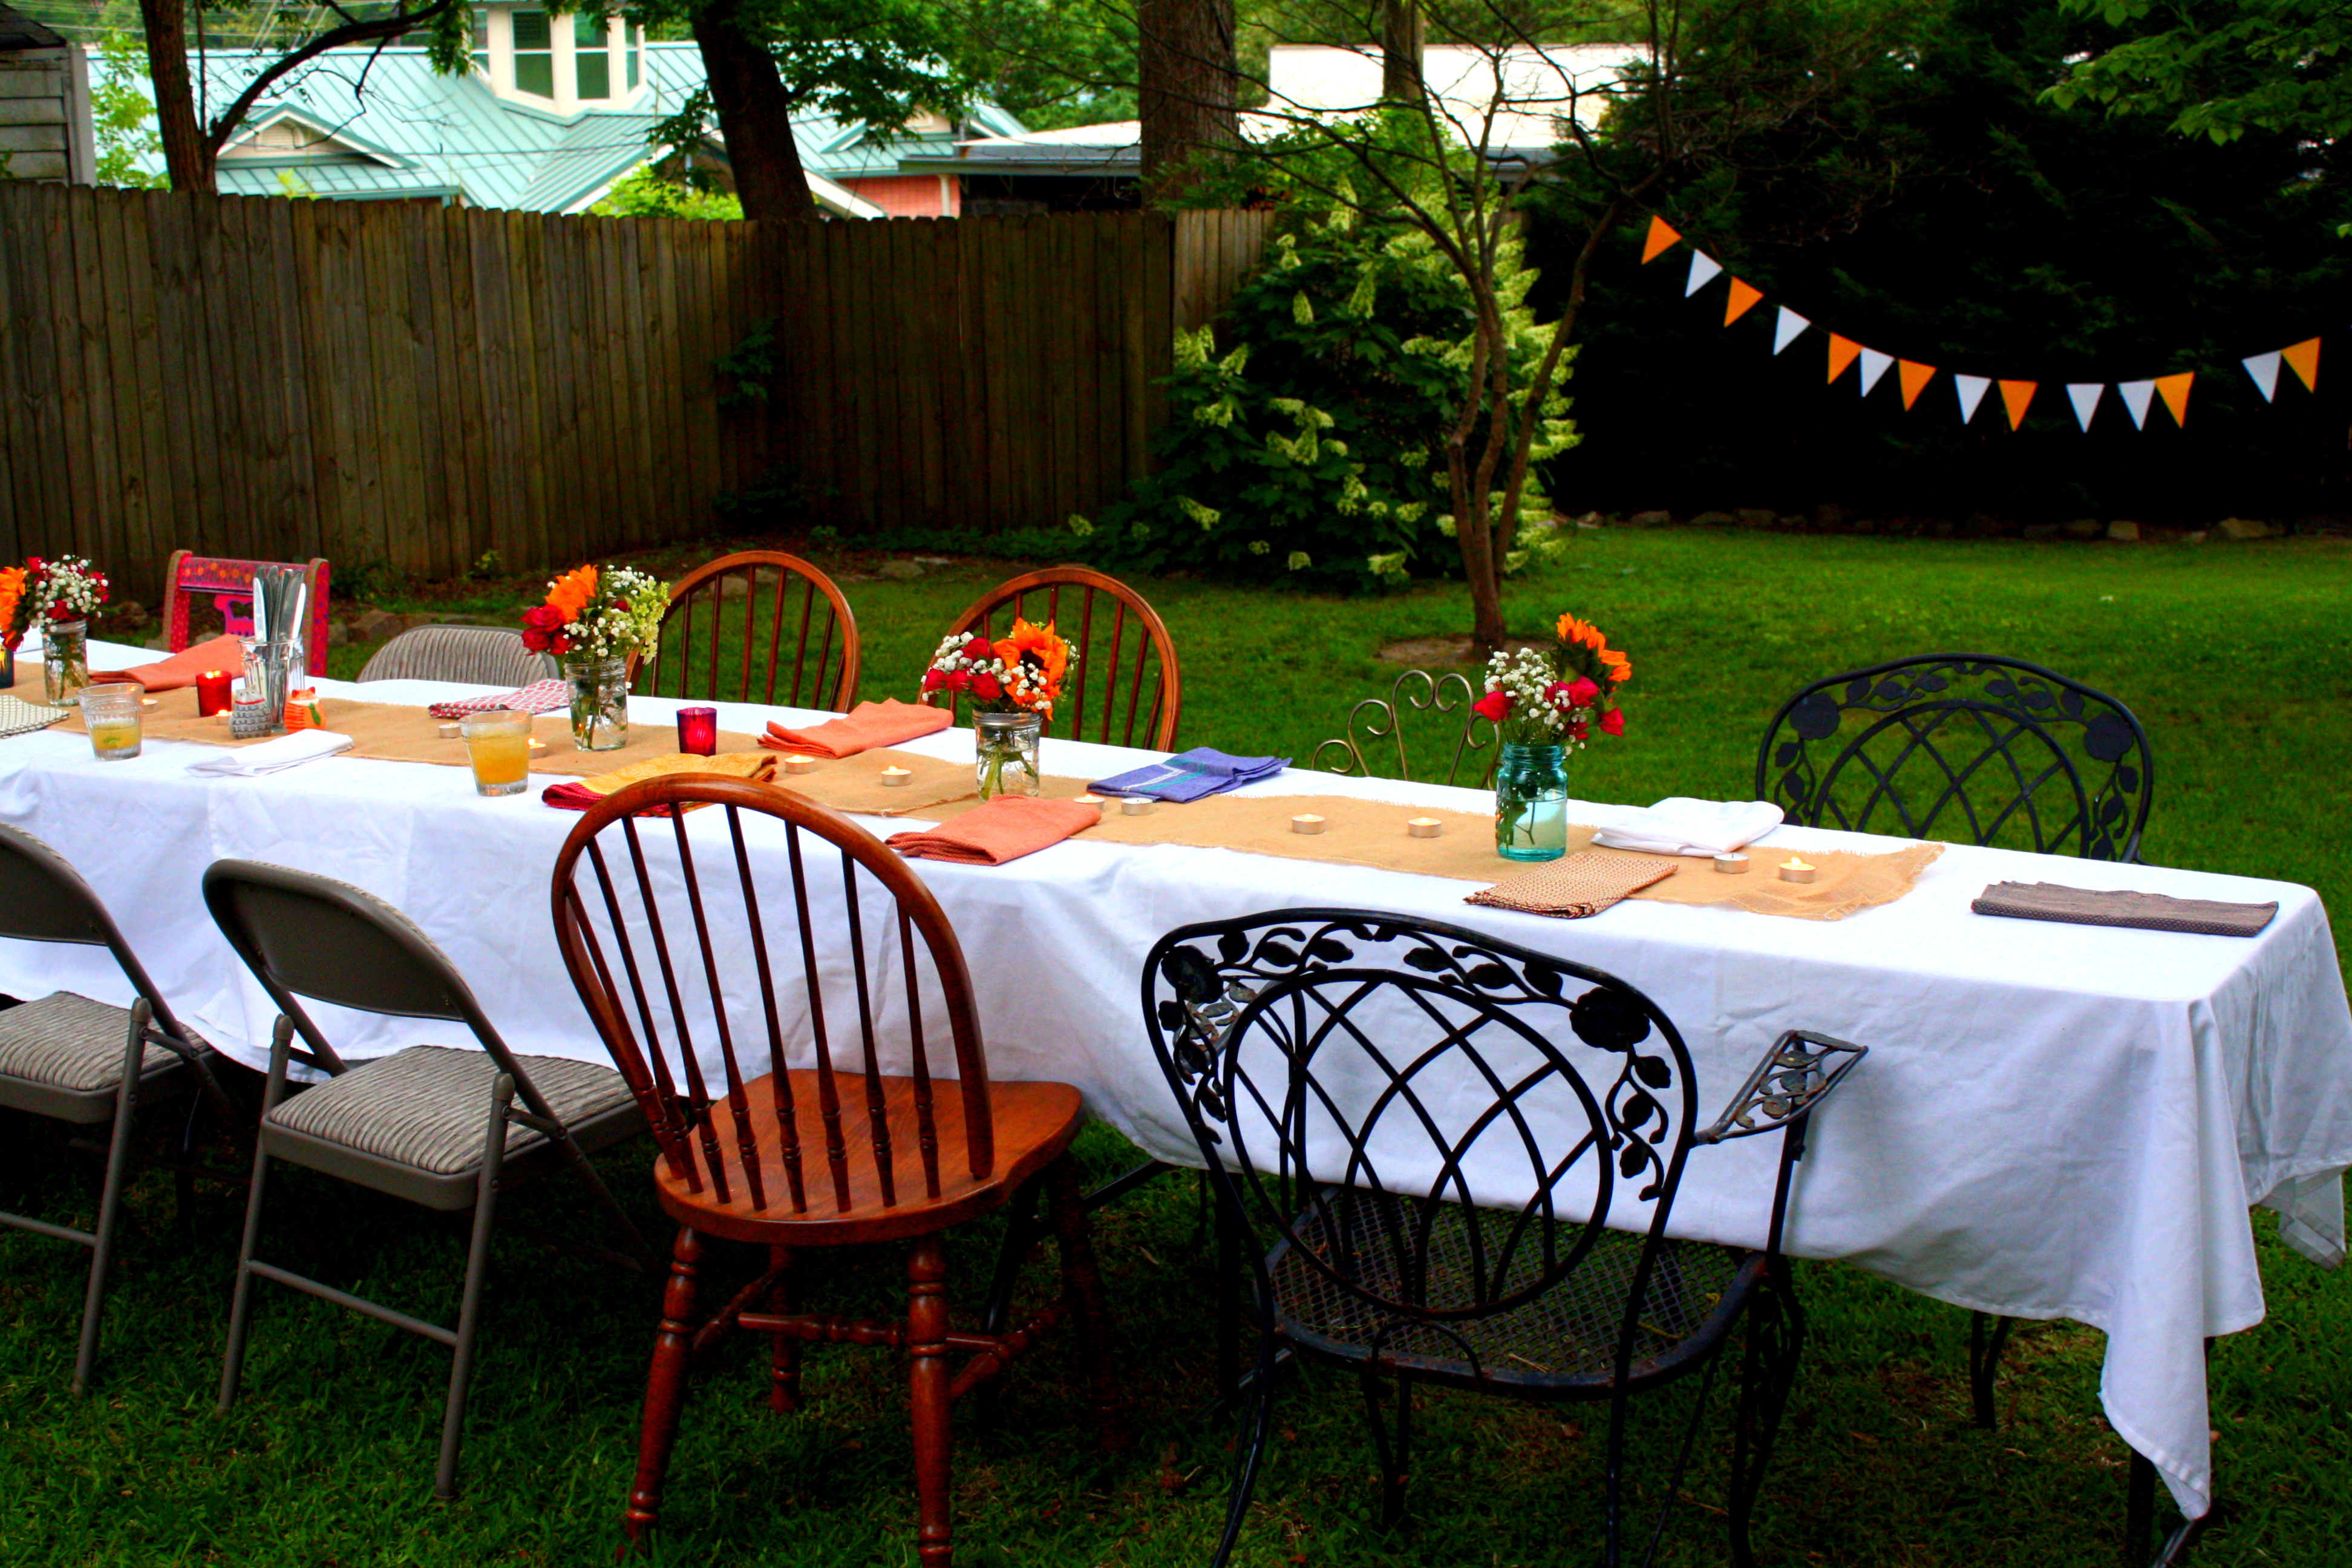
For the table decoration, we used 14-inch-wide burlap table runners at each table. Though the runners looked incredibly long when we pulled them out the box, they ended up being perfect length for the tables – only skimming the floor on either side. Each table also had three to four gold, mercury glass votives. (I purchased sets from Z Gallerie.) We weren’t allowed to use real candles, but the fake candles we purchased worked just fine.

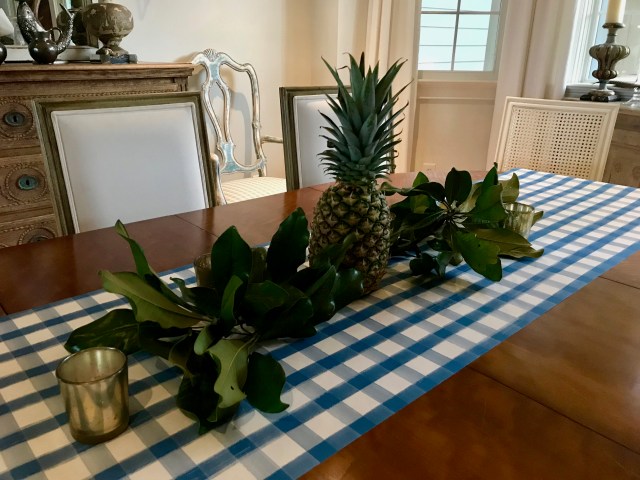
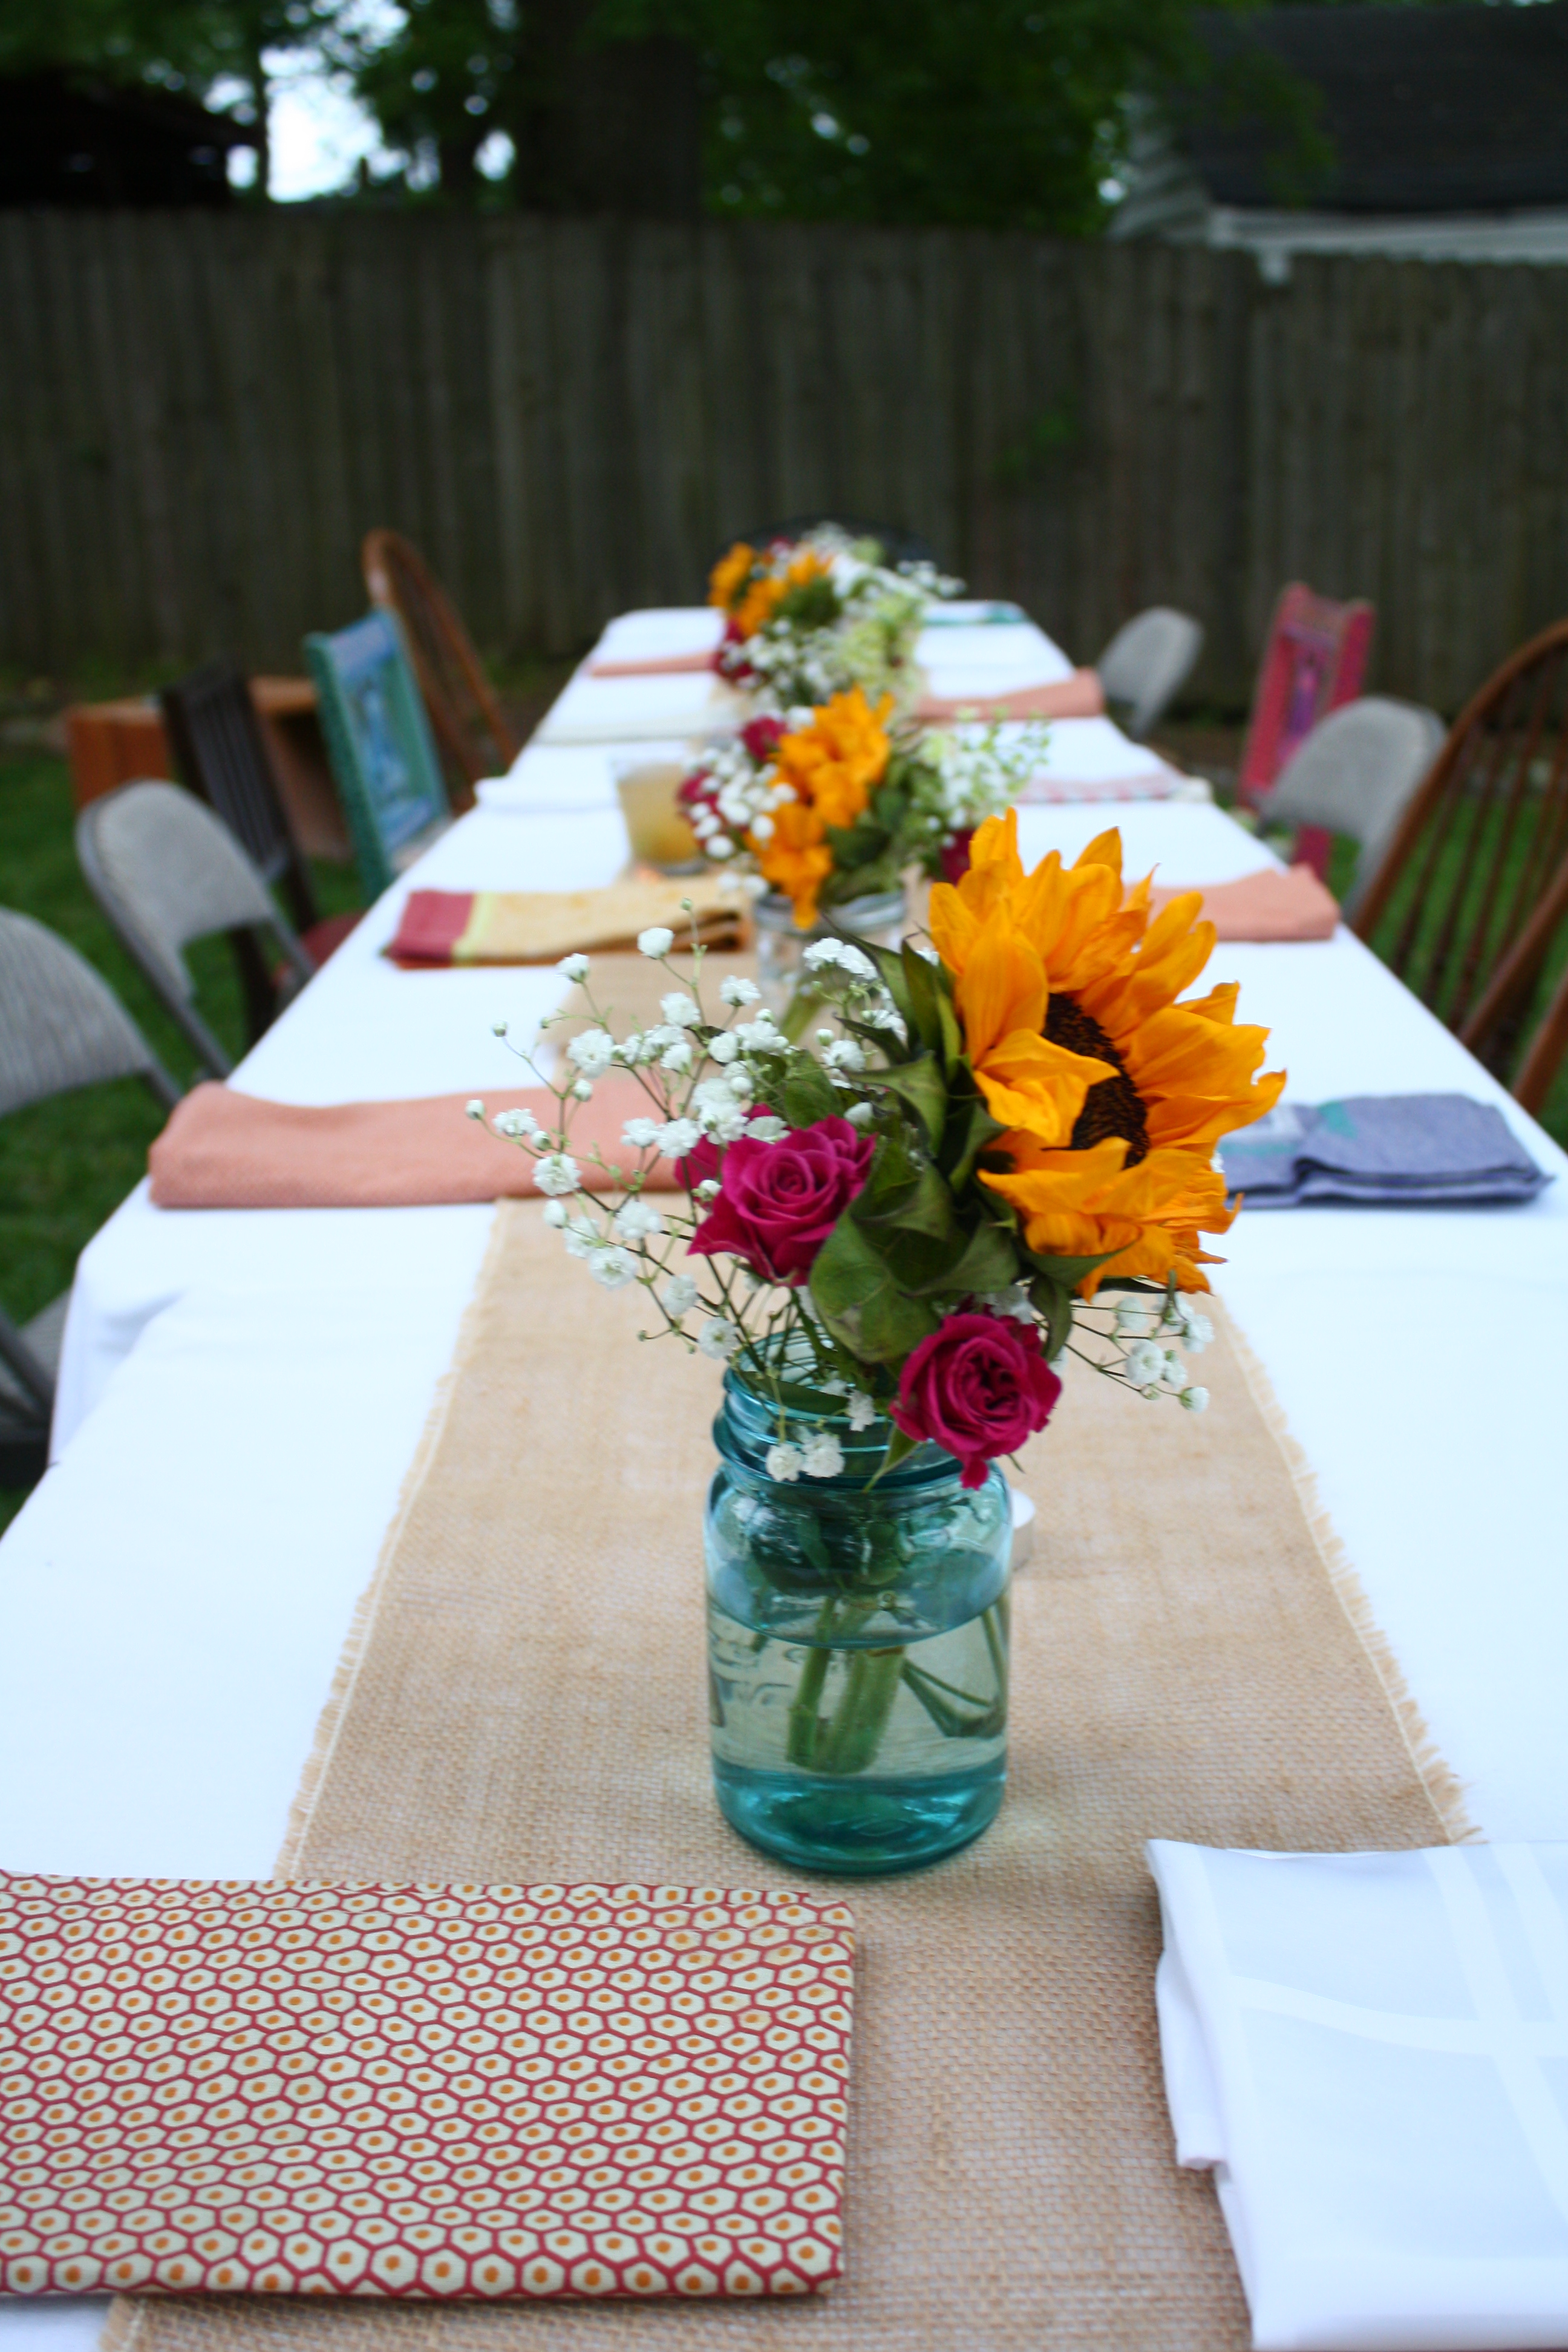
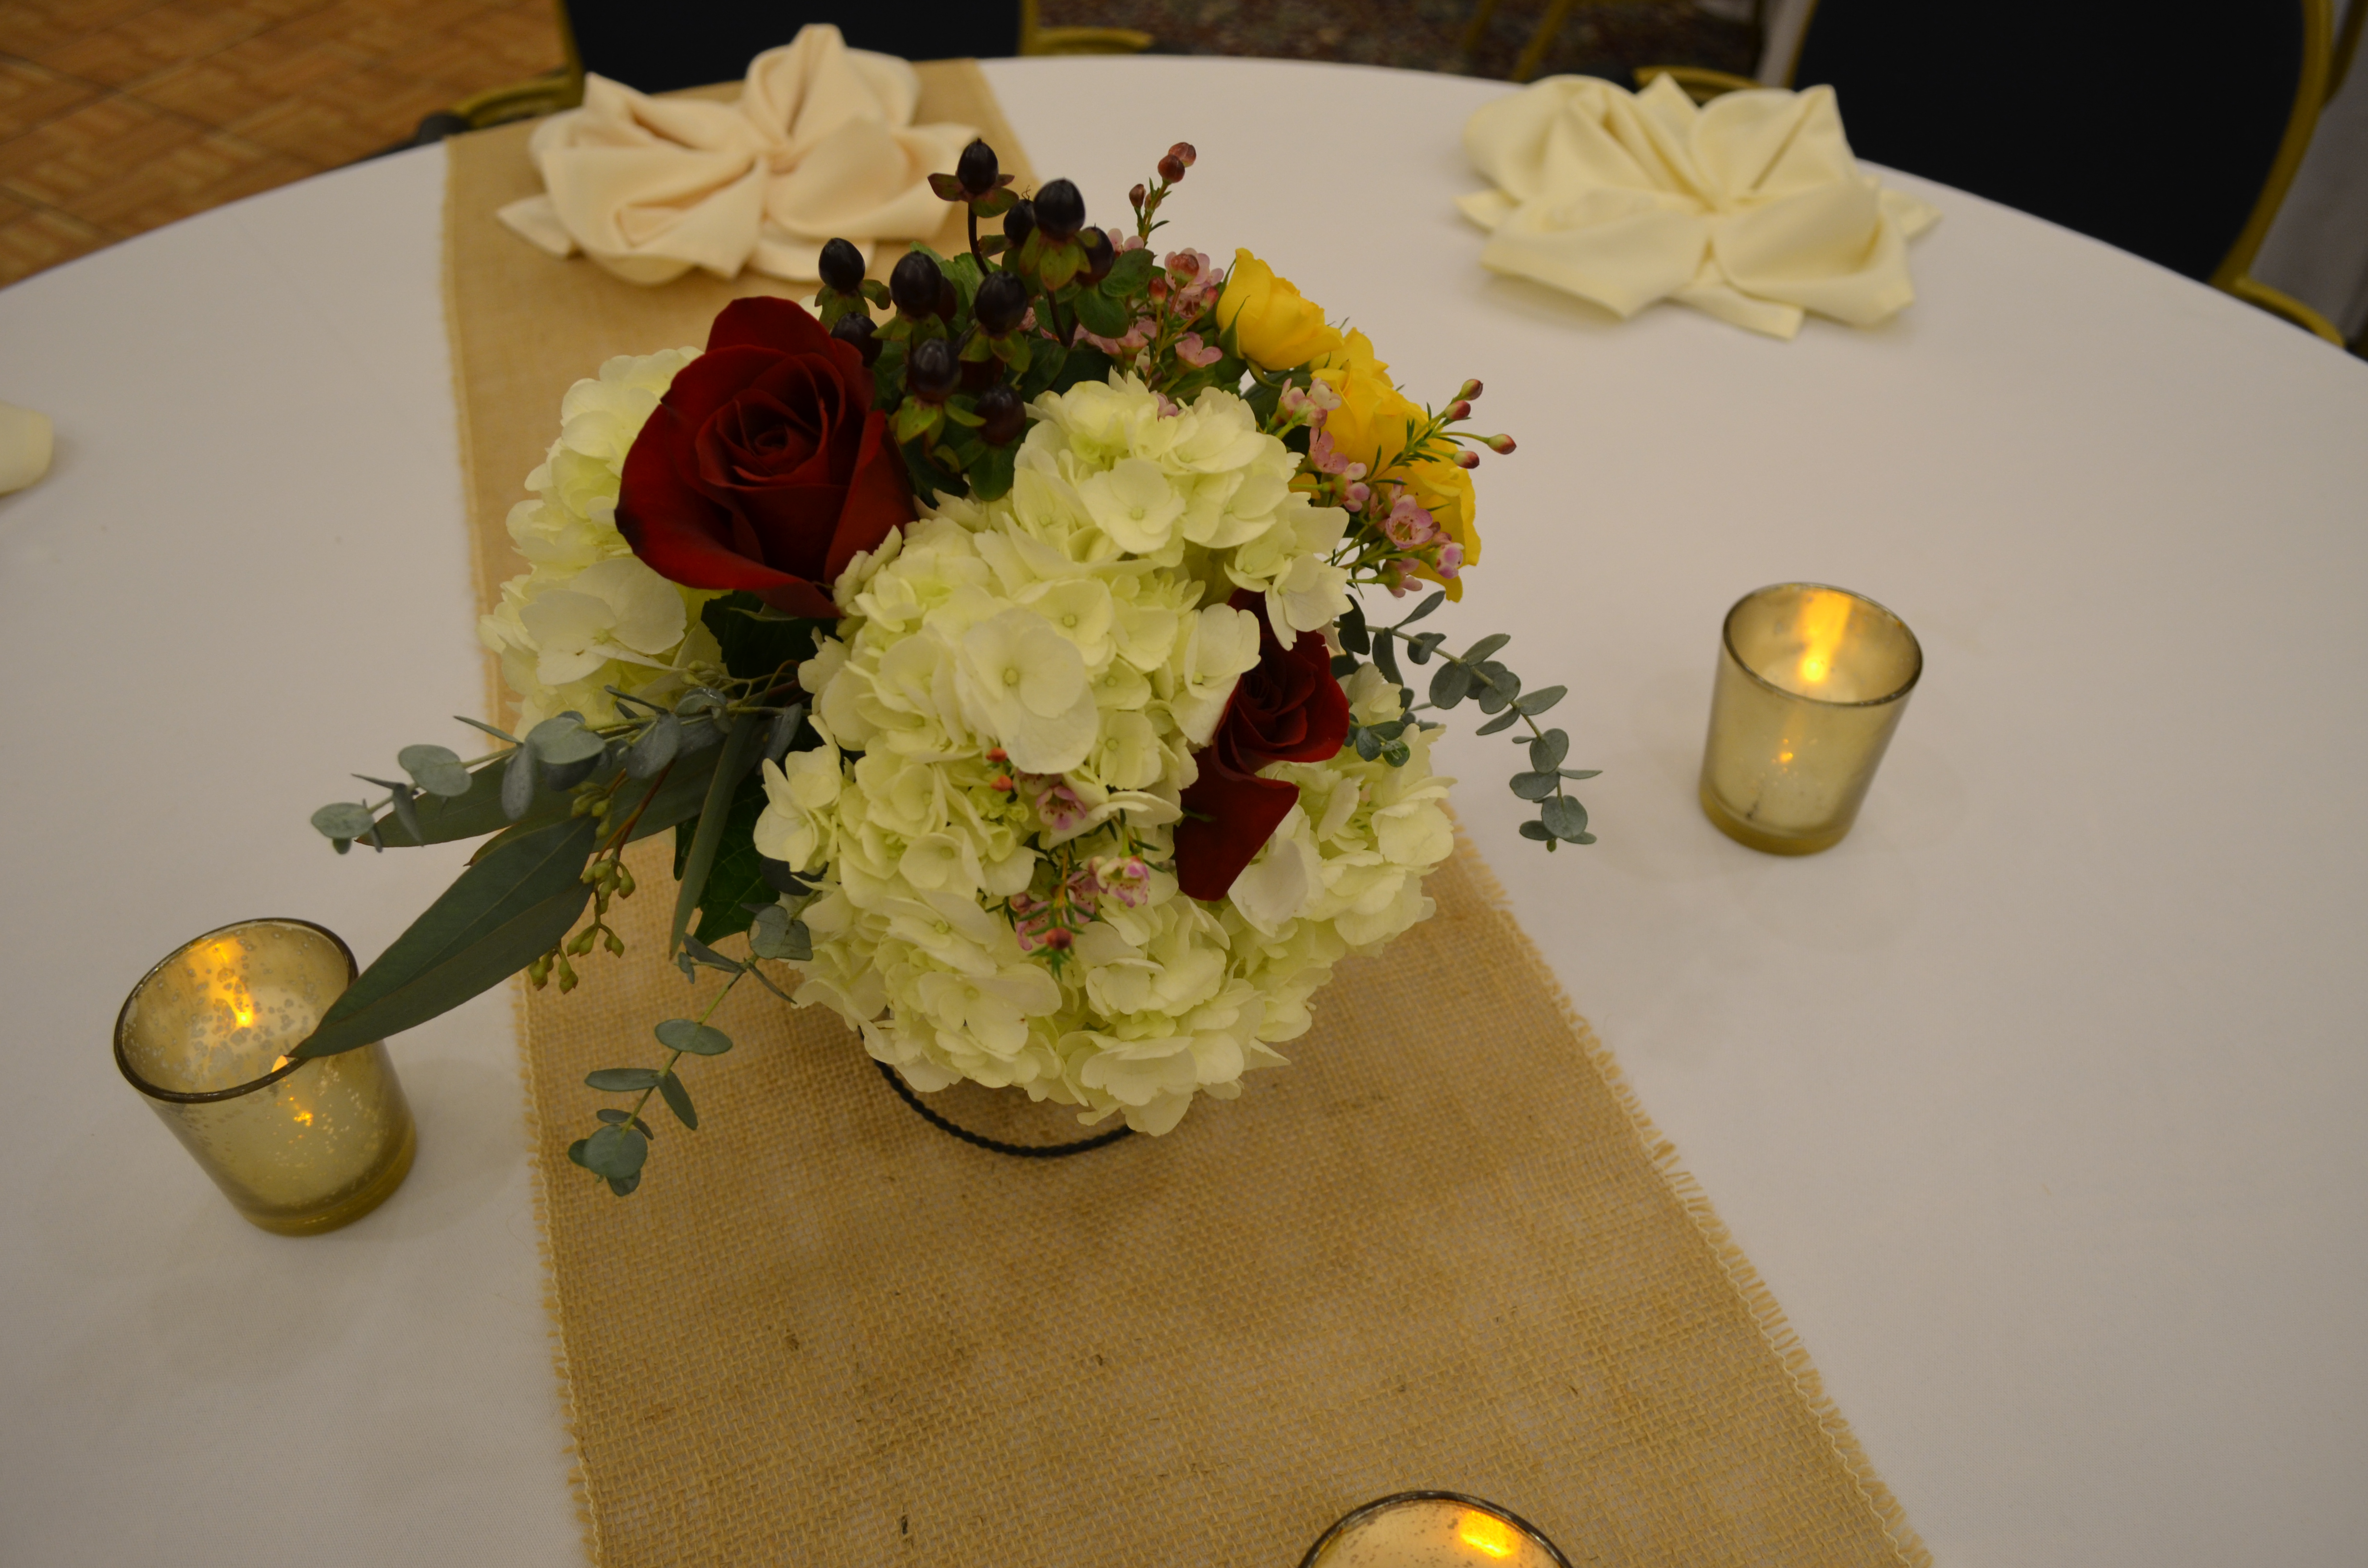
We knew we wanted to have a florist help with the flowers, but to avoid a crazy cost, we decided to purchase only four centerpieces. My mom said she met with the florist for 45 minutes, and the woman created arrangements that were even more beautiful than we imagined. We wanted to color scheme to be white, deep reds, dark greens and purple with touches of yellow. And she did beyond an amazing job. (The picture below fails to display the head of kale she included in each arrangement.) Again, simply stunning!

DSC_0585

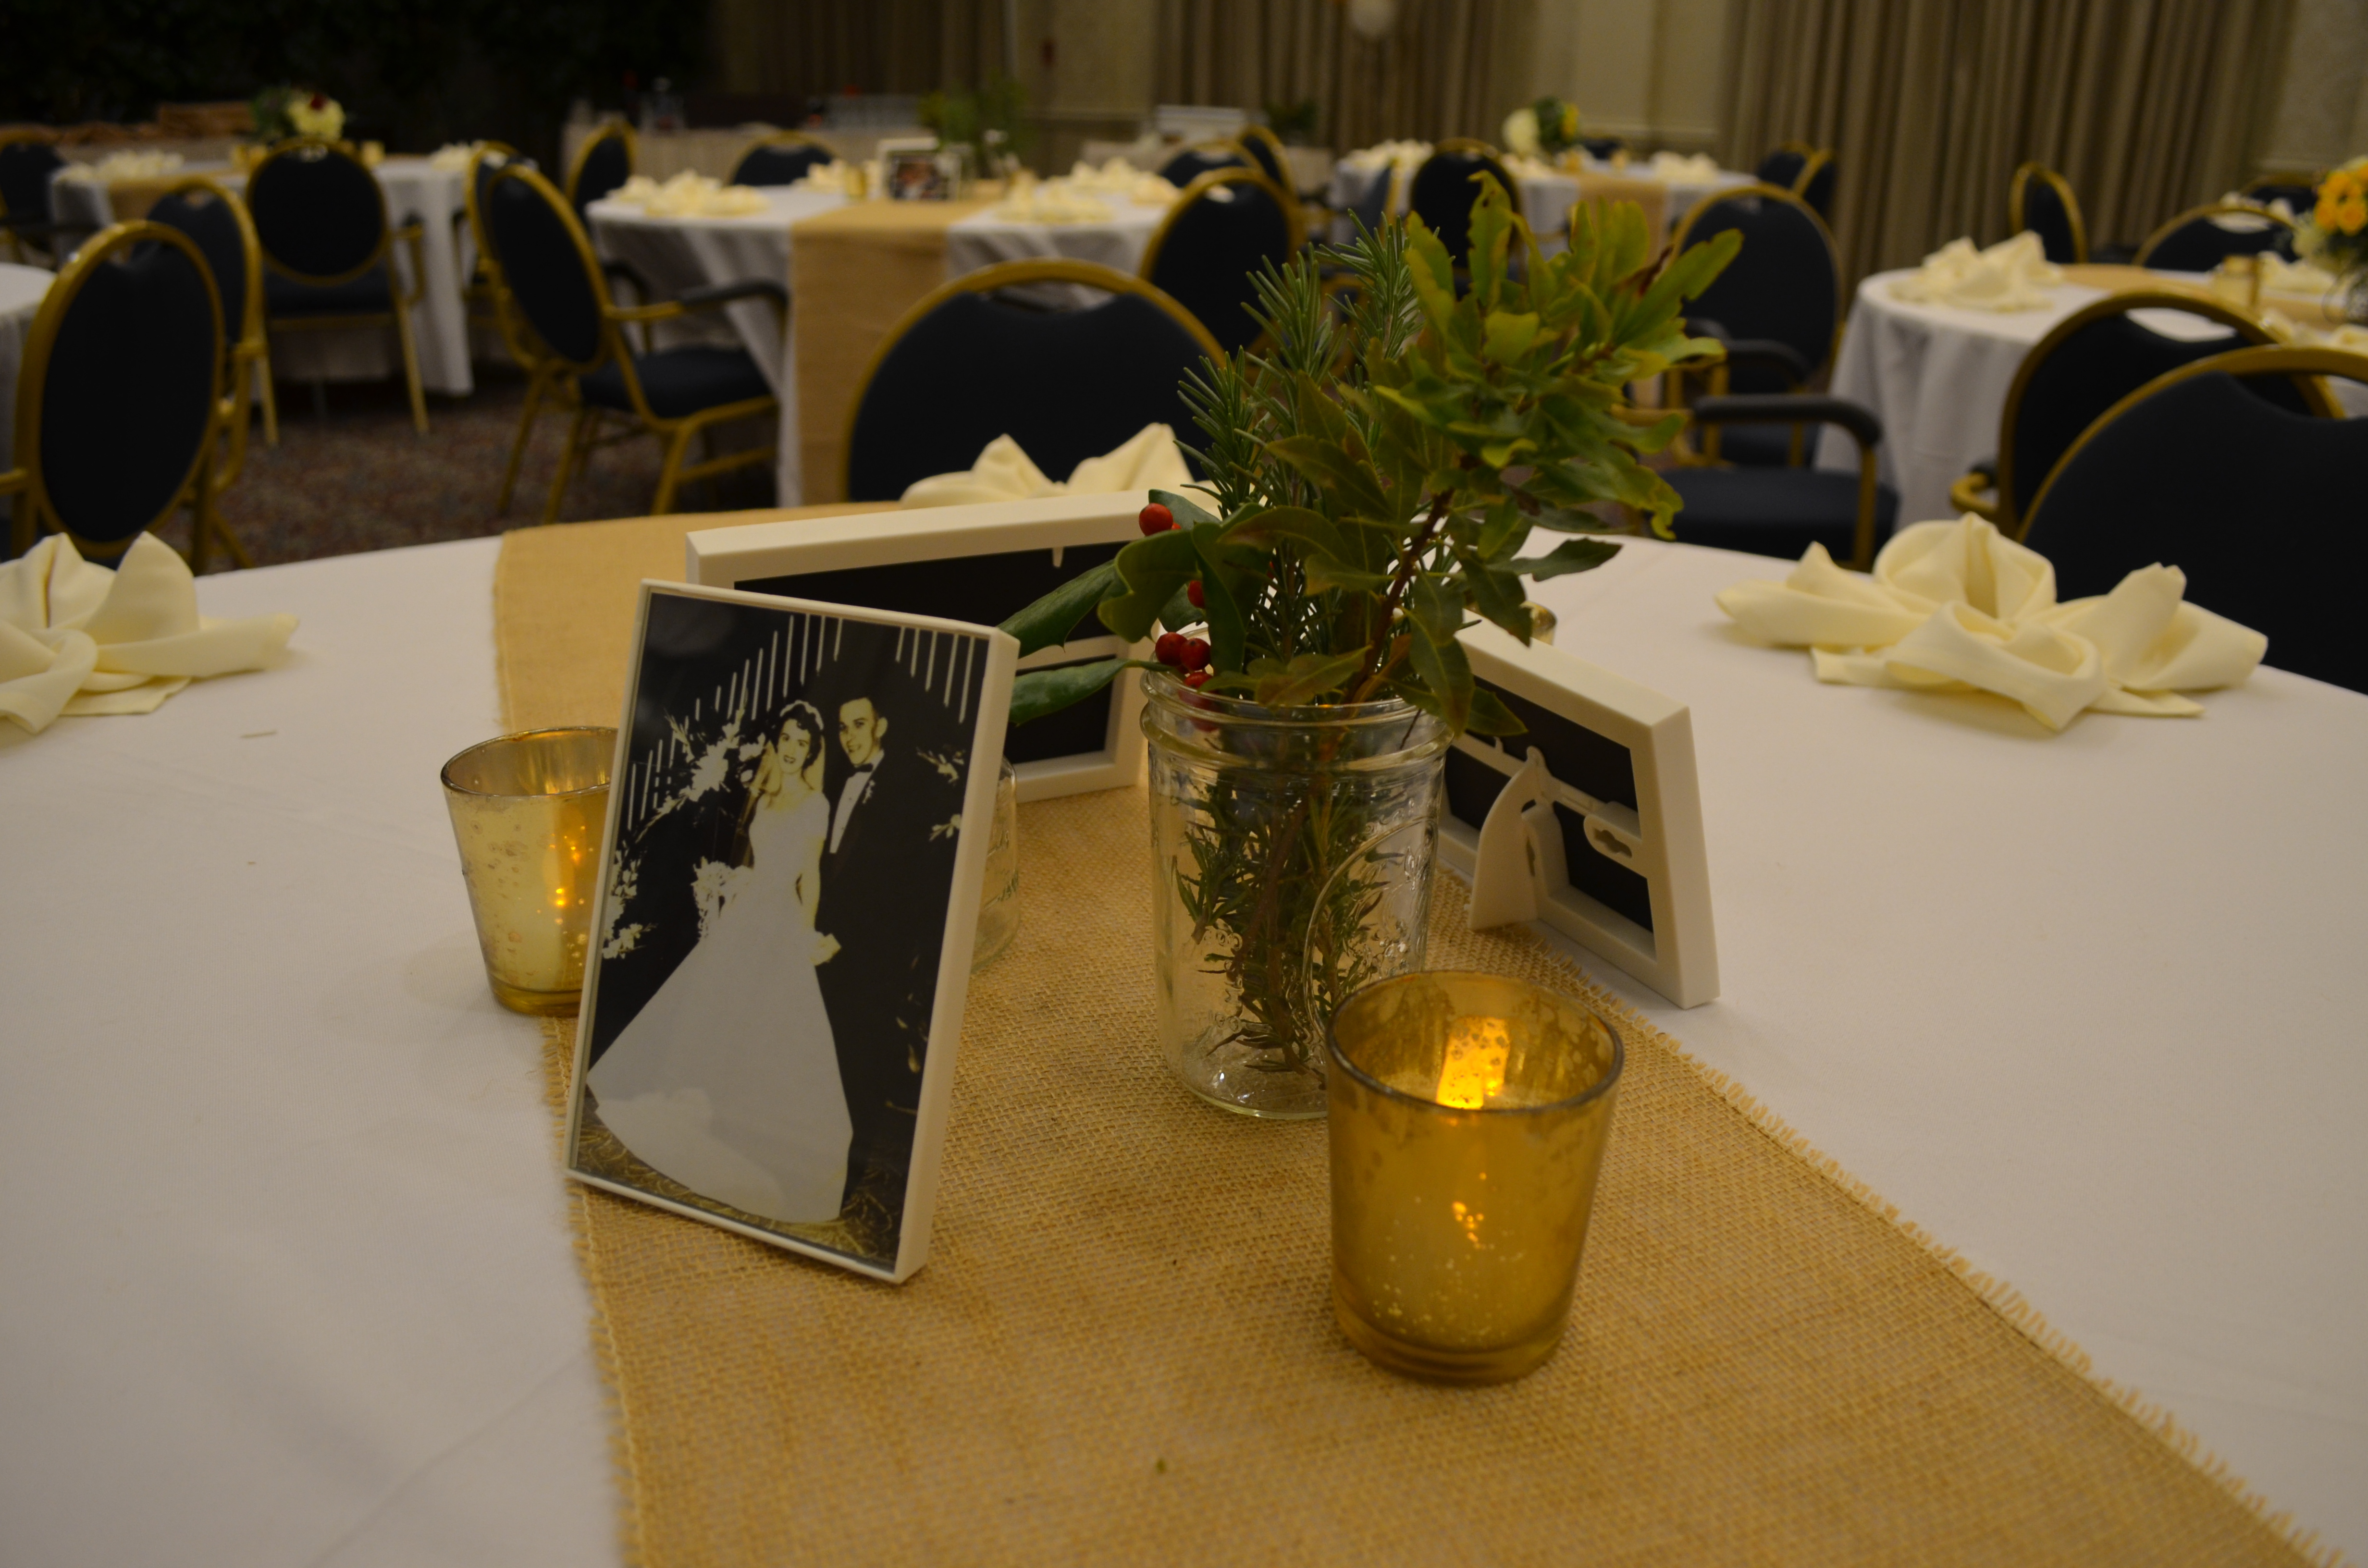
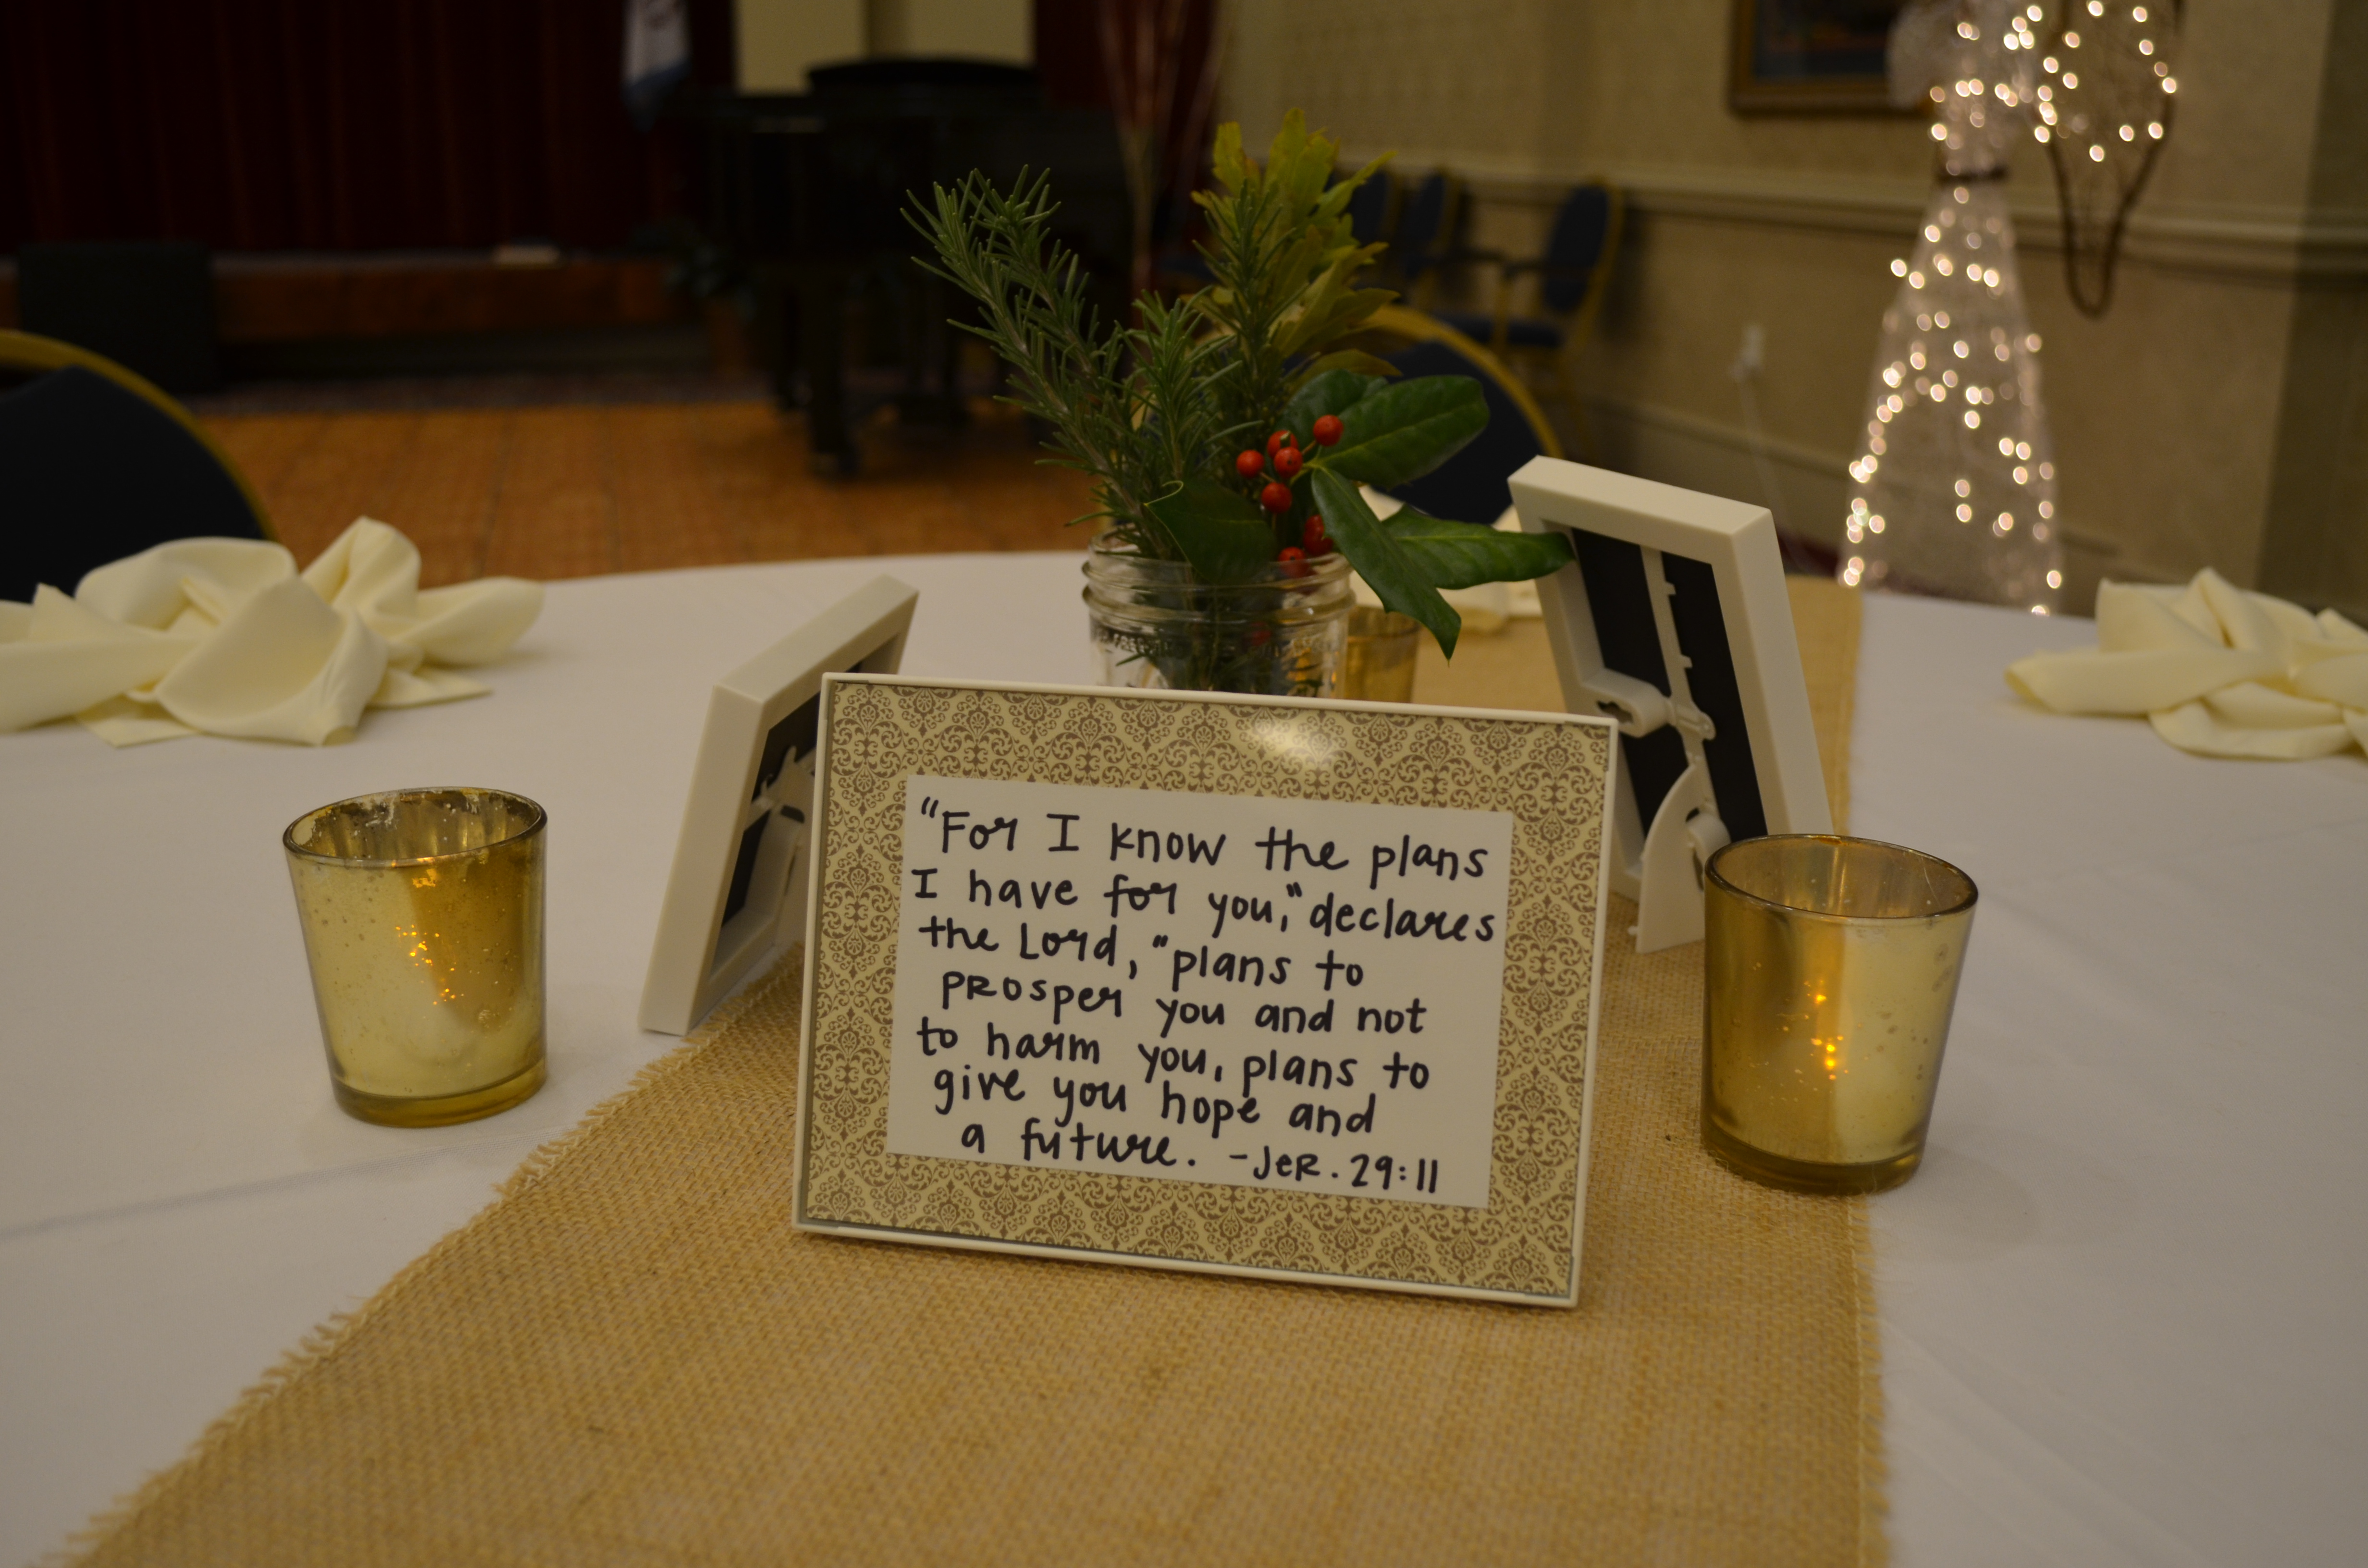
For the other tables, we filled them with pictures. I found these cheap white frames at Walmart. (Though, disclaimer, the stands that held the frames up easily fell down when someone picked them up. It probably would have been worth spending a little more to avoid this annoyance.)

Along with pictures, I also included frames with a beloved Bible verses. The one pictured below is one of my favorites.

DSC_0591

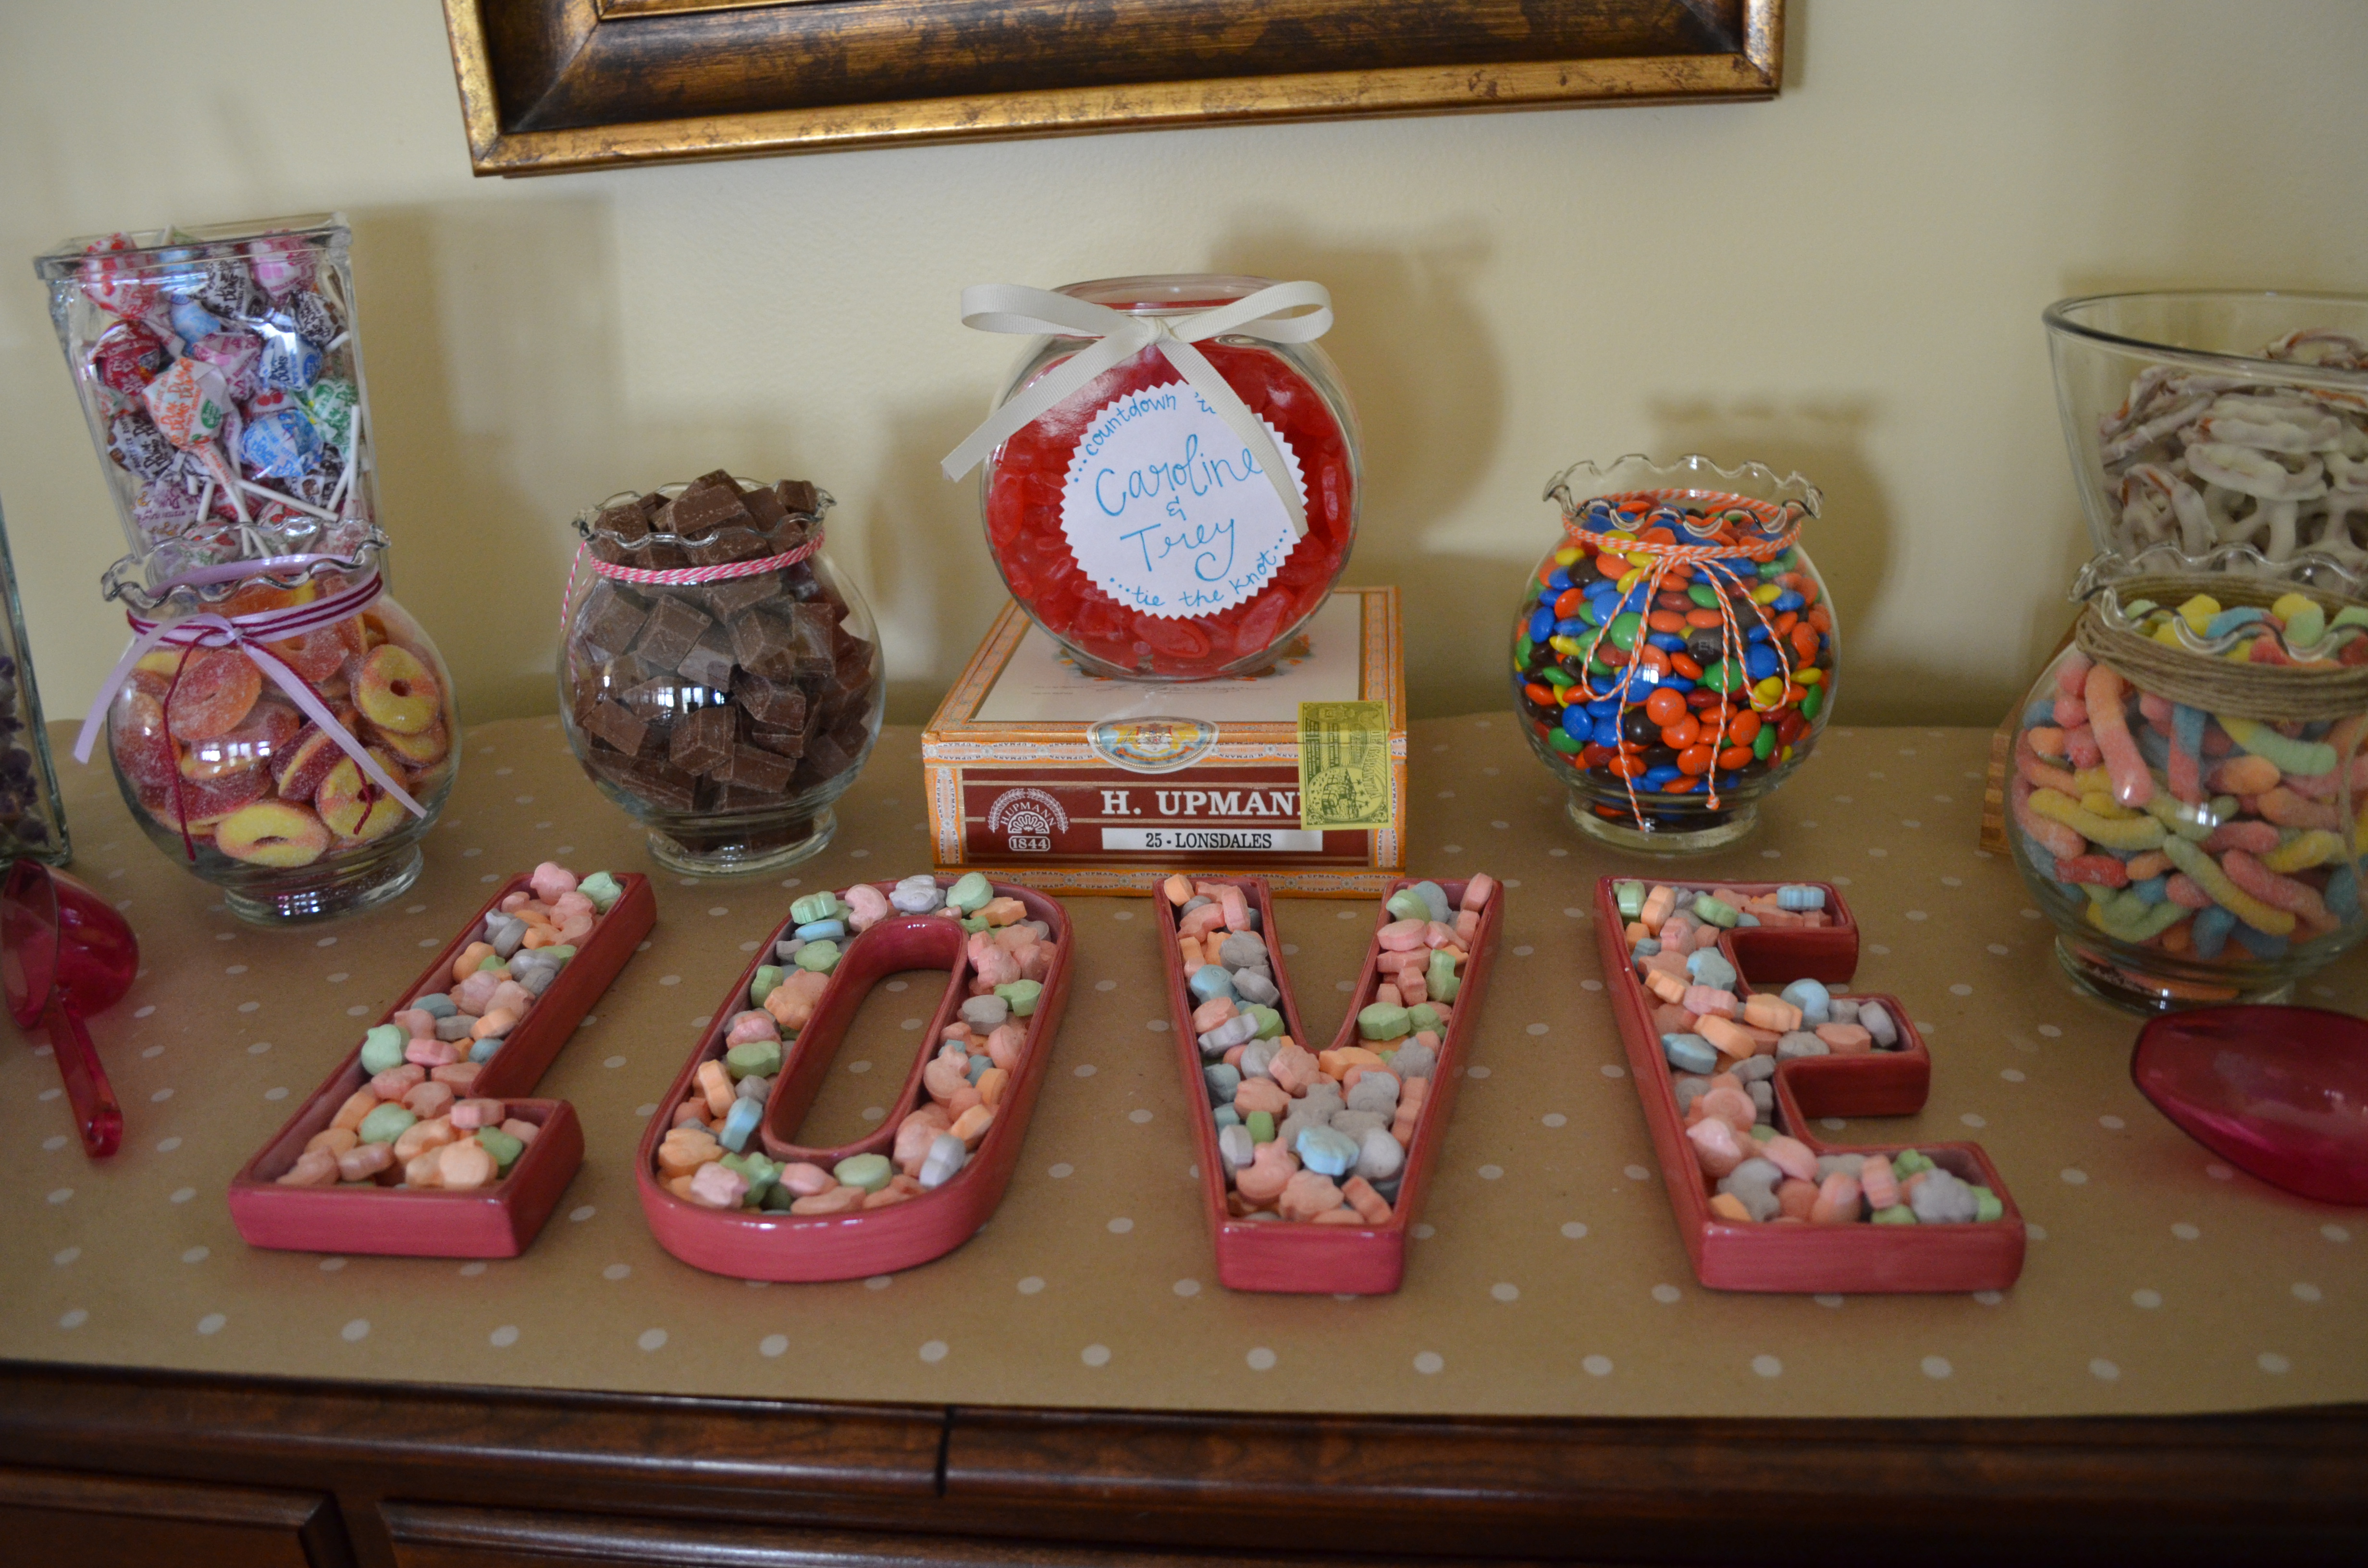
To help fill in spots, I foraged around the retirement community for lots of rosemary, holly and other interesting foliage. Using jars I brought from home, I made arrangements for the tables without flowers. And on a spare table where we set the guest book and party favors (some delicious candied pecans), I placed large vases full of holly.

These arrangements were the perfect touch to complete those “empty” spots.

DSC_0575

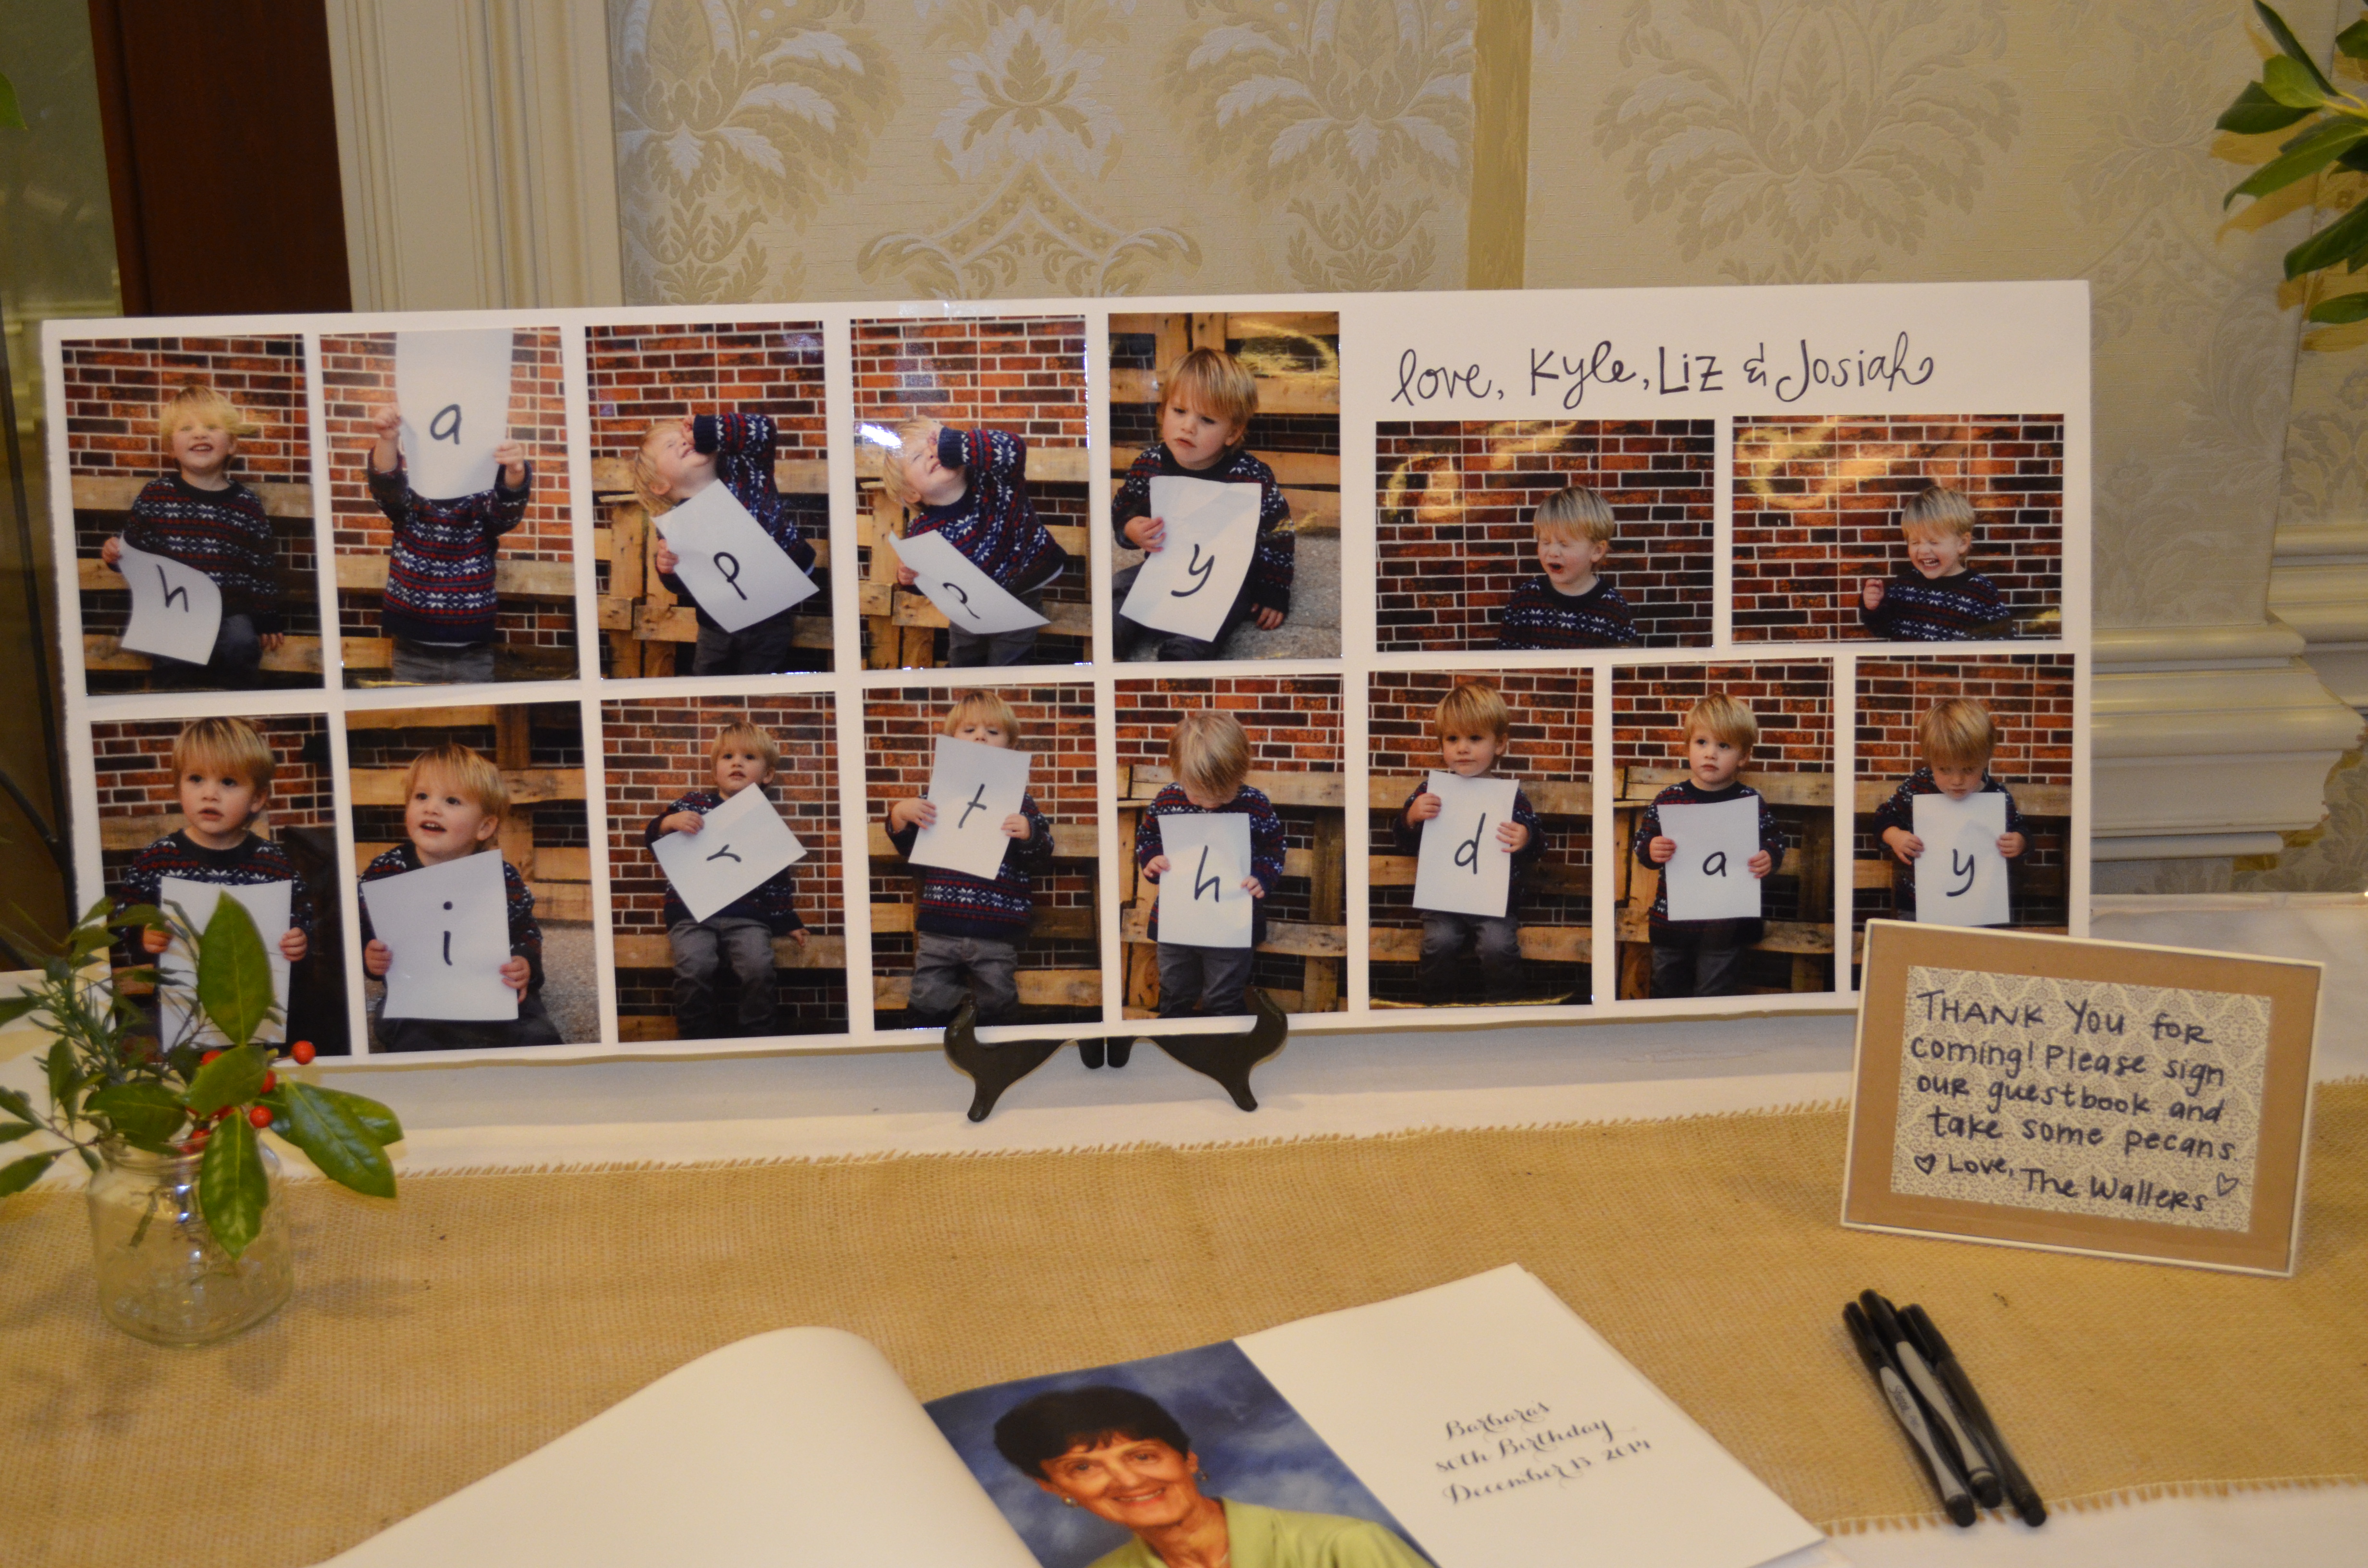
Using Shutterfly, we created a photo book as our guestbook. Each page had a picture of Grandma with plenty of white space for people to sign. We knew that people wouldn’t fill all 20 pages, but we figured Grandma could place cards or pictures from the night in it.

The best detail of the night was a collection of photos my sister-in-law sent of my nephew. I have distinct memories of doing this as a kid – holding up each letter and then Mom mounting them to a board. The fact is – pictures of a 2-year-old will always be a crowd pleaser!

_DSC0452

Finally, what is a birthday without cake? Mom purchased the cake from Pat-A-Cakes in Columbus, GA. The details on the flowers were spectatcuar, and it tasted even better than it looked. For a sweet touch, I made gingerbread cookies – using a B-shaped cookie cutter – to help tie in the holidays. These cookies are always a crowd pleaser.

_DSC0458

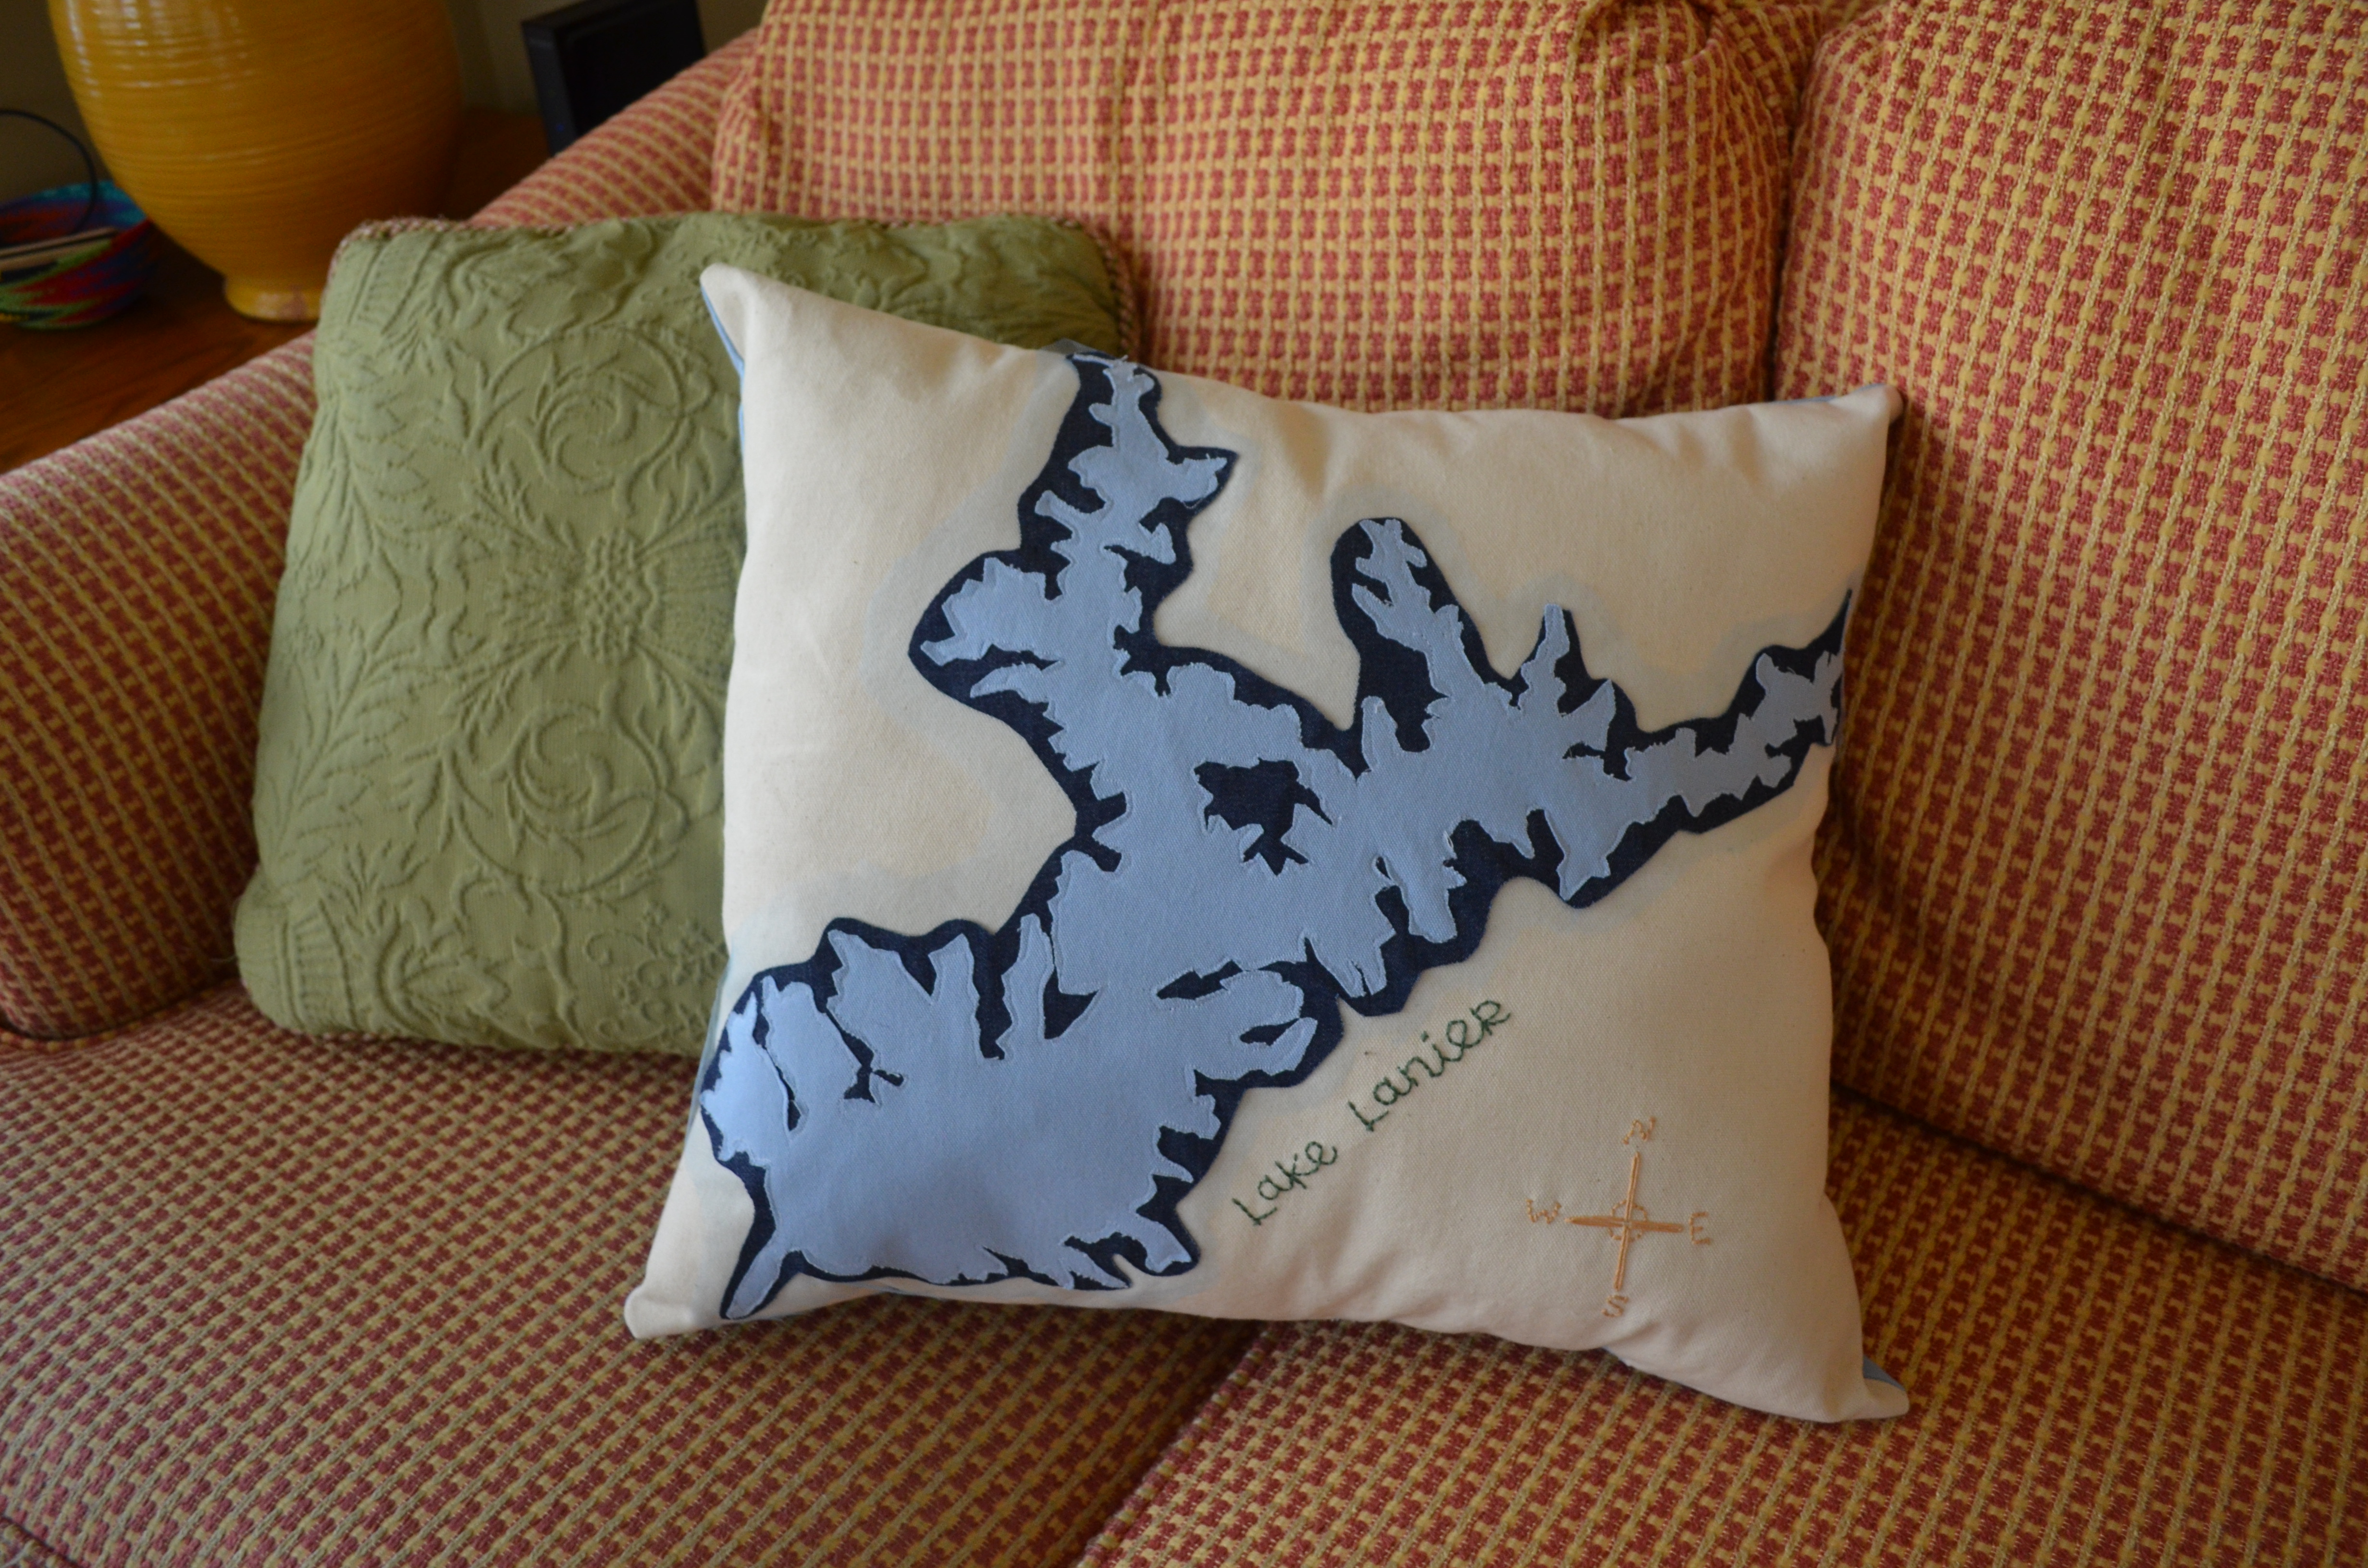
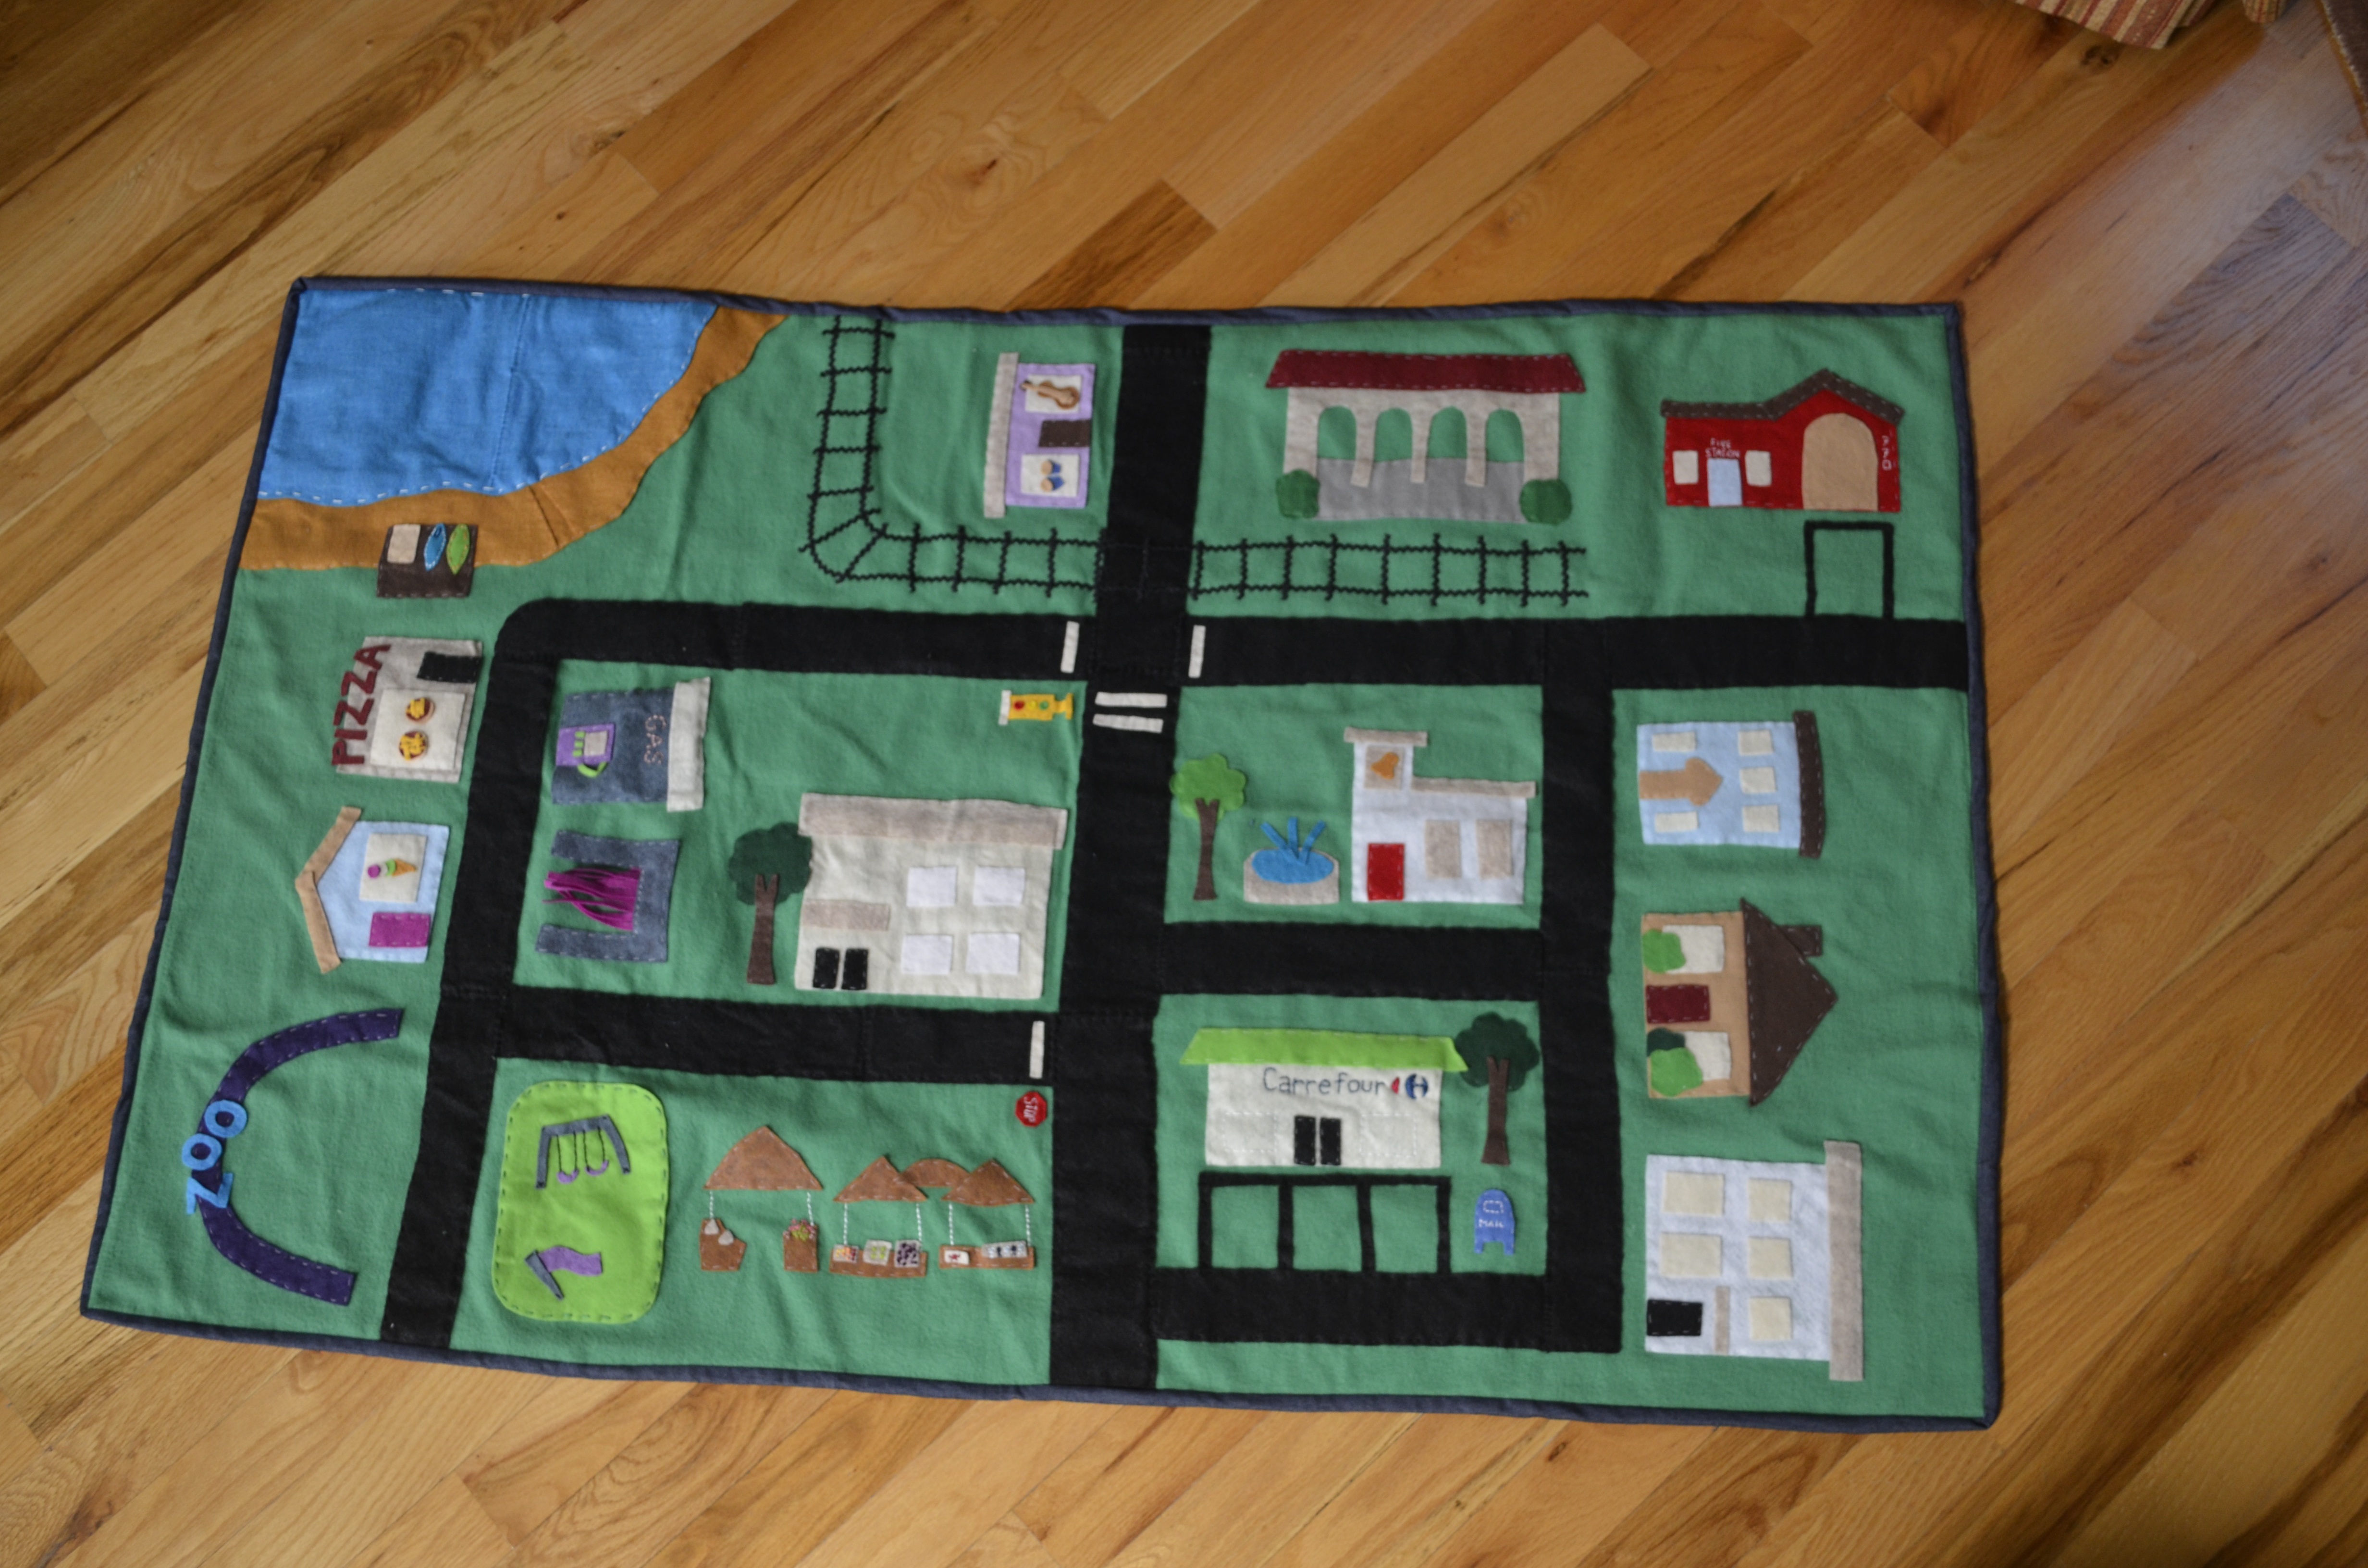
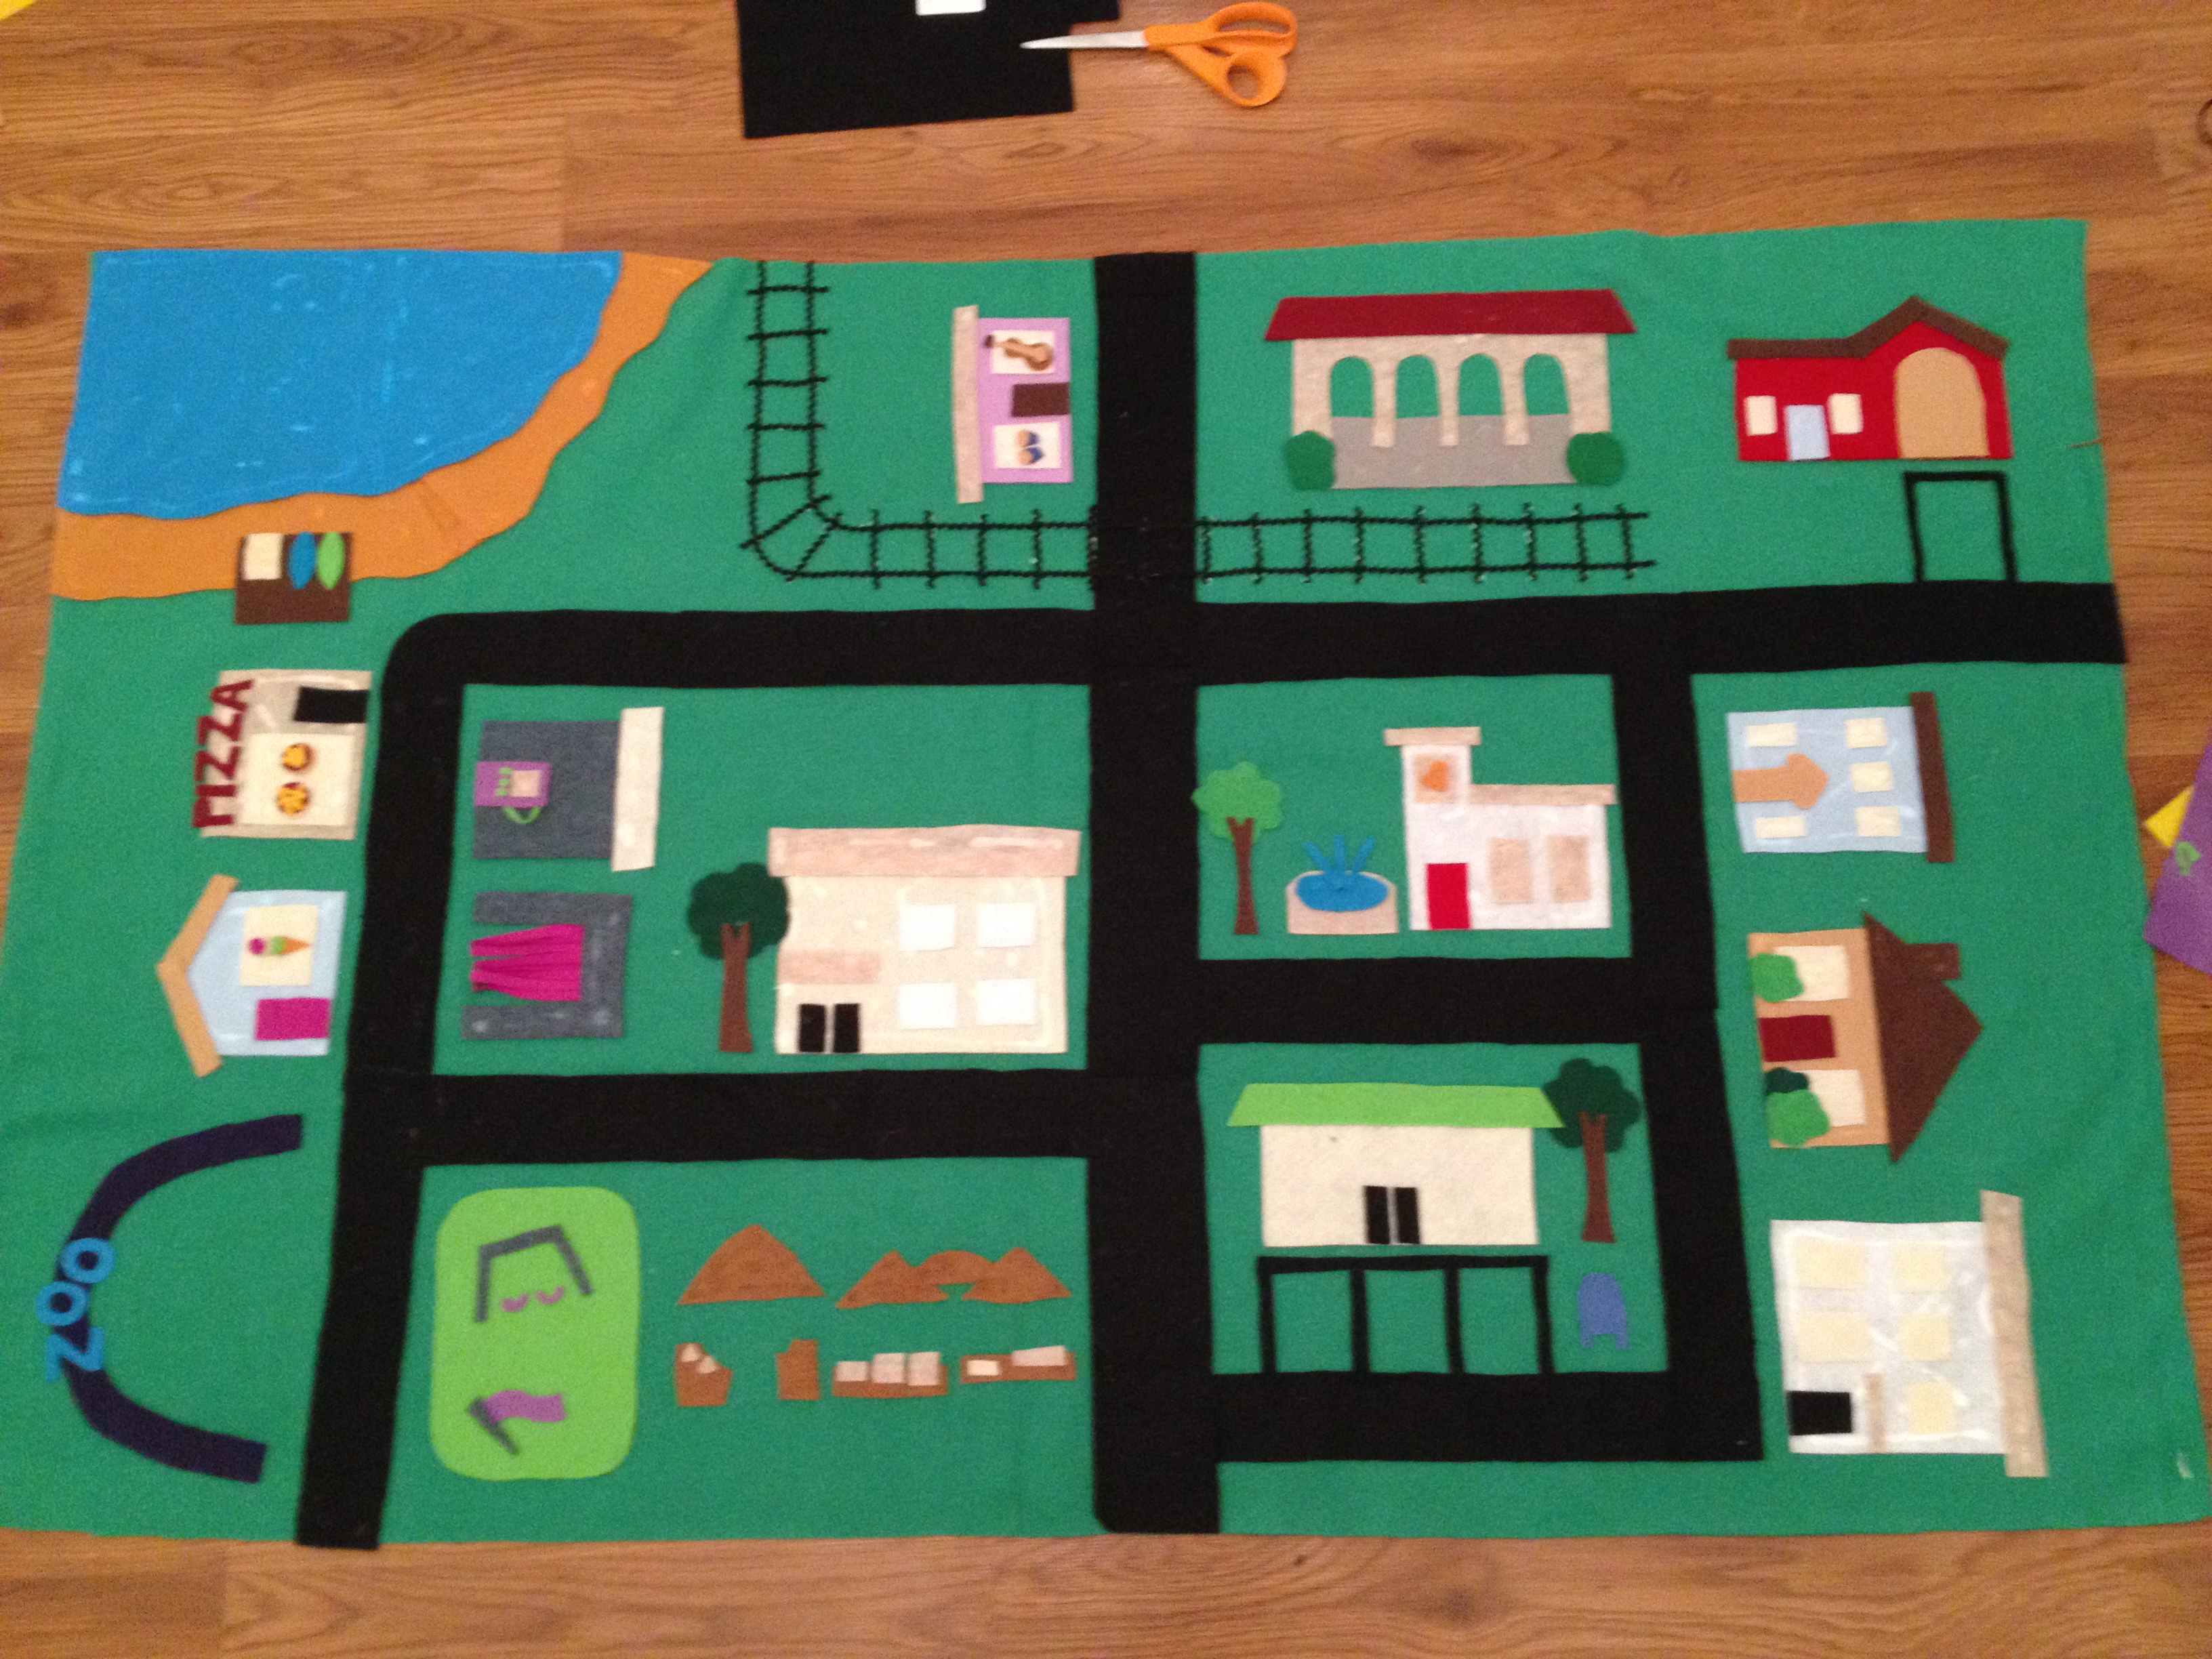
Overall, this party was a blast! It was an honor to be able to do something special for someone who means so much to me and many others. My grandmother is the kindest, most generous and supportive person I know. In her career as a nurse and still today, she spends countless hours selflessly helping so many people. And in her spare time, she can whip up the most spectacular sewing projects you have ever seen! From making clothes for my American Girl doll to teaching me how to set up my sewing machine, she has always encouraged my creative side. Plus, she’s the most avid reader on this blog. I know she’ll be reading this soon, so Grandma: Happy Birthday. I love you!

A Custom Felt Playmat for my Nephew

_DSC0354

The brainstorming process for my nephew’s 2-year-old birthday present began about 2 months ago. I had seen ideas for a “quiet book” on Pinterest. Mostly made from felt, “quiet books” are these cute flip books filled with little activities that are meant to entertain and keep your kid still and quiet. I liked the idea (especially since Josiah is quite the jet-setter), but I wanted something bigger! (He’s my only nephew to make things like this for!) That is when I had the epiphany to create an awesome, felt play mat – customized for his life.

DSC_0477

I started by purchasing a yard of green fleece. In my opinion, fleece holds up better over time than felt. (Felt can shed and eventually start to ball up.) Though I planned to use felt for the details, I knew fleece would be a better foundation. Plus, fleece is much softer in case my nephew every decides he wants to use the mat as a blanket.

IMG_4167

Cutting out the streets and the buildings took a few days. (And as you can see, I let it take over the floor of my kitchen.) I cut everything by freehand, so I did experience some trial and error. Initially, I cut the streets pretty wide, but as I cut out more and more building, I made the streets skinnier to fit everything on the mat. (Plus, I found this cute wood cars that were the perfect size for my smaller roads.)

DSC_0484    DSC_0490

With everything cut out and in place, I used no-heat sewing glue to glue everything down. The glue left marks at first, but they go away as the glue dries.

IMG_4180

Despite everything being glued down, I wanted to secure the felt pieces in place by sewing everything down. (I am giving this to a 2 year old.) I used clear and white thread, and it took about a week to finish since I sewed everything by hand. I also used embroidery floss to add a handful of details – like a sign for the gas station and items for sale at the market.

DSC_0419    DSC_0422

The back side of the fabric shows all of the work, but no one wants to see that. So I found this adorable fabric at Joann Fabric that I used as a back piece.

_DSC0362

I customized this mat for Josiah, picking places that he would recognize from his everyday life. And from what I’m told, Jo loves some pizza and ice cream.

_DSC0361    _DSC0363

Since they live right on the ocean, I added a beach with the surf club my brother belongs too. For the zoo, I decided to leave the space blank since Josiah has so many small, plush animals he could place there.

_DSC0360

I totally took this gas station/car wash idea from Pinterst. I’m obsessed with the car wash. It’s my favorite element on the whole mat!

_DSC0366    _DSC0369

Dad’s office on the left, and a school on the right.

_DSC0367

Their local grocery store is Carrefour. I tired to copy the store’s logo. Though looking back, I’m bet I subconsciously picked a green roof because I shop at Publix. And then with a little extra space, I placed a blue U.S. mail box!

_DSC0370

The train station was a must! And this too is an idea I found on Pinterest. I cut rick rack into piece for the railroad tracks, and then used felt to create an accompanying train station.

_DSC0371    _DSC0373

Last time I went to visit my brother and sister-in-law, we walked into the same music shop everytime we walked by it, so it was also a must-have. Plus, I think the little guitar and bongos look super cute in the windows. The fire station was added because I think it’s pretty iconic.

_DSC0376

These three buildings represent Josiah’s apartment on the right. His grandparents’ house is in the middle. And I added a house I thought could represent their good friends, the Wallaces. (Plus, I wanted to use the silhouette of that archway somewhere on the mat since it ties in so closely to where Josiah is growing up.)

_DSC0384

Finally, I added a Medena, or a little market. Of course, this is a lot smaller than the ones Josiah goes too, but I thought it was a needed detail.

_DSC0379

I attached the back piece of fabric the same as if I was making a quilt. I used basting spray to attach the two pieces together, and then I used denim fabric cut into 2-inch wide strips to bind the edges.

Hand-Stitch a Star Chart

DSC_0442

A needle and thread are the only tools you need to recreate the night sky. My love for the stars and their constellation stories are not new. (You might remember my first constellation-themed project with a pair of Toms.) So when I began to brainstorm new projects to help decorate my new desk at work, I ended reverting back to a favorite, creating this hand-stitched star chart banner.

DSC_0418

Like my pair of Toms, I started by splatter-painting the material with silver paint, but this time, I used a piece of navy muslin fabric. (Sorry, I did not make note of dimensions) This process helps create the look of infinite stars, adding a beautiful layer of dimension. Once done with the silver paint, I did splatter on a little white paint too.

DSC_0447

Once the paint dries, I start with my needle and thread. I printed off a a star chart to help with a few constellations, but for the most part, I stitched everything from memory. If you don’t feel comfortable doing this, use an erasable fabric marker to draw the constellations before stitching. Along with the constellations, I stitched several additional starts to help fill in the spaces between constellations.

DSC_0452

To finish, I took a matching piece of navy muslin, and placed the two pieces right sides together. Using my sewing machine, I sewed them together using a 3/4 inch seam. At the top, I skipped over an inch on each side to leave room for the wood rod. After turning the fabric right-sides-out, I ironed it, placed the wood rod, and used hemp string to hang the banner.

Have an Adventure Embroidery Hoop

DSC_0071

I oftentimes find myself picking up a needle and thread when I have no plans after work. And like doodles on a notepad, designs begin to take shape. Many do not turn out – like a lot – but occasionally one will turn into a masterpiece. This is one of those times.

DSC_0068

I stuck with the fabric I love – felt – and I completely freehanded the world. Didn’t even look at a map. (I know, I’m shocked it turned out so well, too).

DSC_0072

With the world completely, I knew the phrase, “Let’s have an adventure” would be the perfect fit.

DSC_0074


DIY: Candy Buffet

At the bridal shower previously mentioned (see here), my friends gave me the task of creating a candy buffet. It was a causal request via text, but you know me, I naturally took it as a challenge to create the cutest thing possible.

DSC_0120

Choosing your containers: Every website I went to when researching candy buffets said the same thing: pick you container first. And in my experience, I completely agree. Before you take a step into a candy aisle, know how many containers you have and their sizes. (A game plan helps make shopping feel less overwhelming.)

And do not buy containers. Even if you don’t own them, ask around and borrow them. I went home and raided my mom’s collection of glassware. She had several of the round vases from my brother’s wedding. My grandmother gave me taller vases. And the bowl of pretzels is a salad bowl I use almost everyday.

DSC_0128

My mom also had these adorable letters from Valentine’s Day with ridges perfect for holding candy. And it was her idea to put the Swedish Fish in a glass fish bowl.

DSC_0121

Picking the candy: My initial problem was figuring out how much candy to get. I set a budget of $35 (though I did end up going over it), and we were planning on having 30 to 40 people in attendance. I avoided the candy at Sam’s. It was more candy than I needed, and each bag cost around $10. So I decided to pick a mix of name brand candy and cheap generic candy. M&M’s, Swedish Fish, Smarties, Sweet Tarts and Kit-Kat Bites covered the name brands. Gummy worms, Peach rings and lollipops were cheap and helped fill in the gaps. Plus, I decided to make chocolate-covered pretzels, which ended up being the most popular treat.

DSC_0129

Decorative touches: With your containers selected and the candy purchased, the rest is in the details. I found rolls of polka-dot brown wrapping paper at Target for only $1 that I used as the table covering. And then using string that I had around my apartment, I tried to decorate each vase to add touches of color. I found the candy scoops at Party City. I didn’t purchase a scoop for each container of candy. I figure since it was a relatively small party, people could share.

DSC_0130

To go bags: The candy buffet was set up in the middle of the party. So as the afternoon progressed, everyone came around for a handful of candy here and a few chocolate-covered pretzels there. But you could see it in everyone’s eye that they were hoping to take some home. For to-go bags, I found these cheap favor bags at Hobby Lobby. After buying them, I realized that they did not come with twist ties, so I set out of roll of washi tape to help secure the bags.

If you haven’t already noticed, my candy buffet uses several cigar boxes. Below, I used one to help store the bags and washi tape. Others were used to add a little height to some containers.

DSC_0125

Come with a plan: The day before the party, I mocked up the candy buffet to see what it would look like. I filled each container with its respected candy to make sure I had enough, but more importantly, I was able to think things through and play with different placement options. I’m so glad that I did this because when I showed up to help set up the next day, it was a little chaotic. People were running around everywhere, but since I knew what I wanted to do, I was able to set everything up in 10 minutes.

Plus, I made sure to bring my own essentials – scissors, tape and a sharpie – just in case. Since the party was not at my house, I was able to set up the buffet without having to search for these things. I just threw everything in a box and brought it to the party.

DSC_0118

Some people want their candy buffets to be themed in specific colors. Obviously, I didn’t go that route. I love how my candy buffet turned out so colorful and sweet. And it was so fun to pull it all together for an event celebrating such a close friend.

DSC_0126

Pack Yourself a [Felt] Lunch

DSC_0100

Just when I thought the felt pancakes and fried eggs were the cutest things I had made in awhile, I decided to make a felt lunch, complete with a sandwich with all the toppings, a bag of chips and a bright red apple.

DSC_0104

Thanks to Pinterest, I found the idea to make a bag of felt chips. After cutting out two ovals of yellow felt, I used my sewing machine to create ridges. I sewed rows of straight lines and then an additional line that outlined the whole thing. I also found an idea for tortilla chips, using off-white felt cut into triangles.

DSC_0106

The felt chip bag took less than 10 minutes to make. After cutting out two rectangles, I used my pinking scissors to create the zigzagged edge. Then taking one of the rectangles, I sewed the strip of light blue felt to the right side of the fabric. Next, I hand stitched the the yellow sun (again, cut out with my pinking scissors).  Finally, I put the right sides of the two rectangle pieces together and sewed along the edge (you don’t need a large seam allowance with felt). Flipped it right side out and voila!

DSC_0101

The felt apple was a little trickier. I found this tutorial online that I used as my guide. Basically, you need 6 pieces of red. (I just eye-balled the shape based on the tutorials’s template.) Putting rights sides together, I blanket-stitched the sections together. As you can see, this made it so you could see the red stitches. You can hide the stitches by using a sewing machine, but I think I prefer the exposed look.

DSC_0108

The felt sandwich is made up of several layers, each adding a pop of color.

DSC_0113

Starting with felt lettuce, I cut out a leaf-type shape out of green felt. Then, using my sewing machine, I stitch short lines to create veins.

DSC_0110

For the felt tomato, I used three pieces of felt: two round pieces of bright red felt with sections cut out and and one round piece of the dark red felt, sandwiched between the other two. I used white thread to stitch seeds, and then I hand stitched everything together. The felt onions were made with a piece of purple felt and a piece of white felt.

DSC_0115

I spent an hour or so trying to come up with the right meat. Using pink felt seemed strange, but then an epiphany hit. If I blanket stitch the edge with red thread, I can create felt bologna. (And yes, I did just sing the Oscar Myer’s song to help me remember how to spell bologna.) The felt cheese was much easier. I simply cut out a few holes to make it look more distinct.

DSC_0114

After making a version of the bread by blanket stitching two pieces of felt together, I decided that felt bread needed some dimension. It needed to seem more prominent than everything else. So I added some volume by creating a border of light brown felt and stuffing it with polyfill.

DSC_0107

I simply adore how colorful the sandwich turned out to be. Plus, when combined with the breakfast items already made, you have even more possibilities for the type of sandwich your child could create. BLT, anyone?