Travel-Inspired Embroidery Baby Announcement 

img_2488

I am oftentimes asked to create something based on a piece of inspiration a person has found. In the case of this project, a friend had seen a swatch of fabric with a pattern made out of travel tags representing cities all of the world.

This friend, Rachel, is a great traveler, and as the birth of her second child approached, she asked me to make a embroidery baby announcement based on the fabric swatch.

Let me tell you, this project was fun!

I asked Rachel to pick four cities she wanted me to represent, and she was kind to let me design the rest. I decided to keep it simple. I used airport codes, but for cities with more vague codes like OSL, I thought it was best to include the name of the city.

I worked to complete the eight tags in the months leading up to her due date, and then finally, once little Elliott was born, I stitched in his name and info. I also did a zig zag stitch to overlock the edges to avoid unraveling before Rachel could get the piece framed.

Advertisement

Applique Lake Lanier Pillow

DSC_0667

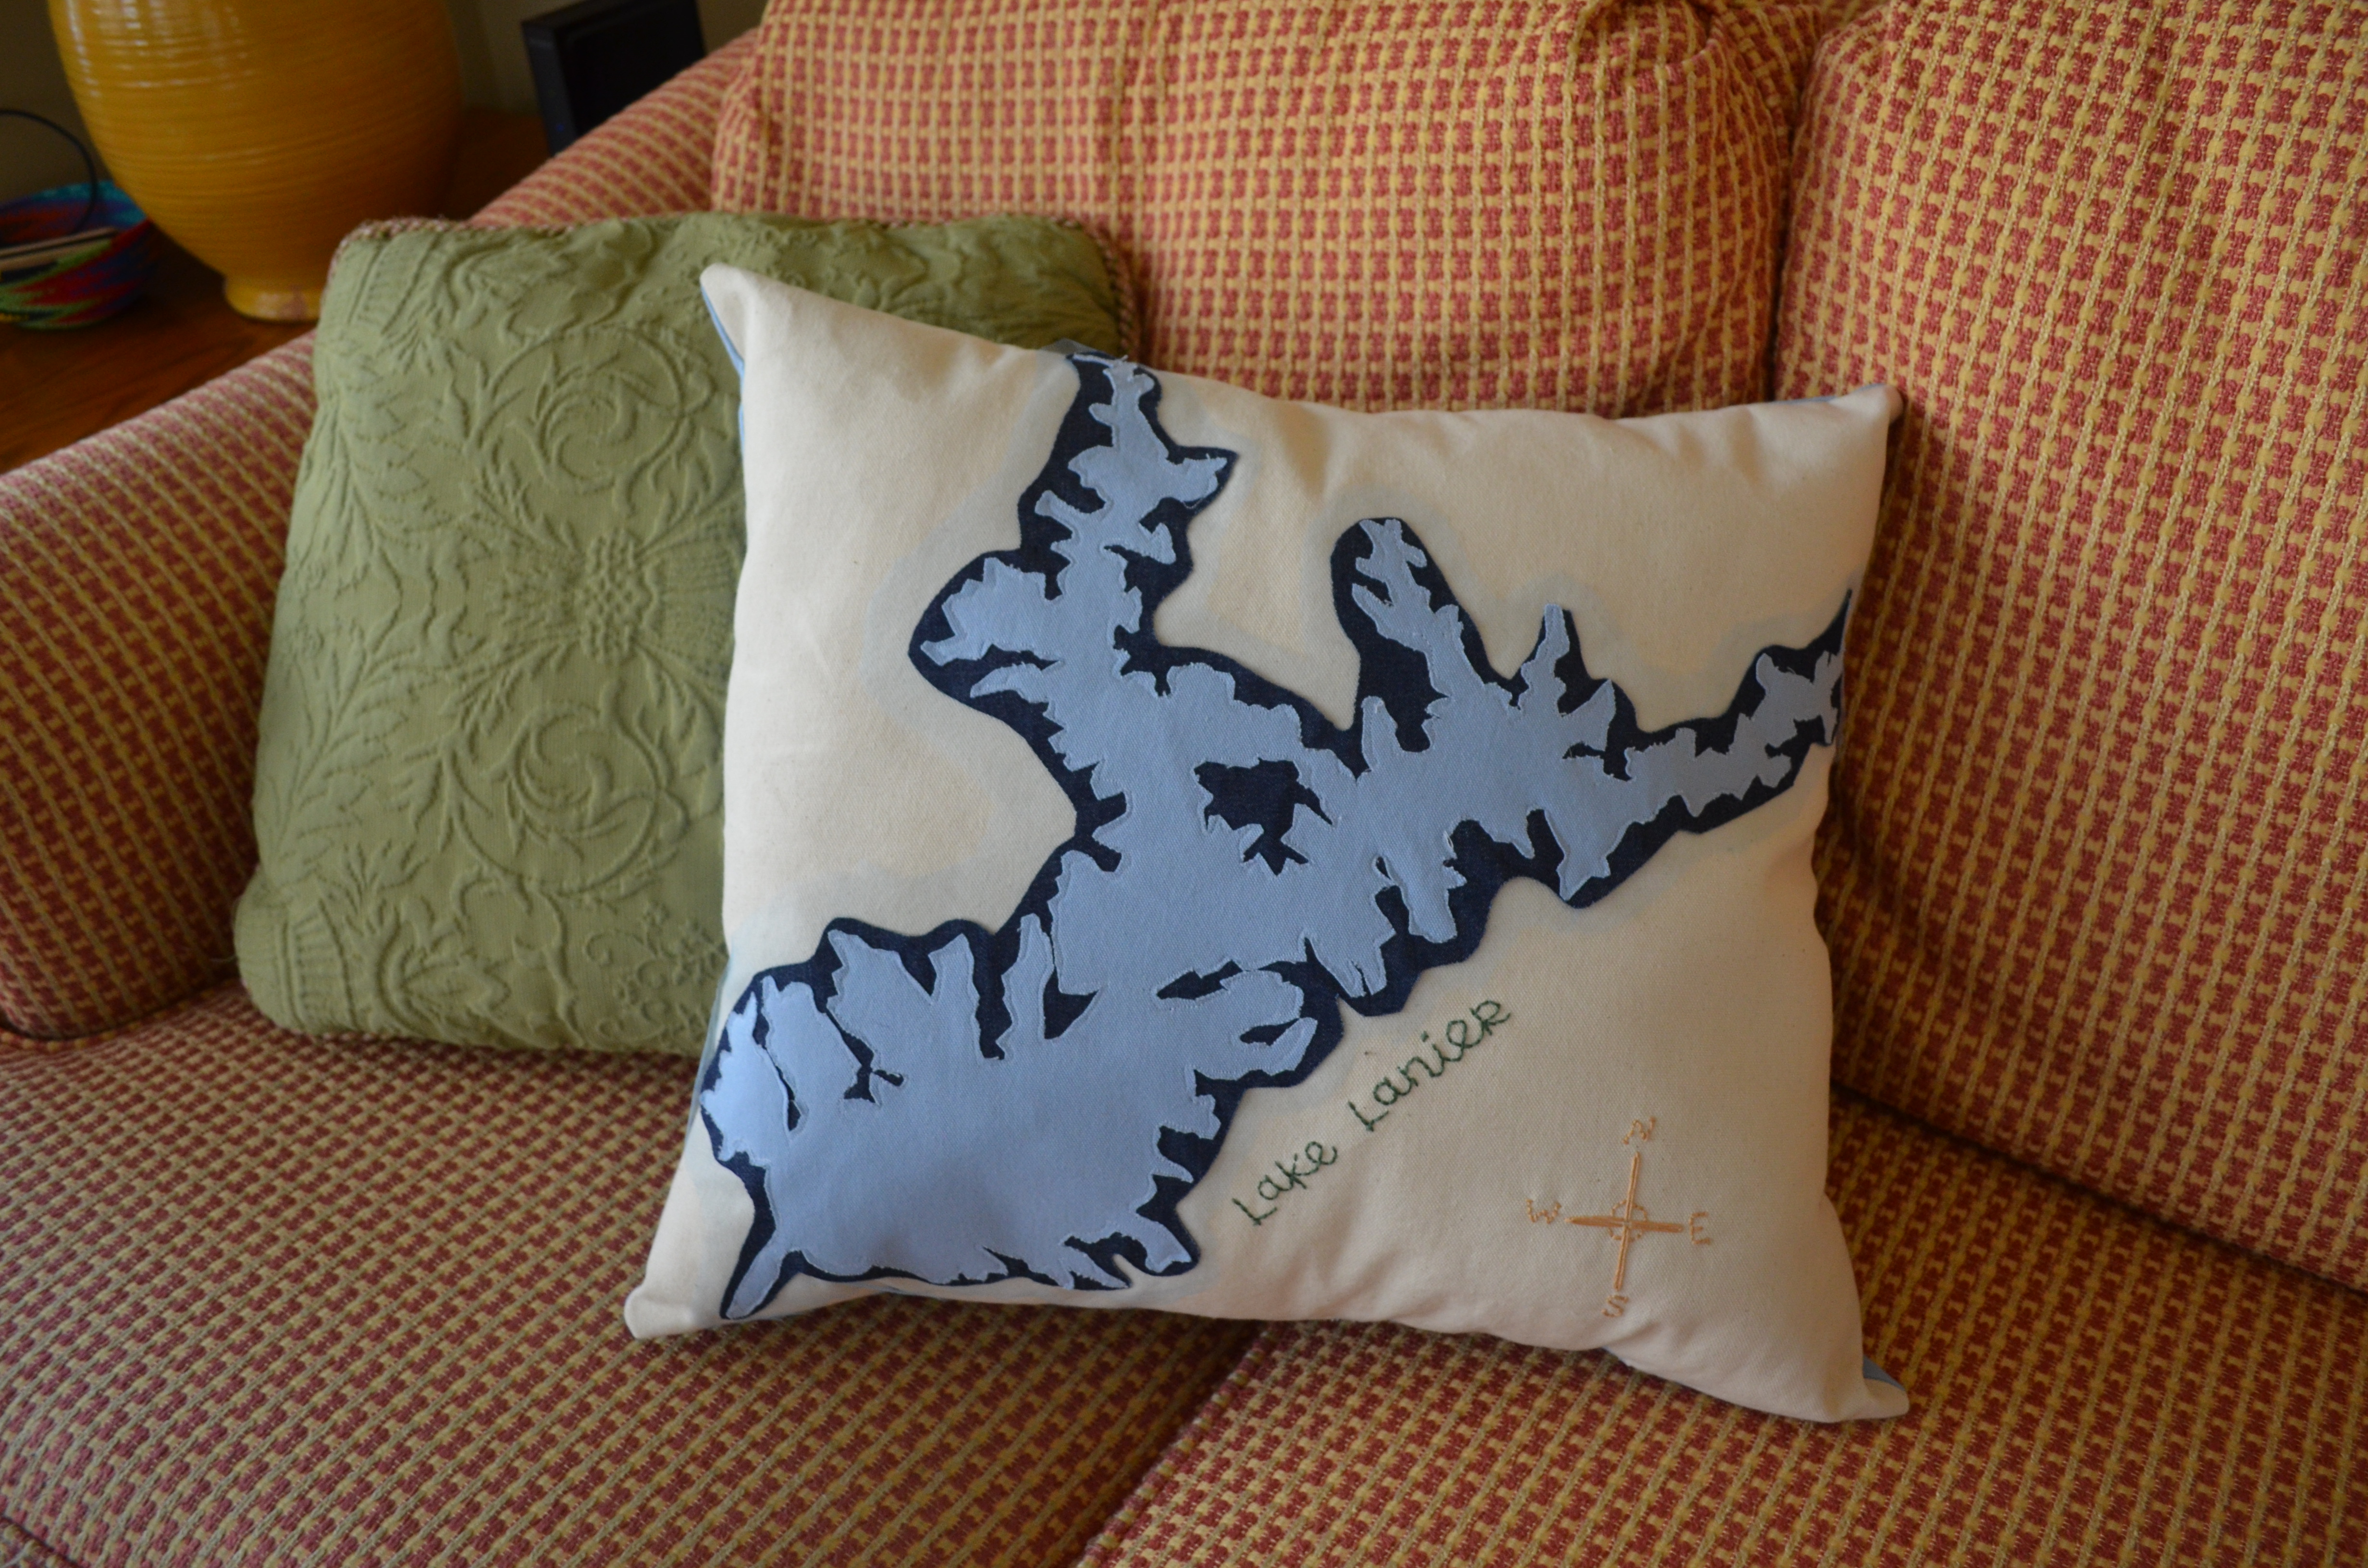
There is a point early on in a sewing project when you just know that the final product is going to be fantastic. This idea – a pillow with a map of the lake my parents live on – had been floating around in my head for months. And finally, back in December (yes, this is another overdue post) I finally put the plan into action. One day at work, I found a map online that I eventually used as my template. It was that early on – before I had even picked up a piece of fabric – that I knew in my heart this pillow was going to turn out awesome!

I think it turned out to be just that.

DSC_0634

I used the map I found online as a compass, pointing me in the direction I should take the project. The map’s size decided the dimensions, and its green outline inspired me to use layers of fabric.

DSC_0635    DSC_0636

The pillow’s map has 3 layers of fabric. The first (though it may be hard to see in the pictures) is a layer of light blue tulle. The second layer is a dark denim material someone gave me as scraps. Using heat n’ bond iron-on adhesive, I cut out a rough outline of the map without the worry of fraying edges.

DSC_0644    DSC_0645

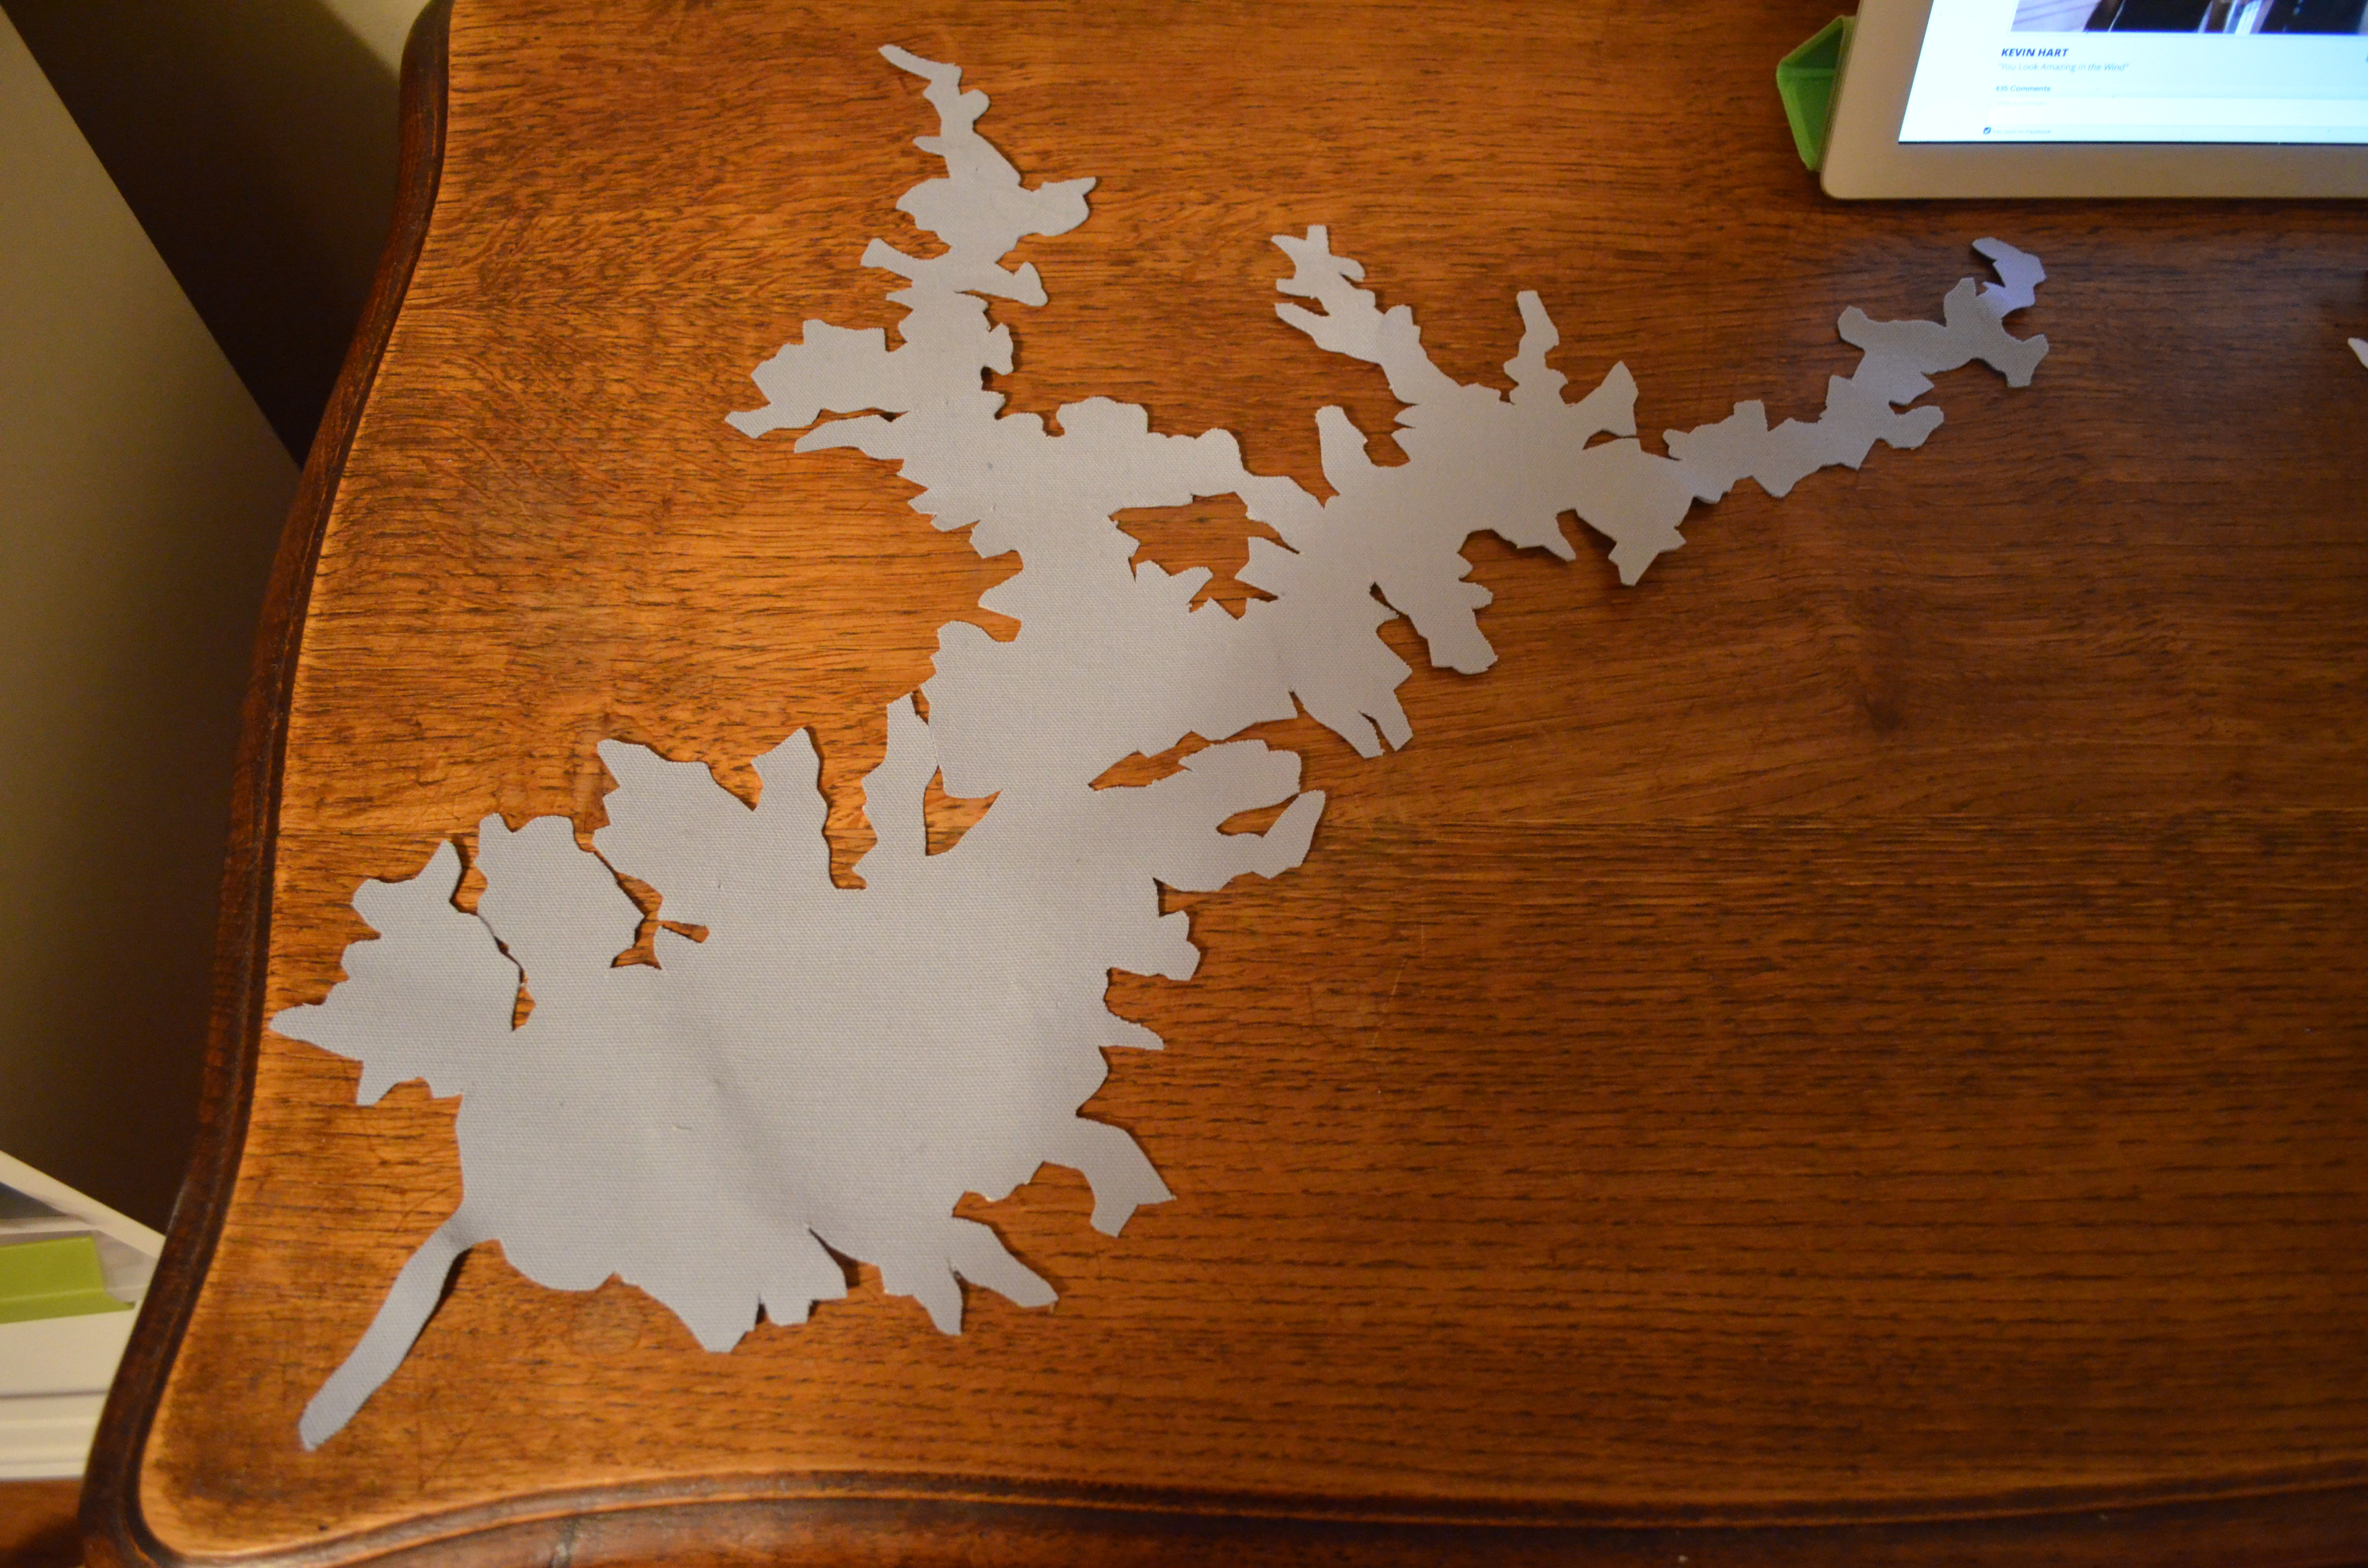
Finally, the third piece is the most detailed. Again using heat ‘n bond iron-on adhesive, I pined the map to the fabric and cut out the map along the green border. (I thought if I cut any closer, some of those tiny coves would be crazy difficult to cut out.) This piece took awhile to cut because I went nice and slow. I didn’t want to make any mistakes.

DSC_0647

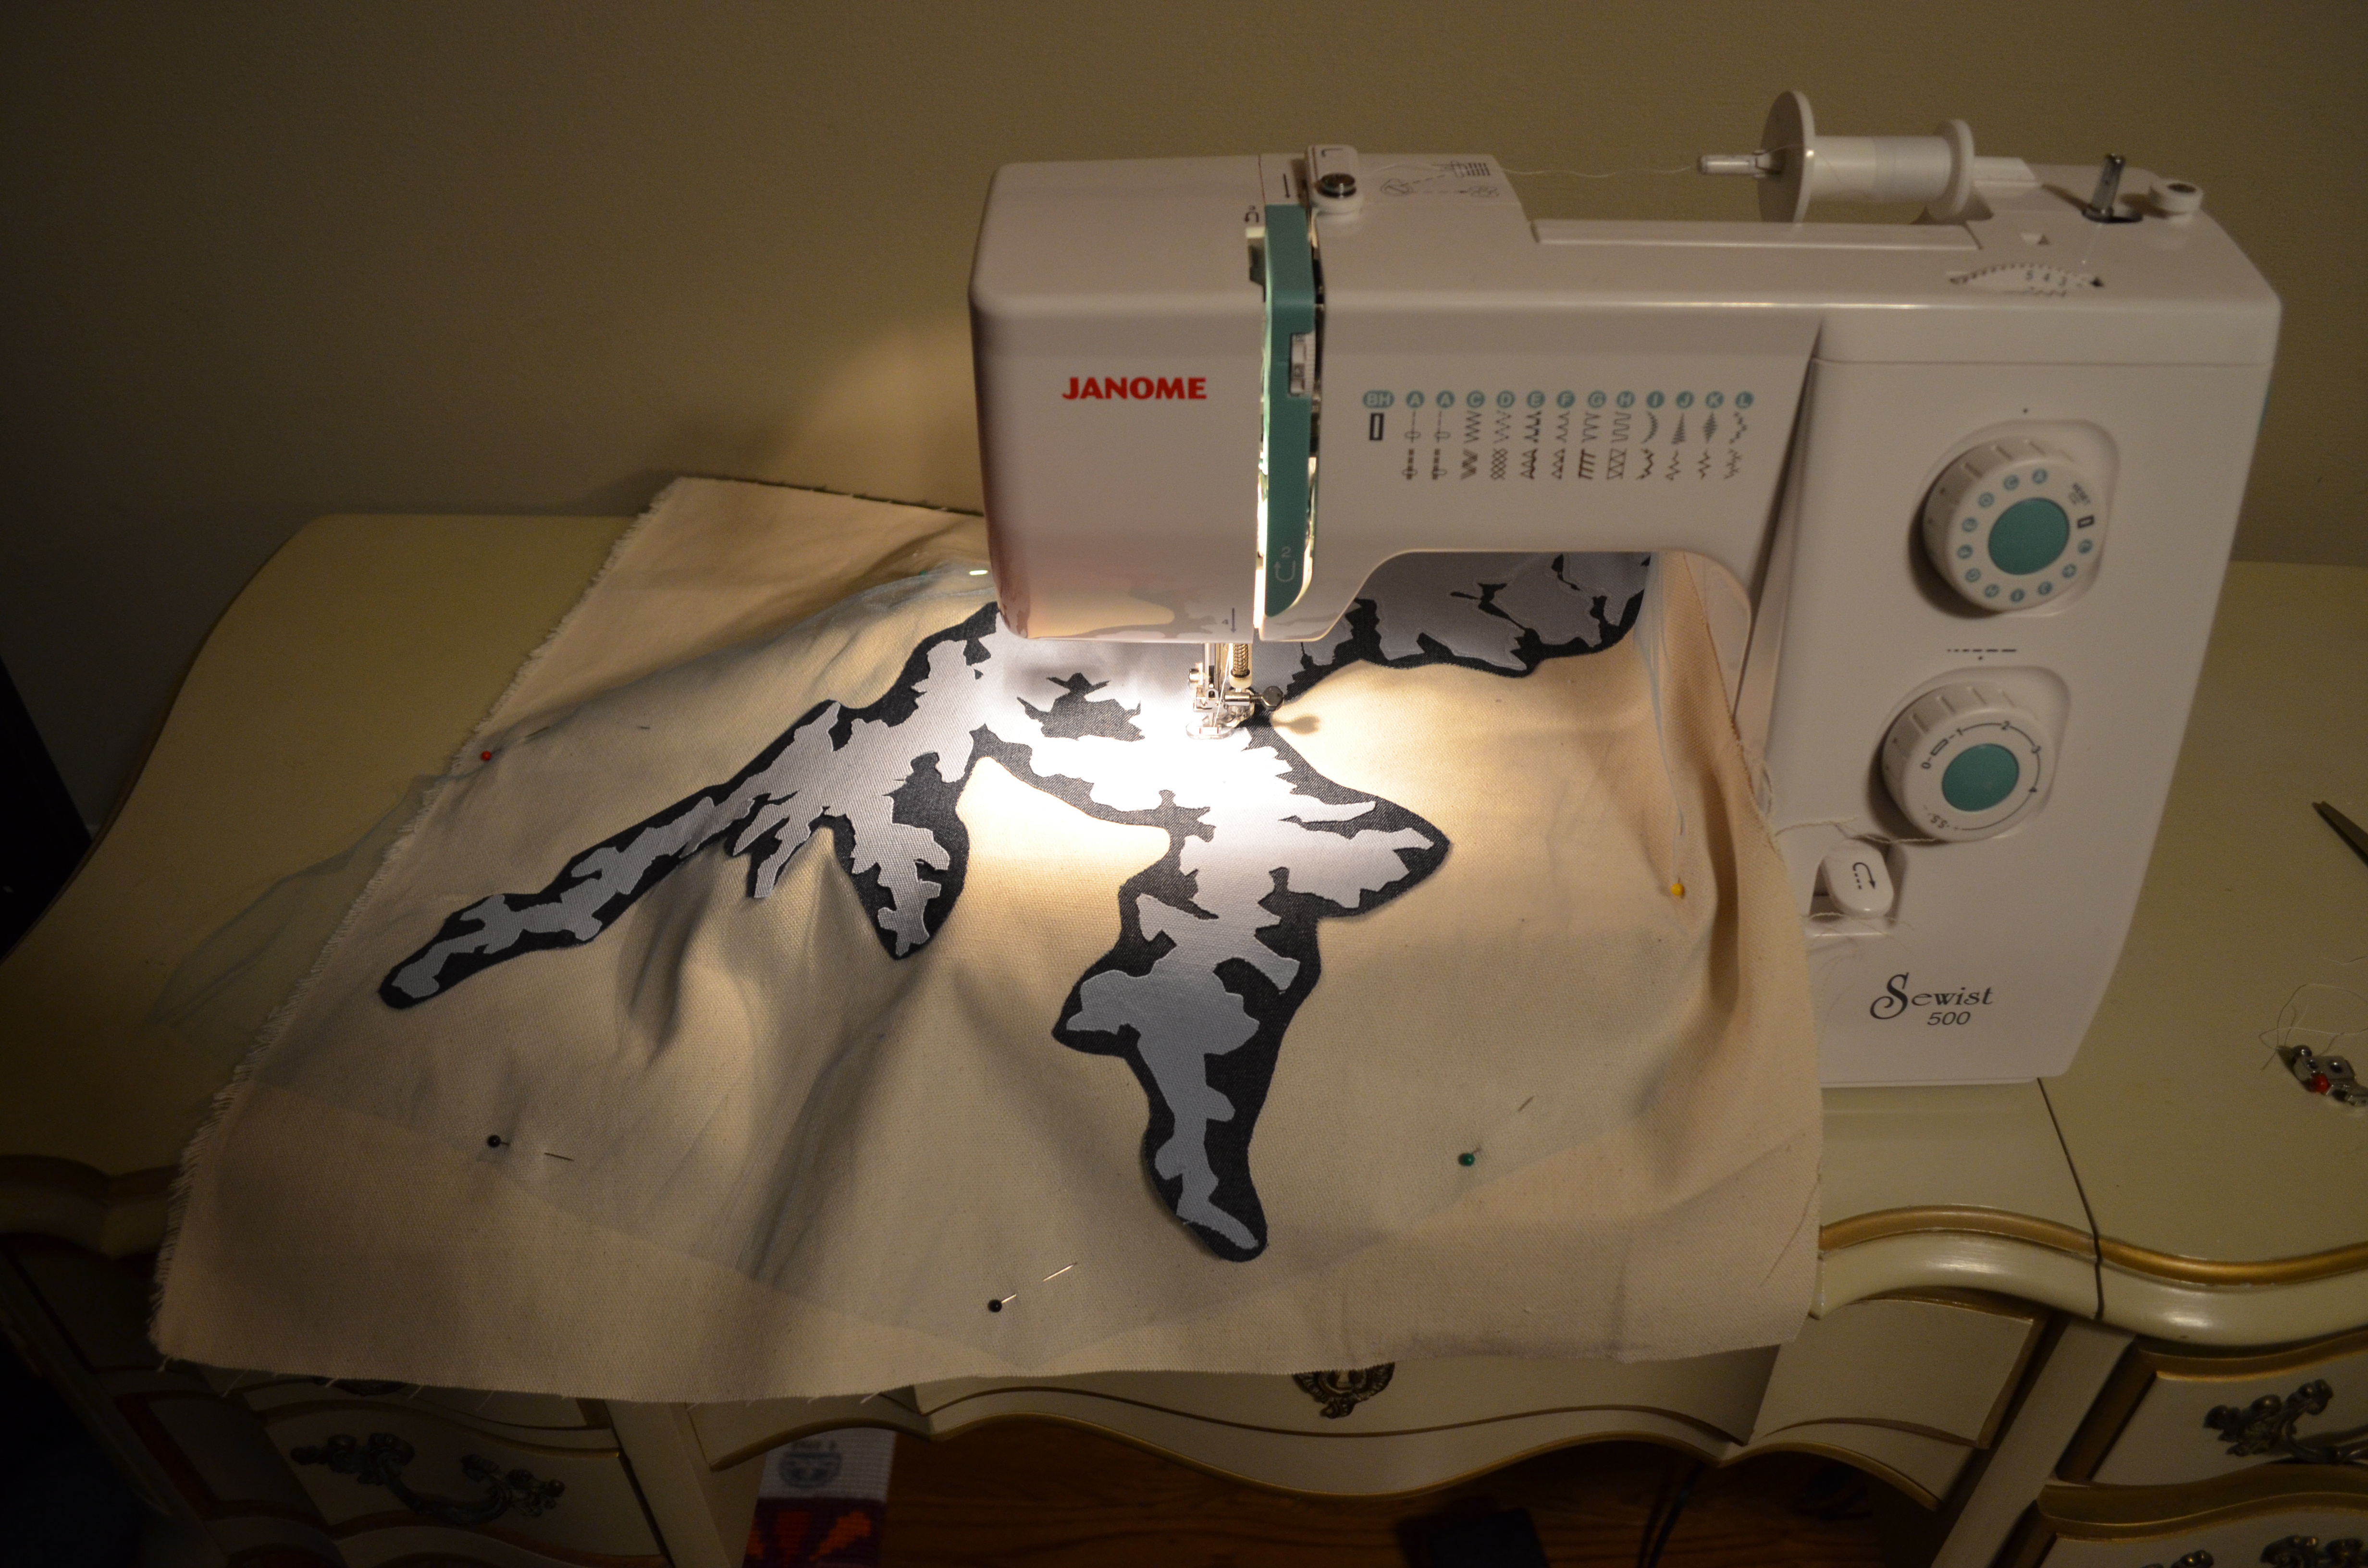
With the three layers made, I ironed the denim piece with the tulle underneath to the pillow. I then did the same with the light blue piece. With everything loosely attached, I used the embroidery foot on my sewing machine to sew everything down.

DSC_0657

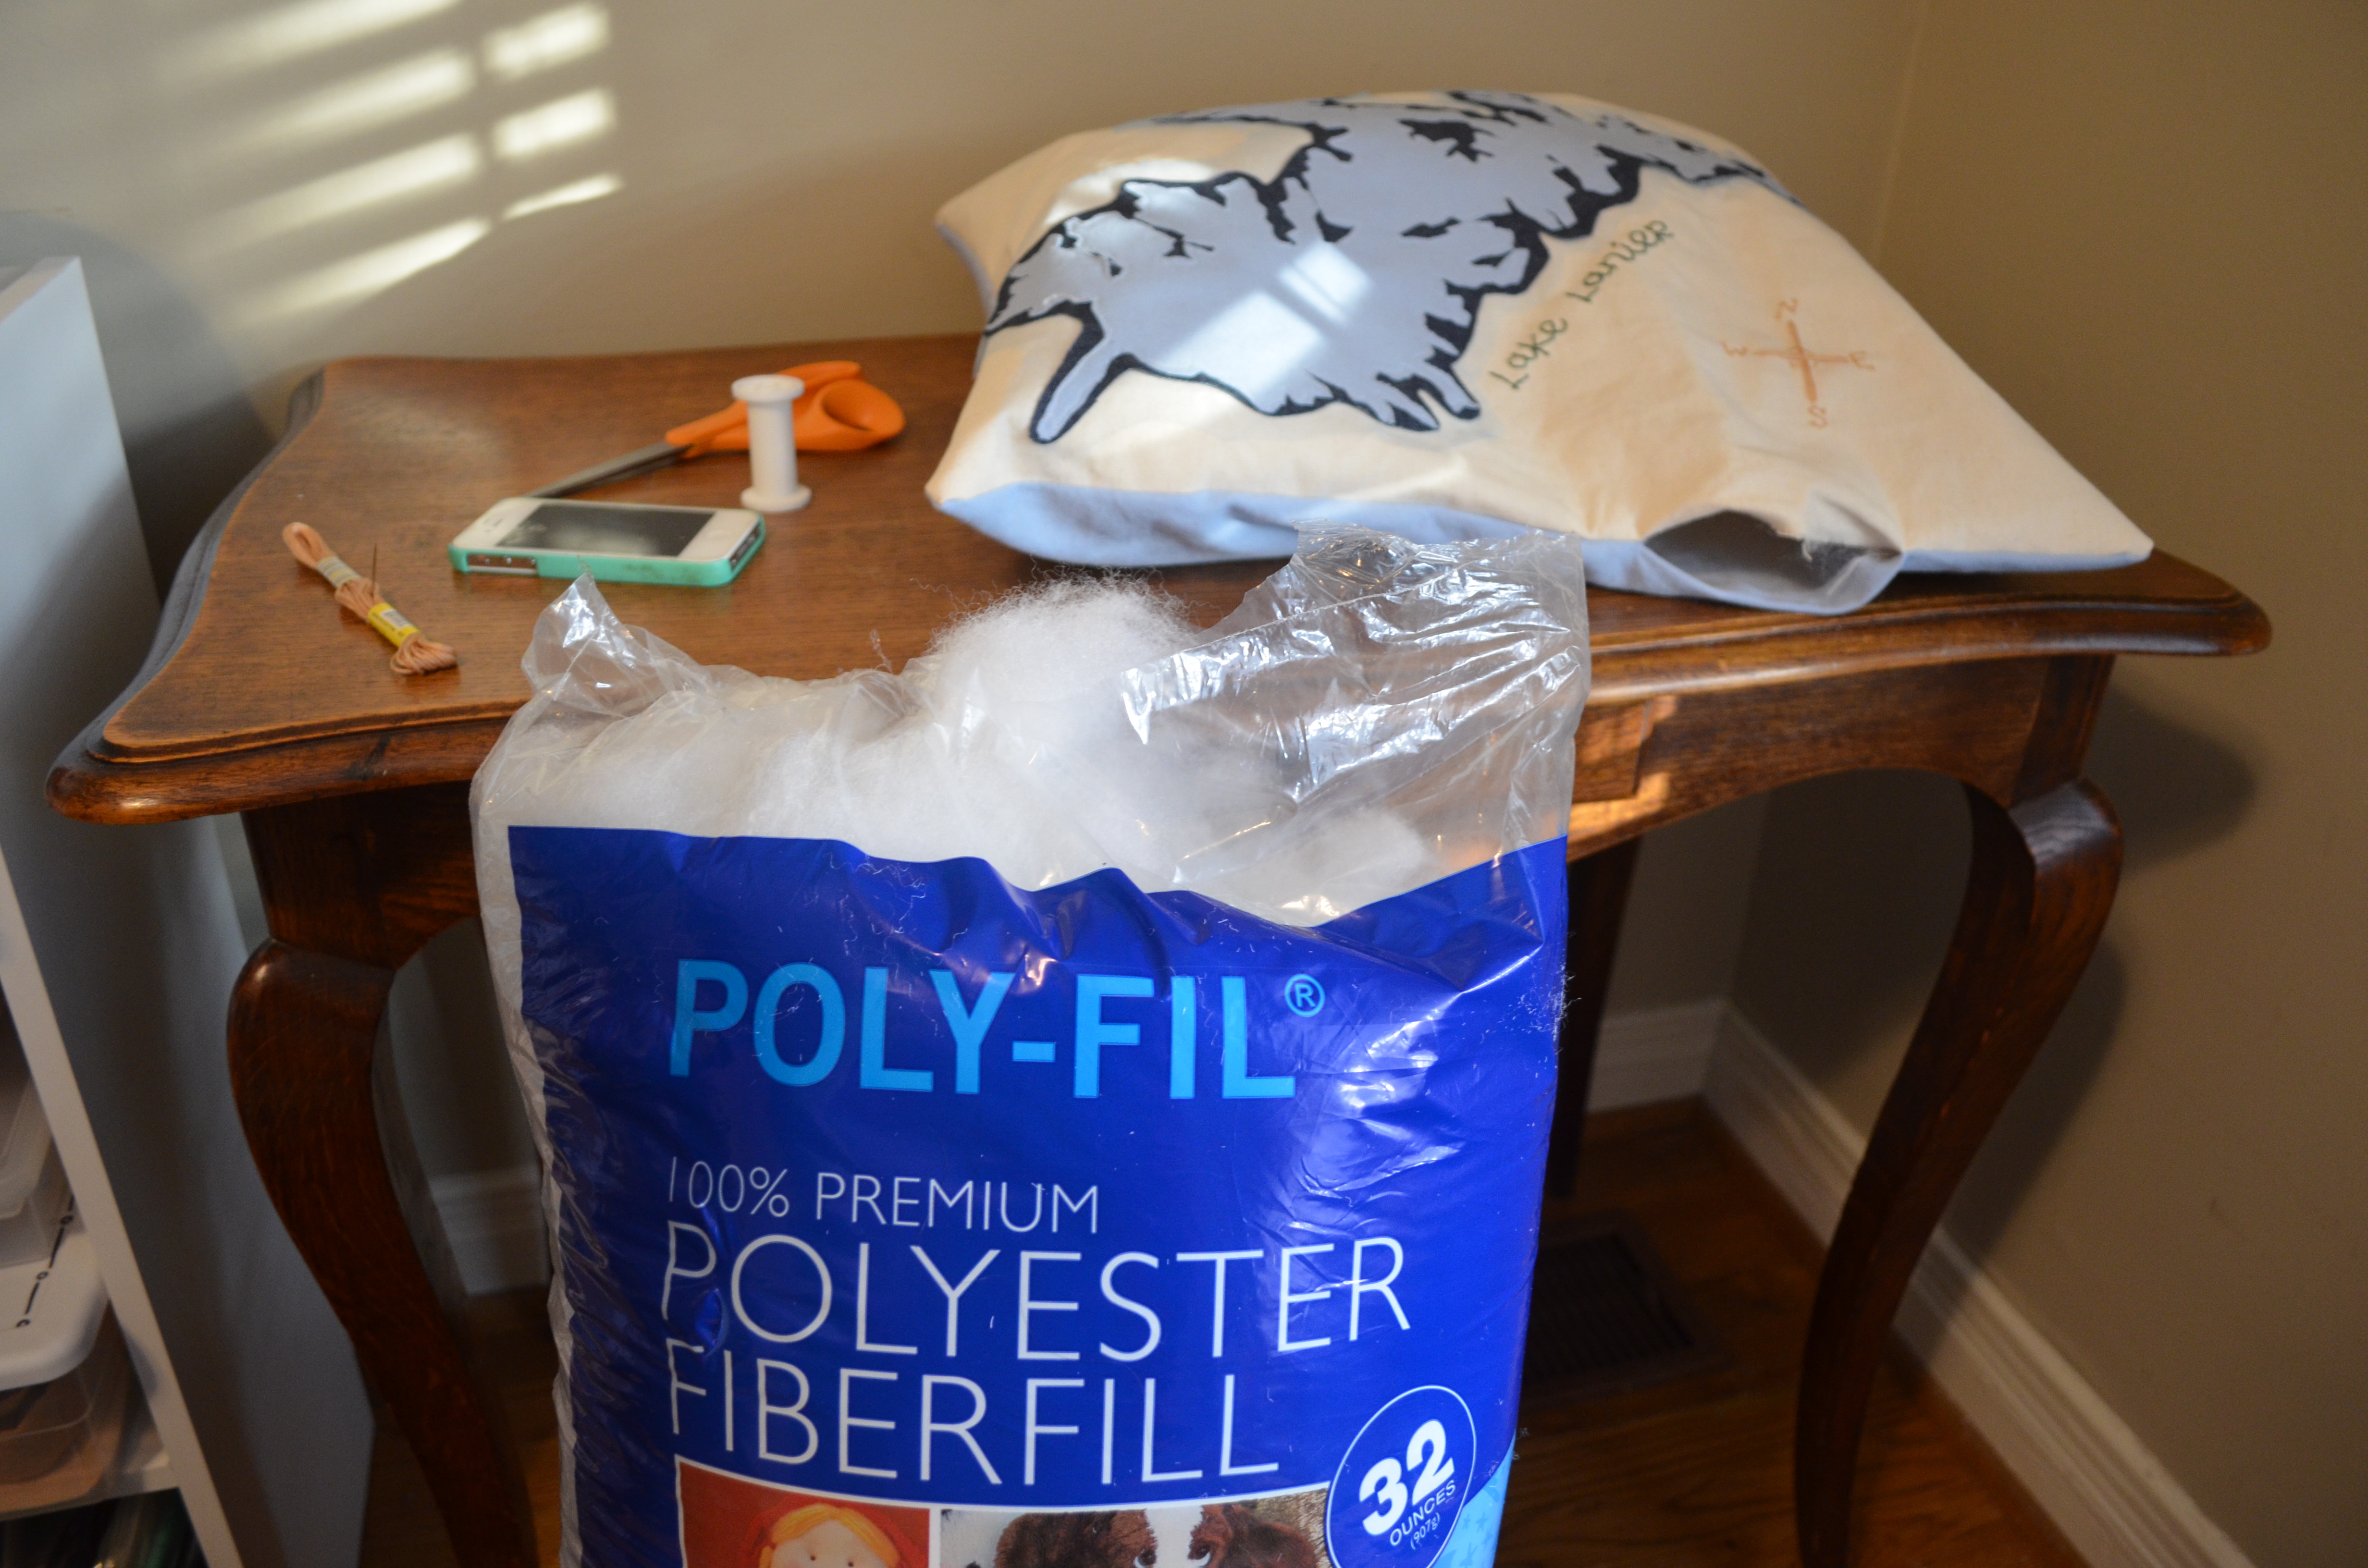
With the map in place, I added a few details, embroidering the lake’s name and a small compass. I then attached the back piece, placing right sides together and sewing along the edge with a 3/4-inch seam allowance. Leaving a small hole, I stuffed the pillow with poly-fil, and hand sewed the hole closed.

DSC_0673

It’s been awhile since I used my embroidery foot with my sewing machine, and for me, it’s take a few minutes before I feel like I have the hang on it. But even in it’s imperfect moments, I love the free-form look of this sewing foot creates. For me, it just enhances the homemade quality.

DSC_0671

After attaching the lake map, I felt like the pillow still needed something extra. I knew I wanted to embroider the lake’s name, but the idea of the compass came to me at the last minute. It was the perfect finishing touch.

DSC_0674

Overall, this pillow is of great quality. I used canvas for the front of the pillow and a thick, blue cotton fabric for the back. Both pieces were in my collect of scrap fabric, so I don’t know about cost. But I do know the fabric choice helps make the pillow feels so sturdy.

DSC_0669The pillow now lives in my parents’ kitchen in a cute sitting area they created (instead of having a kitchen table). On a good winter day, you could stand up from this spot and see the lake through the windows. I couldn’t think of a better home.


Anthropologie-Inspired Felt Christmas Stocking

IMG_4921I know, I know. I’m writing about my Christmas stocking in the final days of January, but to my defense, this month has flown by. I’m ready to flip my calendar to February with hopeful thoughts that next month won’t be as crazy.

But back to Christmas: this year I decided I wanted to buy a nice Christmas stocking, one that I would treasure year after year. When I stumbled across this stocking at Anthropologie, I was instantly smitten, but the price tag made me think twice. The thought is almost reflexive at this point: I could totally make this!

IMG_4907I’ll keep the picture of the Anthopologie stocking small because when placed side-by-side, my stocking looks pretty “crafty” in comparison. The difference is in the quality. I’m sure Anthopologie used expensive wool. I used acrylic felt from Hobby Lobby. They used these adorable mini pom poms with a trendy color pallet. I was stuck with the primary colored trim selection at JoAnn Fabrics.

Don’t get me wrong, I love how my stocking turned out, especially when you compare the price. I spent about $8. The item is now out of stock, but I remember Anthropologie selling it for almost $50.

IMG_4916

In my excitement of the project (plus, I made it really late at night and the lighting would have been a mess), I didn’t take many step-by-step pictures. But the process doesn’t venture far from a normal Christmas stocking tutorial. After cutting out the main piece of the stocking, I simply attached rows of trim. And instead of using my sewing machine, I used a blanket stitch to hand sew the stocking together. I used light blue thread to provide a little contrast.

My final touch was the accent of purple and magenta yarn pom poms. I hunted for the white yarn in the similar style, but after going to a few stores, I felt lucky to have stumbled across the purple yarn. So I made it work!

I’m sure when Christmas comes around this year, I’ll go through the same thought process of wanting a buy nice stocking. But for now, I’m excited that this Christmas stocking is mine.

Felt Christmas Poinsettia

il_570xN.695859870_5bn6

When I came home with the wrong size terra cotta pots (The felt cactuses I sell on Etsy use 3-inch pots; I purchased 2-inch pots), I decided to make the most of my mistake. The result were these adorable, mini felt poinsettias.

il_570xN.695859804_lv22   il_570xN.695983863_gjil

Similar to the felt cactuses I sell, each flower is attached to felt “dirt” and come with a real clay pot.  Teach your little ones to love gardening early on as they can “plant” their flowers over and over again. (And bonus, no mess to clean up or dead plants to deal with.)

il_570xN.695859840_lphd

To create the flower, I used a similar approach to how I create the cactus flower. I took a small rectangle of yellow felt and cut slits along the width. I did the same with a small white rectangular piece of felt. I then rolled up the yellow felt and continued with the white, creating the center. Next, I hand-cut the red petals (sorry, I don’t have templates) – 5 smaller petals and 5 slightly larger ones – and 4 large green leaves. I then attach them one-by-one until the flower is complete.

il_570xN.695983941_r84u

The miniature size is what gets me. My gosh, these flowers are just so darn cute!

Rosemary Wreaths

IMG_4981

Growing up, my mother had the best mottos to live by. My favorite: “Always know what makes you happy.” So when the struggles of life seem too much to handle, you know what activities or items can help pull you up. For me, crafting is my go-to tool for happiness.

My Thanksgiving was a week of personal struggles. I had to have surgery on my left eye. The anticipation was a heavy mental burden, and the post-op pain and physical injury was not easy either. So on Sunday after my surgery, when I was finally starting to feel more normal, I sat down and created a simple rosemary wreath.

I didn’t worry about taking pictures of my process (sorry), but trust me, rosemary wreaths are so easy to create. And I was able to use items I already had available.

I used an embroidery hoop as my wreath’s base. (You could use so many other forms, but this is something I already had at the house). Using more heavy-duty scissors, I cut 8-inch sprigs of rosemary from my parent’s garden. Then I made small bundles (with 2 or 3 sprigs each) and use a rubber band to secure each one. Then I used floral wire to secure each bundle to the embroidery hoop. And if necessary, I used the floral wire to secure a few odd sprigs that didn’t flow well in the circular shape.

And that’s it. The 30 minutes it took to create this wreath did wonders for my overall well-being. Plus, it made the room smell so wonderful! Pardon the cheesiness, but these moments of happiness are the best kind of medicine.

Hand-Stitch a Star Chart

DSC_0442

A needle and thread are the only tools you need to recreate the night sky. My love for the stars and their constellation stories are not new. (You might remember my first constellation-themed project with a pair of Toms.) So when I began to brainstorm new projects to help decorate my new desk at work, I ended reverting back to a favorite, creating this hand-stitched star chart banner.

DSC_0418

Like my pair of Toms, I started by splatter-painting the material with silver paint, but this time, I used a piece of navy muslin fabric. (Sorry, I did not make note of dimensions) This process helps create the look of infinite stars, adding a beautiful layer of dimension. Once done with the silver paint, I did splatter on a little white paint too.

DSC_0447

Once the paint dries, I start with my needle and thread. I printed off a a star chart to help with a few constellations, but for the most part, I stitched everything from memory. If you don’t feel comfortable doing this, use an erasable fabric marker to draw the constellations before stitching. Along with the constellations, I stitched several additional starts to help fill in the spaces between constellations.

DSC_0452

To finish, I took a matching piece of navy muslin, and placed the two pieces right sides together. Using my sewing machine, I sewed them together using a 3/4 inch seam. At the top, I skipped over an inch on each side to leave room for the wood rod. After turning the fabric right-sides-out, I ironed it, placed the wood rod, and used hemp string to hang the banner.

A [Felt] Breakfast of Champions

DSC_0087

When my sister-in-law told me that my 19-month-old nephew loved to “cook,” I figured I could chip in a few ingredients. And while Ikea has supplied him with my the basic fruits and vegetables, I thought I would provide a whole meal: felt fried eggs, felt bacon and a stack of felt pancakes.

DSC_0081

The easiest of the 3 items is the felt fried eggs because you really can’t go wrong. I used two pieces of the white felt (cut in any shape) and one circle of yellow felt for the yoke. Once I attached the yoke to one piece of the white felt, I blanket stitched the two pieces of white felt together (using two pieces hides the back stitch from the attaching the yoke and it adds some thickness).

DSC_0083

I created the felt bacon strips next. Again, using two pieces of brown felt to add thickness. I added the line of “fat” using light brown felt.

DSC_0079

For the felt pancakes, I cut two circles of light brown felt as well as “syrup” with dark brown felt and “butter” with yellow felt. I attached the “syrup” and “butter” to one of the circles, and then using a blanket stitch, I attached the second circle, leaving a small hole to stuff the pancakes with batting before sewing it closed.

I don’t know what what could be more adorable. Well, then there’s lunch…

Valentine’s Day Cards with Felt Hearts

As you very well know, I love Valentine’s Day – probably because it gives me an excuse to make heart-shaped pillows, eat lots of chocolate and send out hand-written notes. And though the pun-filled Valentines one can find at Target are adorable, I decided to make my own stationary this year with items I had around my apartment, and I was able to do it in 3 easy steps.

20140213-144715.jpg

Step 1: Cut hearts out of pink and red felt. (I used pinking scissors when cutting out mine, but the beauty of these notes is that you can do whatever you want.)

20140213-144740.jpg

Step 2: Attached the felt to the notecard using a needle and some thread. (It is remarkably easy to sew through card stock!)

20140213-144729.jpg

Step 3: Write a heart-felt note, like…

Dear friend,

To echo the words of Paul, “I pray that you, being rooted and established in love, may have power, together with all the Lord’s holy people, to grasp how wide and long and high and deep is the love of Christ, and to know this love that surpasses knowledge—that you may be filled to the measure of all the fullness of God.” (Ephesians 3:17-19).

Happy Valentine’s Day!

Love, Sarah

Brown Paper Packages Tied Up with String

From January to November, I am all about using kraft paper for all of my gift wrapping needs. Add in a  cute ribbon, and I have a simple yet adorable package to give out for birthdays, weddings – you name it! But come December, and I can’t help but fall in love with the festive holiday options.

But since life after college has been all about being resourceful, I decided to not invest in the beautiful and very tempting sheets of holiday wrapping (I’m looking at you Paper Source), and instead, use the materials I already have: brown paper, paint and plenty of ribbons!

20131220-120517.jpg

Step 1: Wrap your gift. (Easy enough)

20131215-100604.jpg

Step 2: Paint your design. (My flowers are a mixture of white paint with touches grey and red and black centers.)

20131220-120506.jpg

Step 3: Tie it all up with a bow.

(Sadly, it appears that I got so into gift giving that I forgot to take pictures of this step and onward.) But just imagine it in mind – the beauty of a simple, wrapped gift.