Felt Daily Activity Schedule

IMG_3145

This visual activity schedule for kids was a custom order for a friend of a friend, and looking back over these images, I realize that the person who purchased this got quite the deal. (Aka I charged way too little… which is the story of my business life.)

I am beyond proud of this project. I love how it’s colorful. I love that it’s made out a felt. And I love that I took the extra time to make this banner sturdy—with the hopes that it not only survive one child but could possibly be passed down for the use of a second or a third.

img_2833

The idea was provided by the customer. Her son thrived under a routine, and she found that their days progressed better when he understood, to a point, what to expect. She provided the individual prompts—signs for lunch, playtime, bedtime, snack, etc. We made sure there were enough signs to make it through the hours of the days, plus extras… because obviously, you need some variation within the week.

She asked for the day to start at 7 and end at 7, and then I came up with the rest from there. The trick was trying to figure out how to visualize 13 hours on a banner without making it enormous. Though the problem quickly resolved itself when I realized I would need to create some sort of pocket to store the little signs. I created two columns with seven panels each.

img_3096

Before finishing the banner—using quilting techniques like binding—I attached magnet snaps to the banner along with the signs. Since felt is a soft fabric, I worried that the act of pulling the signs off the banner each day would quickly wear on the fabric, so I made sure each magnet had a backing of thick cardboard.

IMG_3162

I designed the banner so it could be hung on the wall and easily used by a child. Plus, I just wanted it to look good. Knowing it was for a boy, I used lots of blues and greens. But you could easily use different color palettes, like purple and blue, yellow and navy, pink and more pink!

IMG_3155

All of the signs were hand sewn, but I did use a sewing machine for the banner.

… Yeah, I definitely should have sold this for four times the price I charged. Oh well.

IMG_3157

Advertisement

A Black (Copy) Cat Quilt

IMG_1607

Over the 4th of July, my family lost our black cat, Bosley. He might have been a stubborn, little cat, but we sure did love him. Awhile ago, with the help of Pinterest, I stumbled upon mermag.blogspot.com and this fantastic pattern for a black cat quilt. This fall, I decided to make it for my mother’s birthday. I figured that a quilt would help keep her warm this winter since Bosley would not be by her side. The final result was fantastic, and thanks to Merrilee’s pattern, it was quick and easy to make!

IMG_1453

The black cat blocks require 6 pieces.

(Top) Large white rectangle = 9 x 3 inches, 84 pieces
(Left) Medium white rectangle = 3 x 5.25 inches, 84 pieces
(Middle) Black square = 4 x 4 inches, 42 pieces
(Right) Small white rectangle = 2 x 4 inches, 42 pieces
(Bottom) White triangle = 2 x 2 inches, 84 pieces
(Bottom) Black triangle = 2 x 2 inches, 84 pieces

IMG_1533

Mermag’s blog post has a wonderful step-by-step visual guide for sewing the blocks together. You start with the ears and work to create the sweet little face.

IMG_1460

I made 42 blocks in total, and sewed them together with a 1/2 inch seam allowance. The quilt was 6 blocks wide and 7 blocks tall.

IMG_1465

I did run out of the white fabric mid-way through. I was using scrap fabric that was this cool, stiff, linen texture, and I struggled to find a matching fabric at the store. So I bought the closest match I could find, and I purposefully spaced the blocks that used the new fabric so the change looked intentional. I think the difference is quite noticeable in the picture below, but with the finished quilt, you really only notice the change if I pointed it out.

IMG_1556

IMG_1618

I wanted to keep the quite light and bright, so I selected a simple pattern for the back piece, and I binded the quilt with a  yellow cotton fabric (my mom’s favorite color).

IMG_1609

Excuse the wrinkles. The quilt got a little squished when I wrapped it up. But wrinkles aside, I love, love, love this pattern, and I was so happy to give this to my mother for her birthday.

Modern Plus Pattern Baby Quilt

DSC_0800

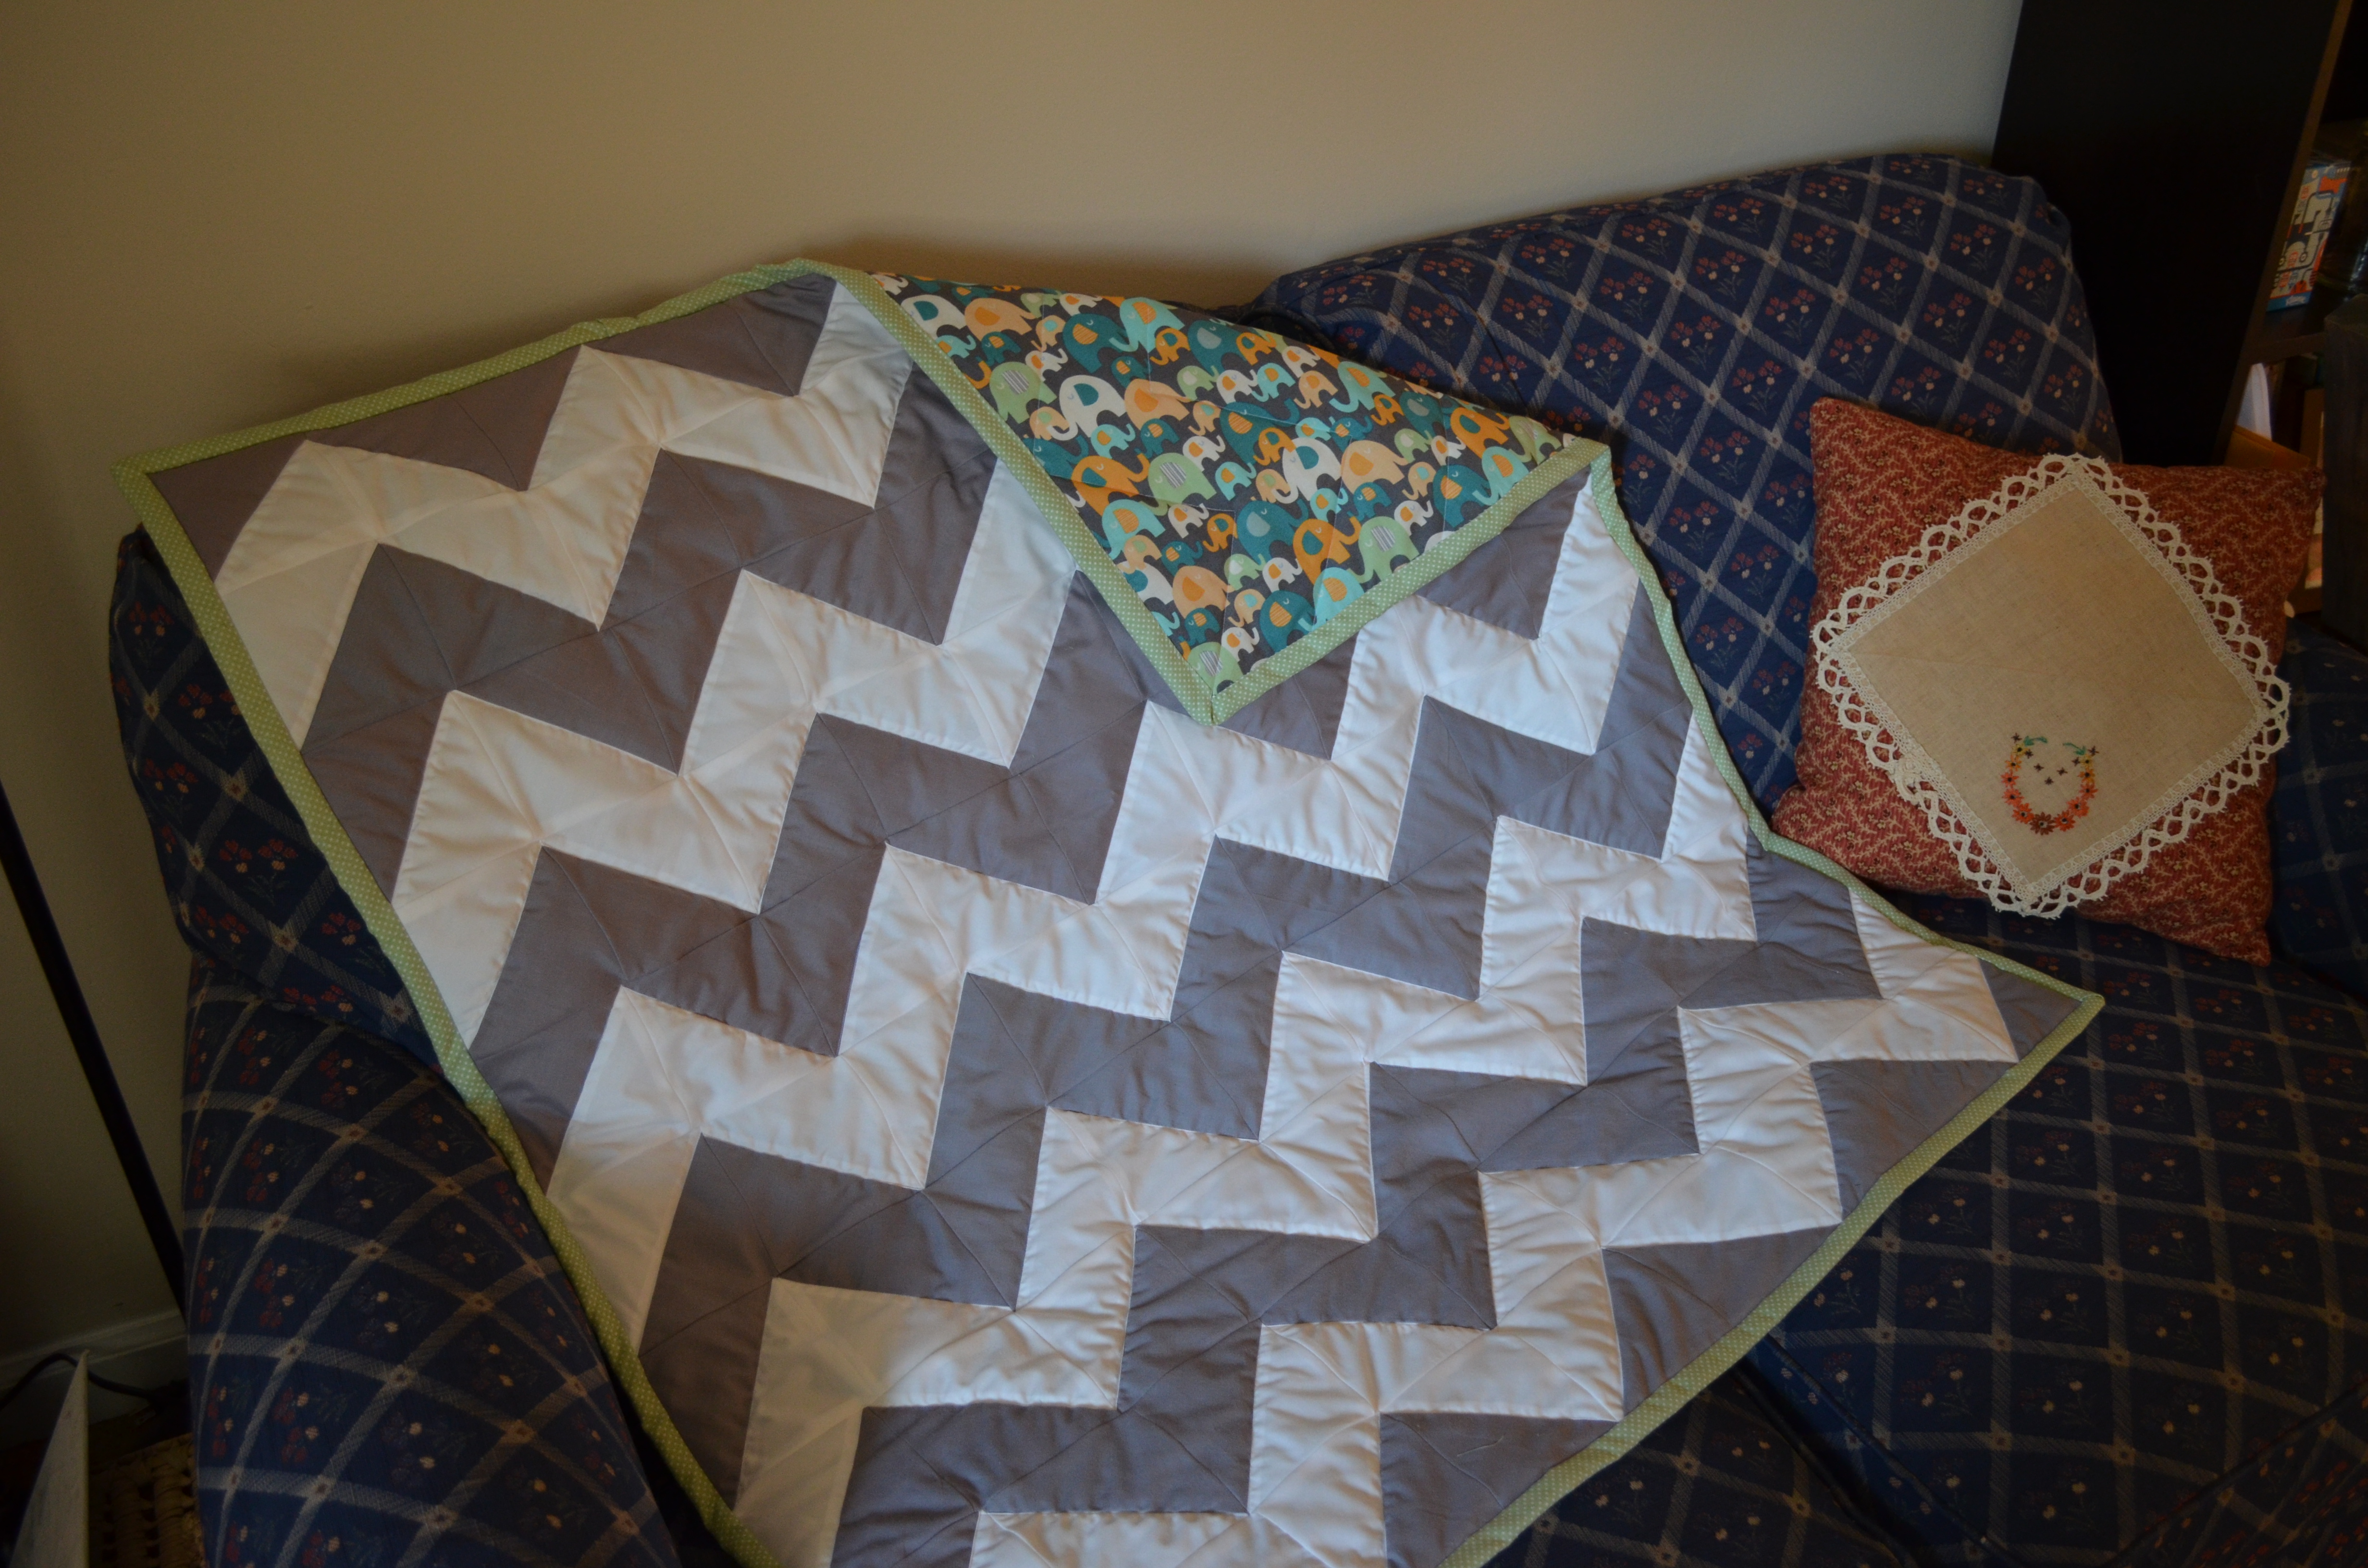
Dear reader, I specifically told you in my last blog post to remind me not to start a new quilt. You dropped the ball. I recently made a baby quilt. Okay, okay, so this has more to do with my lack of self control than your accountability. My little niece was born in January, and I had been itching to meet her, so to help temper my longing heart, I started cutting out squares of fabric.

IMG_5269

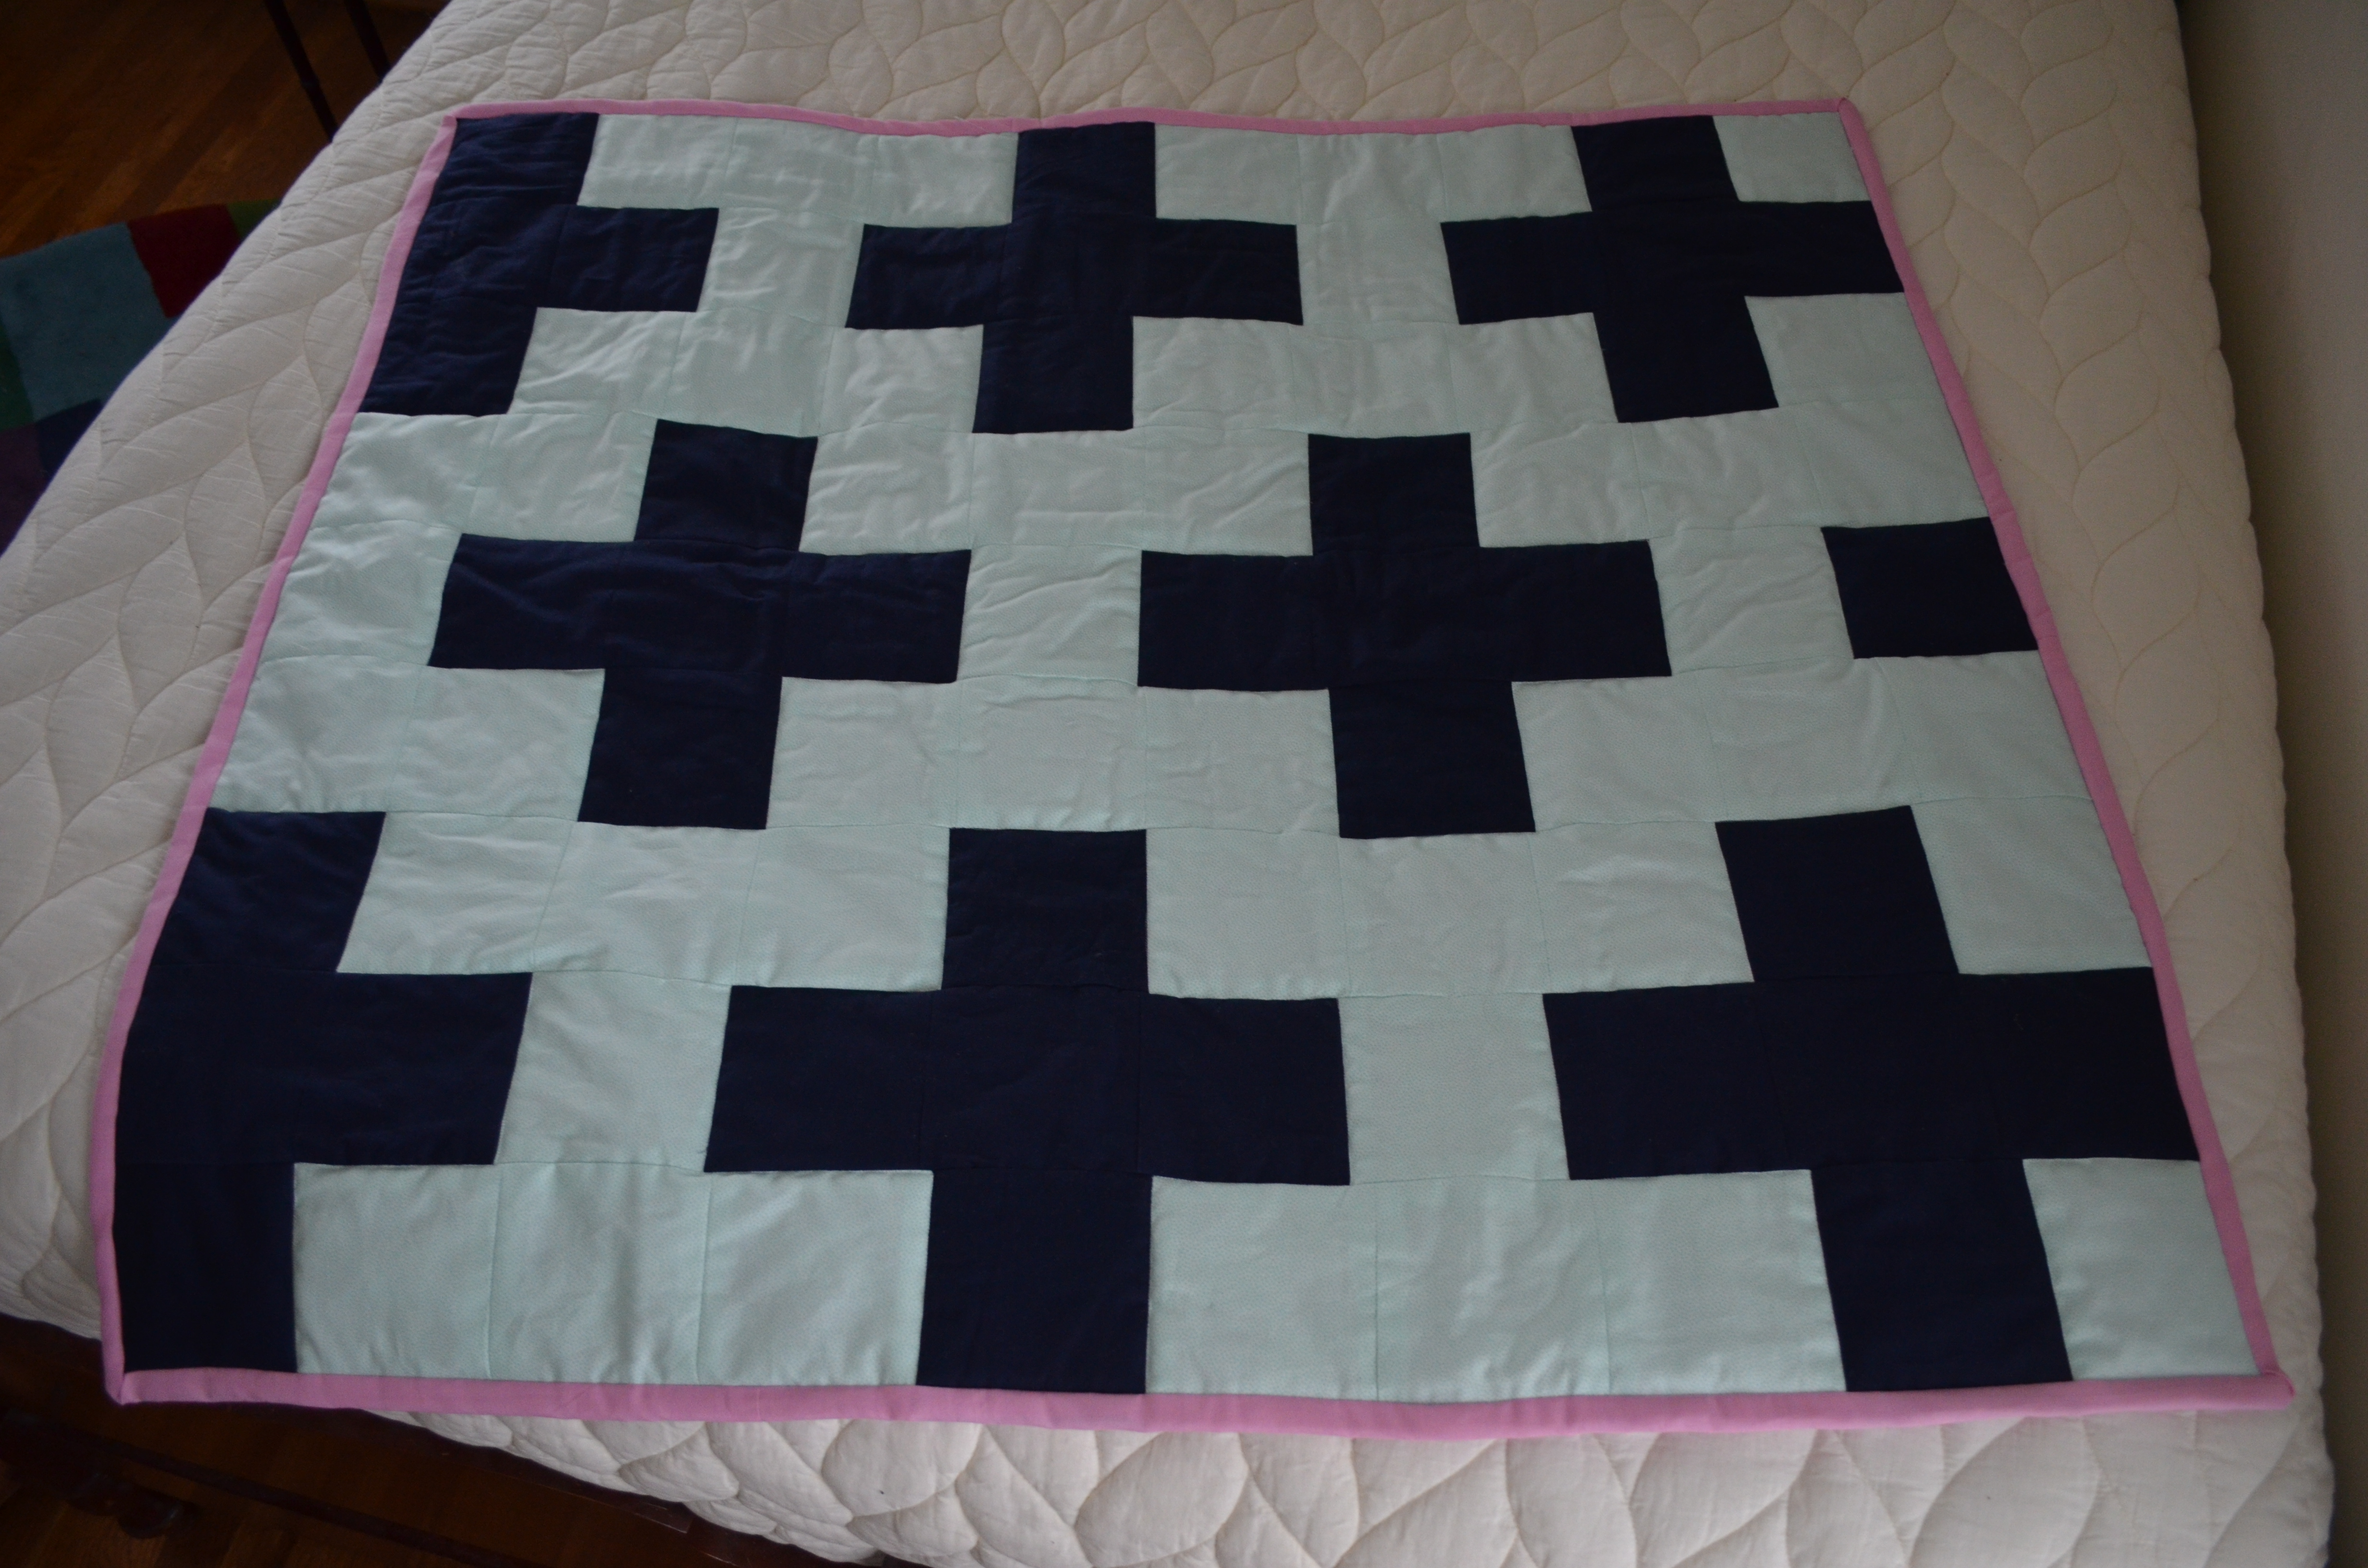
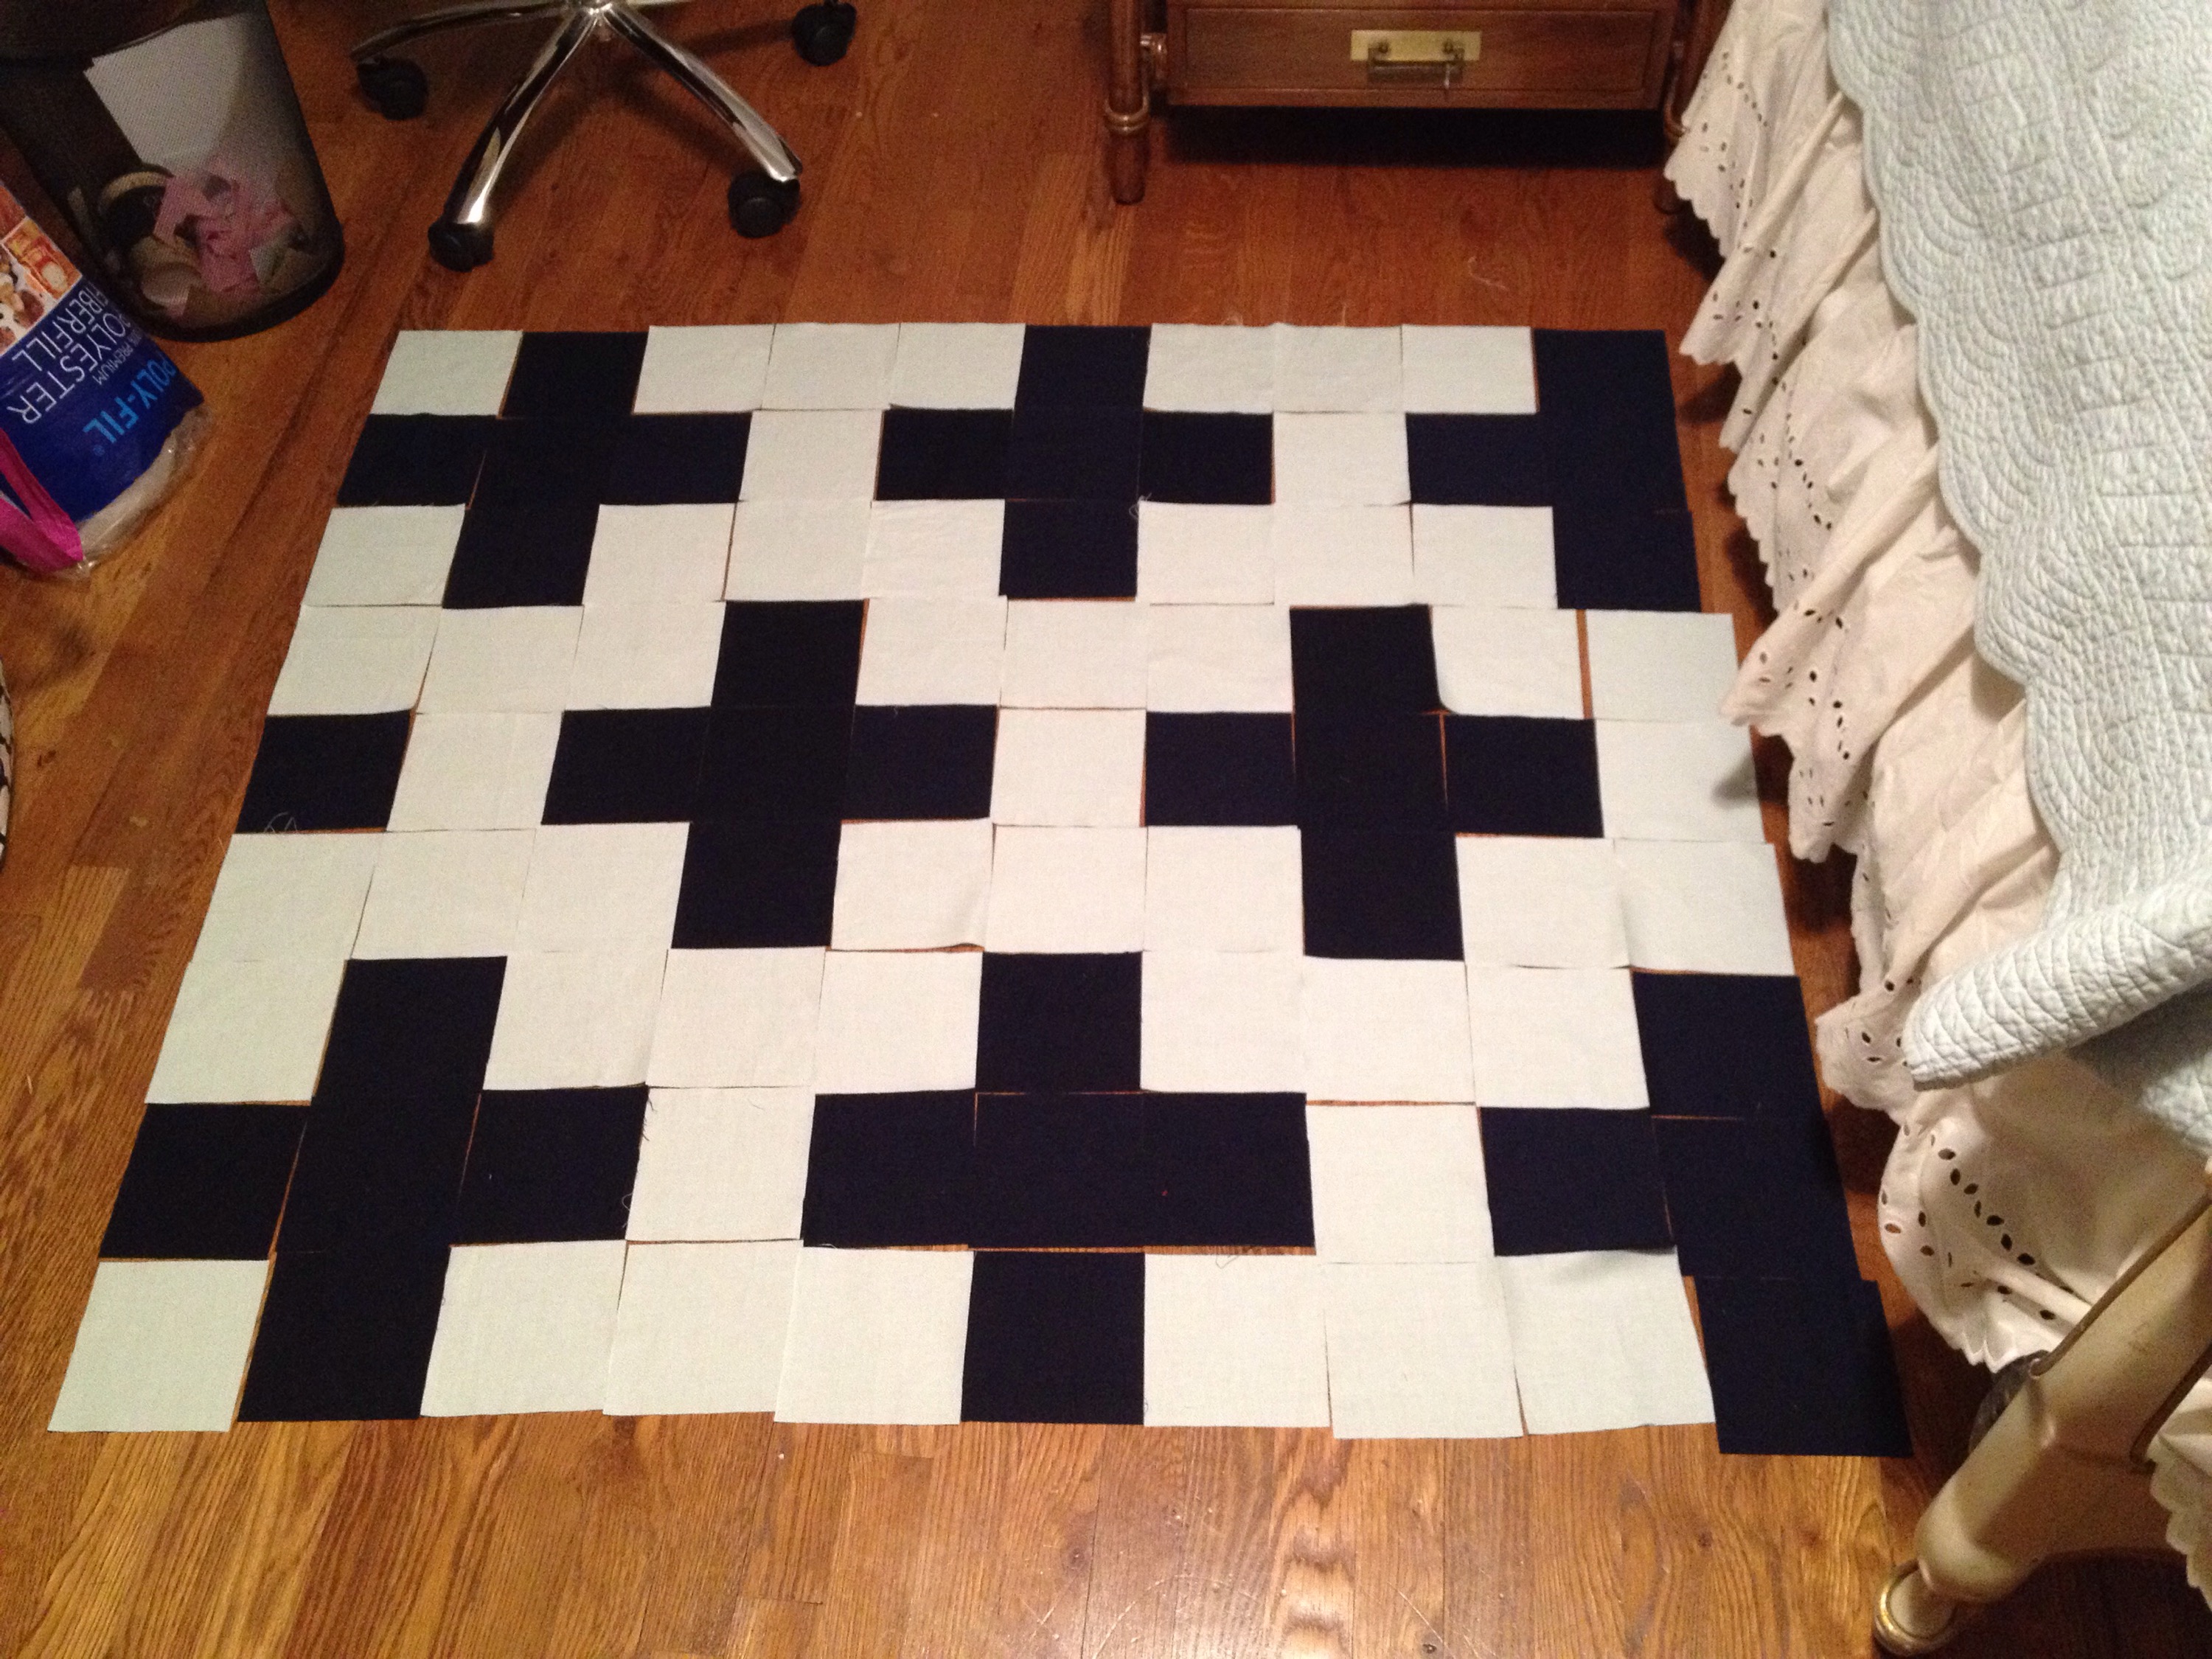
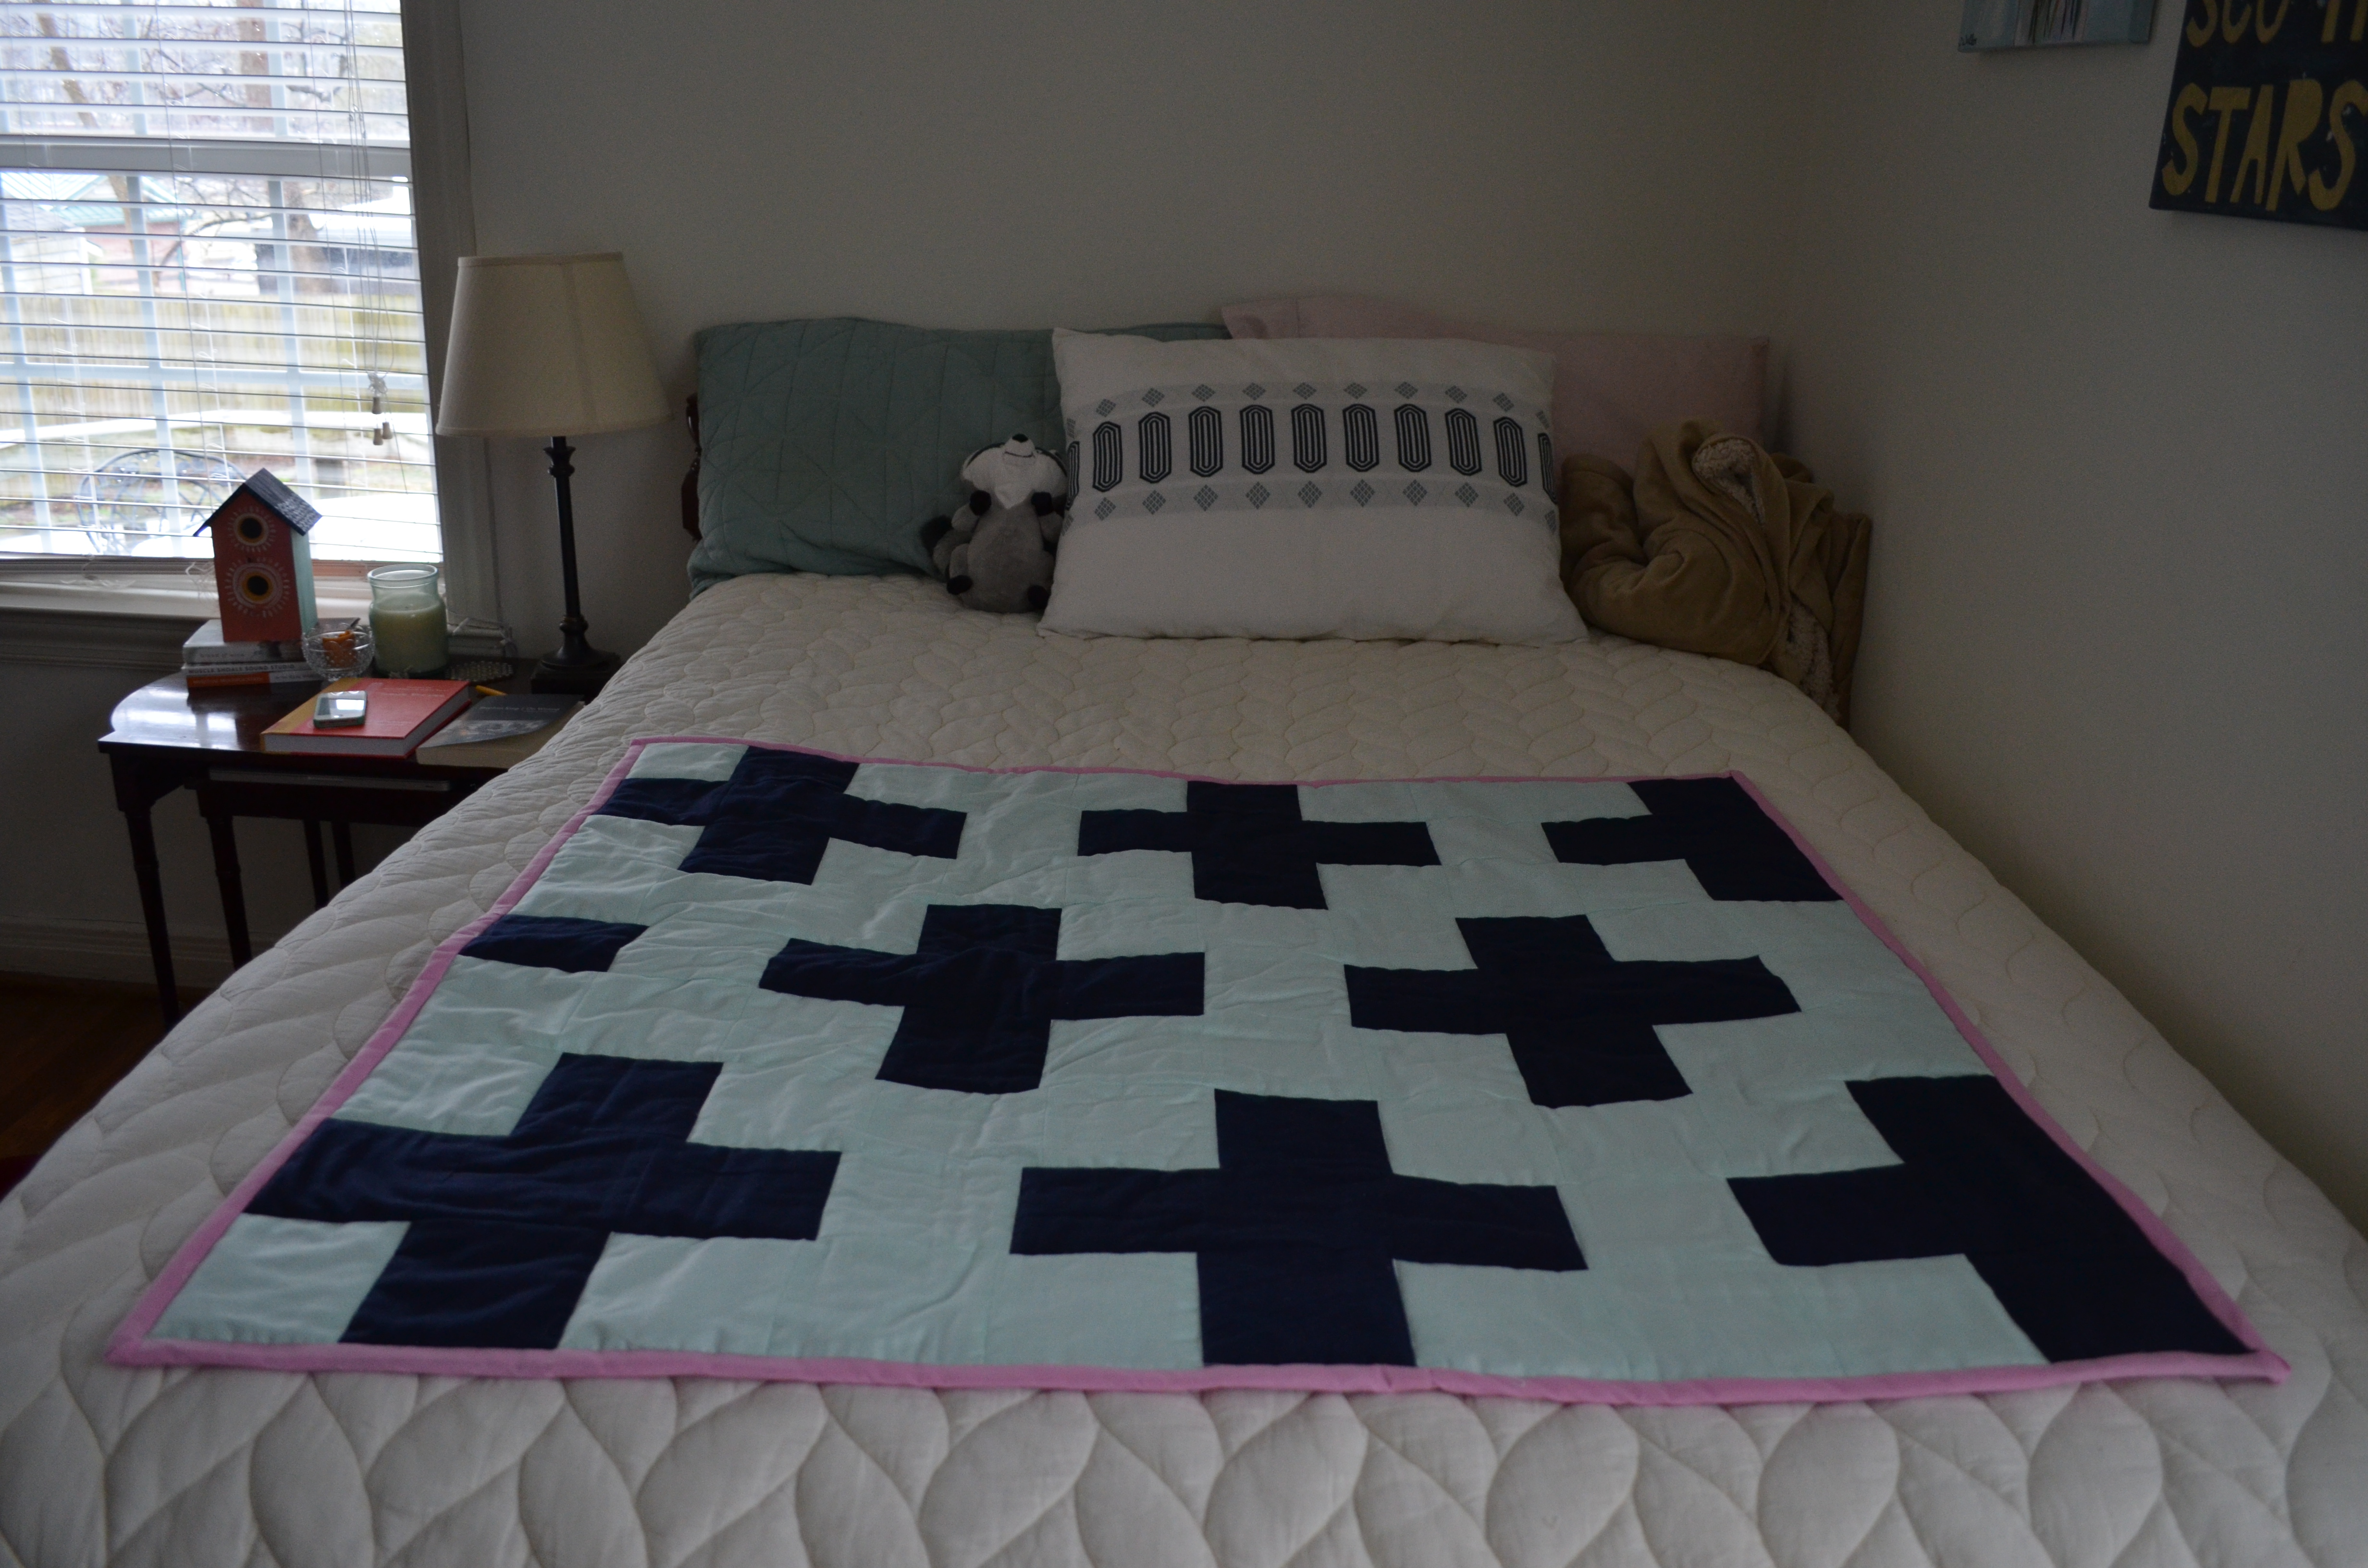
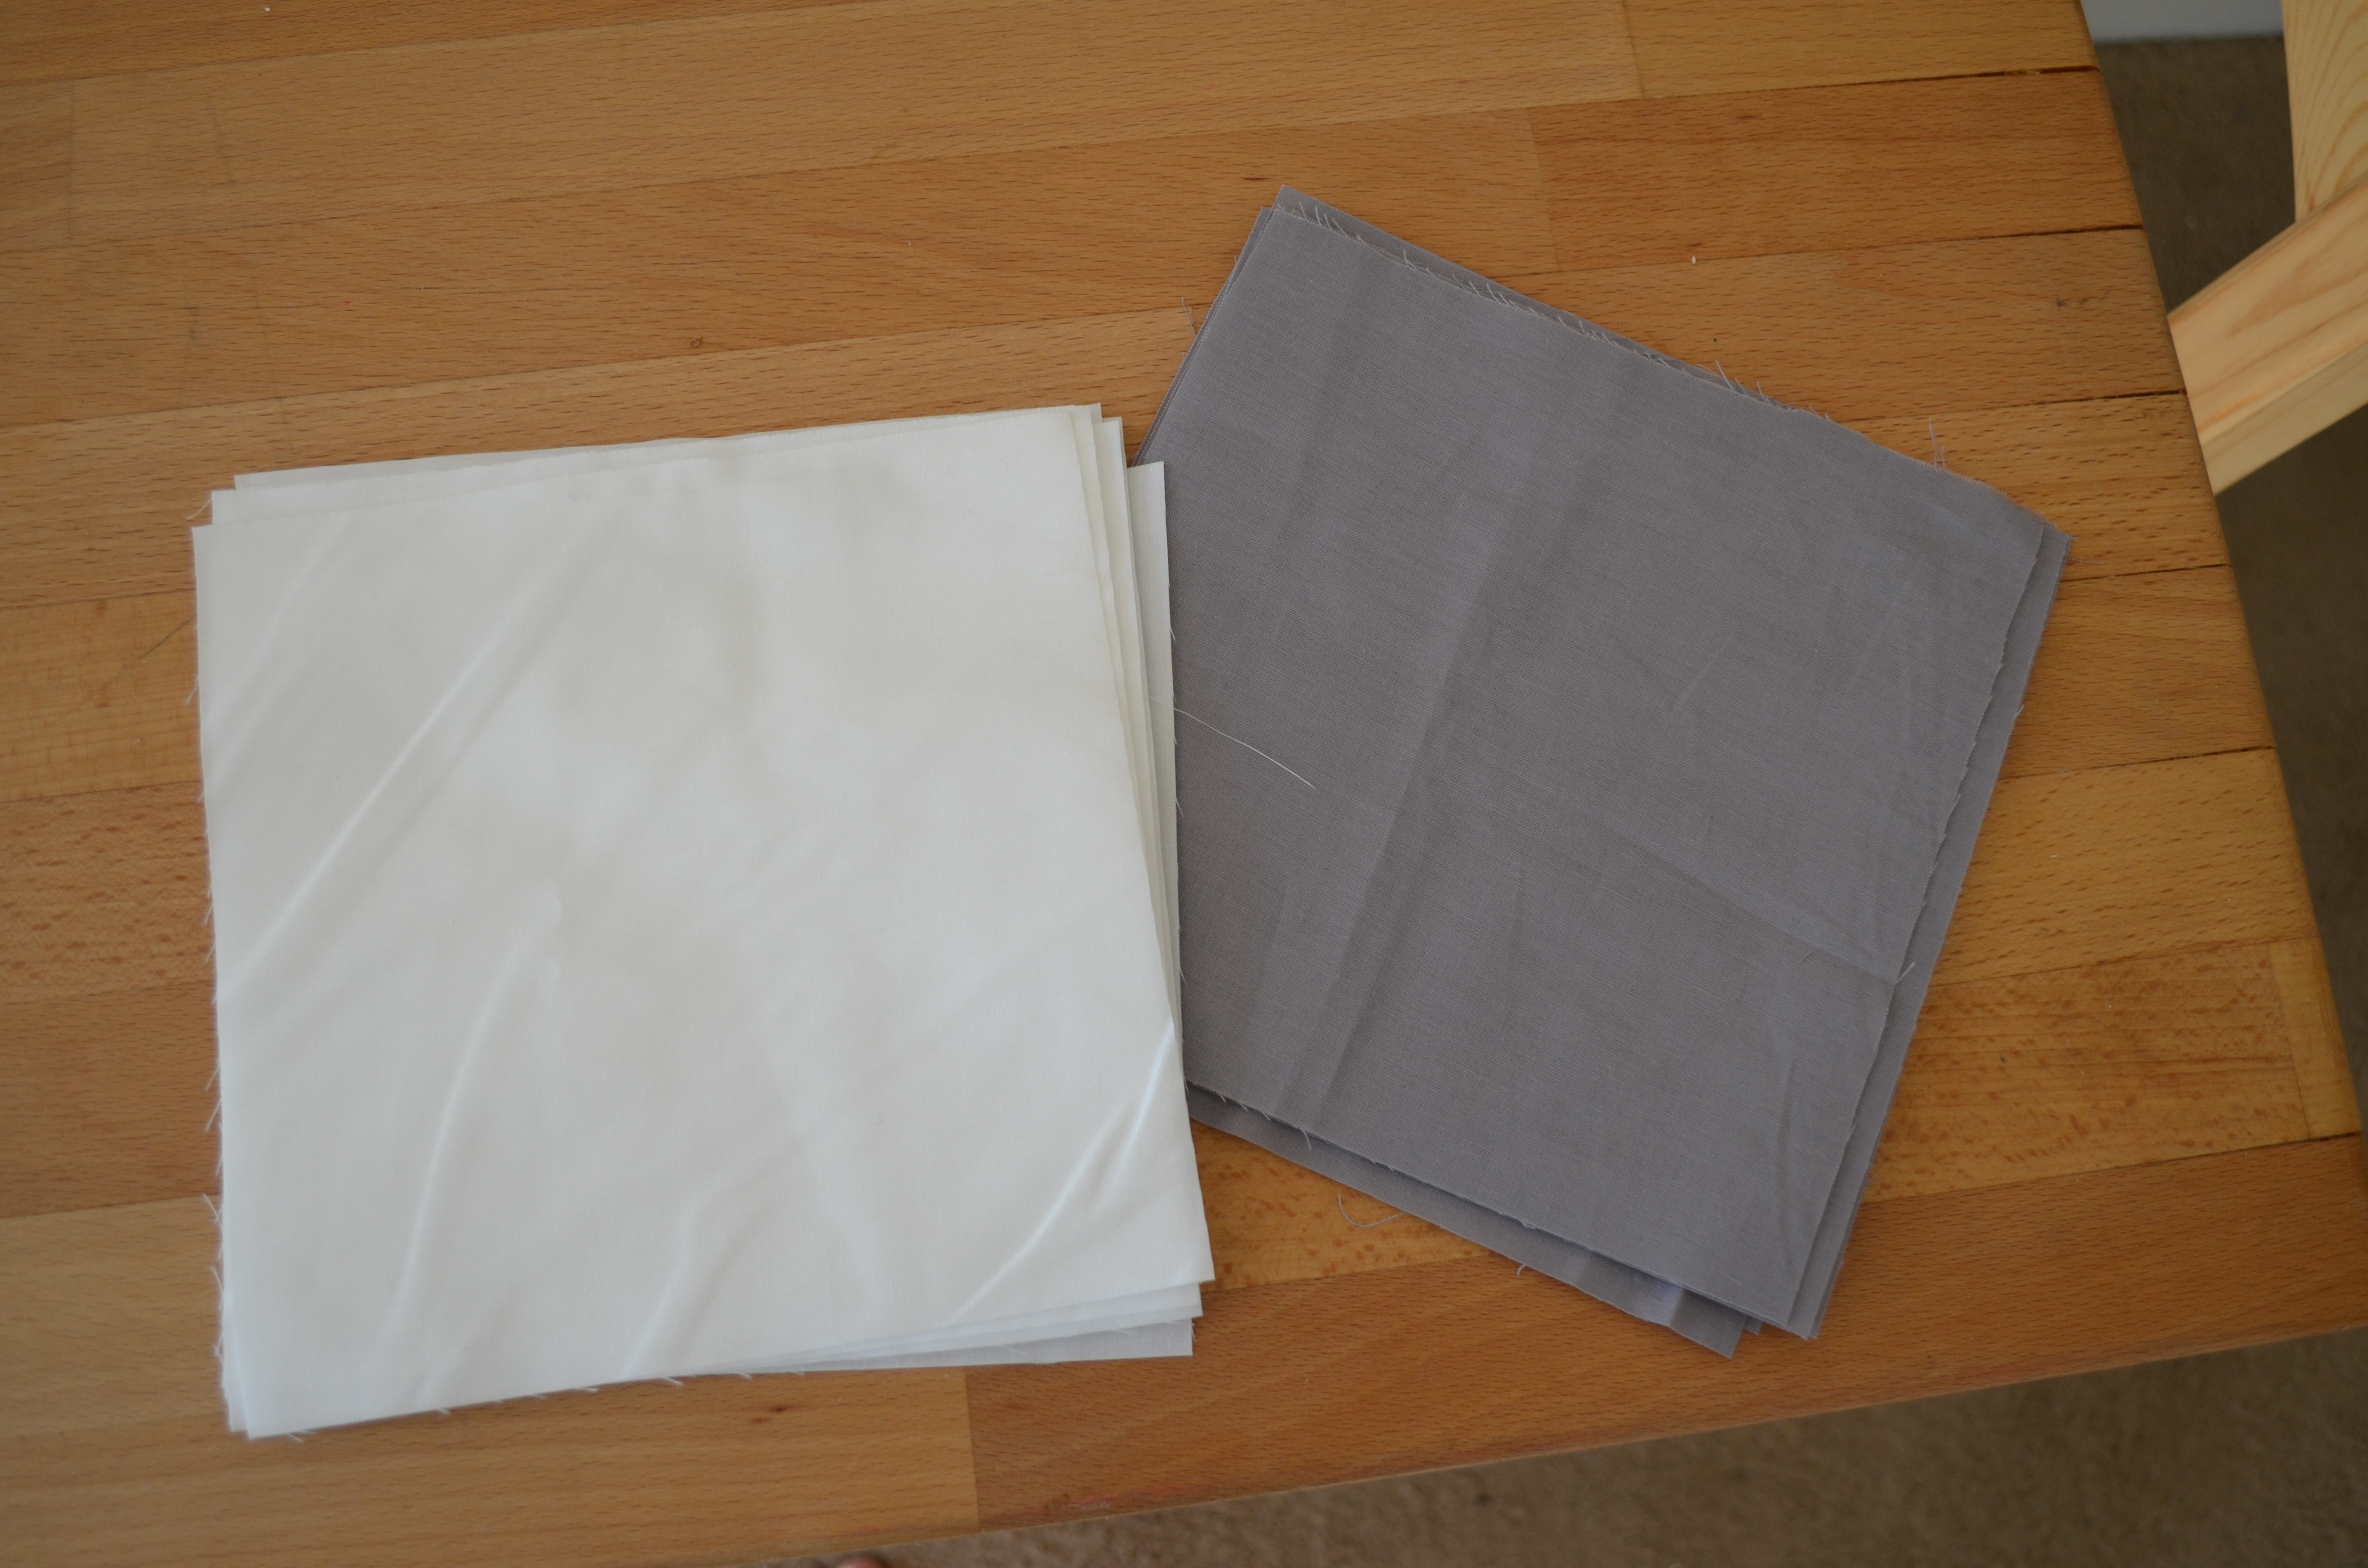
Ninety squares to be exact. For baby quilts, I base the dimensions on a standard yard of fabric – 36 x 44 inches. So I cut 5-inch squares out of two different fabrics: a navy solid and a light blue print. (Totals = 39 navy squares and 51 light blue squares)

IMG_5271     IMG_5272

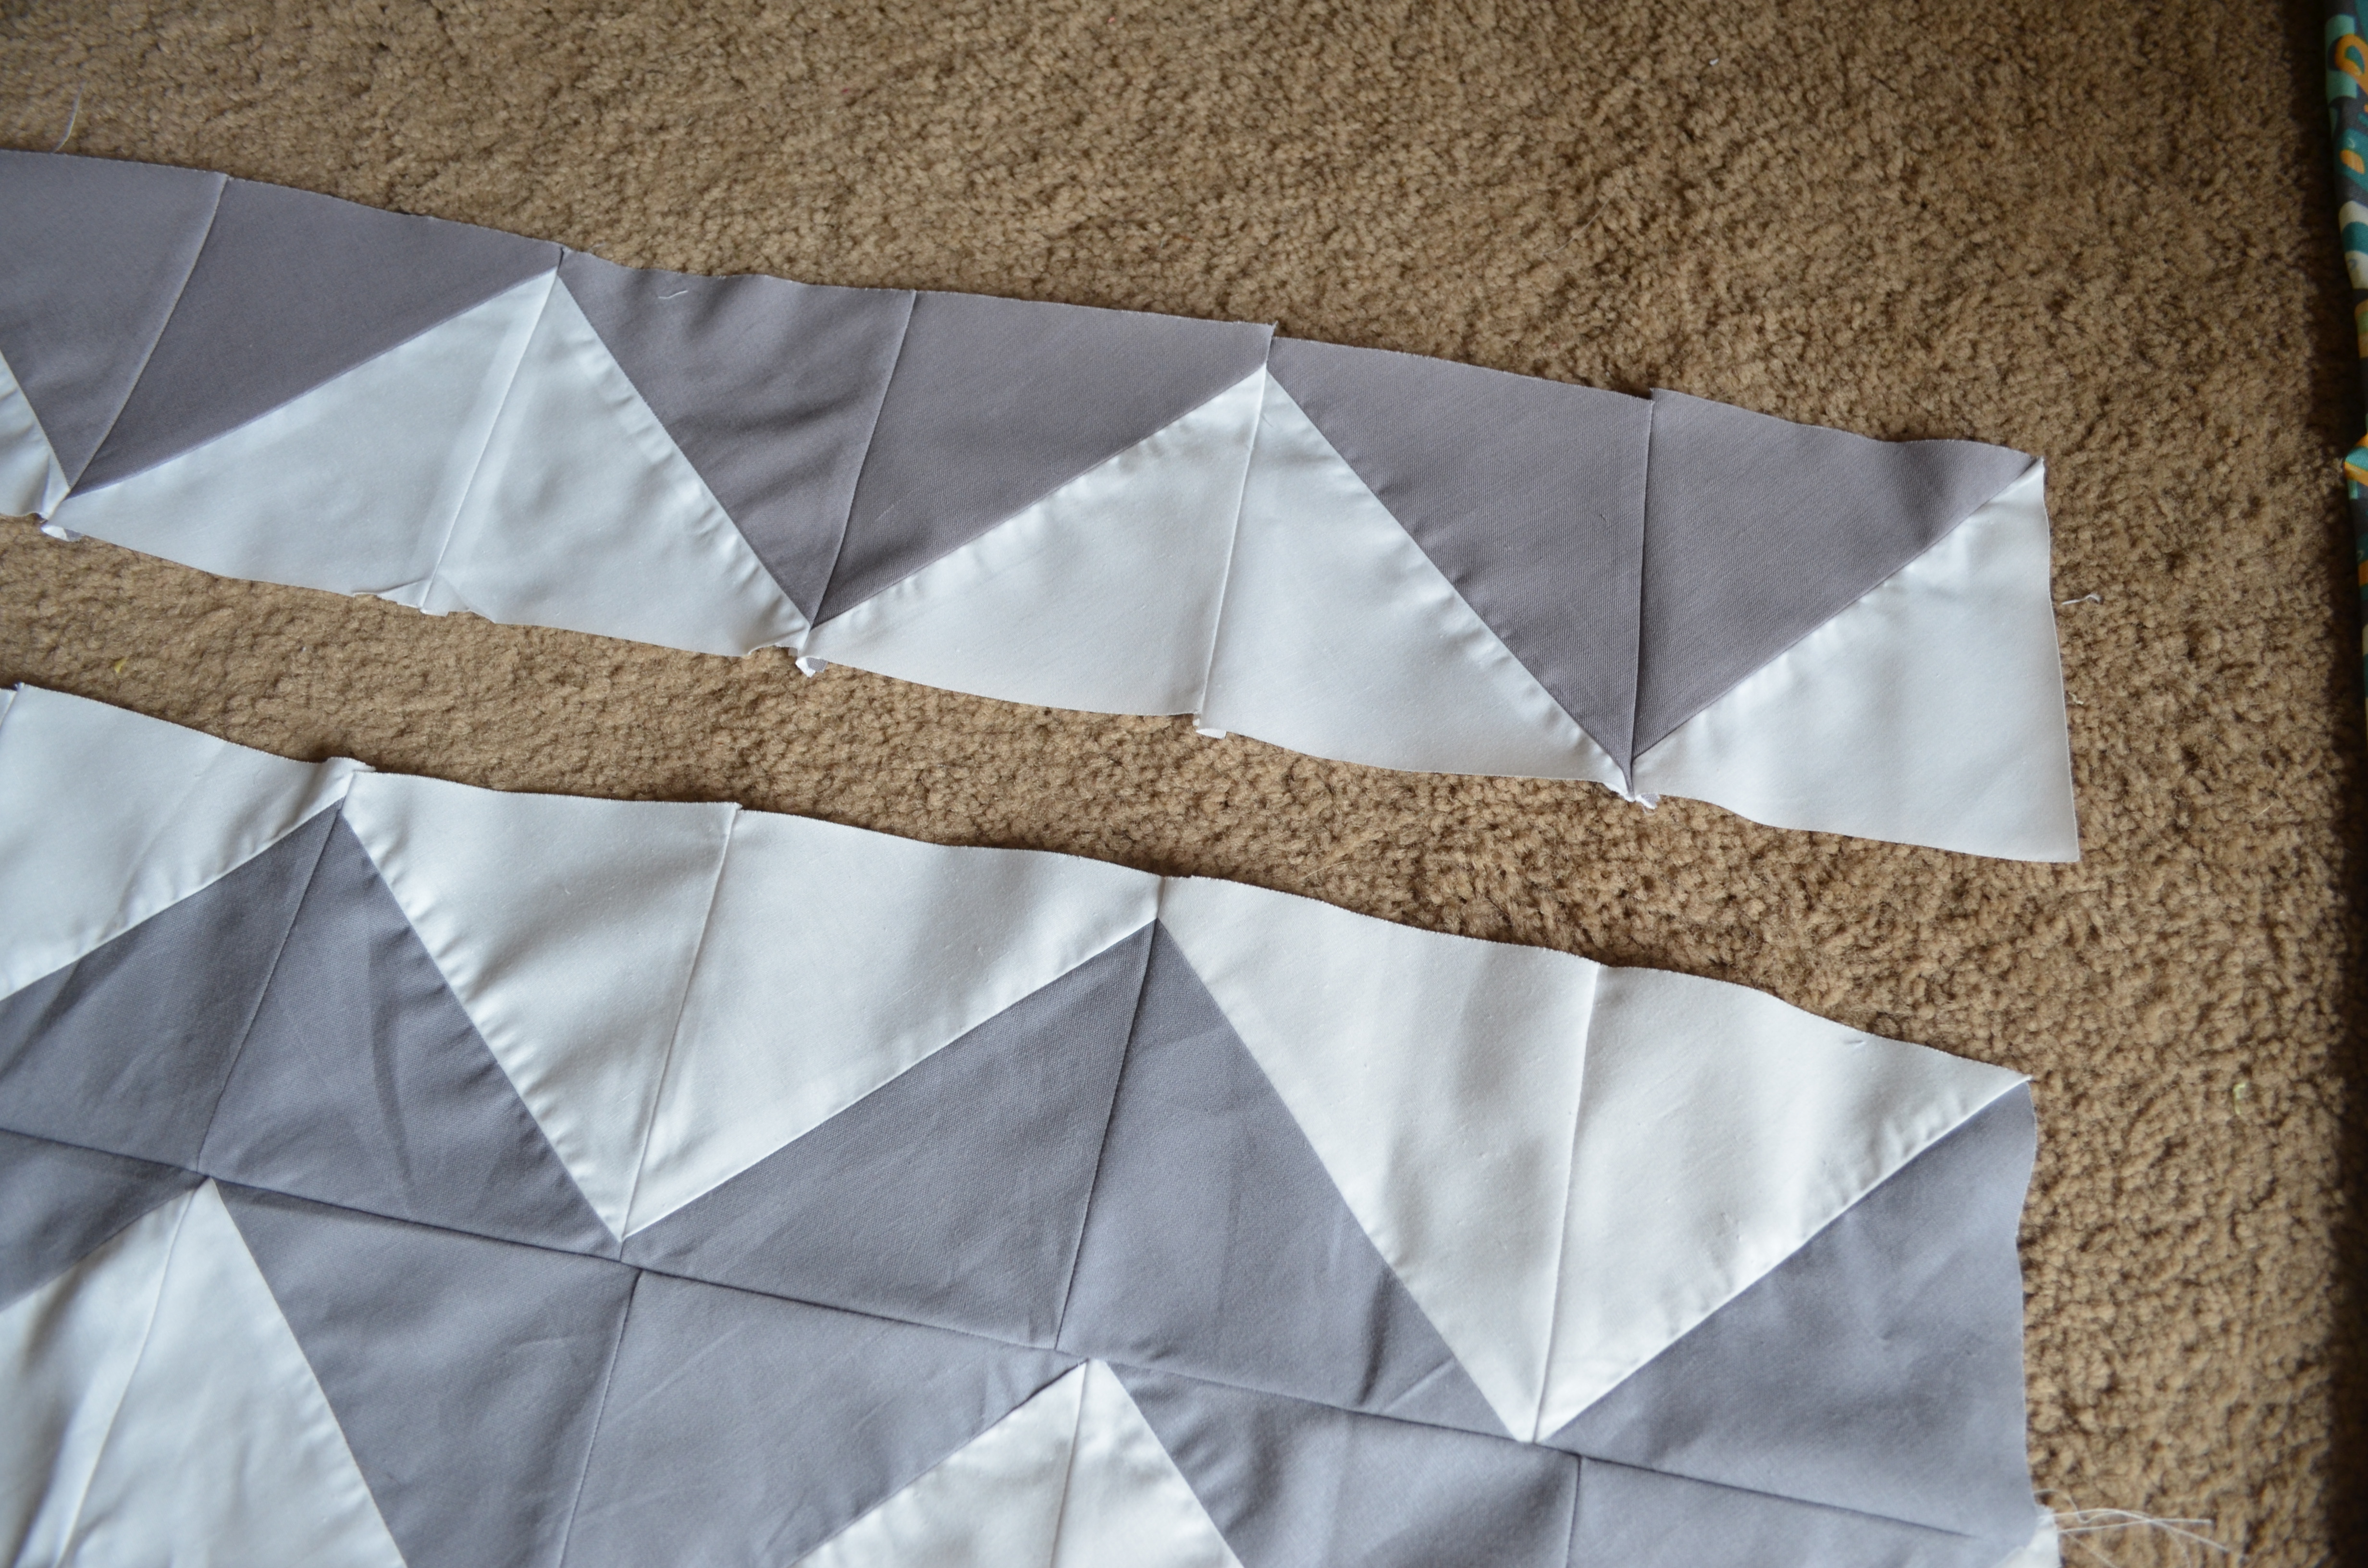
This quilt is a great pattern for beginners because you’re working with squares and straight lines.

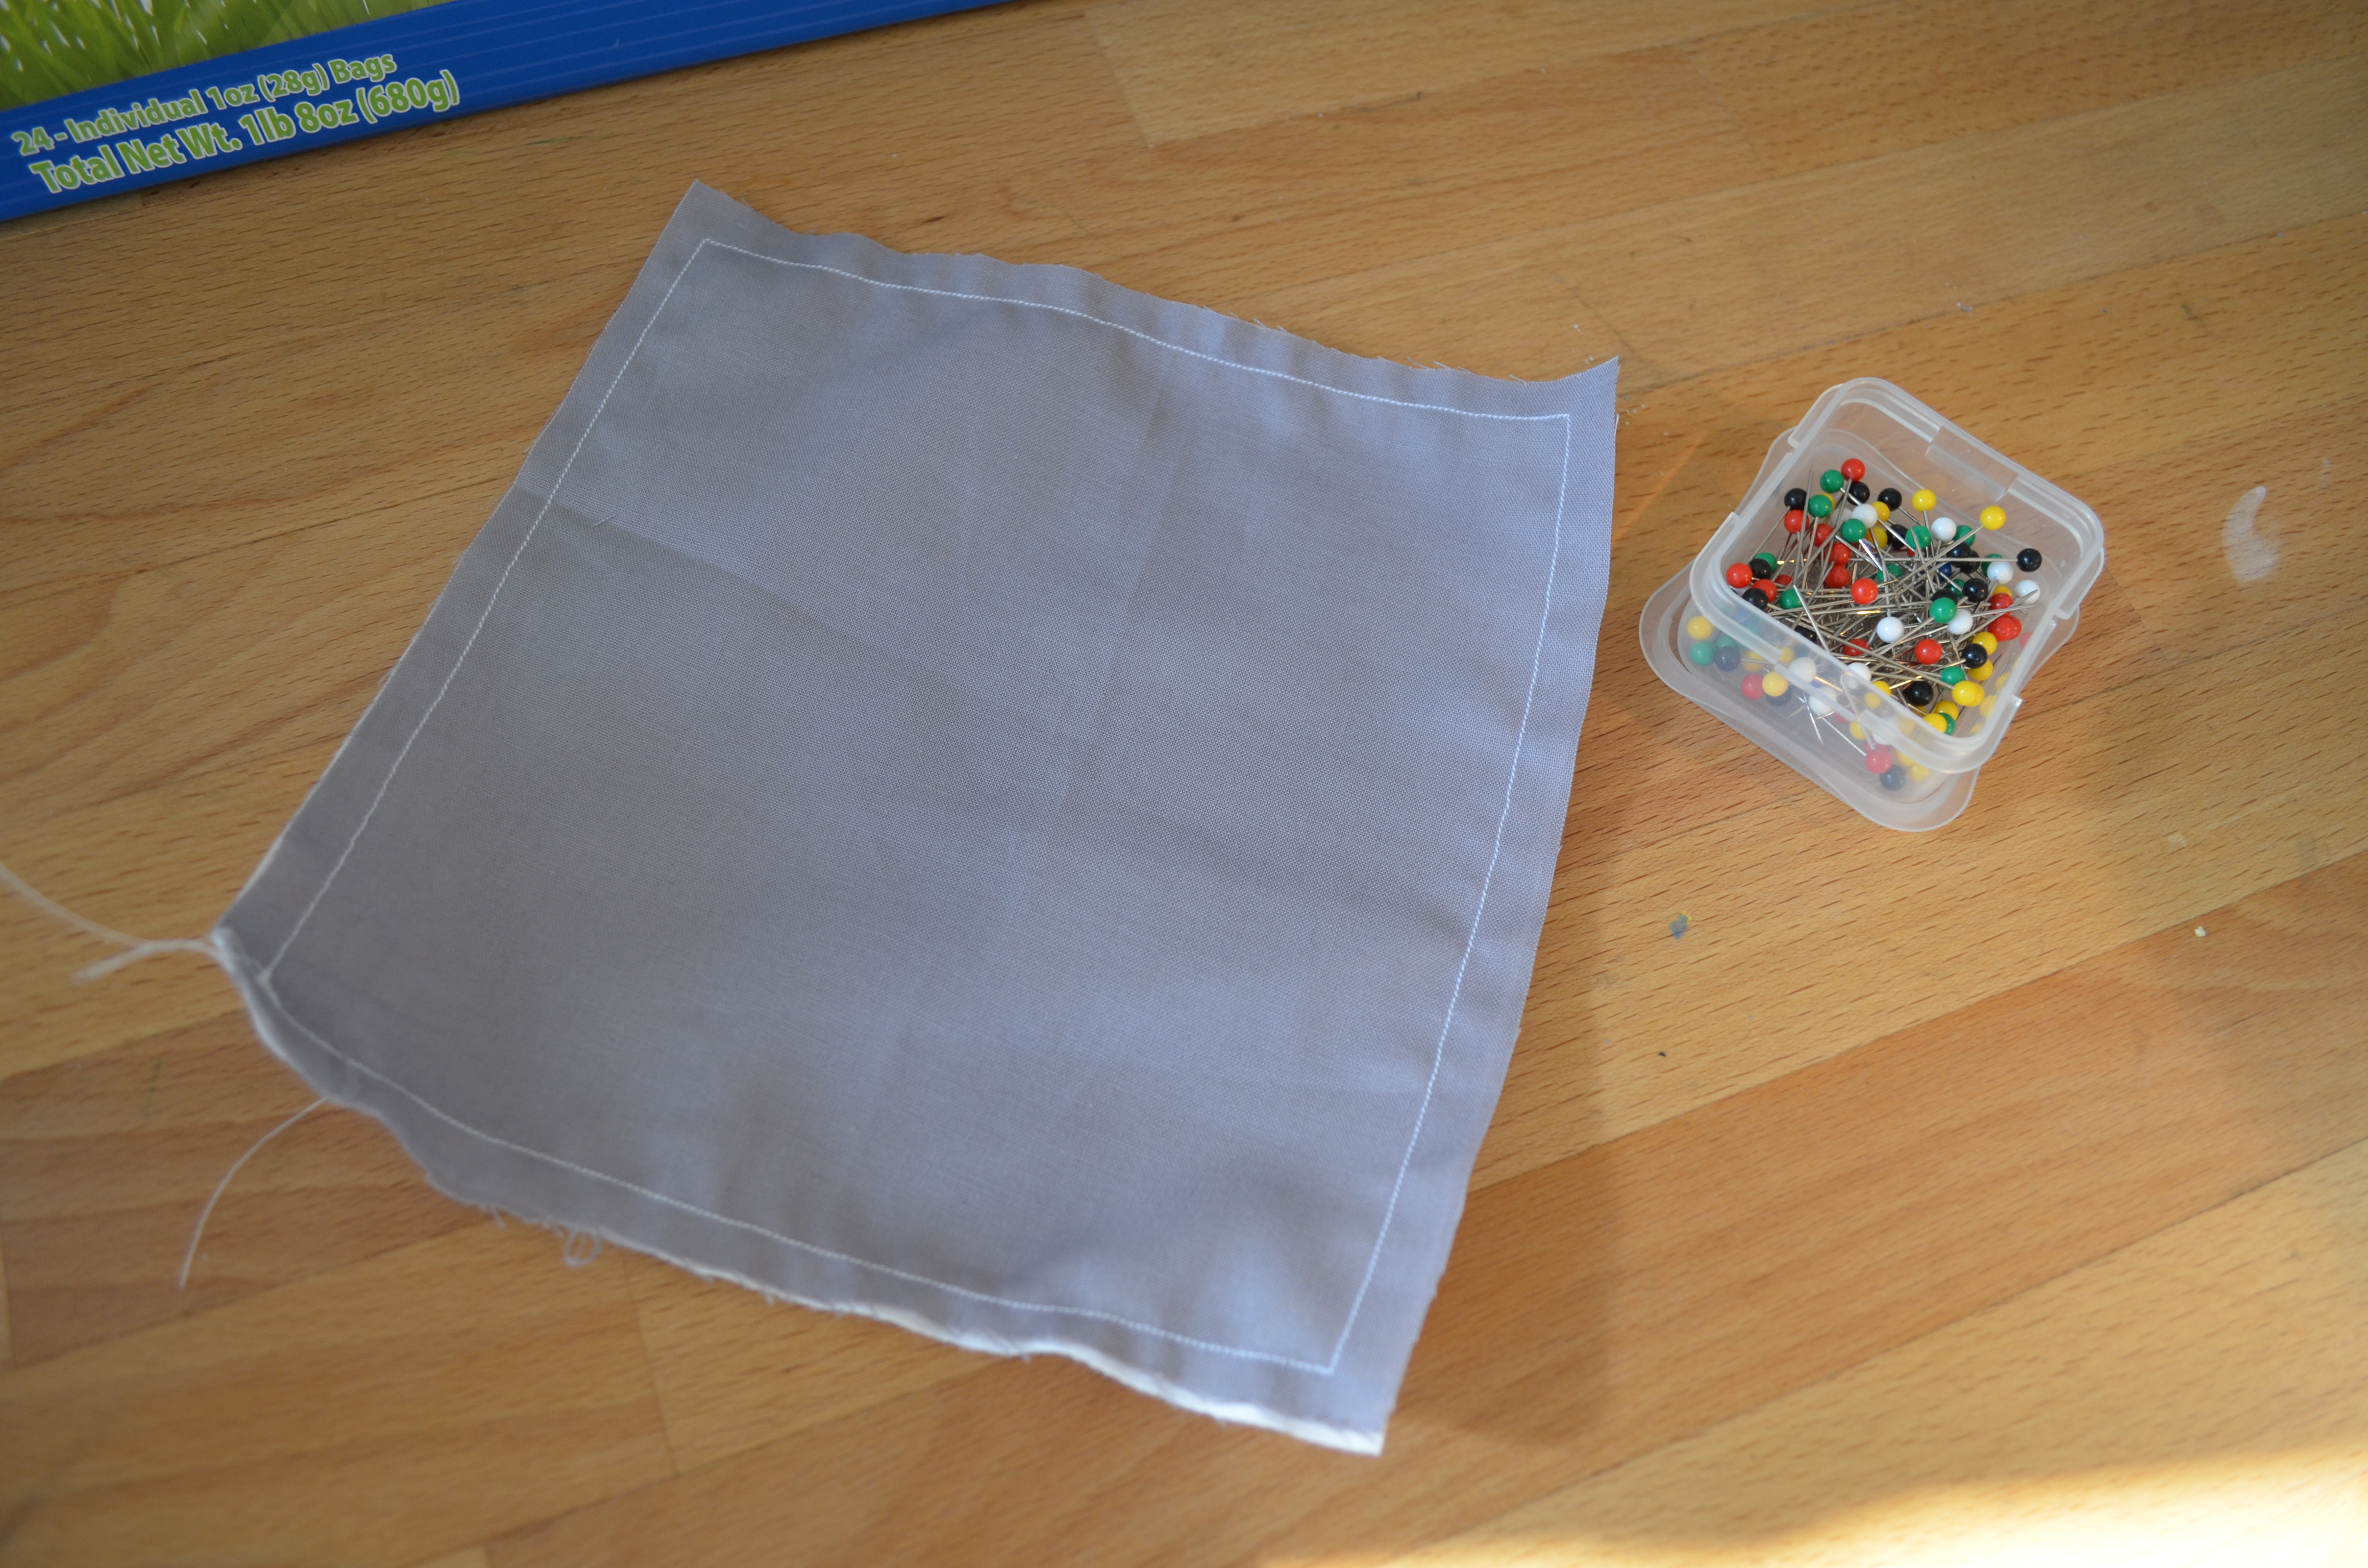
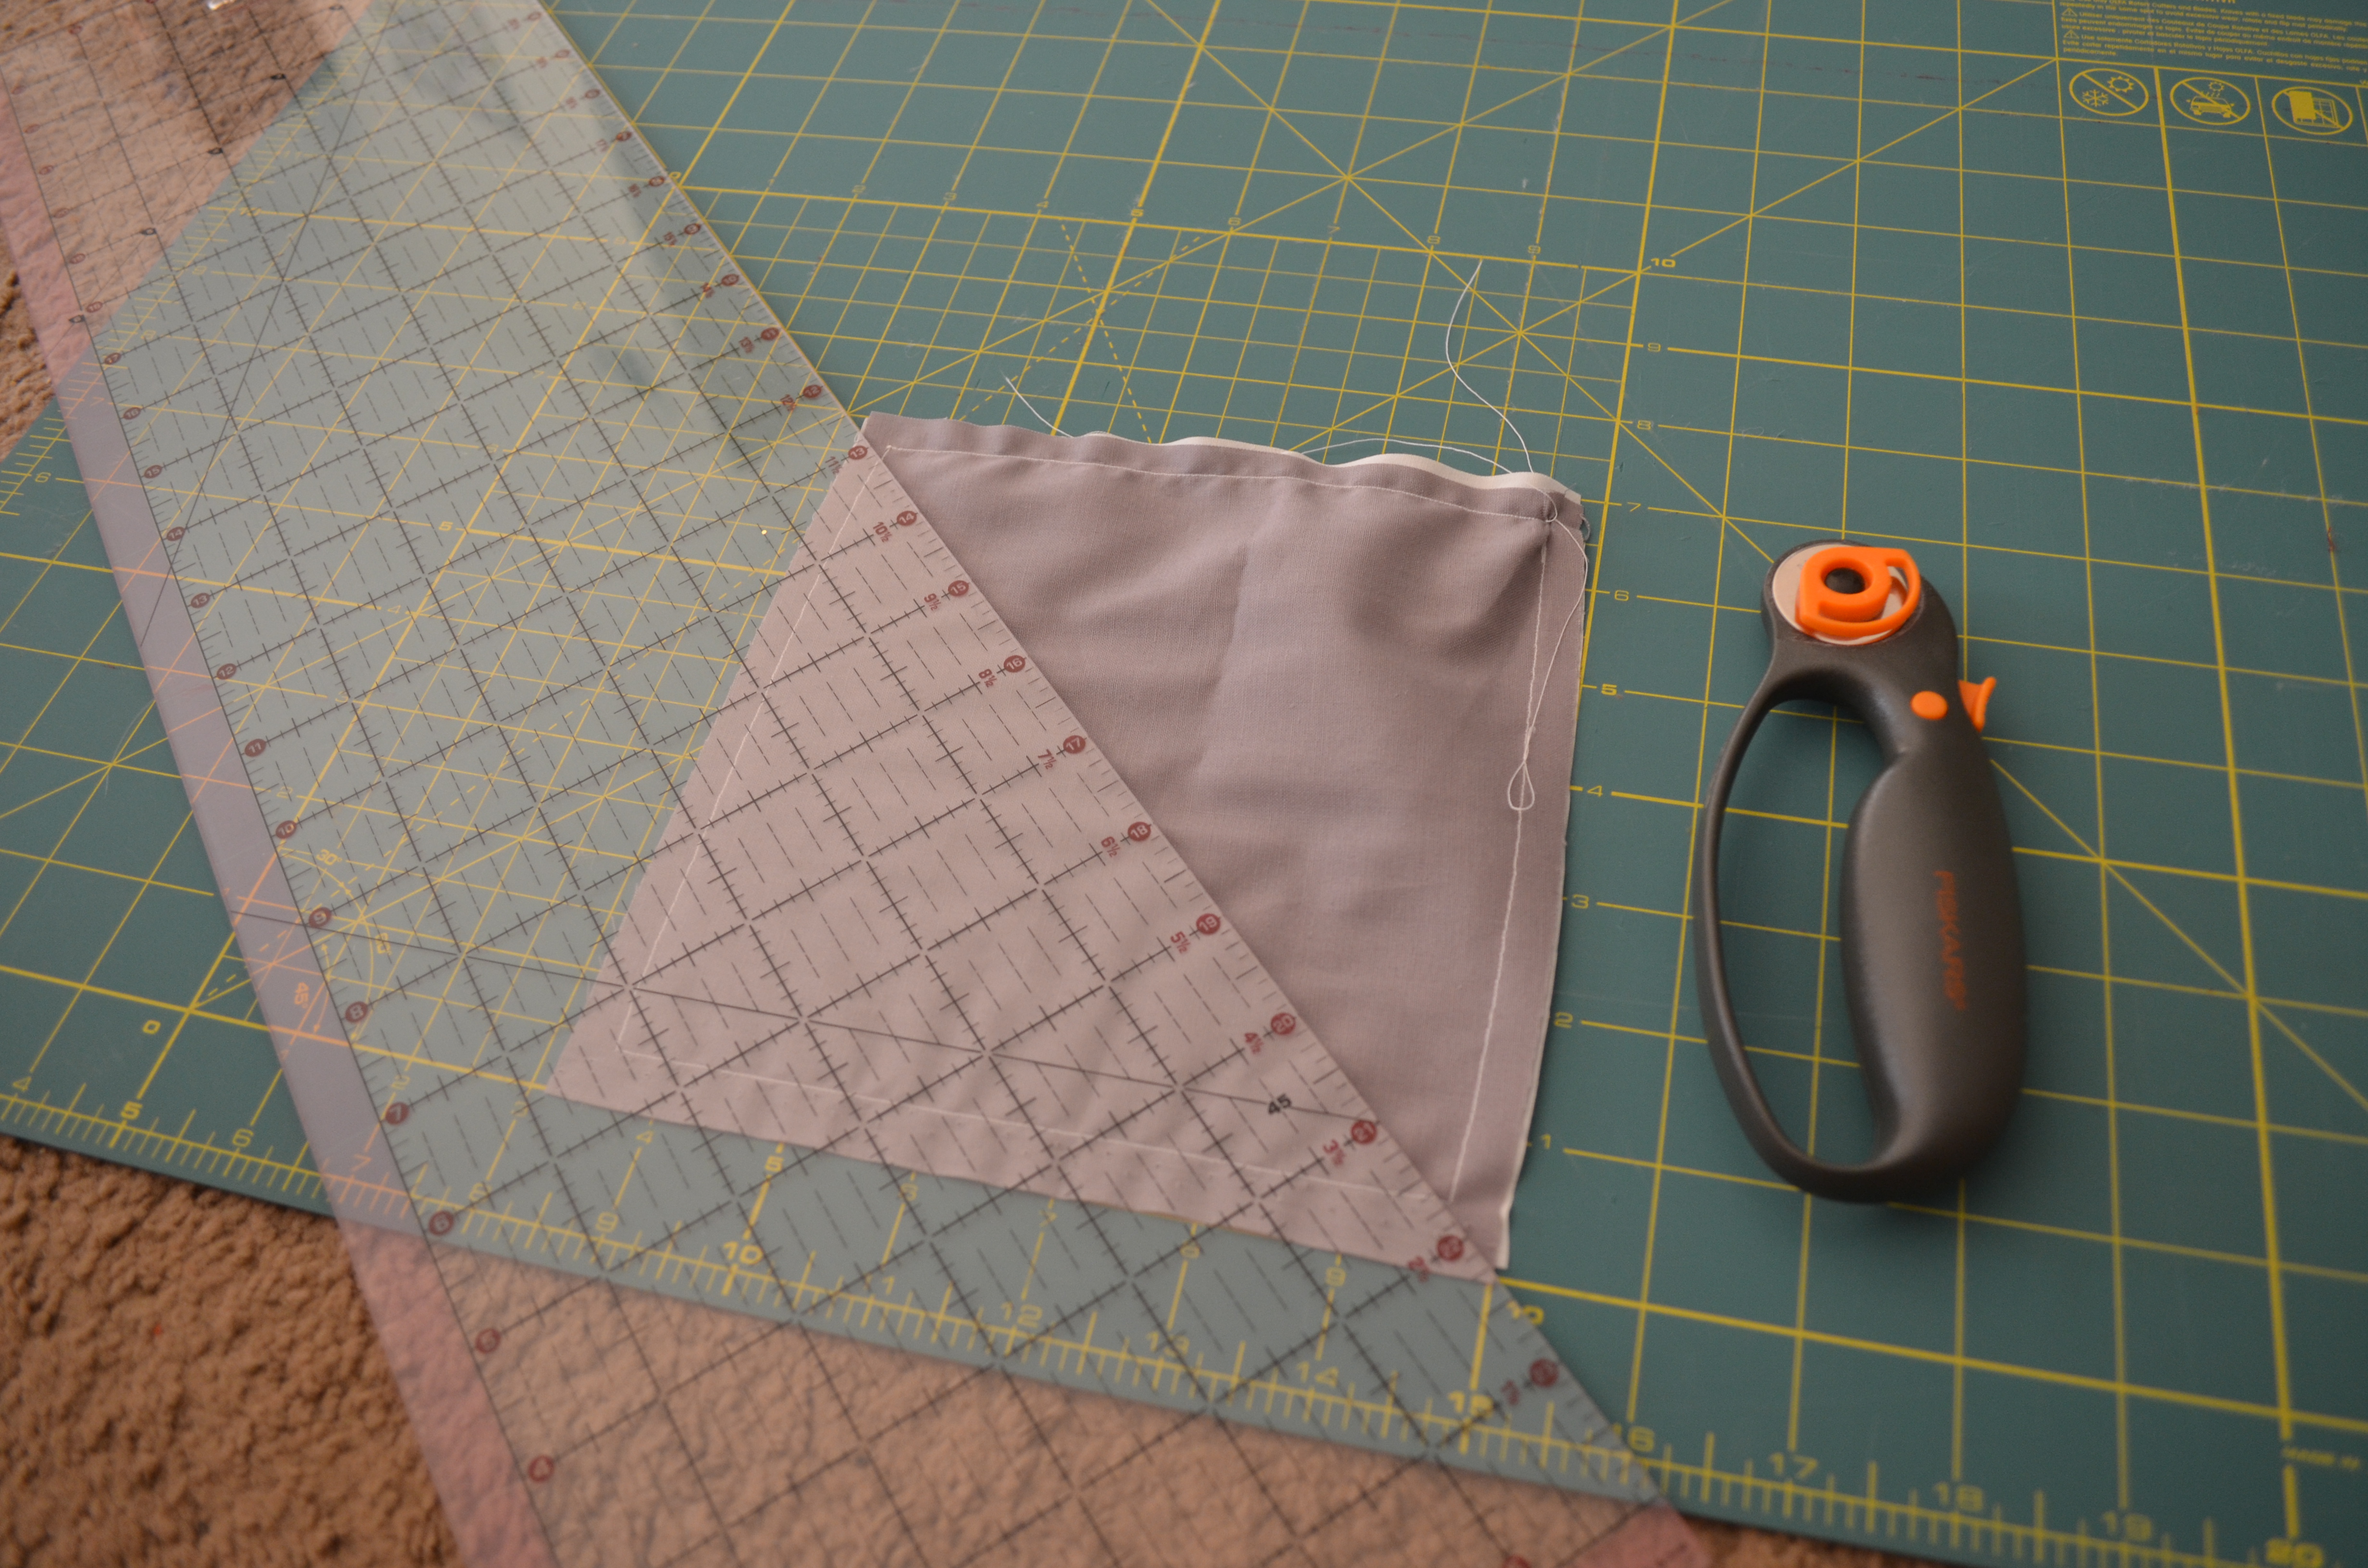
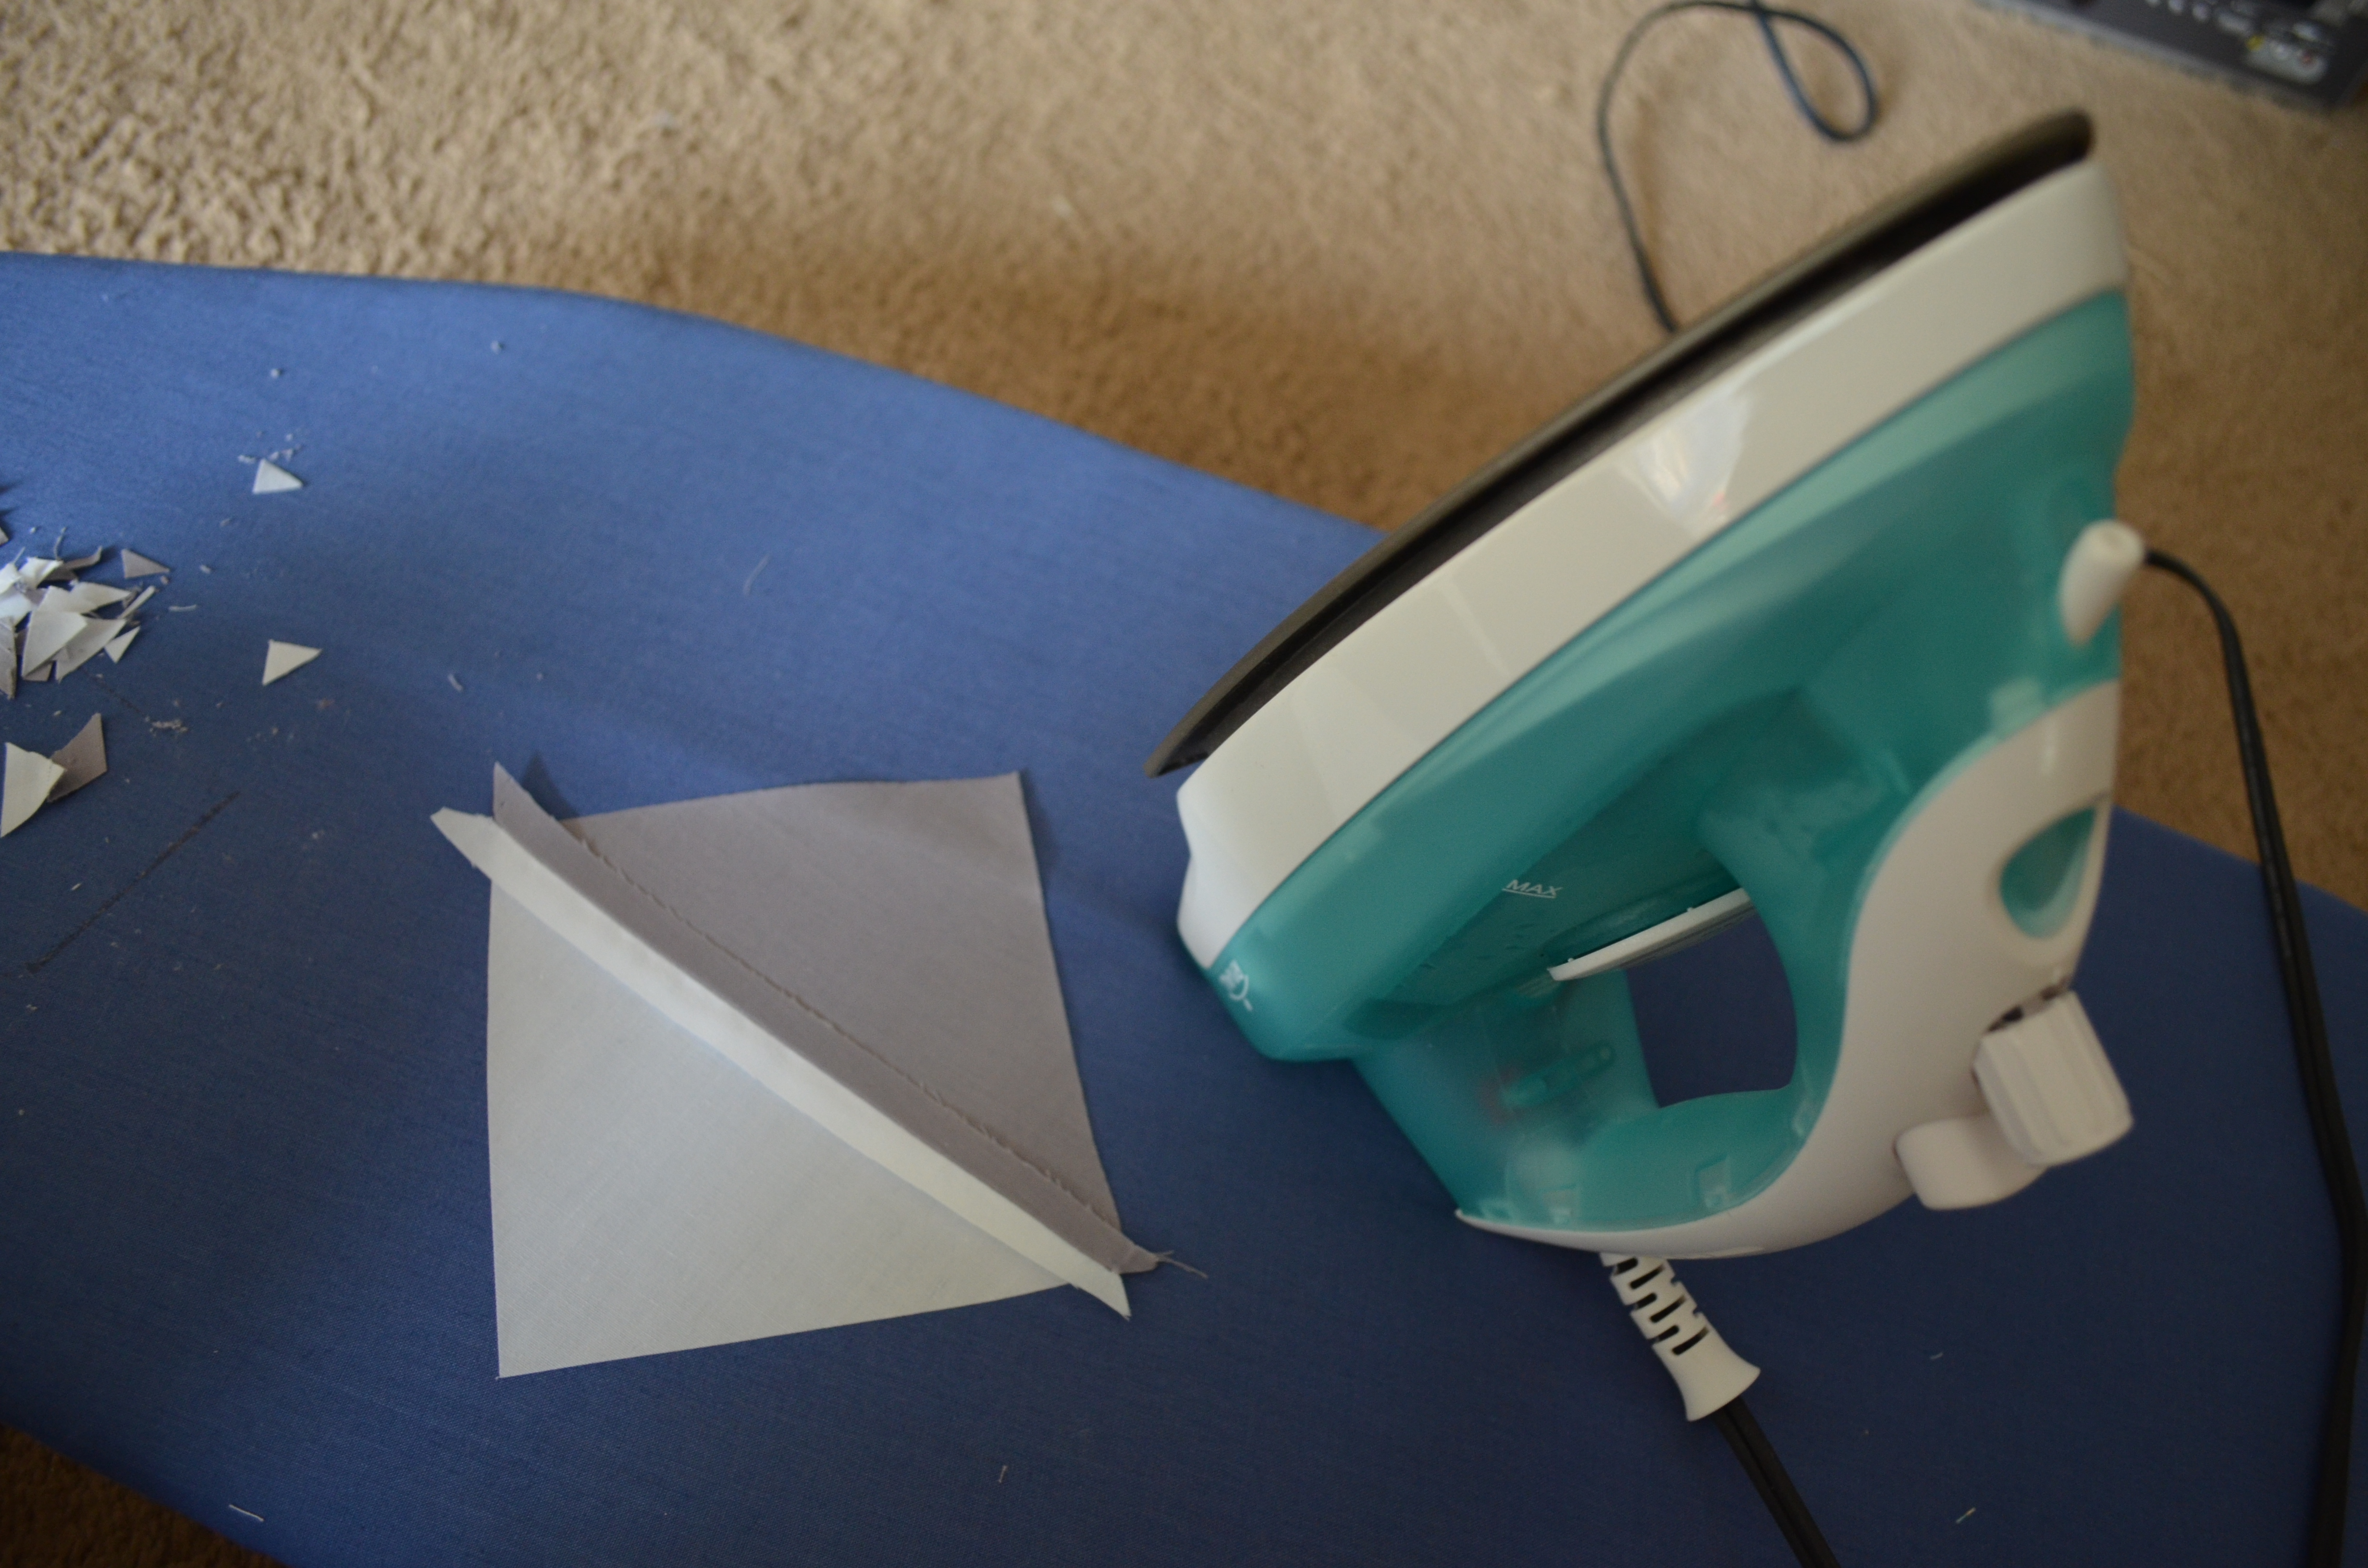
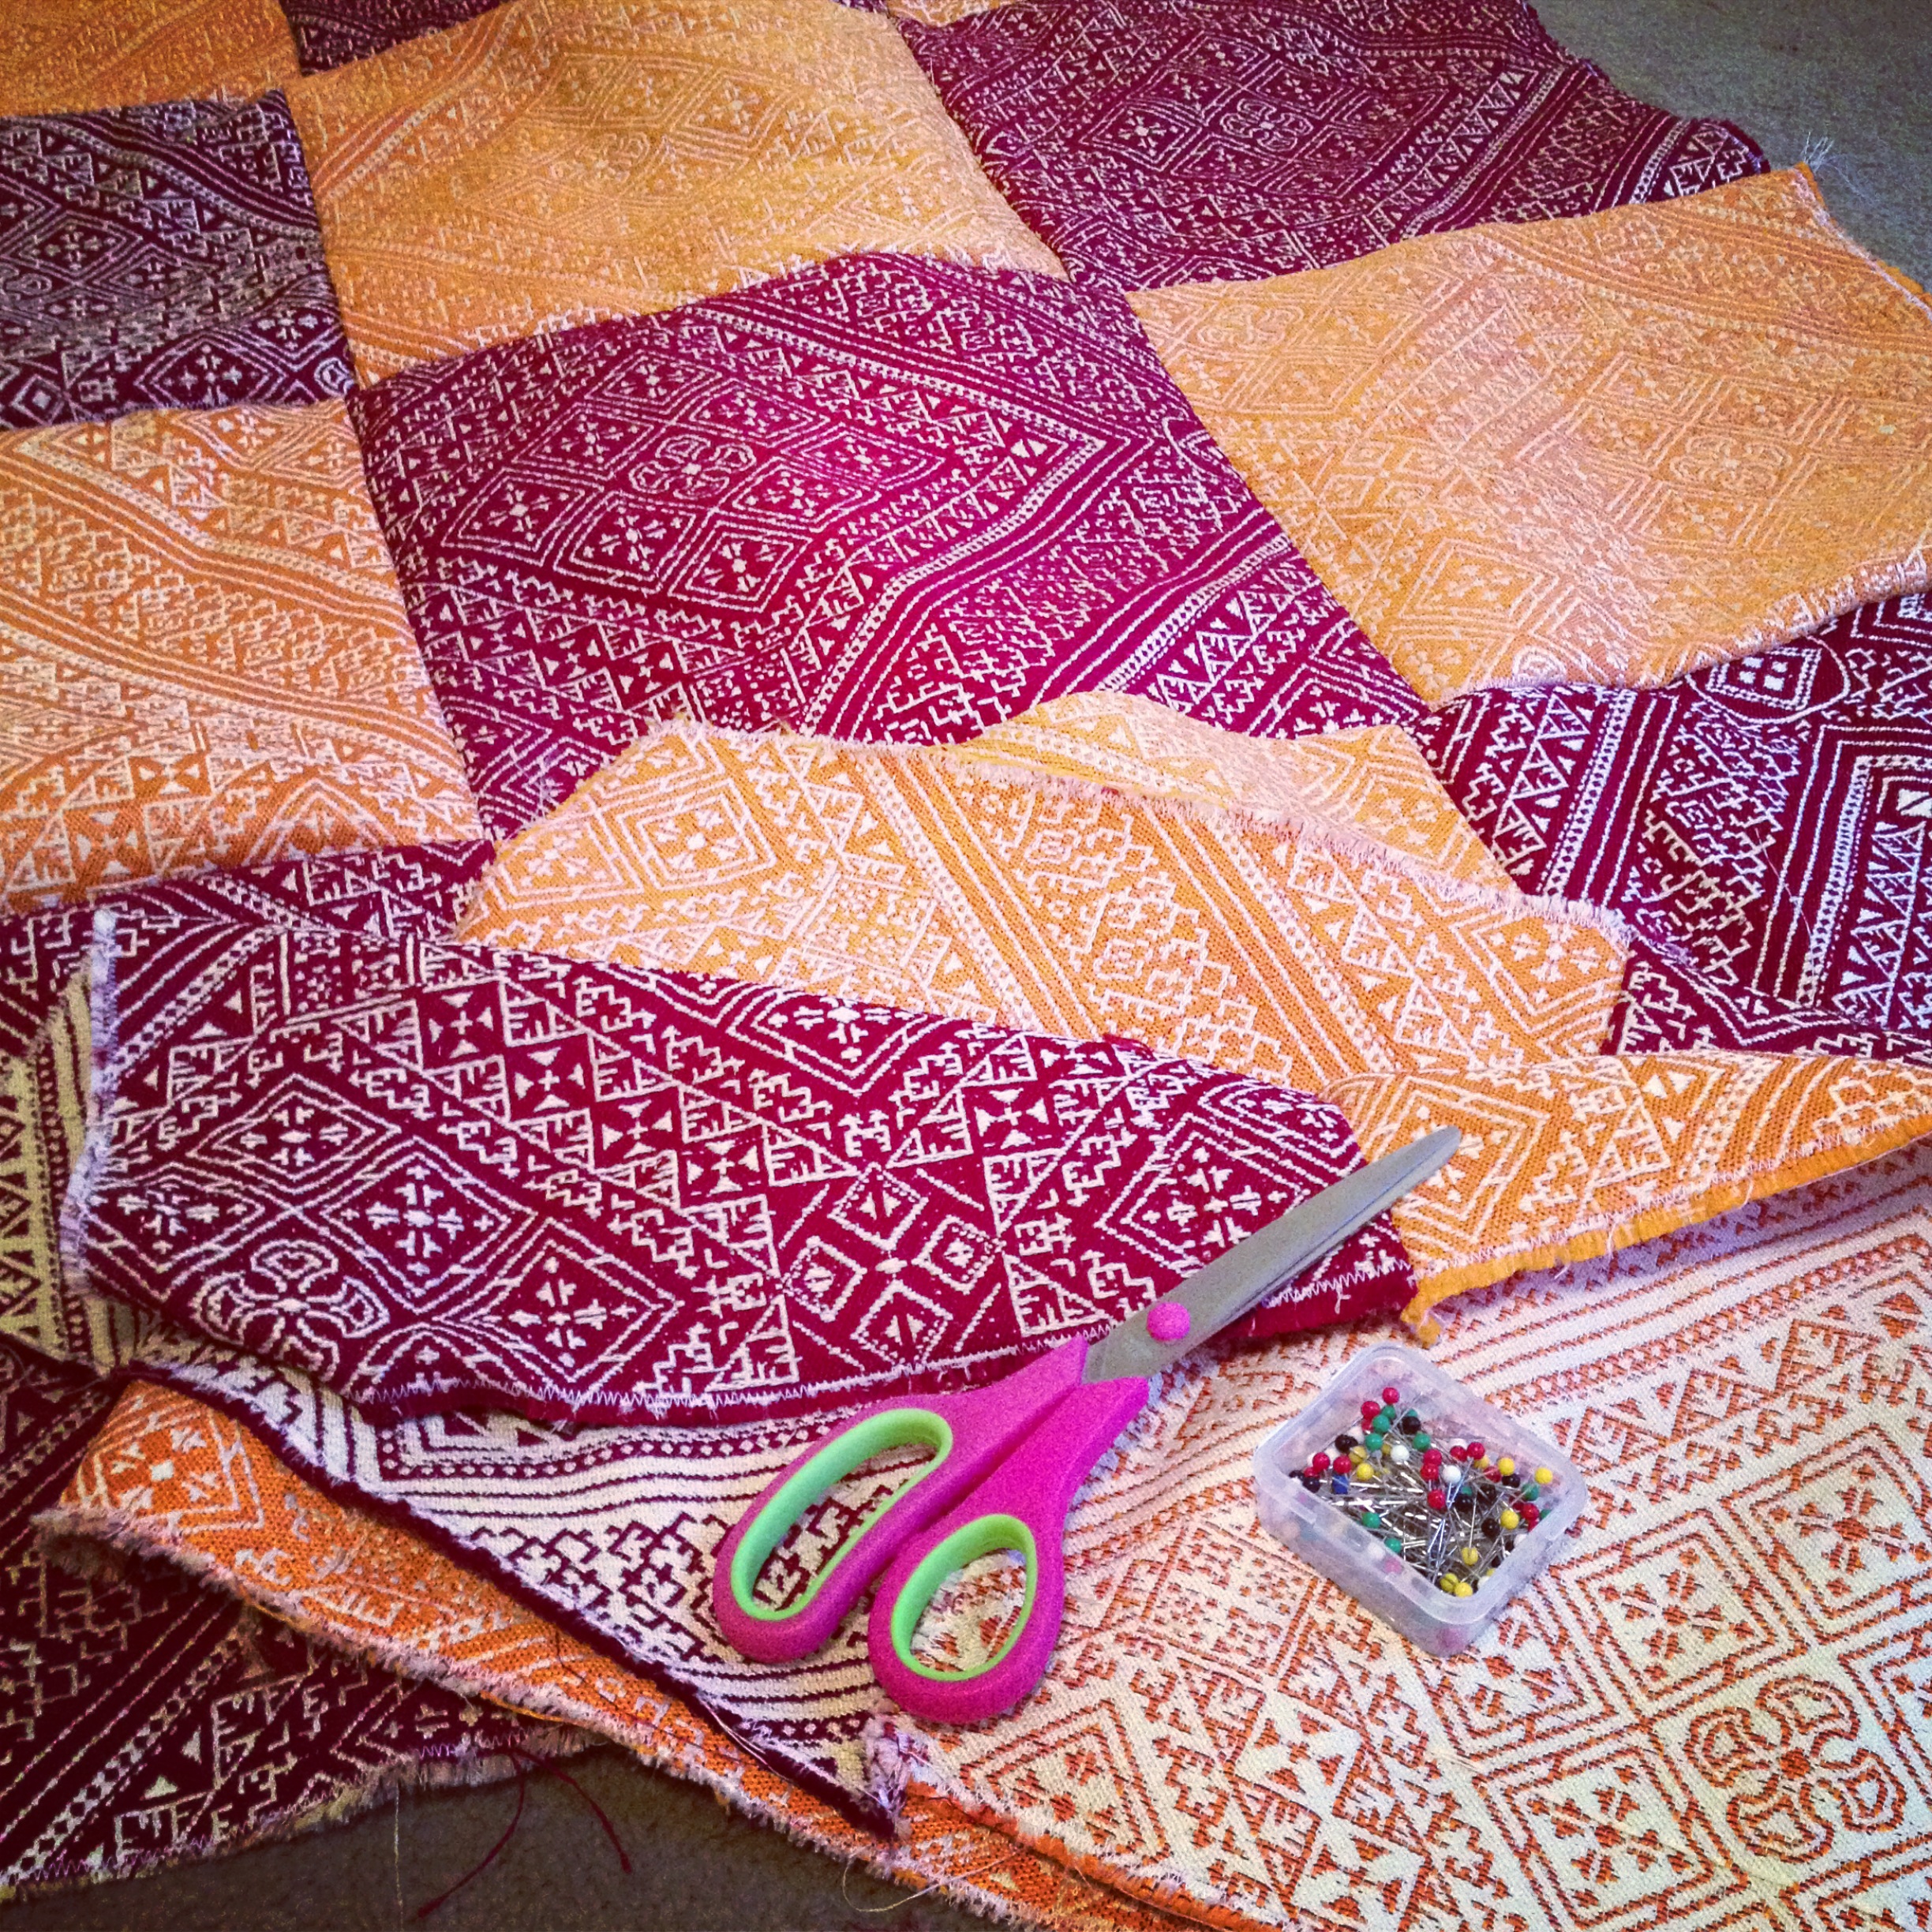
After cutting the 5-inch squares, arrange the pattern on a flat surface (in my case, it’s the floor). Begin sewing the squares together a row at a time (always right sides together). I used a 0.5-inch seam allowance with the basic walking foot on my sewing machine. Then sew each row together. Stop periodically to iron the seams, and after sewing on the last row, iron the entire piece.

DSC_0783

It is important to take the time to iron the seams. For this quilt I used the quilting technique called “stitch-the-ditch” (I explain further down), and you need your seams to lay flat for this technique to work. Before moving on to the next step, also take the time to cut off the loose thread from the seams.

DSC_0787

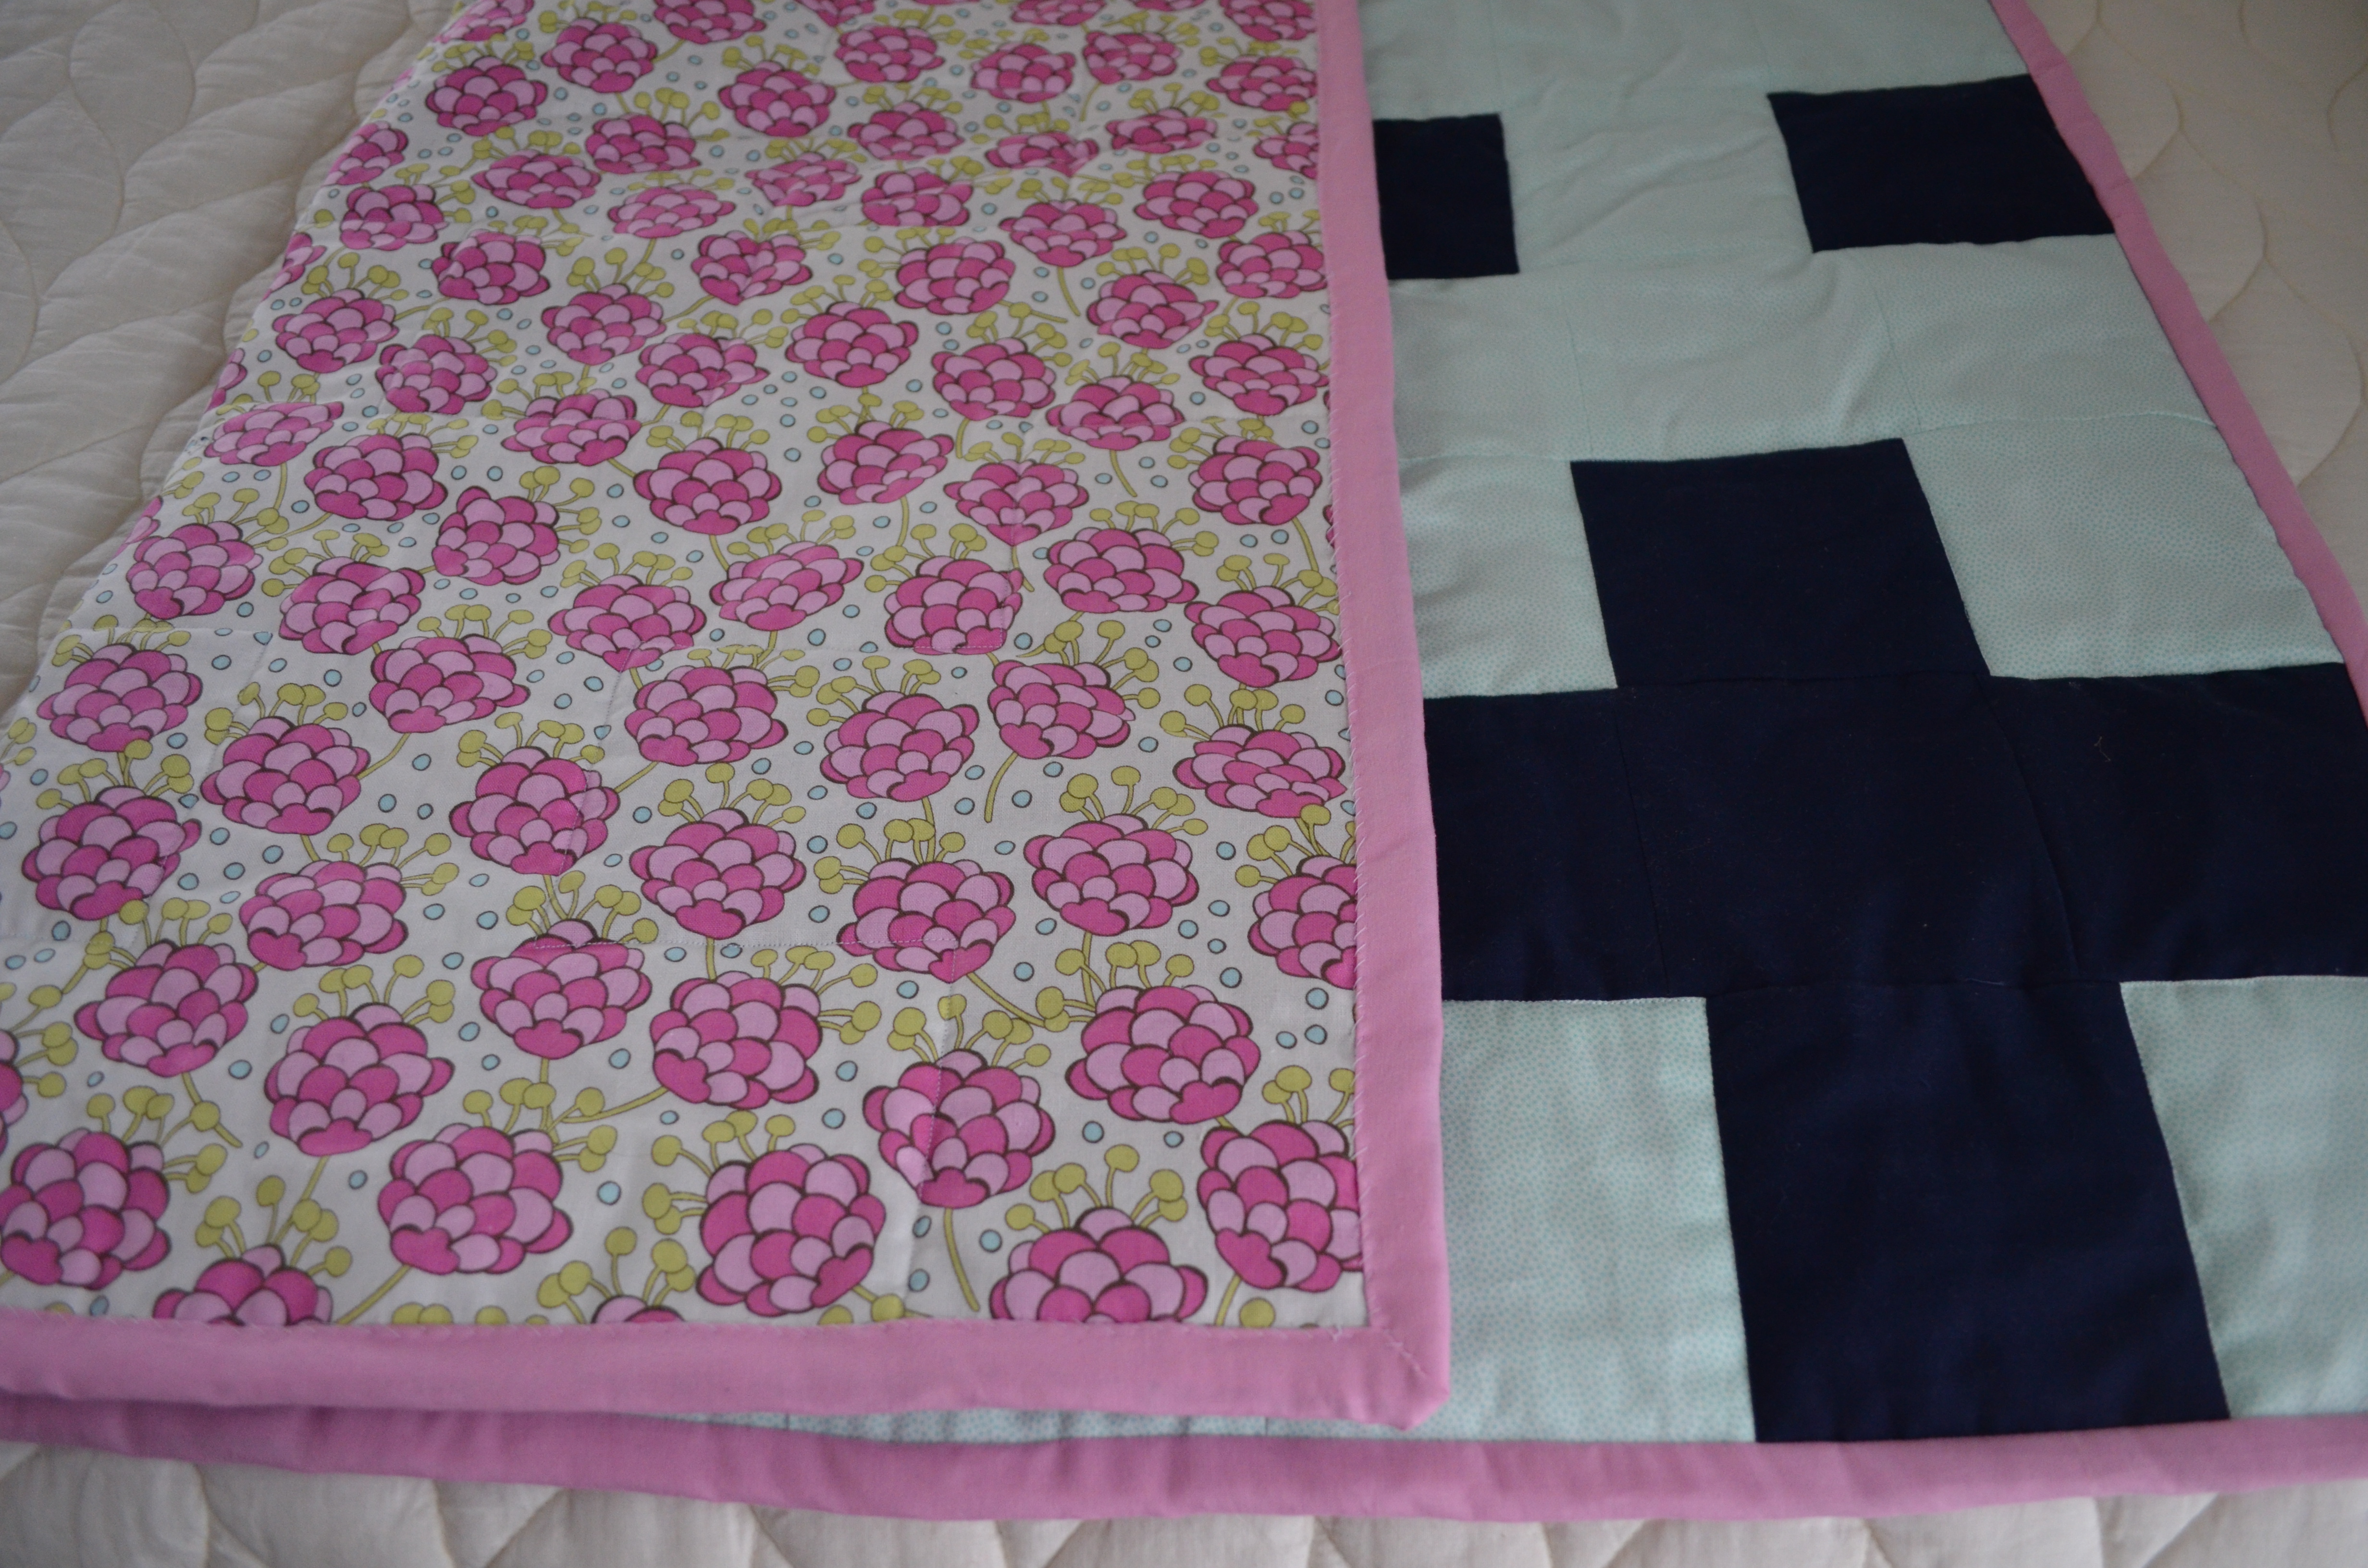
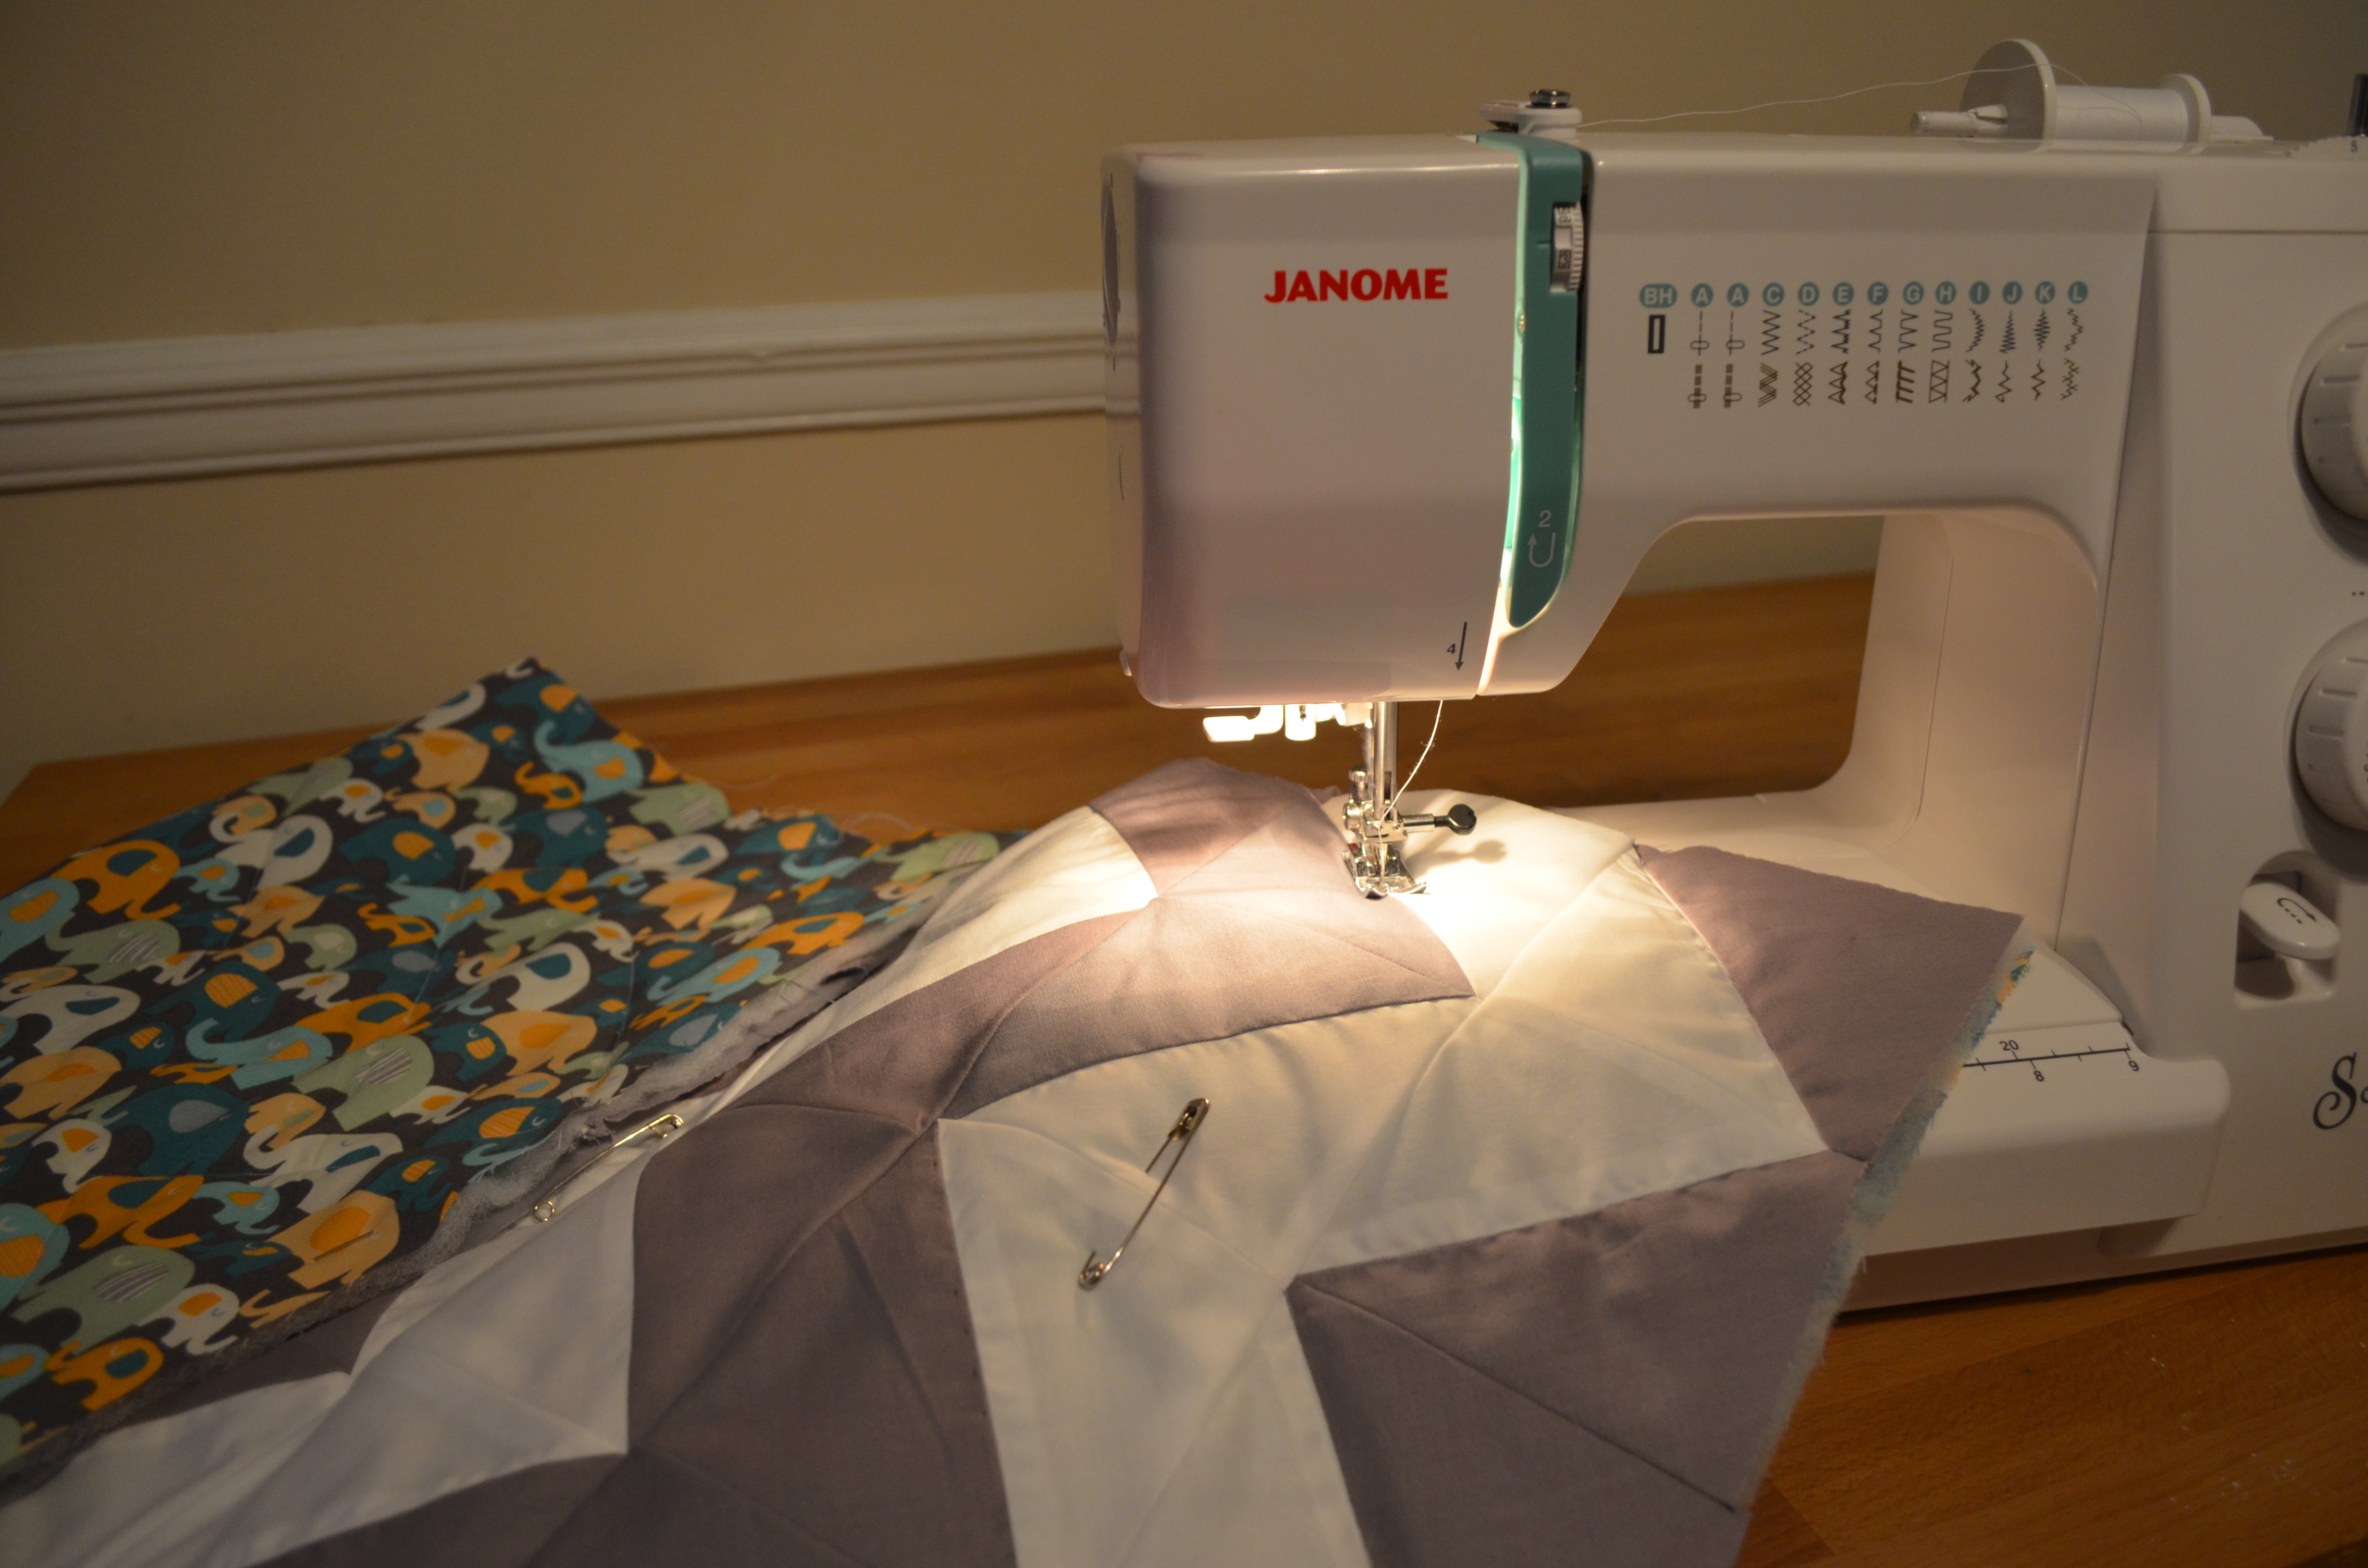
Now that you have created the front piece of your quilt, the next step is to layer the three pieces together and start quilting. I found an adorable floral print for the back piece. It’s a standard yard (36 x 44 inches).

First, take the piece of batting and lay it on a flat surface (again, I use the floor). (I bought a crib-sized piece of polyester batting.) Take the front piece and lay it on a flat surface, with the wrong side facing up. Spray with temporary spray adhesive and let stand for a minute or two (this step is best to do outside). And then lay the front piece on top of the batting, smoothly the fabric as you lay it down. (It’s helpful to have a friend hold up one end as you smooth.) Flip the batting over and do the same with the back piece of fabric. (The back piece is a larger piece of fabric, but still make sure it lines up with the front piece. Once complete, I pin safety pins around the quilt as a precaution to keep the fabric in place.

The next step is quilting! Using the “stitch-the-ditch” quilting technique, you sew along the existing seam, creating a quilting pattern that matched the front piece. For this quilt, I sewed along the outline of each plus sign.

DSC_0791

Once complete, cut off all loose thread as well as any excess fabric that extends beyond the length and width of the front piece.

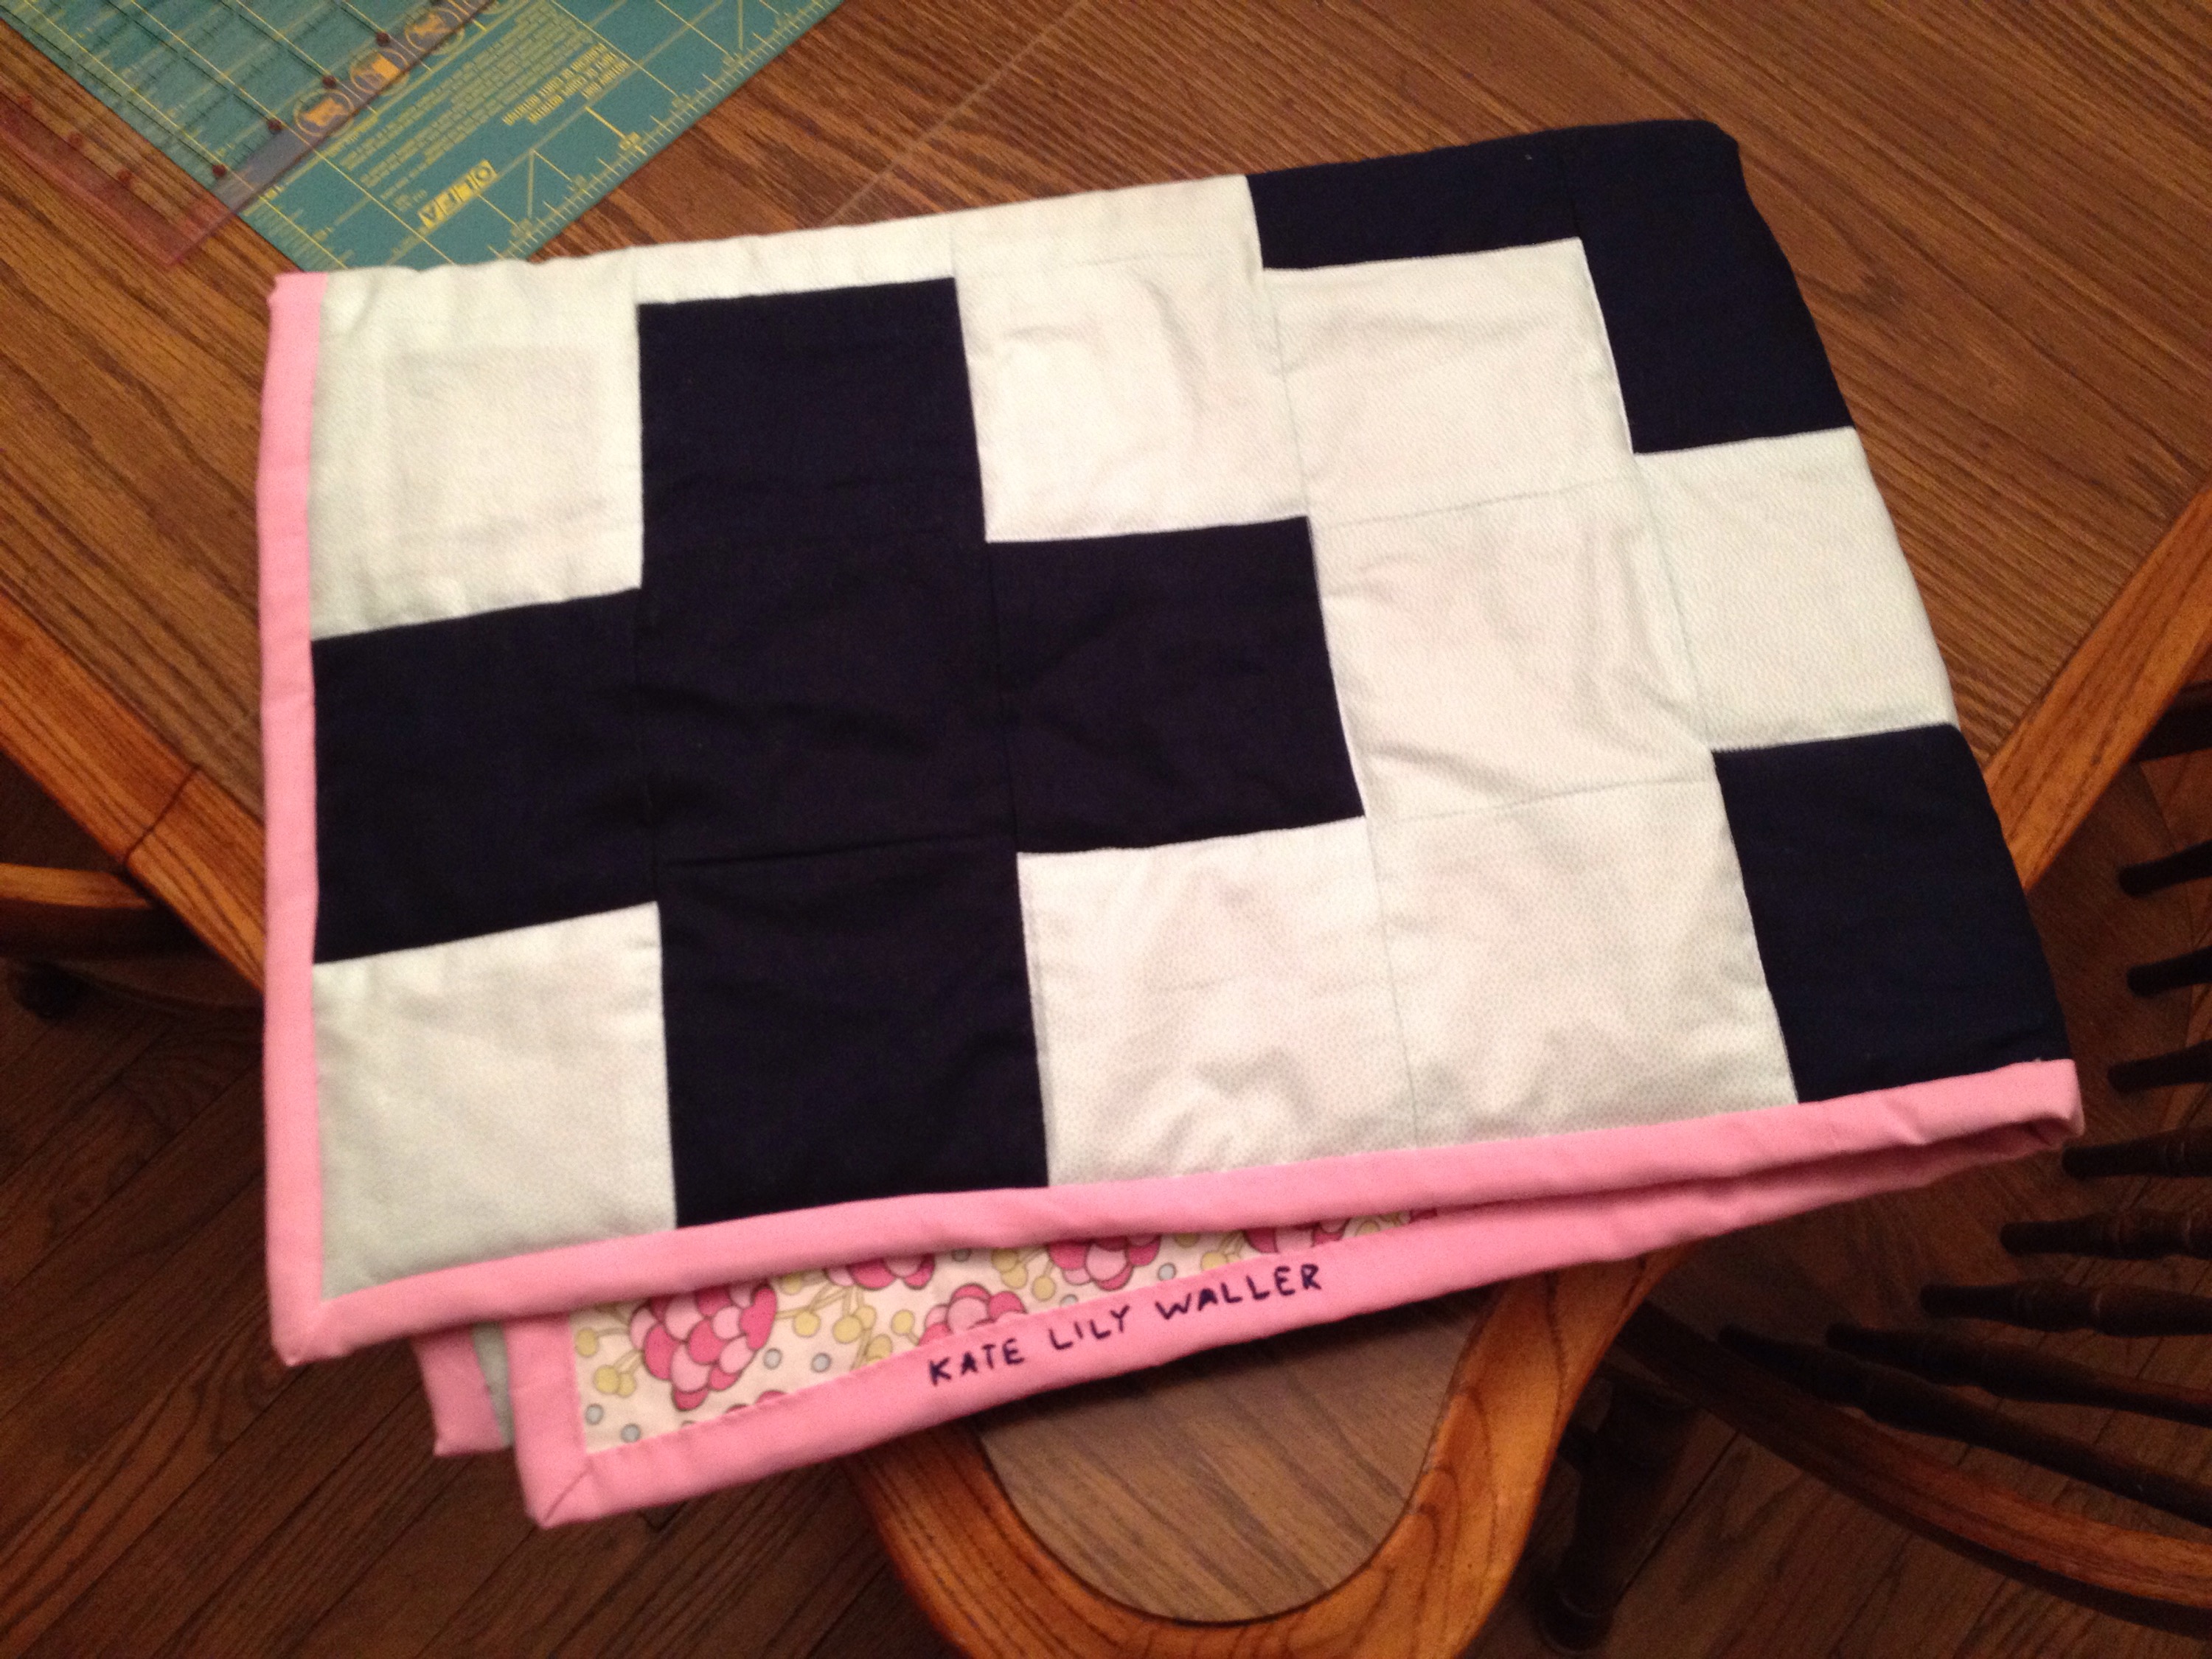
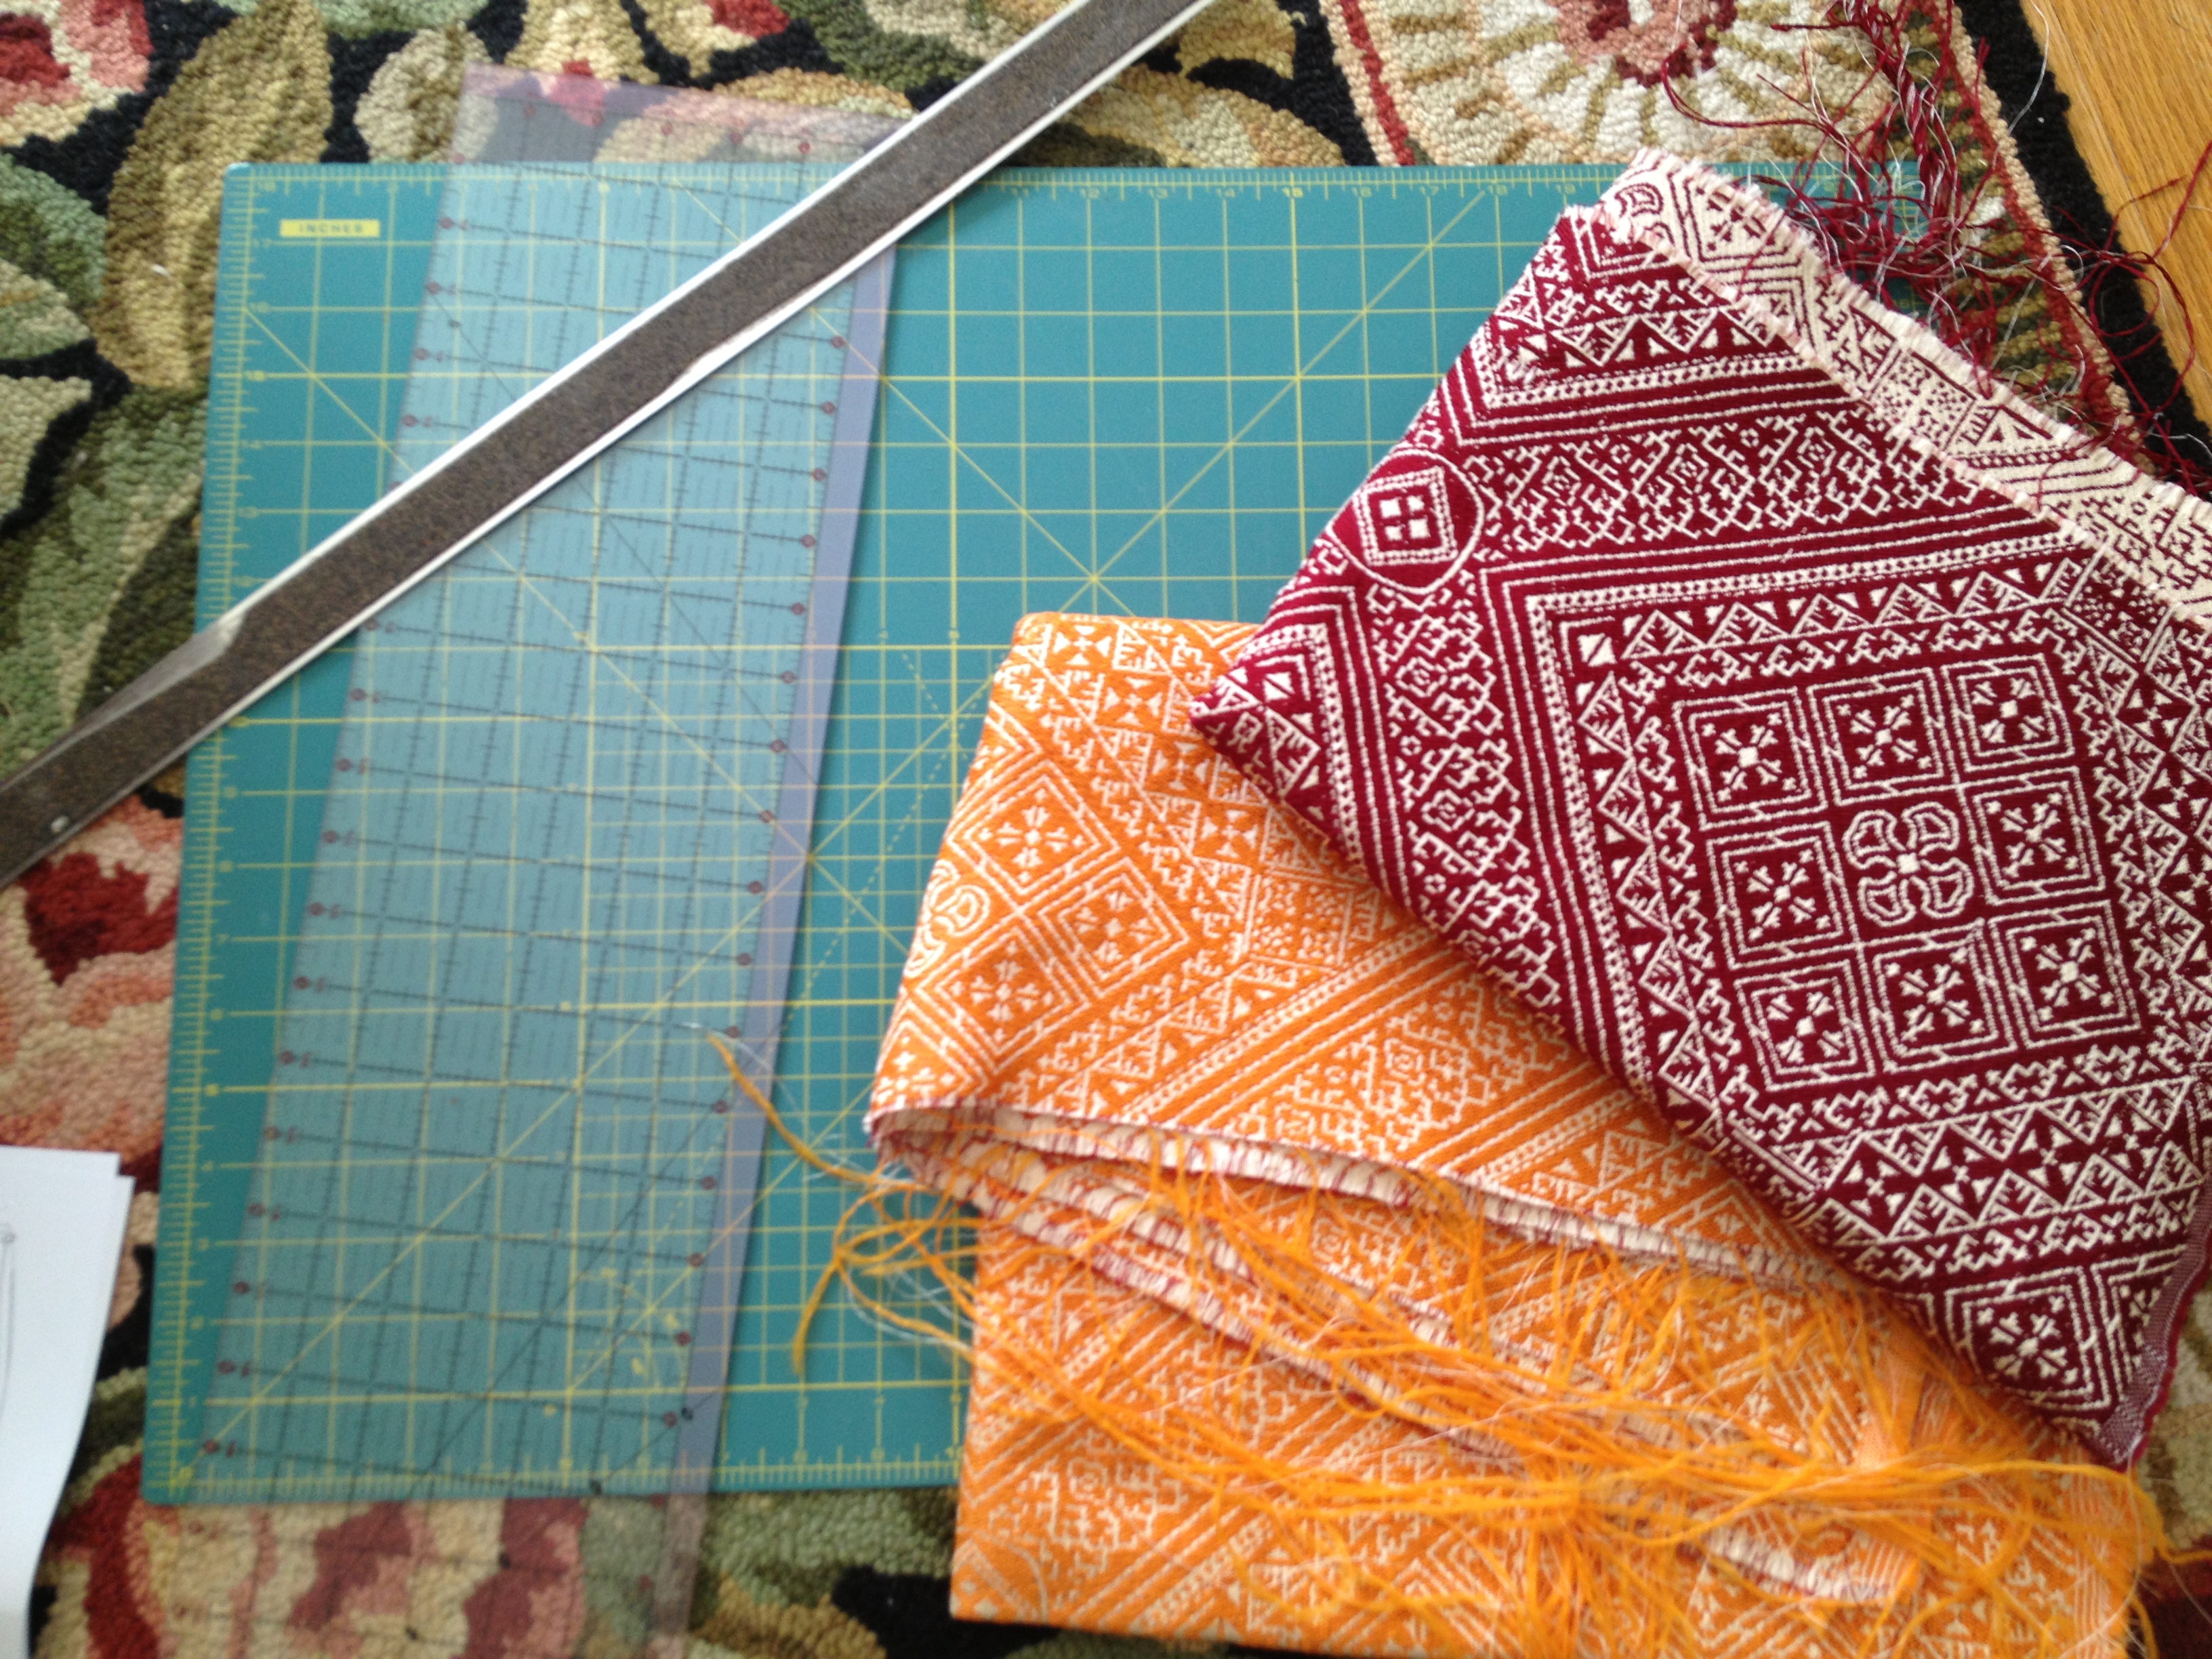
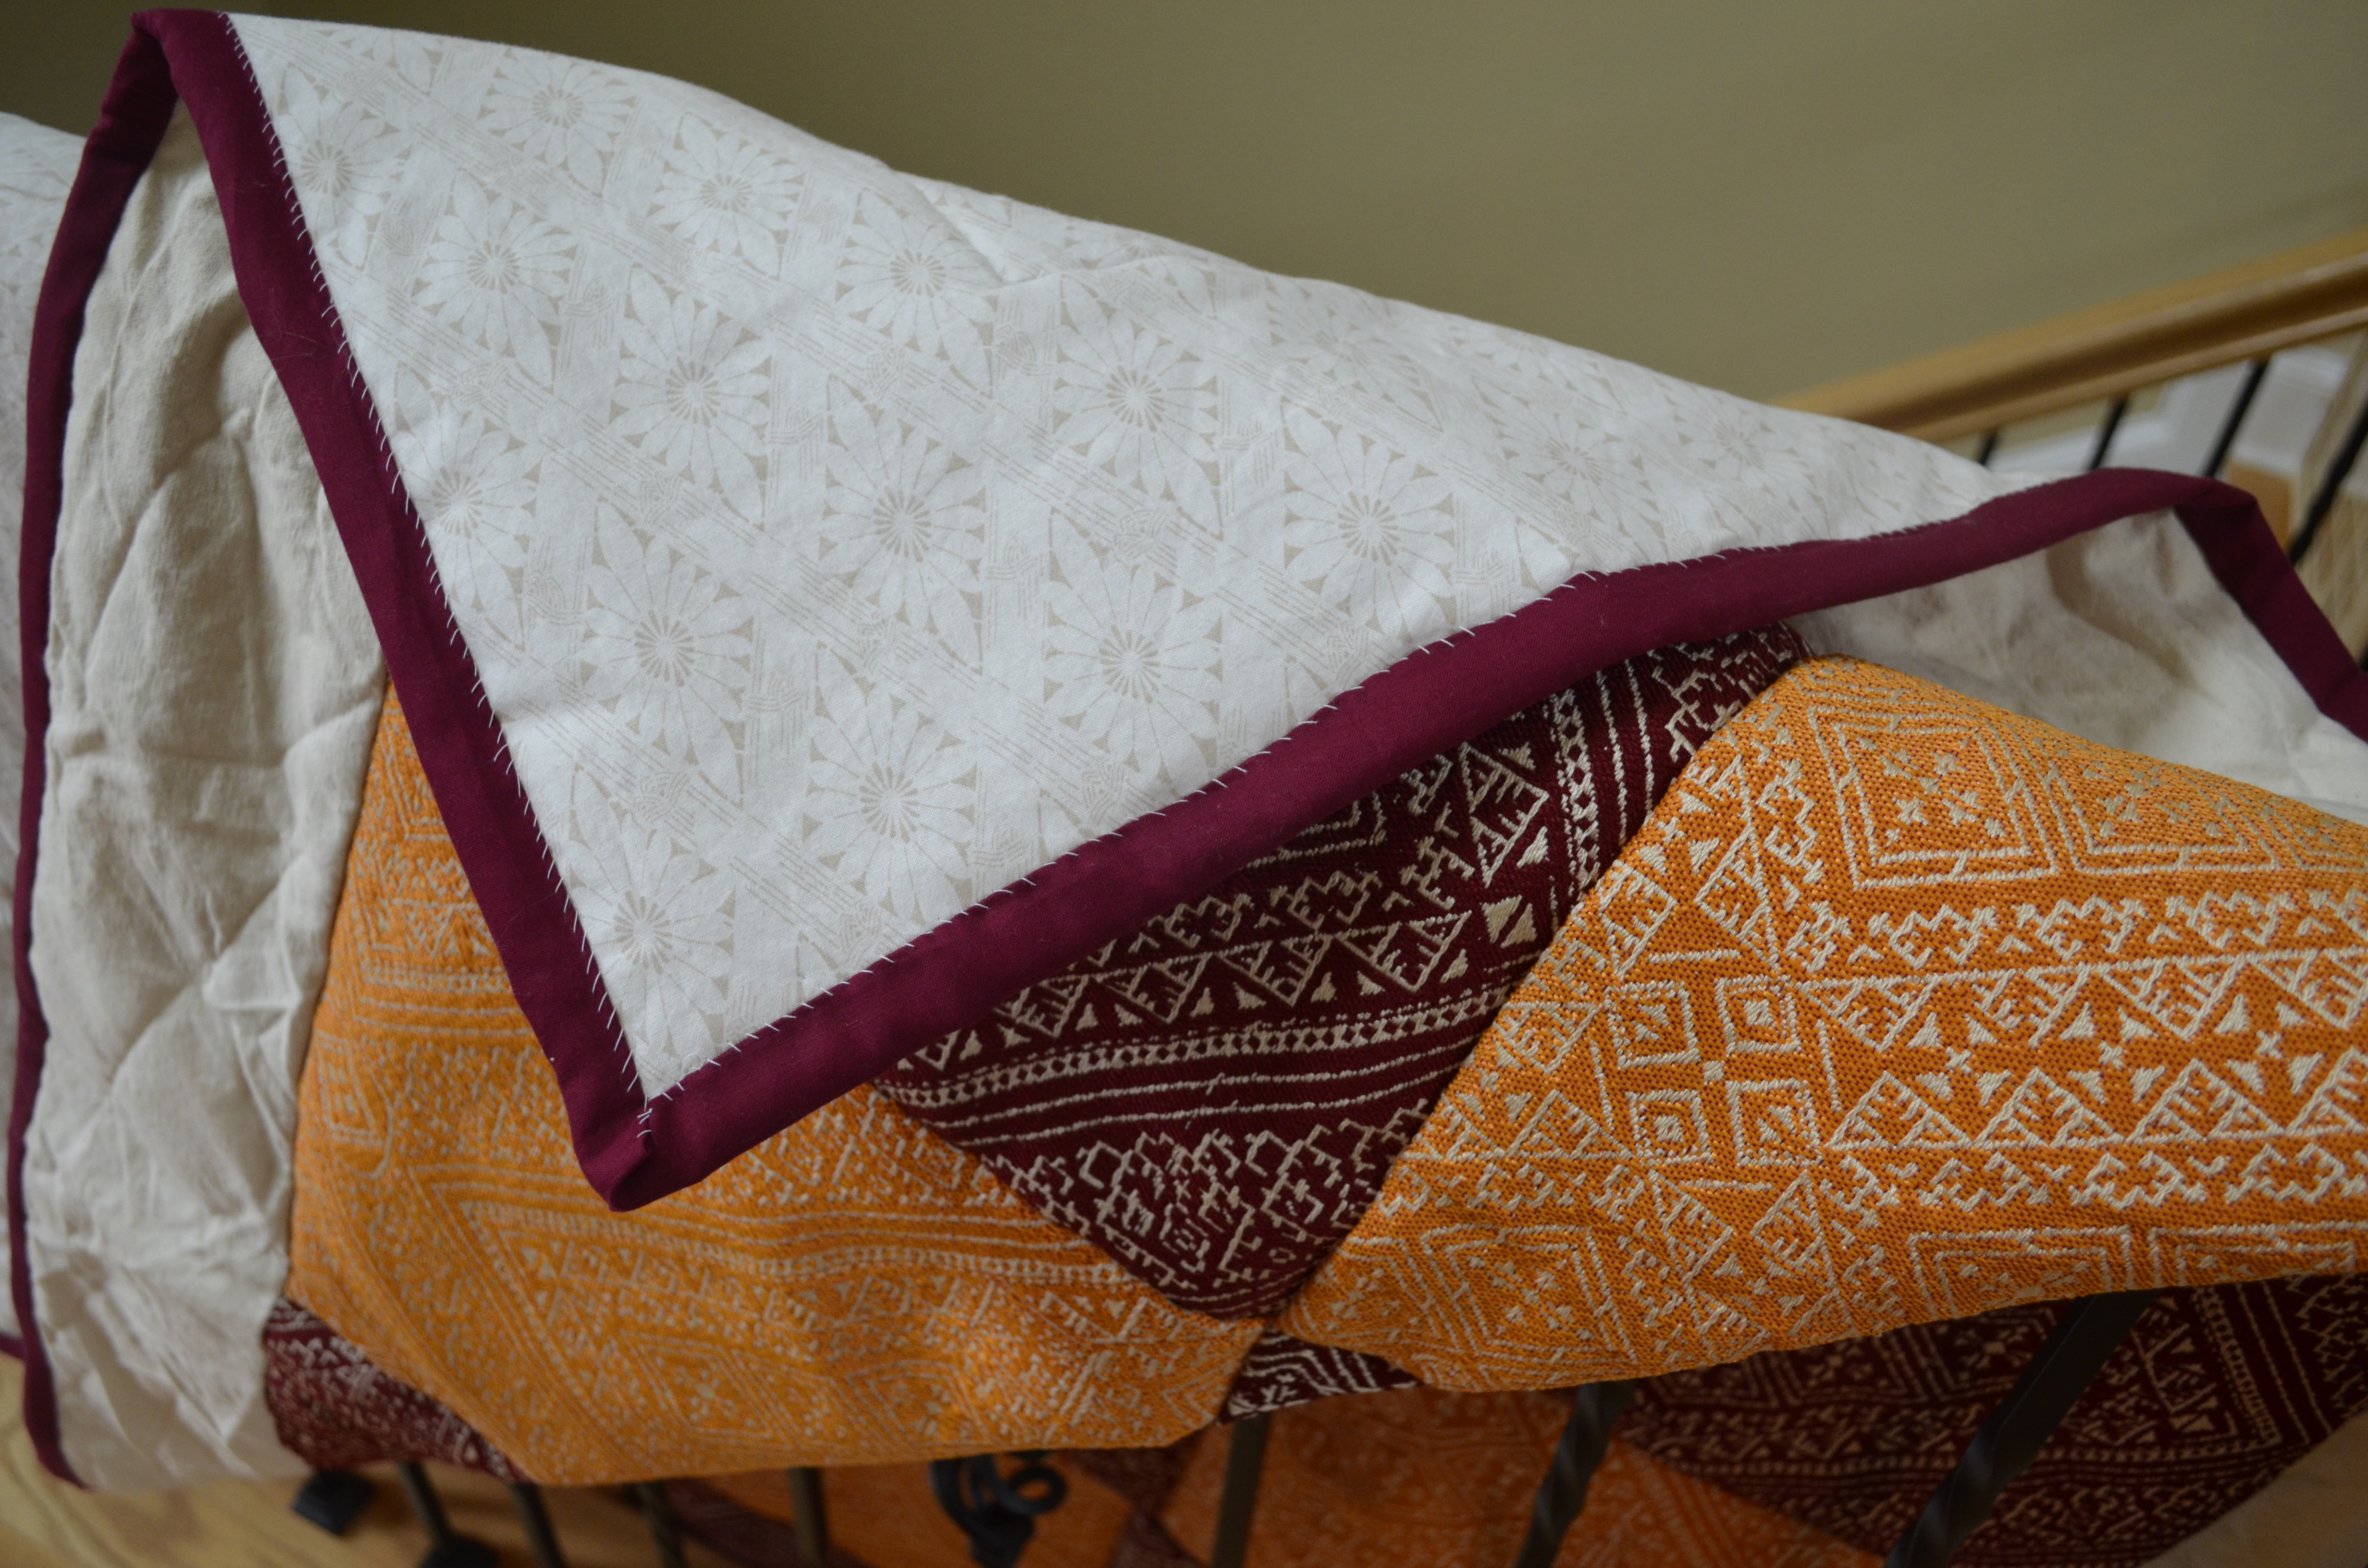
The final step is calling binding, the creation of the quilt’s edge. Since I had a lot of blue in a quilt made for a girl, I went with a pink binding. (I think it’s important to pick a color or fabric that helps connect the pattern and colors of the front and back pieces.) First, cut out several 2.5-inch strips, and sew them together so the fabric measure the lengths + the widths of the quilt. (I can’t remember the exact dimensions.) Iron down 0.5 inch on one side, and then pin the strip of fabric to the front side of the quilt (remember, always rights sides together).

DSC_0790

When you get to a corner, keep the fabric aligned with the edge, folding at the corner so the fabric overlaps (hopefully the picture can help explain). With the fabric in place, sew along the quilt’s edge with a 0.5-inch seam allowance. As you approach, stop sewing about 0.5 inch from the corner. Remove the needle from the quilt, and turn the quilt 90 degrees. Because of how you folded the fabric strip, you’ll have a excess triangle of fabric. When you put your needle back into the fabric, make sure that excess triangle is out of the way.

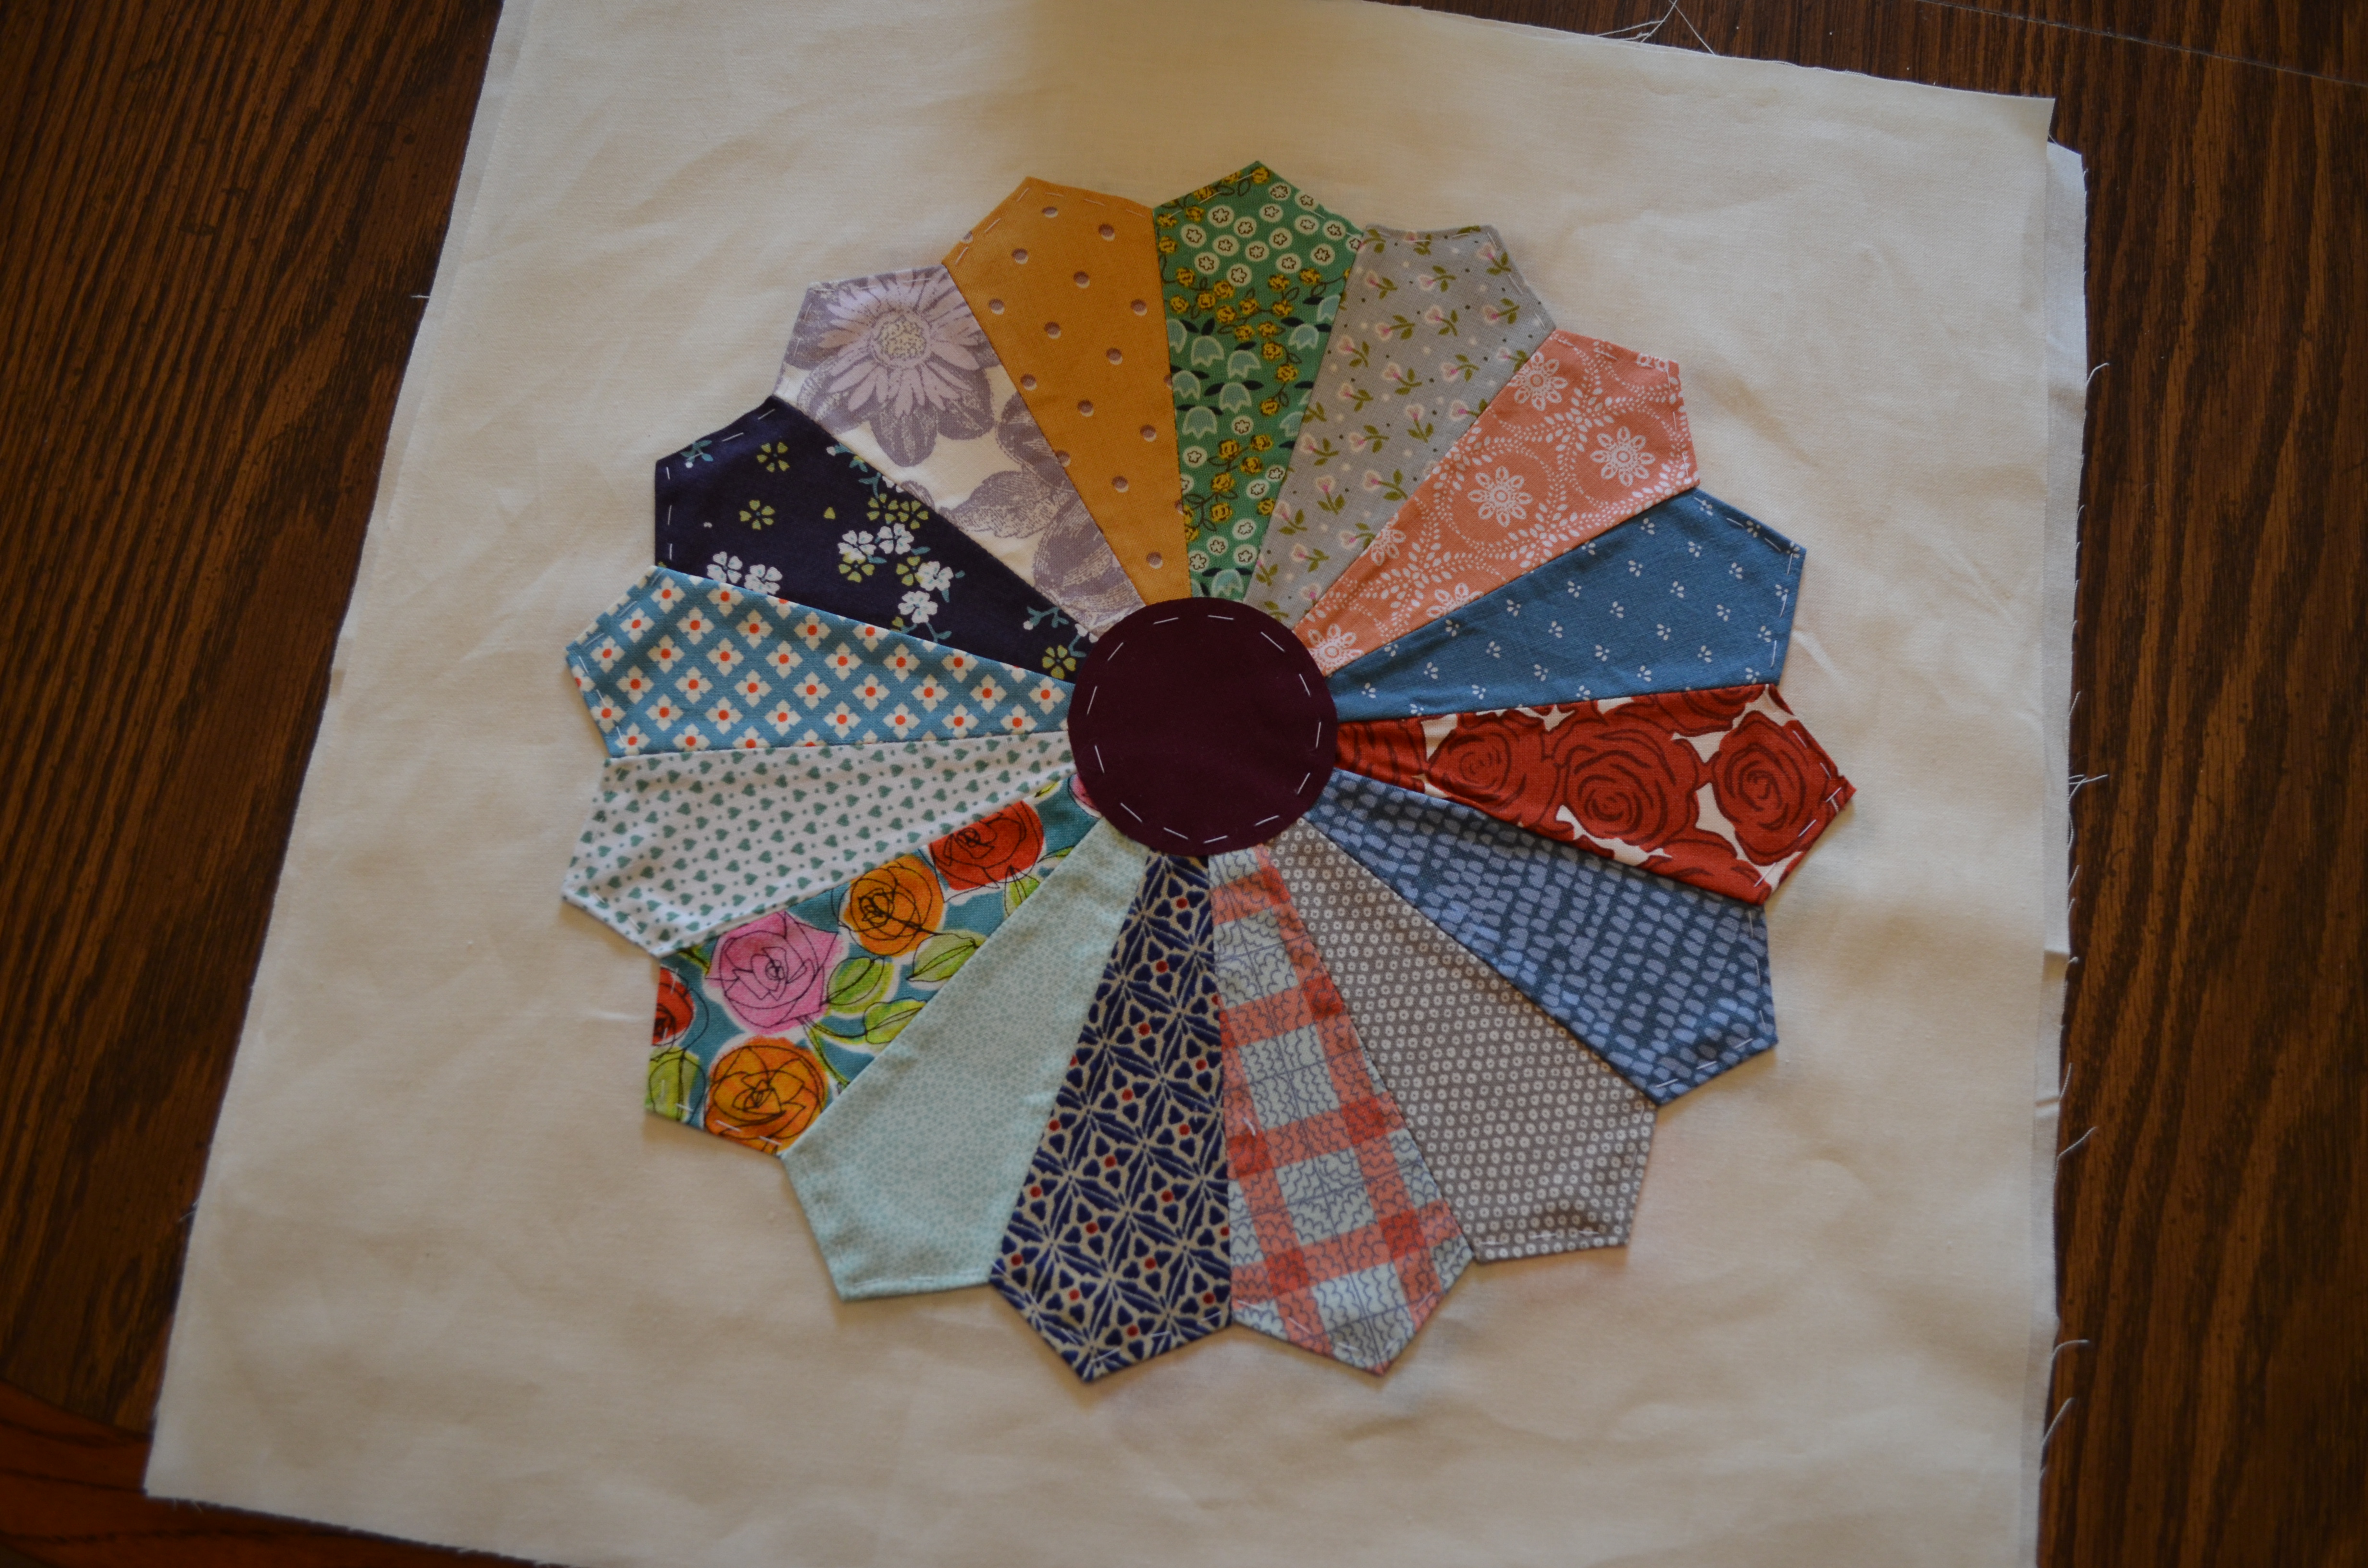
This process is hard to explain, but trust me, there are a ton of YouTube videos out there that are very helpful (especially for those who are visual learners like me).

With the one edge of the binding in place, I fold the fabric over the edge and whip-stitch the other side in place. (It’s a long process, but I find it easier that machine binding the whole thing!)

IMG_5276

Before I finished the binding, I took a moment to embroider my niece’s name. These personal touches make all the difference!

DSC_0802

I love the modern twist to the classic gift of a baby quilt. (And I’m a huge of the navy, blue and pink combination.) I did finally get the chance to meet my little niece, and she looks crazy cute wrapped up in this!

DSC_0793

Piecing Together a Dresden Plate Quilt

IMG_3849

It was about this time last year that I took this picture. It was in the midst of Birmingham’s Snowpocalypse 2014, and with the office closed and roads a mess, I had nothing better to do than start a quilt. Now – more than a year later – I found the motivation to pick up where I left off with the hopes of finishing my first full-size quilt before the end of March.

The pattern is called the Dresden plate. (I also heard it be called the flower or floral plate.) The idea has been floating around in my head ever since I finished my last quilt (as my Pinterest board can attest.) Finally, I bit the bullet (a year ago) and purchased the template blocks and got started.

IMG_3852      IMG_3854

Piecing this pattern is a two step process that involves a lot of ironing. Step one: cut out the pieces. I used the template, a rotary cutter and mat to cut out each piece. I then took the top of each piece (where the fabric comes to a point), folded over a 1/4 inch seam allowance and pressed the seams. Step two: sew pieces together in sections. Instead of sewing the ring together piece by piece, it is much easier to work in sections: sewing pieces into pairs – stop and iron – then pairs to quarters – stop and iron – quarters to halves – stop and iron – and finally 2 halves into 1 whole circle.

DSC_0693

With a plate completed, the next step is to applique it to a block of fabric. For my quilt, I cut each block to measure 15 x 15 inches.

DSC_0696

Now some tutorials will show you how to hand-applique the plate in place, but I decided to cheat and use heat n’ bond iron-on adhesive. I cut a piece of adhesive to be smaller than the plate, leaving the outer points untouched. (A downside of using iron-on adhesive is that it will make the fabric stiffer, but I find it so helpful in keeping the fabric in place.)

DSC_0698

After ironing the piece of adhesive to the plate, I peeled off the back side, placed the plate in the center of the block and ironed it in place.

DSC_0702DSC_0703

Next, I cut the center circle. Instead of pressing the seams, I decided to use the heat n’ bond to avoid frayed edges. (This may back fire on my one day, but for now, it makes this step super easy.) I simply ironed the circle in place.

DSC_0705

Finally, I hand stitched the outer edge and center circle to help secure everything in place. (Plus, I think the stitching enhances the overall look.)

DSC_0714

For my quilt, I need 35 of these blocks, and I have made 10 so far. So I have quite the feat in front of me. In the meantime, feel free to visit my Patchwork Pinterest board. (And remind me I cannot start a new quilt until I finish this one!)

A Custom Felt Playmat for my Nephew

_DSC0354

The brainstorming process for my nephew’s 2-year-old birthday present began about 2 months ago. I had seen ideas for a “quiet book” on Pinterest. Mostly made from felt, “quiet books” are these cute flip books filled with little activities that are meant to entertain and keep your kid still and quiet. I liked the idea (especially since Josiah is quite the jet-setter), but I wanted something bigger! (He’s my only nephew to make things like this for!) That is when I had the epiphany to create an awesome, felt play mat – customized for his life.

DSC_0477

I started by purchasing a yard of green fleece. In my opinion, fleece holds up better over time than felt. (Felt can shed and eventually start to ball up.) Though I planned to use felt for the details, I knew fleece would be a better foundation. Plus, fleece is much softer in case my nephew every decides he wants to use the mat as a blanket.

IMG_4167

Cutting out the streets and the buildings took a few days. (And as you can see, I let it take over the floor of my kitchen.) I cut everything by freehand, so I did experience some trial and error. Initially, I cut the streets pretty wide, but as I cut out more and more building, I made the streets skinnier to fit everything on the mat. (Plus, I found this cute wood cars that were the perfect size for my smaller roads.)

DSC_0484    DSC_0490

With everything cut out and in place, I used no-heat sewing glue to glue everything down. The glue left marks at first, but they go away as the glue dries.

IMG_4180

Despite everything being glued down, I wanted to secure the felt pieces in place by sewing everything down. (I am giving this to a 2 year old.) I used clear and white thread, and it took about a week to finish since I sewed everything by hand. I also used embroidery floss to add a handful of details – like a sign for the gas station and items for sale at the market.

DSC_0419    DSC_0422

The back side of the fabric shows all of the work, but no one wants to see that. So I found this adorable fabric at Joann Fabric that I used as a back piece.

_DSC0362

I customized this mat for Josiah, picking places that he would recognize from his everyday life. And from what I’m told, Jo loves some pizza and ice cream.

_DSC0361    _DSC0363

Since they live right on the ocean, I added a beach with the surf club my brother belongs too. For the zoo, I decided to leave the space blank since Josiah has so many small, plush animals he could place there.

_DSC0360

I totally took this gas station/car wash idea from Pinterst. I’m obsessed with the car wash. It’s my favorite element on the whole mat!

_DSC0366    _DSC0369

Dad’s office on the left, and a school on the right.

_DSC0367

Their local grocery store is Carrefour. I tired to copy the store’s logo. Though looking back, I’m bet I subconsciously picked a green roof because I shop at Publix. And then with a little extra space, I placed a blue U.S. mail box!

_DSC0370

The train station was a must! And this too is an idea I found on Pinterest. I cut rick rack into piece for the railroad tracks, and then used felt to create an accompanying train station.

_DSC0371    _DSC0373

Last time I went to visit my brother and sister-in-law, we walked into the same music shop everytime we walked by it, so it was also a must-have. Plus, I think the little guitar and bongos look super cute in the windows. The fire station was added because I think it’s pretty iconic.

_DSC0376

These three buildings represent Josiah’s apartment on the right. His grandparents’ house is in the middle. And I added a house I thought could represent their good friends, the Wallaces. (Plus, I wanted to use the silhouette of that archway somewhere on the mat since it ties in so closely to where Josiah is growing up.)

_DSC0384

Finally, I added a Medena, or a little market. Of course, this is a lot smaller than the ones Josiah goes too, but I thought it was a needed detail.

_DSC0379

I attached the back piece of fabric the same as if I was making a quilt. I used basting spray to attach the two pieces together, and then I used denim fabric cut into 2-inch wide strips to bind the edges.

A Chevron Quilt

DSC_0502

Several months ago, I pinned a chevon quilt on Pinterest with the intent of making it. But as the months past, the idea never came to fruition. That is, until I started to think about what I wanted to make for a friend whose baby is due at the beginning of October. I knew it was a design she would adore, and I am excited to say, it’s a design that is super easy to make.

DSC_0422

The entire quilt is made of these squares. For my quilt that was 36 inches x 40 inches, I used 90 of them.

DSC_0413

The process of making these squares is a trick that  all beginning quilters should learn. Once made, these squares can be arranged in several different patterns, including a pinwheel. The first step is cutting out 7×7-inch squares of both the white and grey fabric.

DSC_0414

Next, I  layer a square of the grey fabric on top of one of the white and sew a border, using a 1/4 inch seam allowance.

DSC_0418

I then cut the square in half, diagonally. I repeat this step with the two triangles I just created.

DSC_0419

To finish, I unfolded the triangles and ironed the seams. I also cut off the extra fabric at the corners. As you can see, one 7-inch square quickly creates 4 smaller squares. Once you get the hang of it, you’ll find you have 90 squares before you know it.

DSC_0477

DSC_0478

Once you have made all of the squares, you simple have to sew them together. My quilt was 10 rows of 9 squares each. You arrange the squares so the same colors are always touching.

DSC_0482

Since we’re dealing with squares, it means we’re exclusively dealing with straight lines. So once you create the rows of 9 squares, all you have to do is sew the rows together.

DSC_0484

To accompany the chevon design on the front of the quilt, I used a yard of an adorable elephant pattern for the back that matches perfectly (if I do say so myself).

DSC_0488

Once I basted both sides of the fabric to the polyester batting I purchased, I simply quilted along the chevron pattern.

DSC_0492

For the binding, I chose a green fabric that matches one of the elephants on the back. I cut the fabric into 2.5 inch stripes, sewing them together to have enough to fit the diameter of the quilt. I next ironed down a half inch of one side of the fabric.

DSC_0494

I sewed the binding to the quilt, using a 0.5 inch seam, using my short cut you can read about here for the corners.

DSC_0496

Now that I have made a handful of quilts, I wanted to create a tag that would start to mark them as mine. But for this quilt, I didn’t want to use my initials since I am making the quilt for a friend, so I decided to use the year – the year her baby would be born.

DSC_0504

I couldn’t be more happy with the final result. Of course, the quilt contains a few mistakes (if you look closely, you’ll notice I accidentally purchased two different colors of grey fabric). But with such an easy first-time experience,  I know I will make another chevron quilt in the near future. And coincidentally, when I gave the quilt to my friend, I found out the chevron and the elephants match her nursery perfect. I guess you could just say I am very on top of the current trends!

DSC_0503

DSC_0505

Quilting with Moroccan Fabric

IMG_2475

Having traveled to the cold land of the hot sun –  aka Moracco – twice now, I have found myself with several meters of fabric that are calling to be used. On my second trip to North Africa, I purposely bought a meter of a different color of the same fabric with the idea of making a quilt. With such beautiful fabric, I wanted to keep the quilt simple, so I mapped out a basic square pattern – one that could easily be used to make a t-shirt quilt.

IMG_2812

You can see the dimensions I worked with in the picture above. The squares were 11.5 x 11.5 inches, and I used a 0.5 inch seam allowance.

IMG_2509

Since I was working with woven fabric, I prevented frayed edges by using the basic zigzag stitch to act like an overlocking stitch. It  was a tedious process, but completely necessary. Fabric can still fray even after you stitch the pieces together.

IMG_2801

Once I finished the edges, it was a quick process to sew all of the individual squares into the rows and then the rows into a quilt. Again, I used a 0.5 inch seam allowance throughout.

IMG_2807

With the middle squares in place, I used a off-white canvas fabric to act as a margin of color – another simple touch to highlight the beauty of the fabric. The strips were 7 inches wide. I used the canvas fabric to match the thickness of the Morroccan fabric, but for the back fabric and binding, I used cotton. To see how I bind quilts, you can visit my previous post on the matter.

_DSC0061

I couldn’t be more happy with the finished product. It achieved the goal that I wanted – something that could show off the beautiful, hand-woven fabric as well as encapsulate my memories of purchasing the fabric on my travels. You just can’t find fabric like this here in America – well, as least not for the price that I paid for them.

_DSC0064

I found the fabric for the back side of the quilt at Handcock Fabrics, and it worked perfectly.  For the back side, I think the fabric needs to be simple enough to not trump the front, but interesting enough to add to the overall look of the quilt. This fabric did just that.

_DSC0073

This pattern is easy and simple to recreate since pieces are large, and you work with straight lines. Please feel free to ask any questions you have; I would love to help you as you work to create a quilt for yourself.

DIY Cloth Books

I have dedicated the month of January to finishing the project I have purchased materials for. Two summers ago, my grandparents took my cousin and I to Amish country in Ohio. In an adorable quilt shop, I found this fabric that had a tutorial to make a cloth children’s book. Naturally, I purchased a fabric set of Benjamin Bunny and Peter Rabbit.

DSC_0298

Now, I wish I purchased 3 more sets of fabric. The pages were laid out over a yard of fabric. Where I needed to cut was marked by dotted lines, and the instructions were listed at the bottom.

DSC_0293

DSC_0295

The book is made up of three sets of two panels each. To make a page, I basted a layer of filling (cut to the same size of the panel) to the wrong side of one of the panels. Then pin the corresponding panel to the other – right sides together. I used a 1/4 inch sewing allowance, leaving space to flip the book right-side-out. To finish, whipstitch the hole together, and press with an iron.

DSC_0299

Repeat this with the next 2 pages. Once the three pages are finished, simply layer then in order, with the cover on the bottom, and sew a seam down the middle of the book. And that’s it – you have yourself a book.

DSC_0301

My book is not perfect, which I love. It is definitely homemade!

DSC_0306

DSC_0311

DSC_0314

A World View

DSC_0338

Another quilt, another day. My mother purchased this fabric for me months ago, asking me to make a quilt for her. At the time, we just had heard the news of our my coming nephew, and I was all into quilt making! Little did I know it would take me forever to finish it (mainly because my crafting leave-of-absence over the summer.)

I started with the fabric. The map piece was a yard, so I purchased a coordinating yard of fabric for the back. Basting it together with a layer of batting, I purchased a ton of black embroidery floss for the next step: quilting.

DSC03323

DSC_0343

I traced each contient. Europe would have killed me if I traced each country. And I will tell you this, the process takes a long time (as hand-sewing does), but I think it is totally worth it.

DSC_0331

I did not hide the knots on the back, My initial thought was the quilt would be cute hung on the wall, so hiding the knots wouldn’t matter. By now I wish I took the extra time and did it anyways.

IMG_1875

IMG_1876

Once I finished quilting, I cut down the border to prepare for the binding. I only wanted an 1/2 inch edge.

DSC_0339

For the binding, I cut 2-inch wide strips. See how I finish quilts here.

Oh Baby (Quilt)

The day after my brother and sister-in-law announced they were expecting, I found myself in a fabric store freaking out over all the adorable baby patterns. I saw this fabric and knew I had to do something with it. Let’s face it, a baby opens up a whole new genre of crafts that can be made, and I am so ready to embrace it.

Naturally, the first thing that came to my mind was a quilt. So I bought a yard of this fabric, a yard of this amazing plaid fabric (that matched perfectly, I might add), and 4 inches of an orange polka dot fabric (that matched the monkey) for the binding.

To assemble the quilt, I decided to not cut up the fabric but keep the pieces whole. This made it super easy and super fast to make. I used the adhesive spray to stick the fabrics to the batting, and then I simply quilted boxes using the plaid side as my guide.

Finally, I attached the binding (see instructions on earlier posts). I was able to make the quilt in less than a day, and it might be the most adorable thing I have ever made.

I can’t wait for the newest member of this family to get here, but in the mean time, I’m sure there are many crafts I can make until then.