Something Beautiful

When I lived in Washington D.C. last summer, I would wander the halls of the National Museum of Art and feel envious of the painters who were allowed to spend hours recreating the masterpieces that hung on its walls. On certain lazy Sundays, I like to take up the practice of mimicking another’s work. Though it may sound strange, I find the practice rather relaxing, but truly, studying the stroke and technique of another painter is the best way to grow as a painter yourself. Today, I decided to bask in the art of flowers (ones first created by Erin Gregory).

IMG_2924

Advertisement

Quilting with Moroccan Fabric

IMG_2475

Having traveled to the cold land of the hot sun –  aka Moracco – twice now, I have found myself with several meters of fabric that are calling to be used. On my second trip to North Africa, I purposely bought a meter of a different color of the same fabric with the idea of making a quilt. With such beautiful fabric, I wanted to keep the quilt simple, so I mapped out a basic square pattern – one that could easily be used to make a t-shirt quilt.

IMG_2812

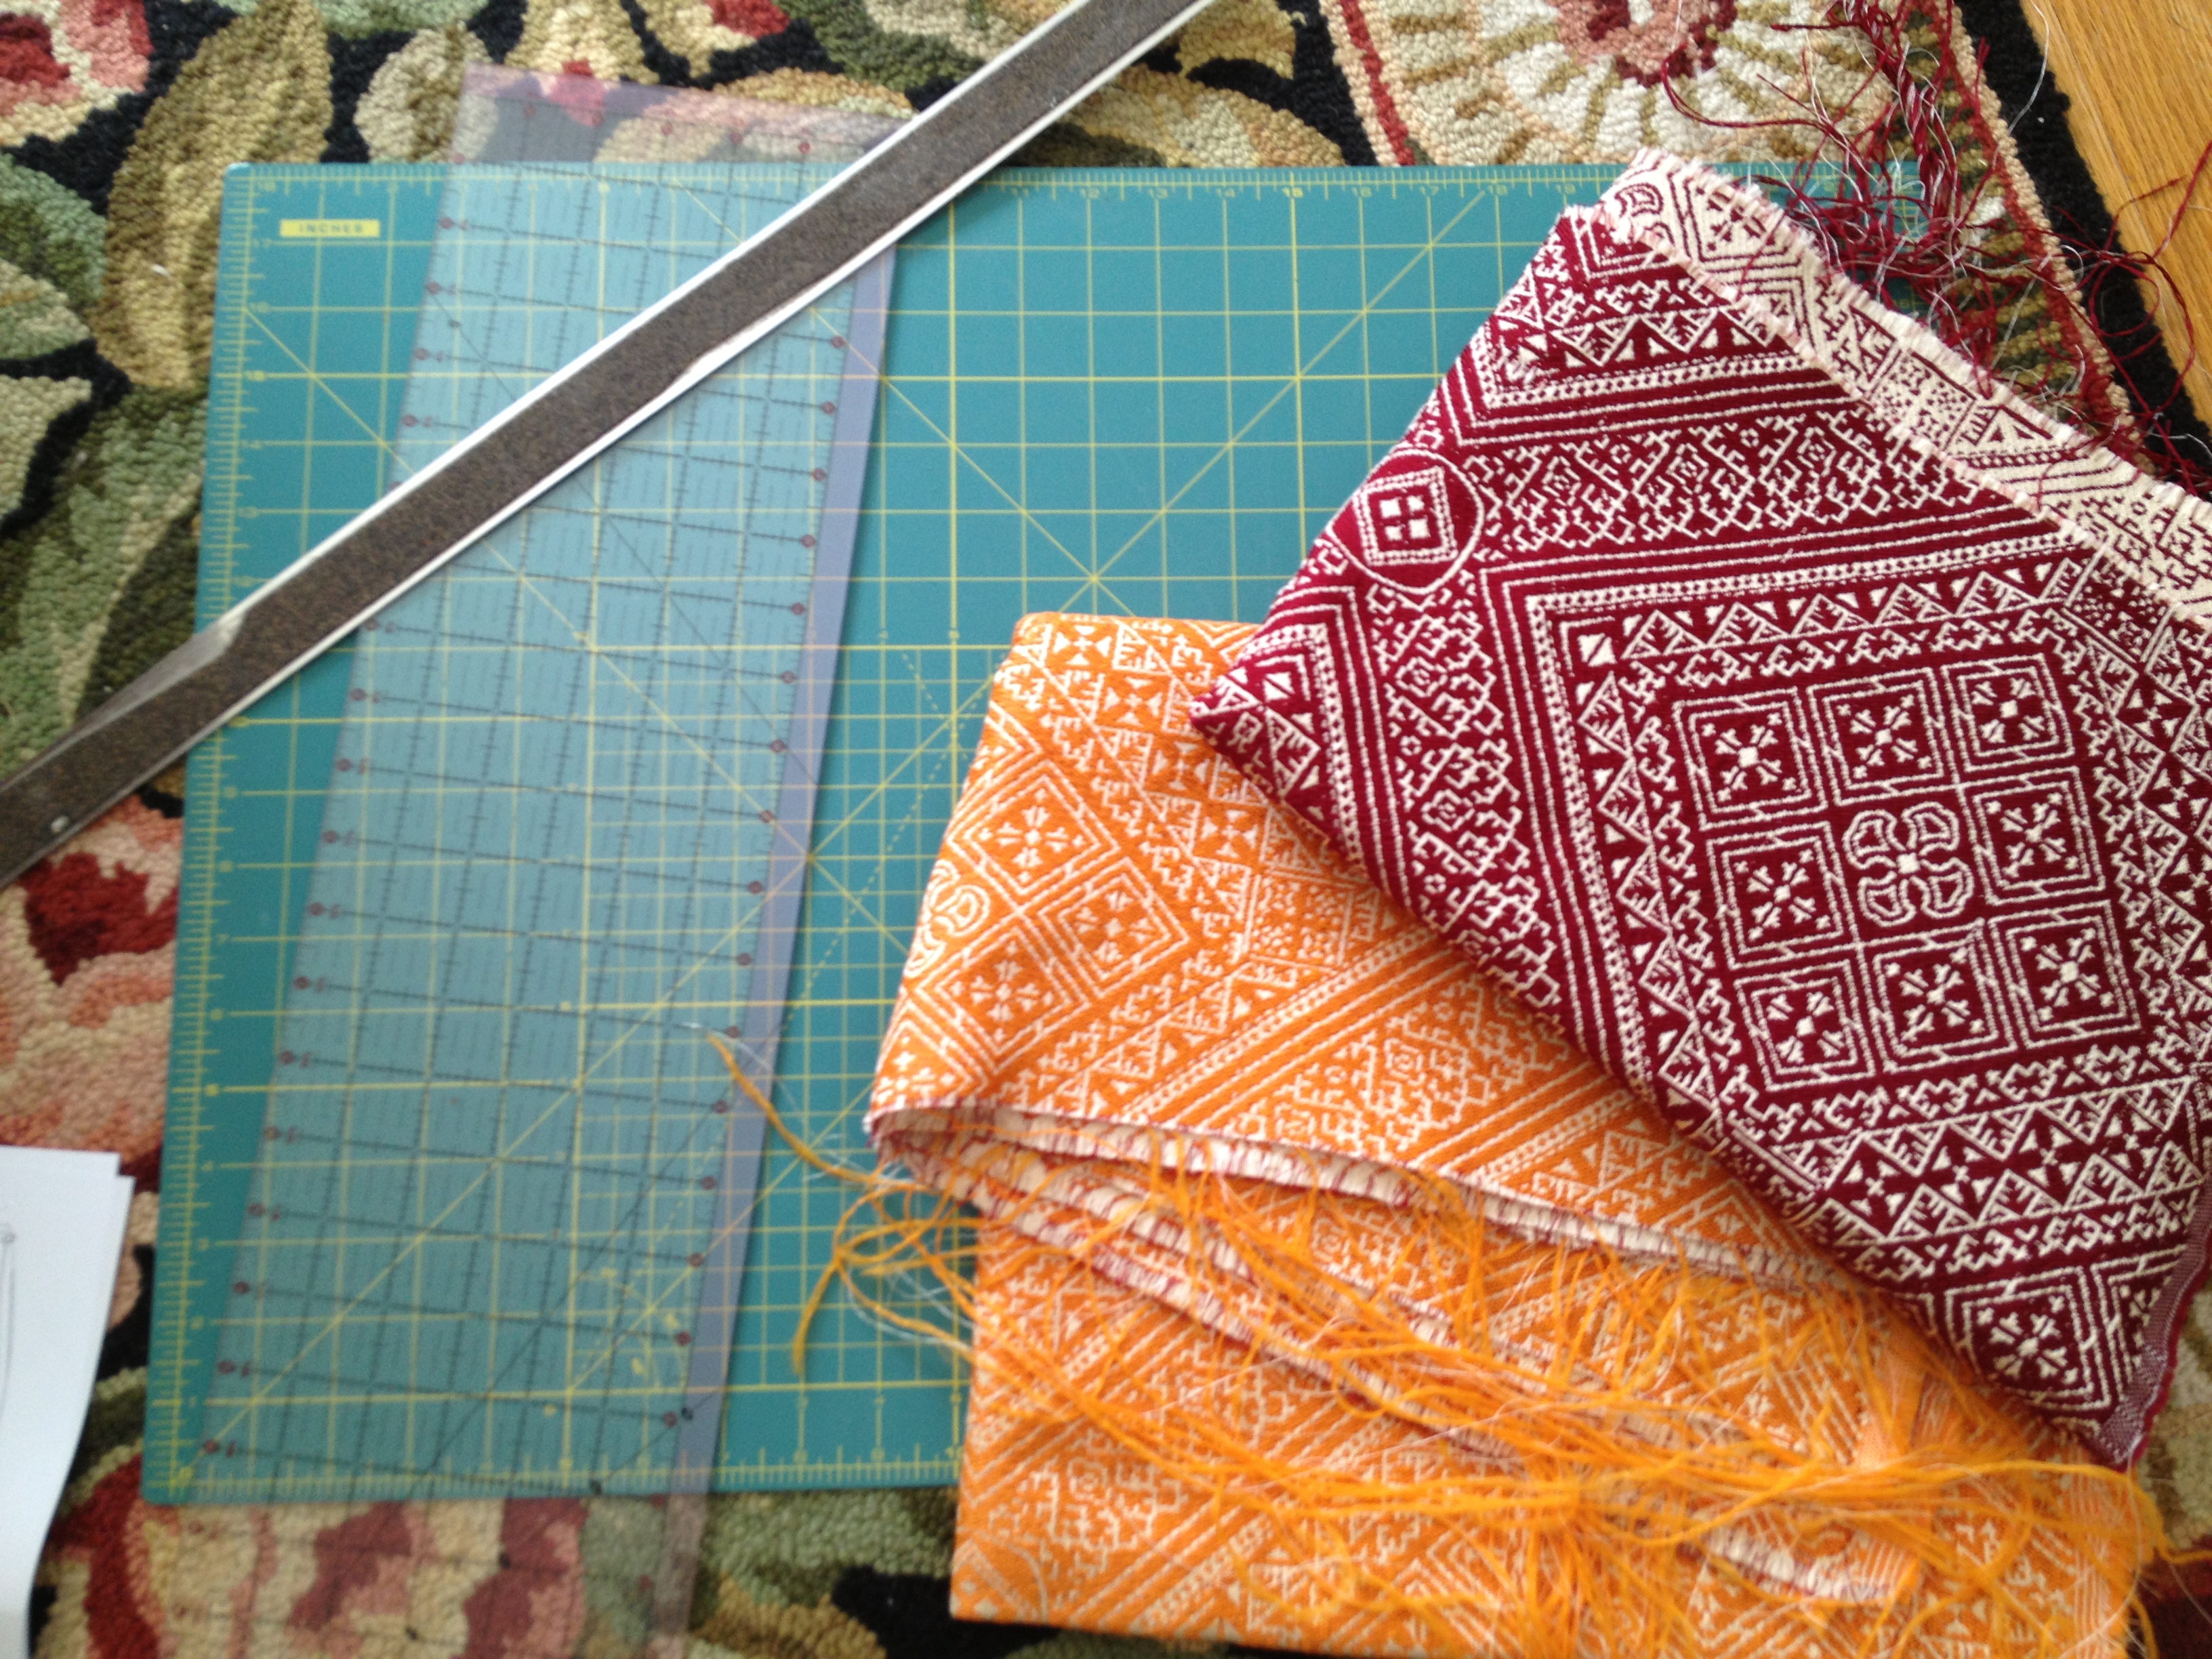
You can see the dimensions I worked with in the picture above. The squares were 11.5 x 11.5 inches, and I used a 0.5 inch seam allowance.

IMG_2509

Since I was working with woven fabric, I prevented frayed edges by using the basic zigzag stitch to act like an overlocking stitch. It  was a tedious process, but completely necessary. Fabric can still fray even after you stitch the pieces together.

IMG_2801

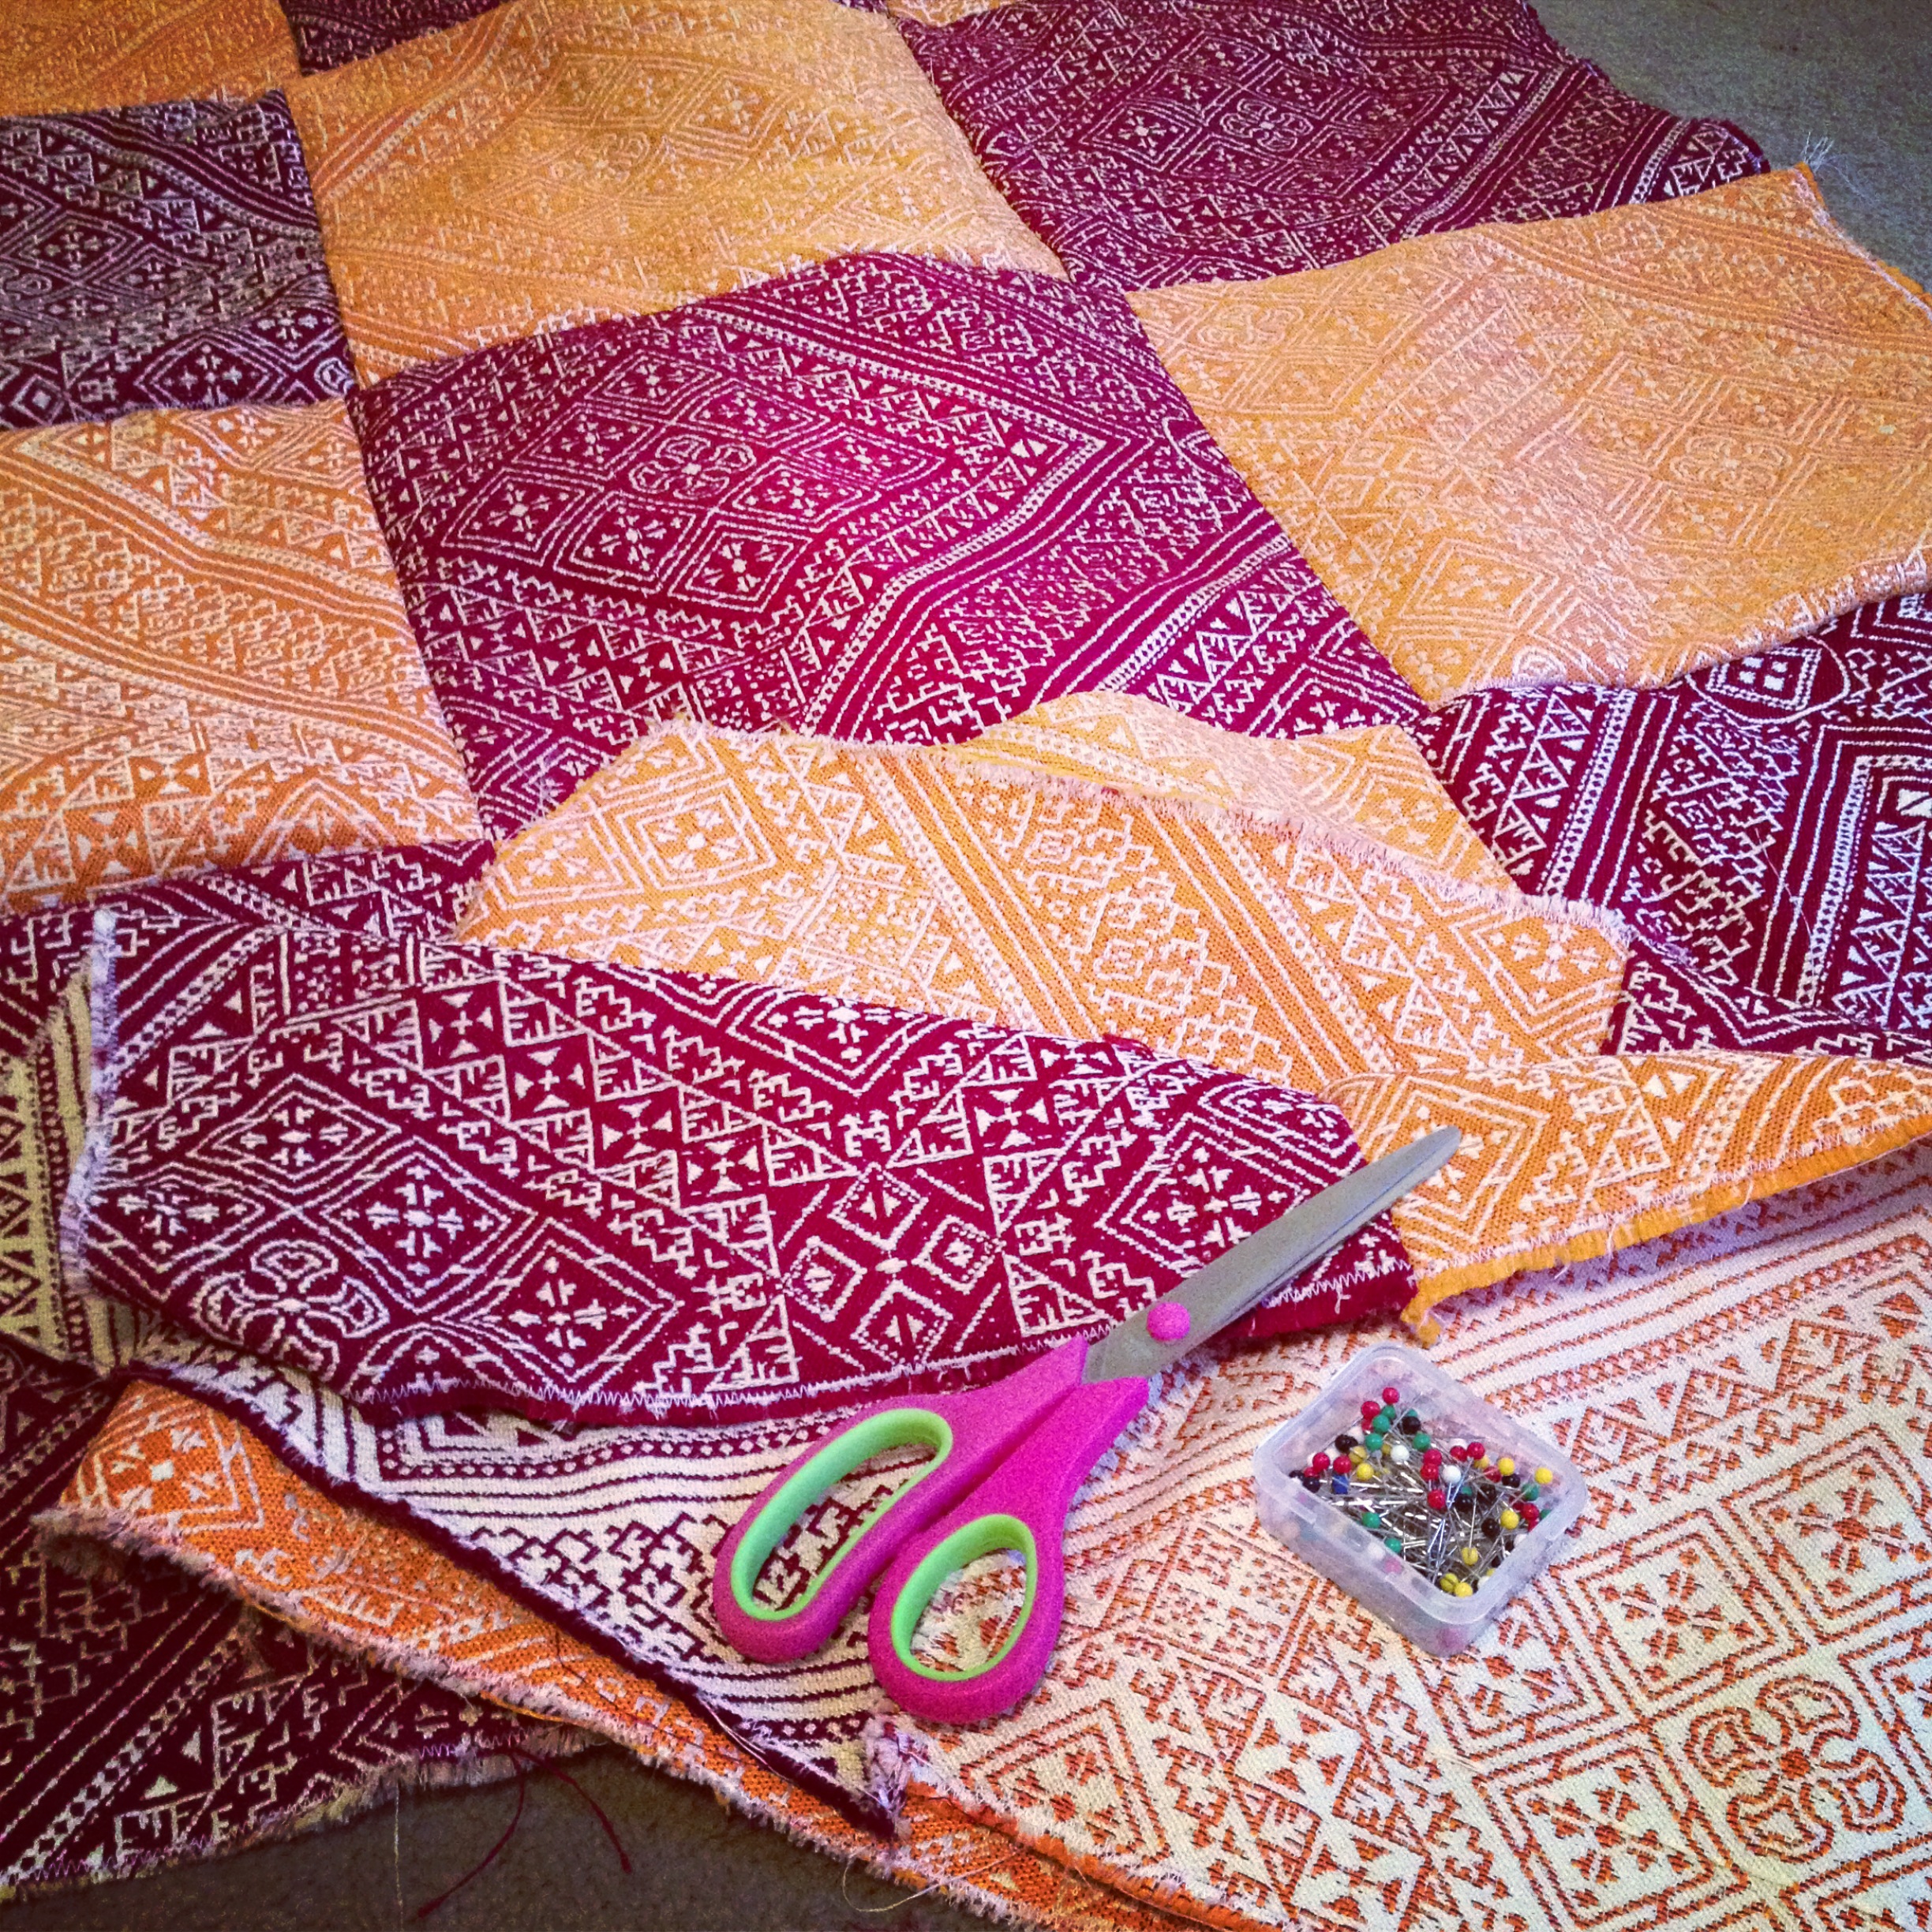
Once I finished the edges, it was a quick process to sew all of the individual squares into the rows and then the rows into a quilt. Again, I used a 0.5 inch seam allowance throughout.

IMG_2807

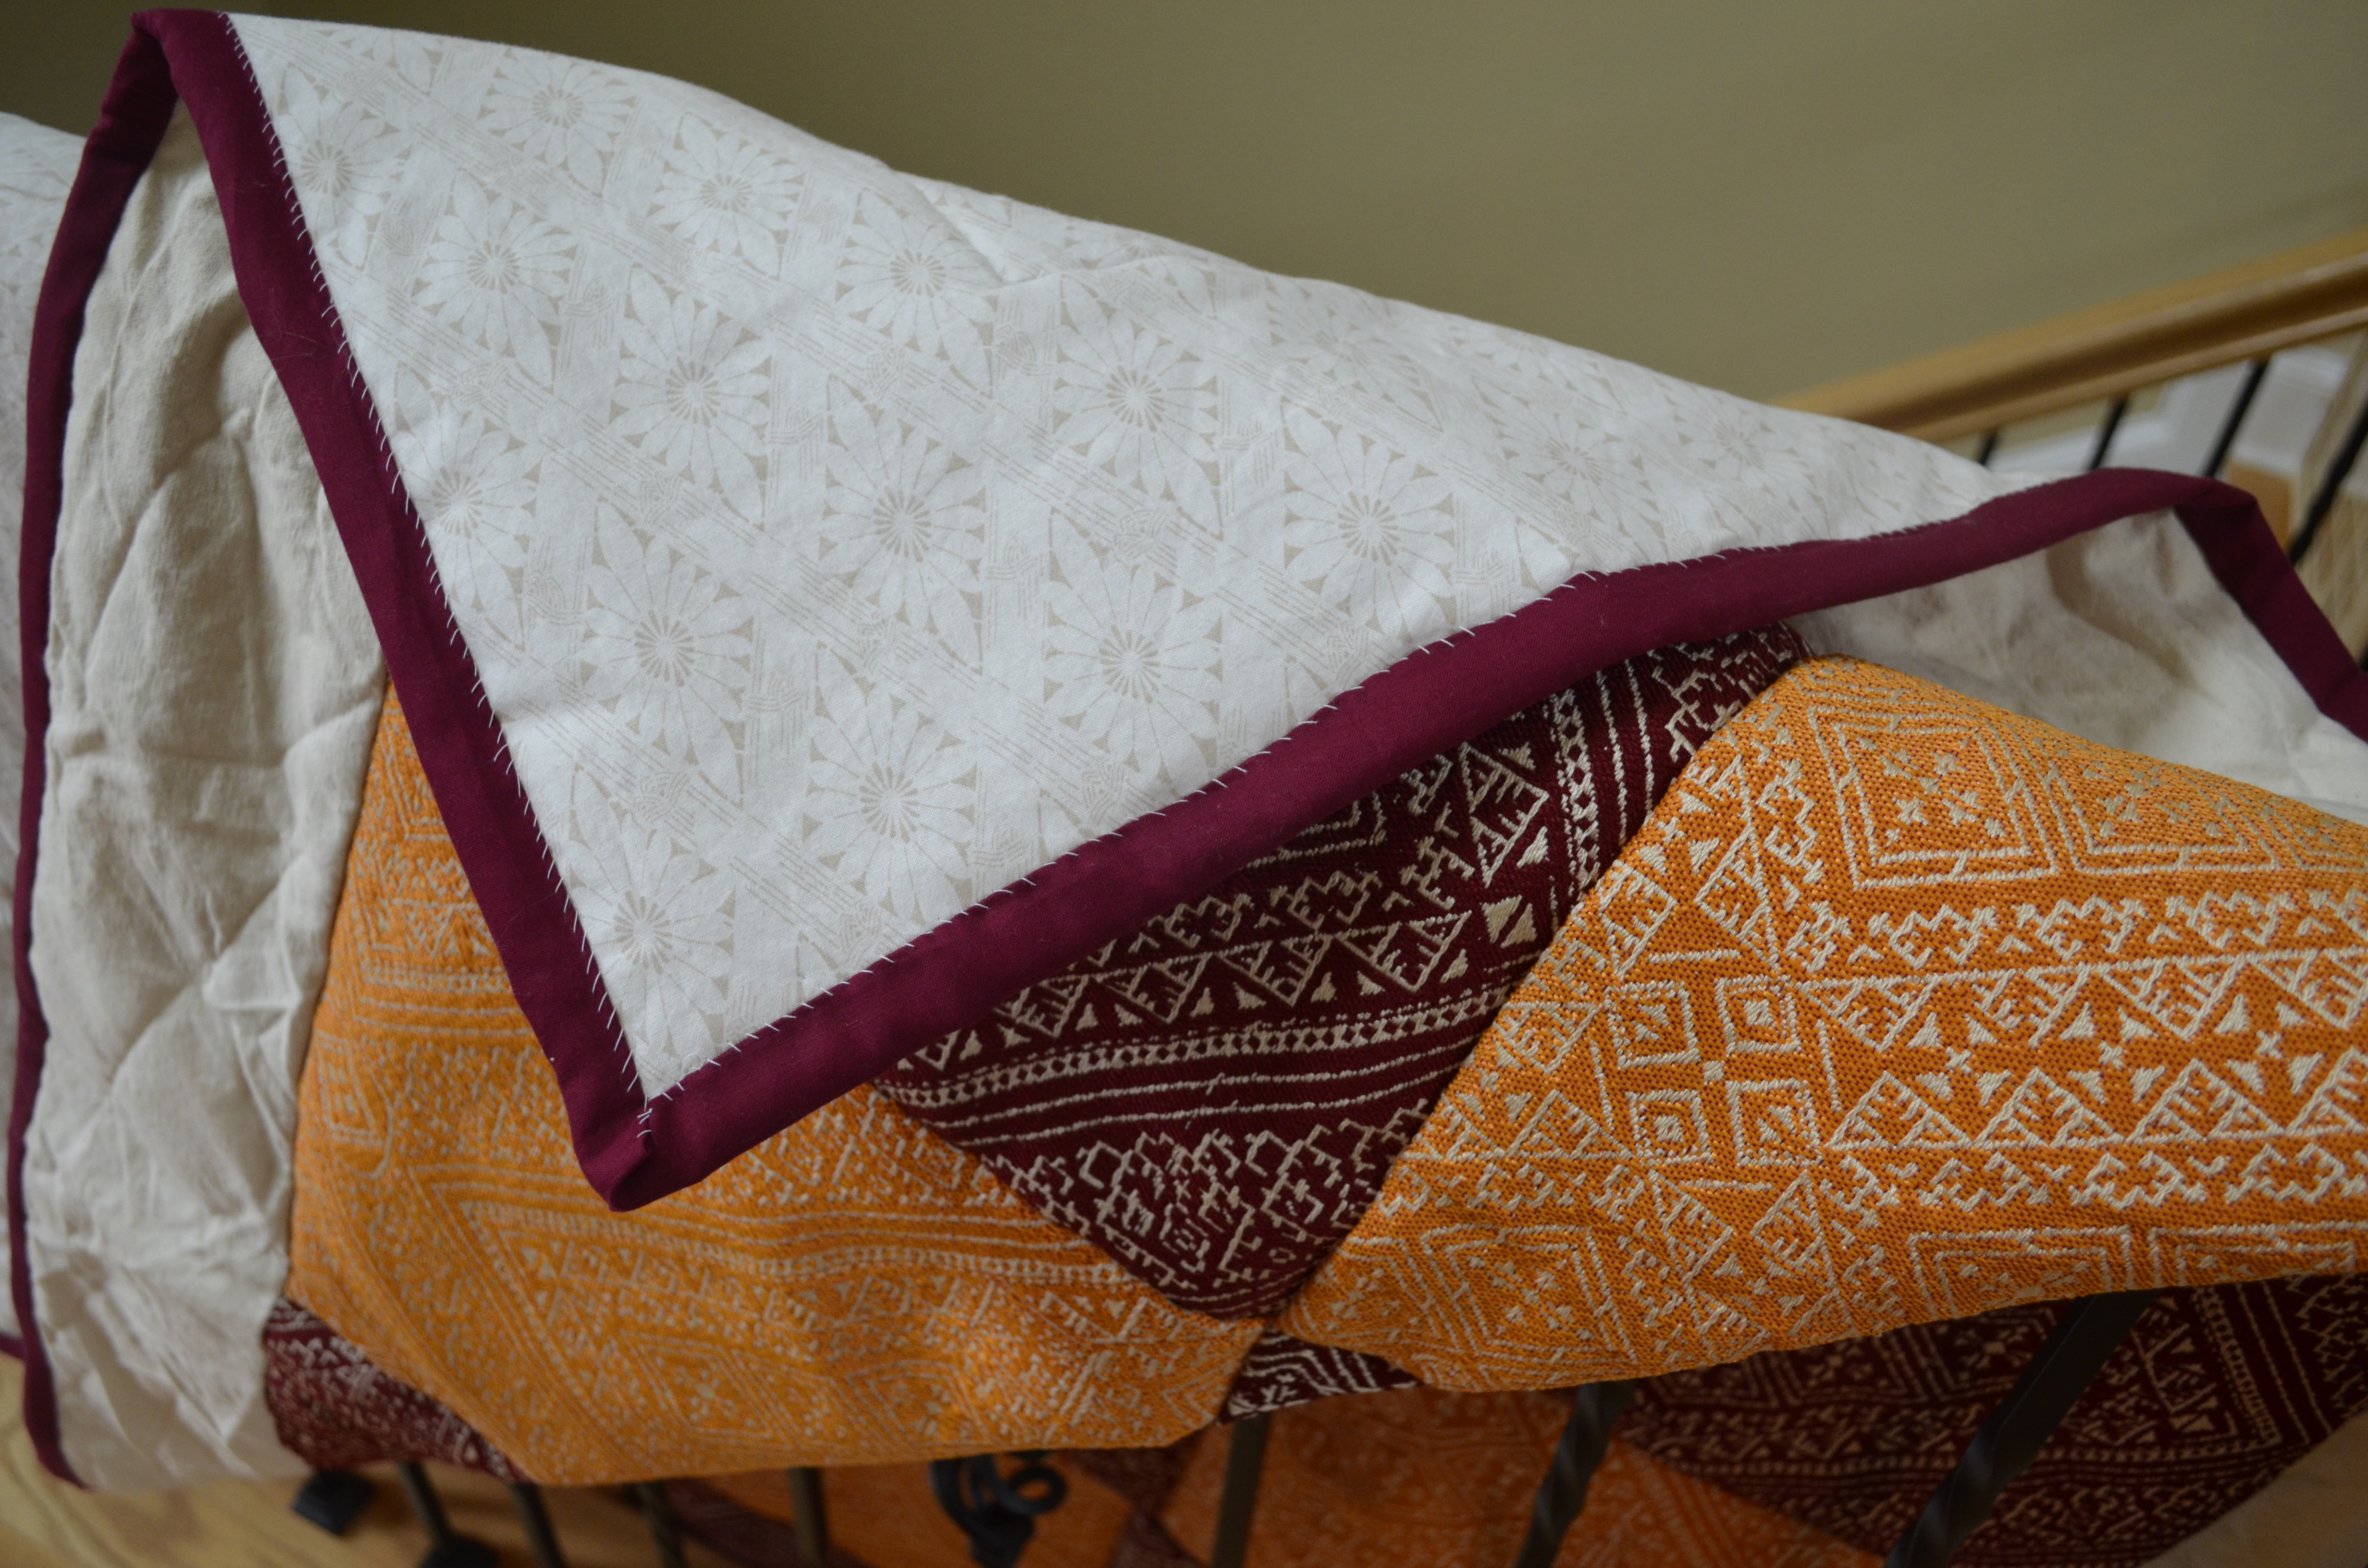
With the middle squares in place, I used a off-white canvas fabric to act as a margin of color – another simple touch to highlight the beauty of the fabric. The strips were 7 inches wide. I used the canvas fabric to match the thickness of the Morroccan fabric, but for the back fabric and binding, I used cotton. To see how I bind quilts, you can visit my previous post on the matter.

_DSC0061

I couldn’t be more happy with the finished product. It achieved the goal that I wanted – something that could show off the beautiful, hand-woven fabric as well as encapsulate my memories of purchasing the fabric on my travels. You just can’t find fabric like this here in America – well, as least not for the price that I paid for them.

_DSC0064

I found the fabric for the back side of the quilt at Handcock Fabrics, and it worked perfectly.  For the back side, I think the fabric needs to be simple enough to not trump the front, but interesting enough to add to the overall look of the quilt. This fabric did just that.

_DSC0073

This pattern is easy and simple to recreate since pieces are large, and you work with straight lines. Please feel free to ask any questions you have; I would love to help you as you work to create a quilt for yourself.

3rd Grade Art

IMG_2523Thanks to the wonders of Facebook, a friend sent me a picture of a painting I made in the 3rd grade that still hangs on the walls of my elementary school. Crazy! She informs me that it decorates the walls of the school’s media center. I feel so honored.


Growing Carrots in a 5-Gallon Bucket


Since I graduated from college three weeks ago, my new roommate says I have taken on a new obsession to help with the transition: gardening. (A little bit of dirt is good for the soul.) A few years ago, I heard of a neighbor growing carrots in a 5-gallon bucket, and finally, I decided to try it out for myself.
IMG_2711

This project began at my parent’s house (because they have tools and I do not). First step was buying the list below:

  • 5-gallon bucket (The Home Depot had them on sale at the end of each aisle. A bucket cost about $2)
  • A bag of rocks
  • Potting soil
  • Carrot seeds 

I also needed things I found in at my parent’s house

  • Hammer
  • Screw driver

IMG_2712

Before I can pour in the dirt, I prepared the bucket by poking holes in the bottom using a hammer and screwdriver. I found that the holes I made near the center of the bucket caused cracks (which I did not want). So, just beware that can happen. IMG_2713

With holes finished, I put a 3-inch layer of rocks at the bottom of the bucket. I purchased river pebbles, but if I was to do it again, I probably would have used larger rocks.
IMG_2714

Next, I filled the bucket up with dirt. IMG_2715

I read online that carrot seeds should be sown in about 1-inch deep of dirt. And that I could sew a good amount of seeds (like 40-60). So I did. (This is the point of the project where you should know that I am 100% a novice gardener. I can tell you what I did, but I do not know if this is correct.)IMG_2718

But with that being said, after a week of being in full-sun and being watered everyday, I had sprouts! I am not sure how long this growing process will take, but I will need you updated. The lesson to be learned – If I can do it, so can you!IMG_2791

A Stately Touch

IMG_2138As a gift for a friend who lives abroad, I made her some customized tea towels that would help remind her of home. The project is simple and cheap to make. I purchased the towels at Target for less than $3, and I used scrap fabric and Heat n’ Bond adhesive to make the appliqué.

IMG_2135To use the Heat n’ Bond, I traced my chosen state (Georgia) off my iPad. I then traced the reverse image on the back side of the Heat n’ Bond paper. Using an iron, I attached the paper and then cut out the shape. I then ironed on the fabric to the towel and used my sewing machine to secure it in place.

IMG_2140

And then, because it is so darn trendy, I added a small heart. (Don’t we always say, the home is where the heart is?) I also made a towel for the country she currently lives in.

Voila – a simple, easy gift for a new home.


All is Well

Somedays, you have to let yourself improv with your creativity. I found this yellow chevron-print fabric in the scrap section of the fabric store, and I decided it needed to be a background for something. Yellow is not my go-to color, but occasionally, I try to bring some bright colors into my life. To compliment it, I went to the default: felt.

IMG_2019

I knew I wanted to use the phrase, but the idea for the flowers just came to me. I played around with cutting out different sizes and using different colors, but I think I was smart to keep it simple and use two different flowers.

Once the felt was sewn on, I mounted the fabric to a flat canvas. Using clear packaging tape, I wrapped the fabric around the board and taped it down on the back.

IMG_1945

DIY Cloth Books

I have dedicated the month of January to finishing the project I have purchased materials for. Two summers ago, my grandparents took my cousin and I to Amish country in Ohio. In an adorable quilt shop, I found this fabric that had a tutorial to make a cloth children’s book. Naturally, I purchased a fabric set of Benjamin Bunny and Peter Rabbit.

DSC_0298

Now, I wish I purchased 3 more sets of fabric. The pages were laid out over a yard of fabric. Where I needed to cut was marked by dotted lines, and the instructions were listed at the bottom.

DSC_0293

DSC_0295

The book is made up of three sets of two panels each. To make a page, I basted a layer of filling (cut to the same size of the panel) to the wrong side of one of the panels. Then pin the corresponding panel to the other – right sides together. I used a 1/4 inch sewing allowance, leaving space to flip the book right-side-out. To finish, whipstitch the hole together, and press with an iron.

DSC_0299

Repeat this with the next 2 pages. Once the three pages are finished, simply layer then in order, with the cover on the bottom, and sew a seam down the middle of the book. And that’s it – you have yourself a book.

DSC_0301

My book is not perfect, which I love. It is definitely homemade!

DSC_0306

DSC_0311

DSC_0314

Two Years In

20121221-235128.jpg

With another year comes another milestone. Today marks this blog’s 2nd birthday!! And all I can saw is thank you.

Following my summer hiatus, I logged back into WordPress and found an average of 30 visitors a day. And this is after four months of posting nothing. I don’t know who all of you are, but I am grateful for your loyalty and encouragement.

I’ll keep posting if you keep coming back.