Woodland [Felt] Creature Mobile

img_2561

Felt and woodland creatures are a pretty adorable combo! I created this sweet baby mobile for friend preparing a nursery for her son. The theme: animals.

img_2556

I’m pretty proud of this project because I created the animals without templates. It took me a couple tries to get the right look, especially for the raccoon, but that’s why we sketch things out.

img_2559

Once I was happy with the sketches, I used them as a template to cut out the felt. Working with a front and back piece for each animal, I added details, sewed the pieces (right sides) together and used fiberfill to make them slightly plush.

IMG_2587

To create the mobile, I initially thought I would use an embroidery hoop for the structure. But then I found this piece of wood at JoAnn Fabrics, and I thought it really added to the “woodland” theme.

IMG_2593

I forgot the technical name of the hooks I used, but they screwed into the wood board really easily. I used twine to hang the animals. I even added a few felt leaves as an final  touch.

IMG_2594

Advertisement

Let’s Embroider a Logo

Gift are best personalized.

My friends at my previous job – Oxmoor House – reached out to me and asked if I could create a patch for a gift they were working on for a coworker who was moving on to new job. Of course, you can’t say no to a friend. So I got to work on the patch while they hired someone on Etsy to make this knitted iPad case.

img_2852

I’ve never tried to copy a font before (most of what I do is free hand), so this was an interesting challenge. Luckily, I figured it out in about 15 minutes. I could have done a better job stitching the patch to the case, but oh well, the imperfection adds to the homemade charm.

img_2835

Stages of the [Felt] Moon

FullSizeRender 5.jpg

Oftentimes, when an idea pops into my head, I question its originality. People say there’s no such things as an original idea anymore… right?

After finishing this project, I have seen so many references to the moon phases in others’ craft projects and art pieces. Original… maybe. But the truth is, we all influence each other.

To be fair, I have always had a love of space (as several posts on this blog can prove.)

FullSizeRender 4.jpg

After the idea came to me, it only took 30 minutes to complete this simple project. I had circle of wood that I mounted the felt to with Mod Podge, and I used tape to attached the circles on the string. (My 8th grade science teacher should be proud that I remembered the moon phases without having to reference the Internet.)

IMG_2569.JPG

Travel-Inspired Embroidery Baby Announcement 

img_2488

I am oftentimes asked to create something based on a piece of inspiration a person has found. In the case of this project, a friend had seen a swatch of fabric with a pattern made out of travel tags representing cities all of the world.

This friend, Rachel, is a great traveler, and as the birth of her second child approached, she asked me to make a embroidery baby announcement based on the fabric swatch.

Let me tell you, this project was fun!

I asked Rachel to pick four cities she wanted me to represent, and she was kind to let me design the rest. I decided to keep it simple. I used airport codes, but for cities with more vague codes like OSL, I thought it was best to include the name of the city.

I worked to complete the eight tags in the months leading up to her due date, and then finally, once little Elliott was born, I stitched in his name and info. I also did a zig zag stitch to overlock the edges to avoid unraveling before Rachel could get the piece framed.

A Black (Copy) Cat Quilt

IMG_1607

Over the 4th of July, my family lost our black cat, Bosley. He might have been a stubborn, little cat, but we sure did love him. Awhile ago, with the help of Pinterest, I stumbled upon mermag.blogspot.com and this fantastic pattern for a black cat quilt. This fall, I decided to make it for my mother’s birthday. I figured that a quilt would help keep her warm this winter since Bosley would not be by her side. The final result was fantastic, and thanks to Merrilee’s pattern, it was quick and easy to make!

IMG_1453

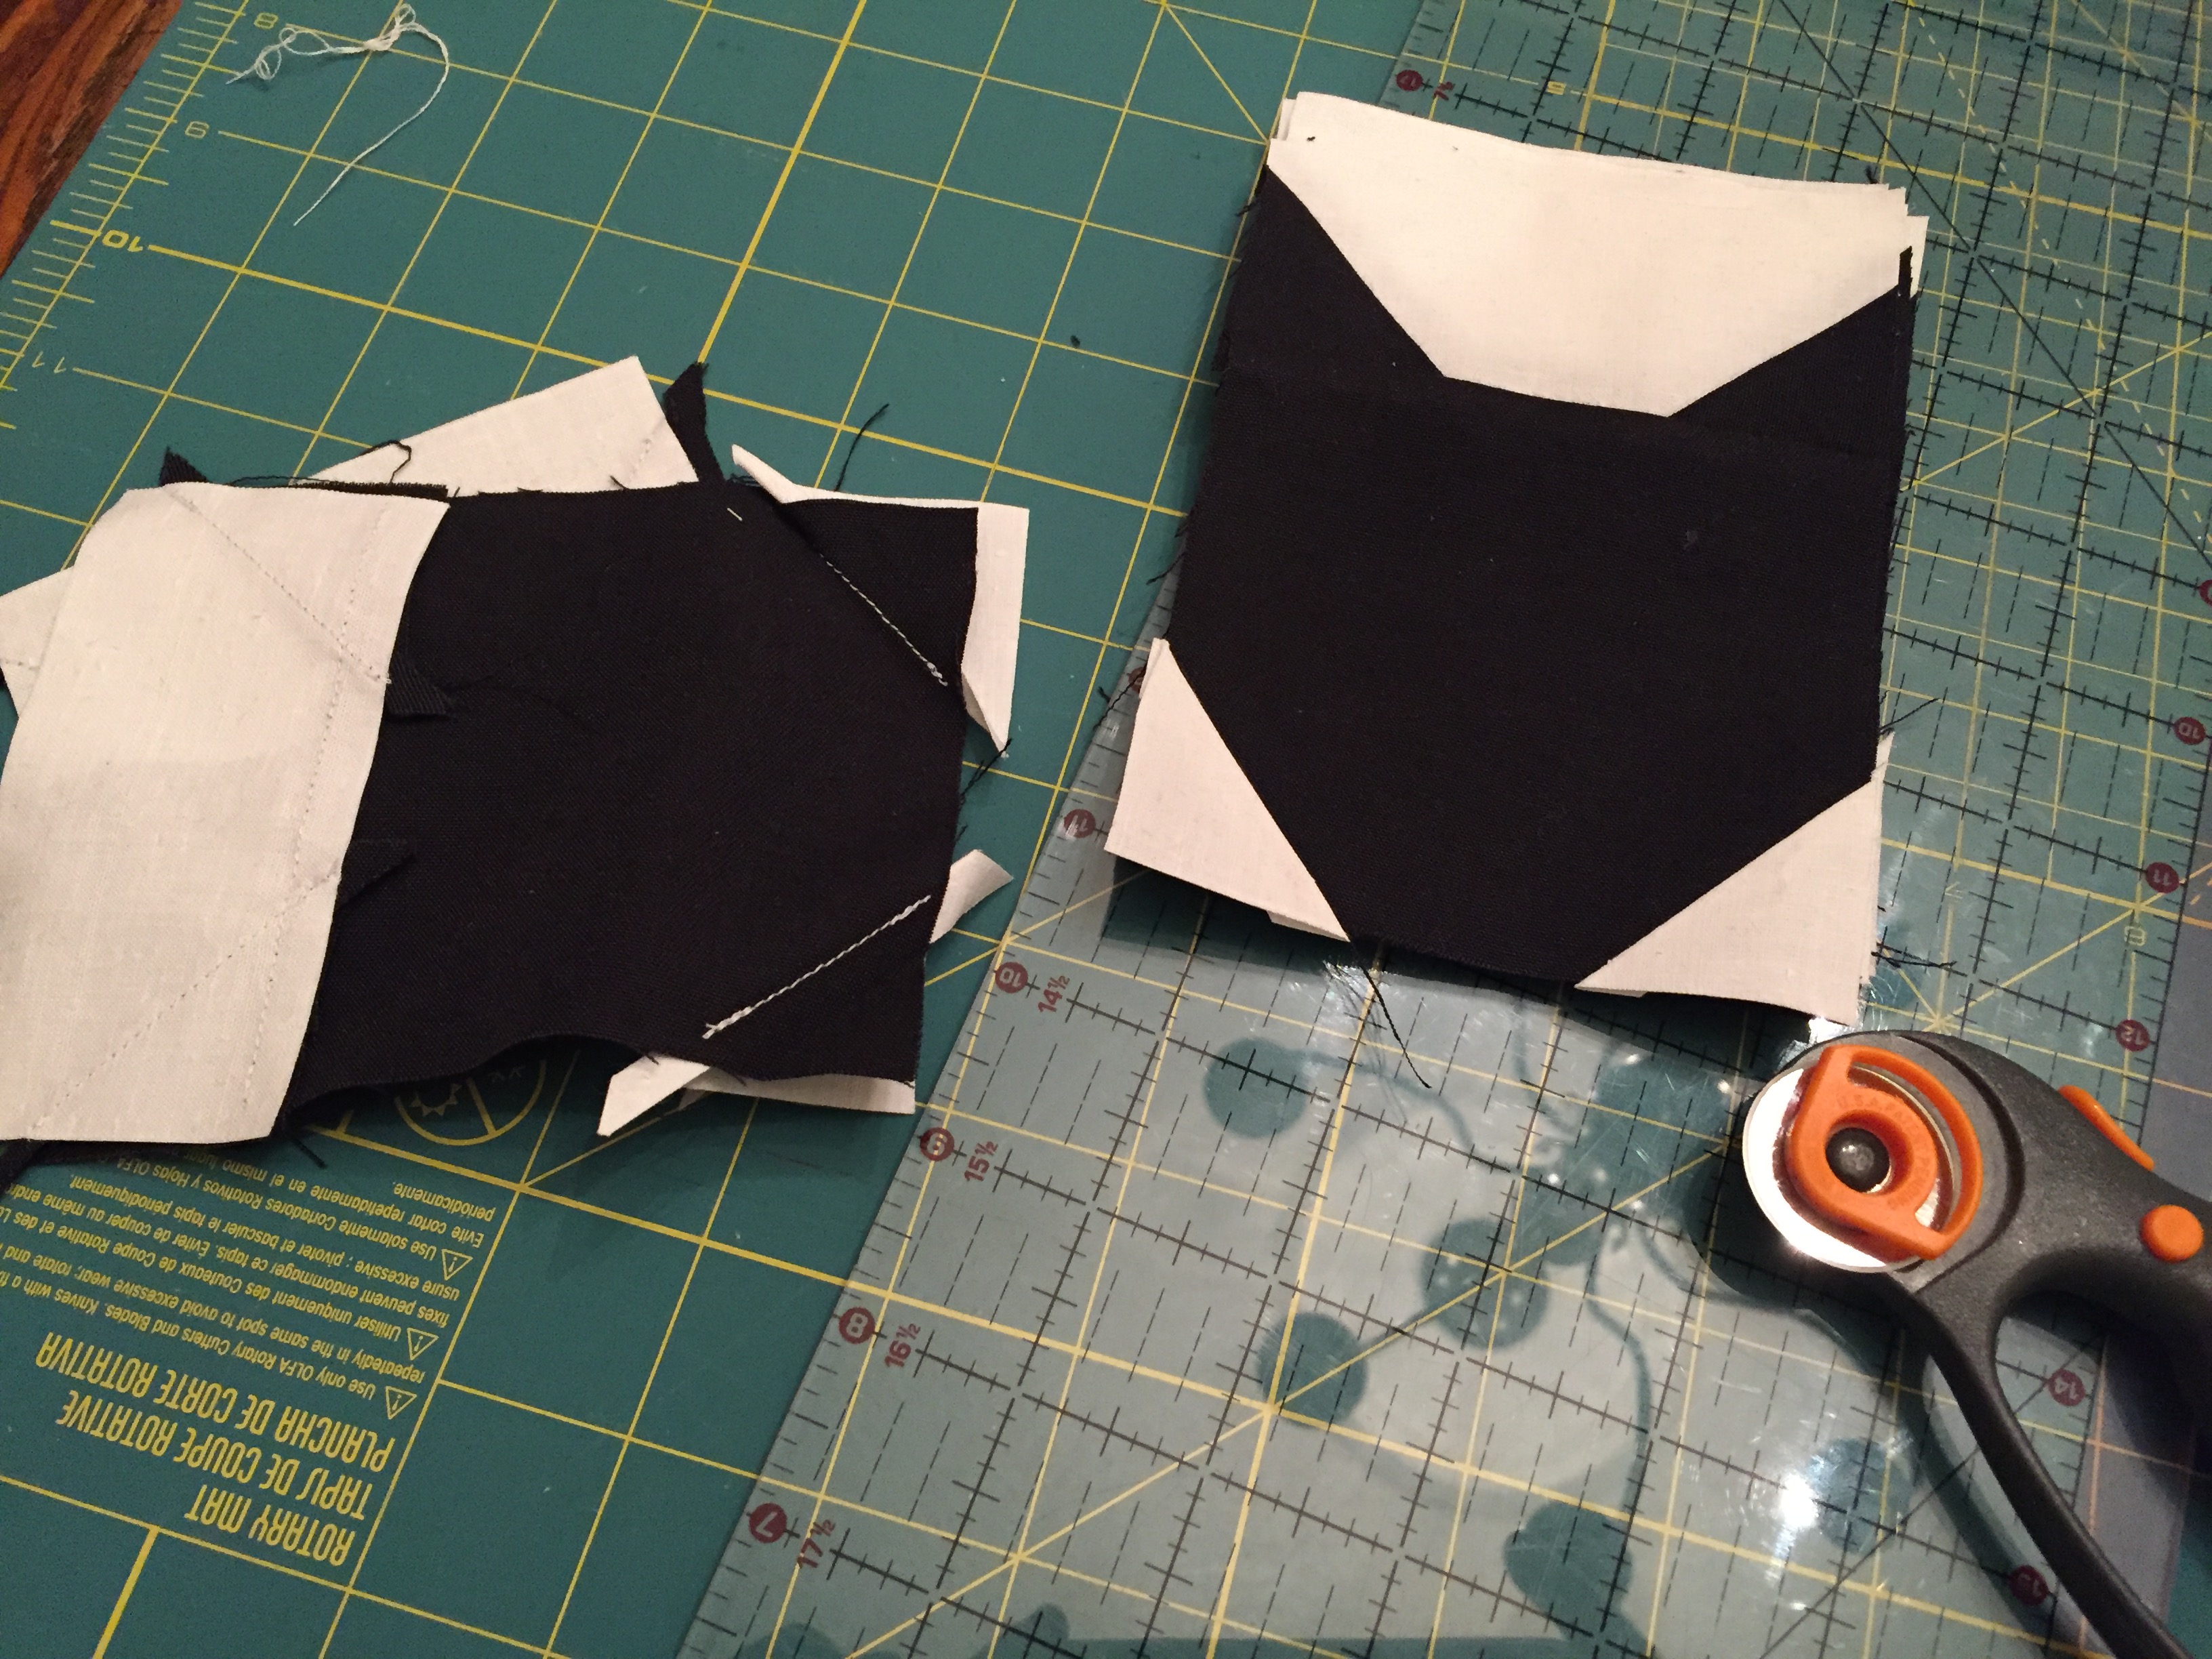
The black cat blocks require 6 pieces.

(Top) Large white rectangle = 9 x 3 inches, 84 pieces
(Left) Medium white rectangle = 3 x 5.25 inches, 84 pieces
(Middle) Black square = 4 x 4 inches, 42 pieces
(Right) Small white rectangle = 2 x 4 inches, 42 pieces
(Bottom) White triangle = 2 x 2 inches, 84 pieces
(Bottom) Black triangle = 2 x 2 inches, 84 pieces

IMG_1533

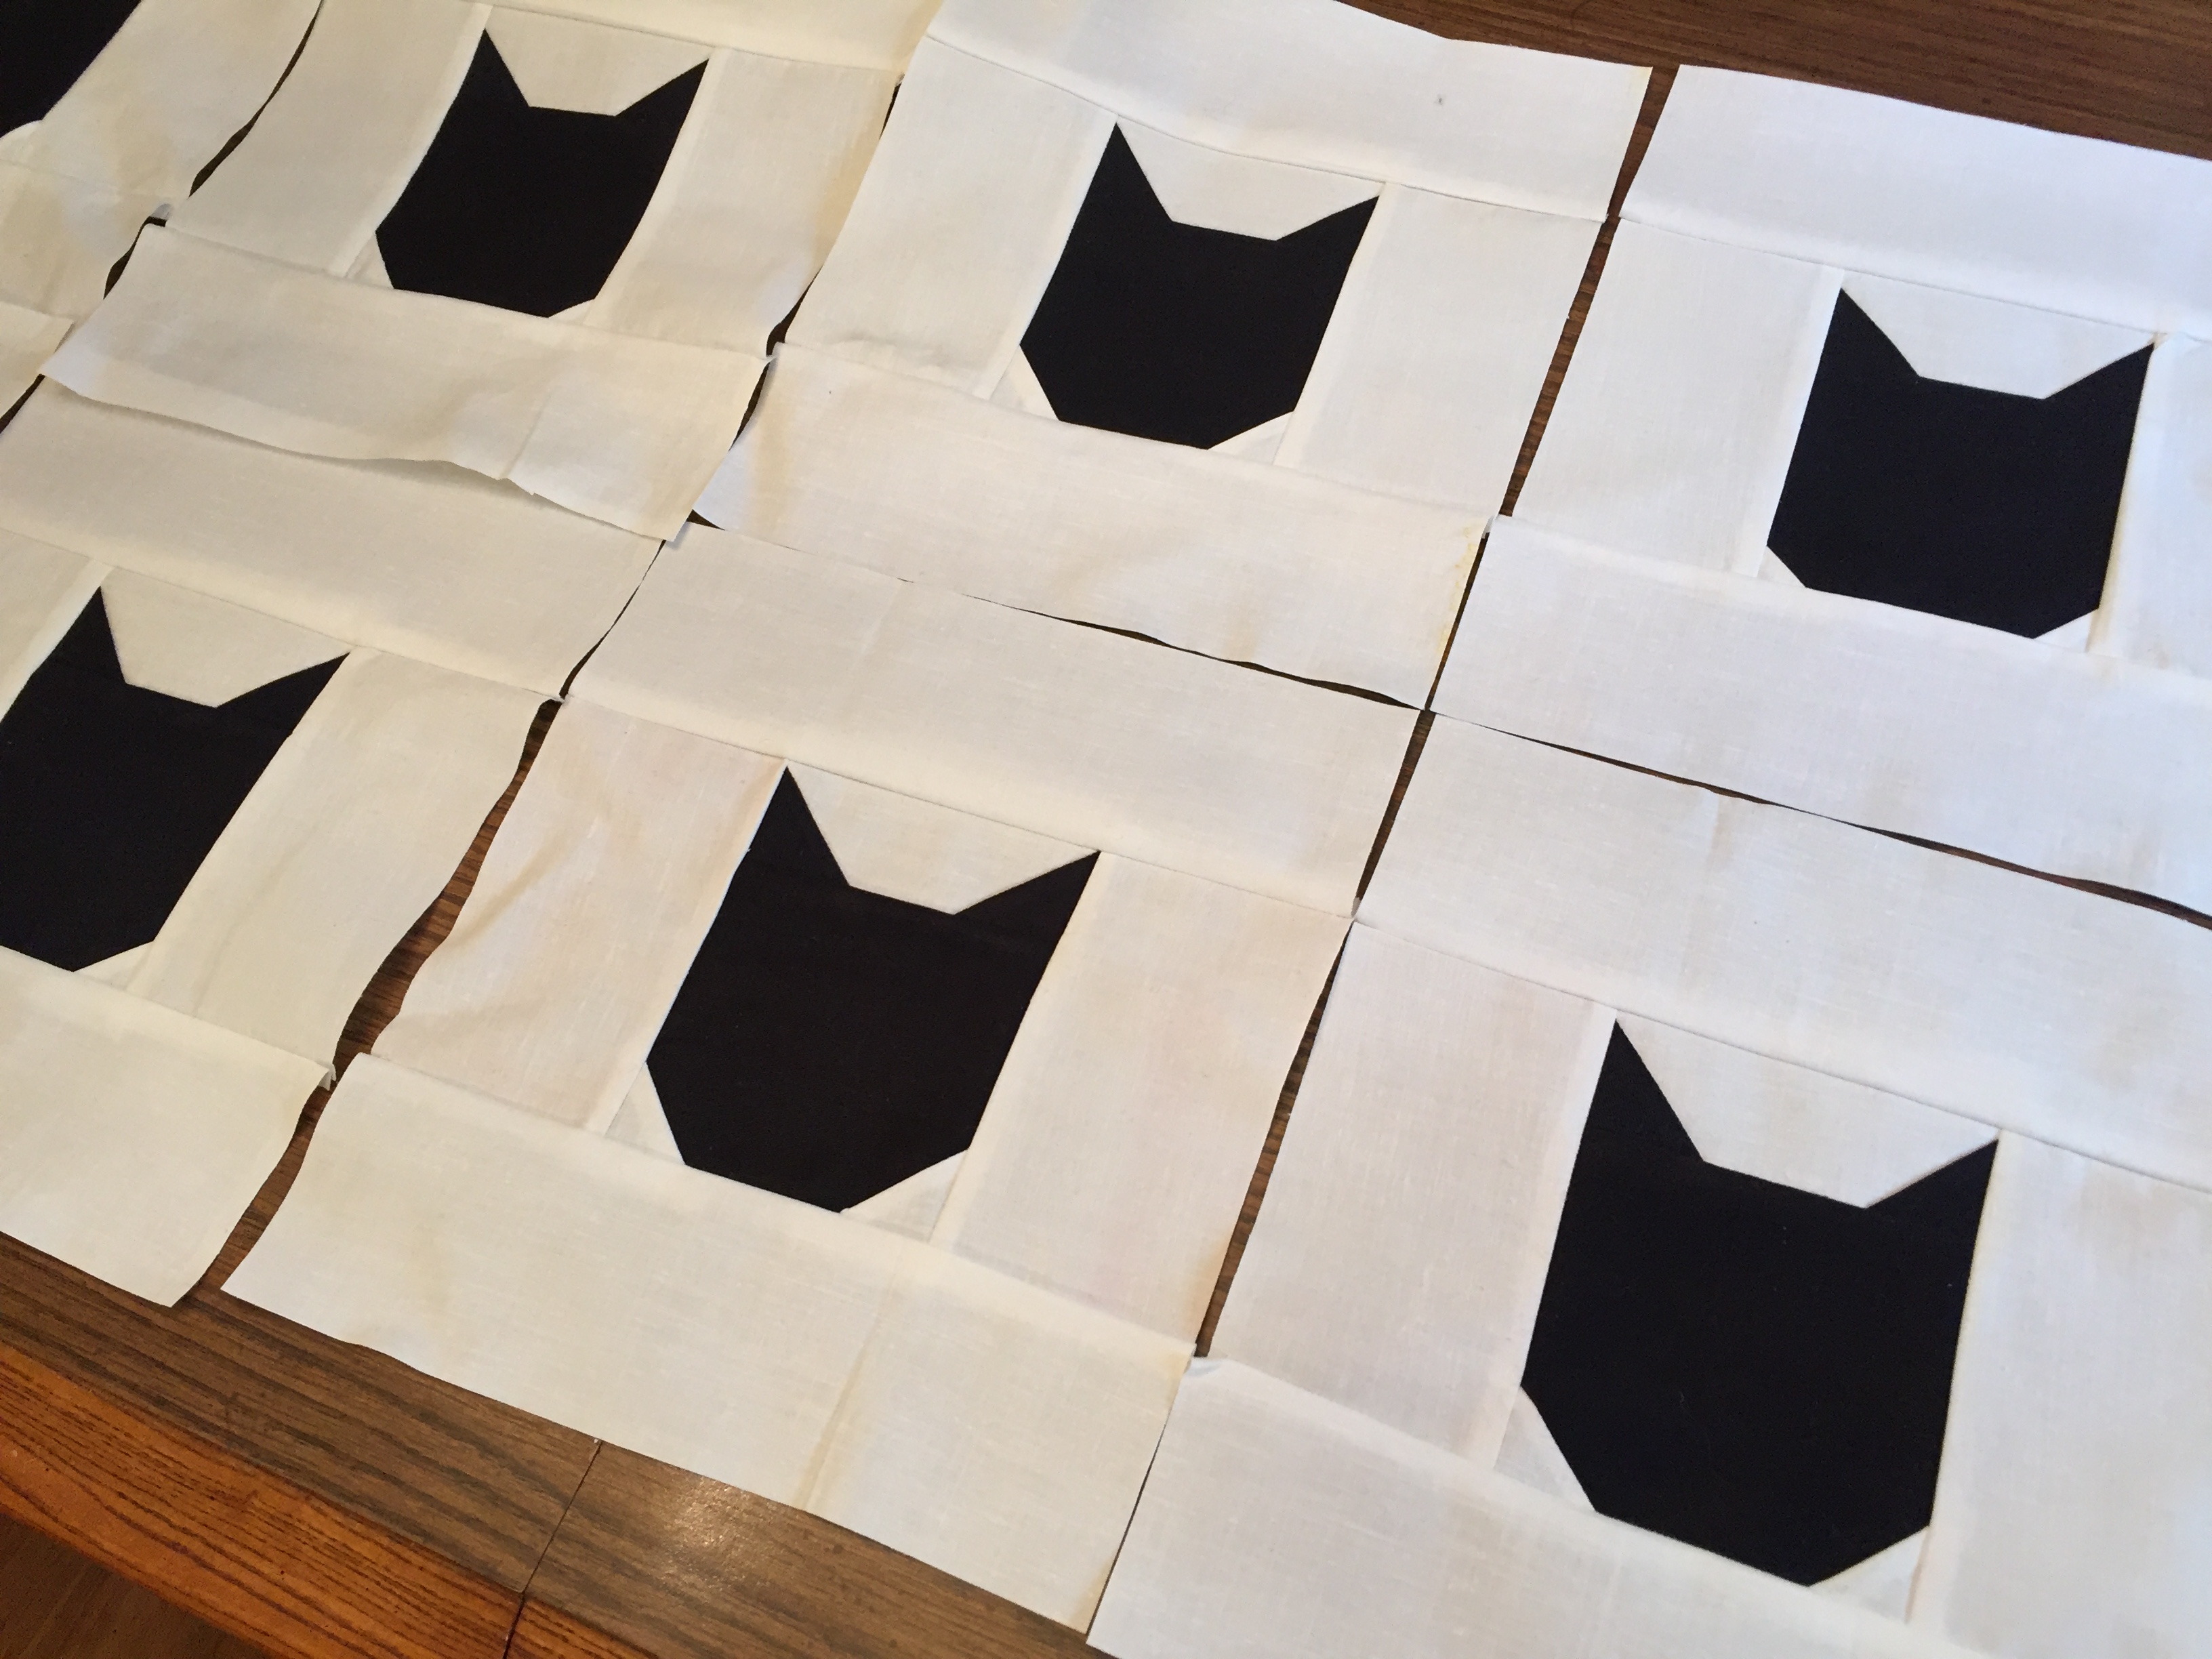
Mermag’s blog post has a wonderful step-by-step visual guide for sewing the blocks together. You start with the ears and work to create the sweet little face.

IMG_1460

I made 42 blocks in total, and sewed them together with a 1/2 inch seam allowance. The quilt was 6 blocks wide and 7 blocks tall.

IMG_1465

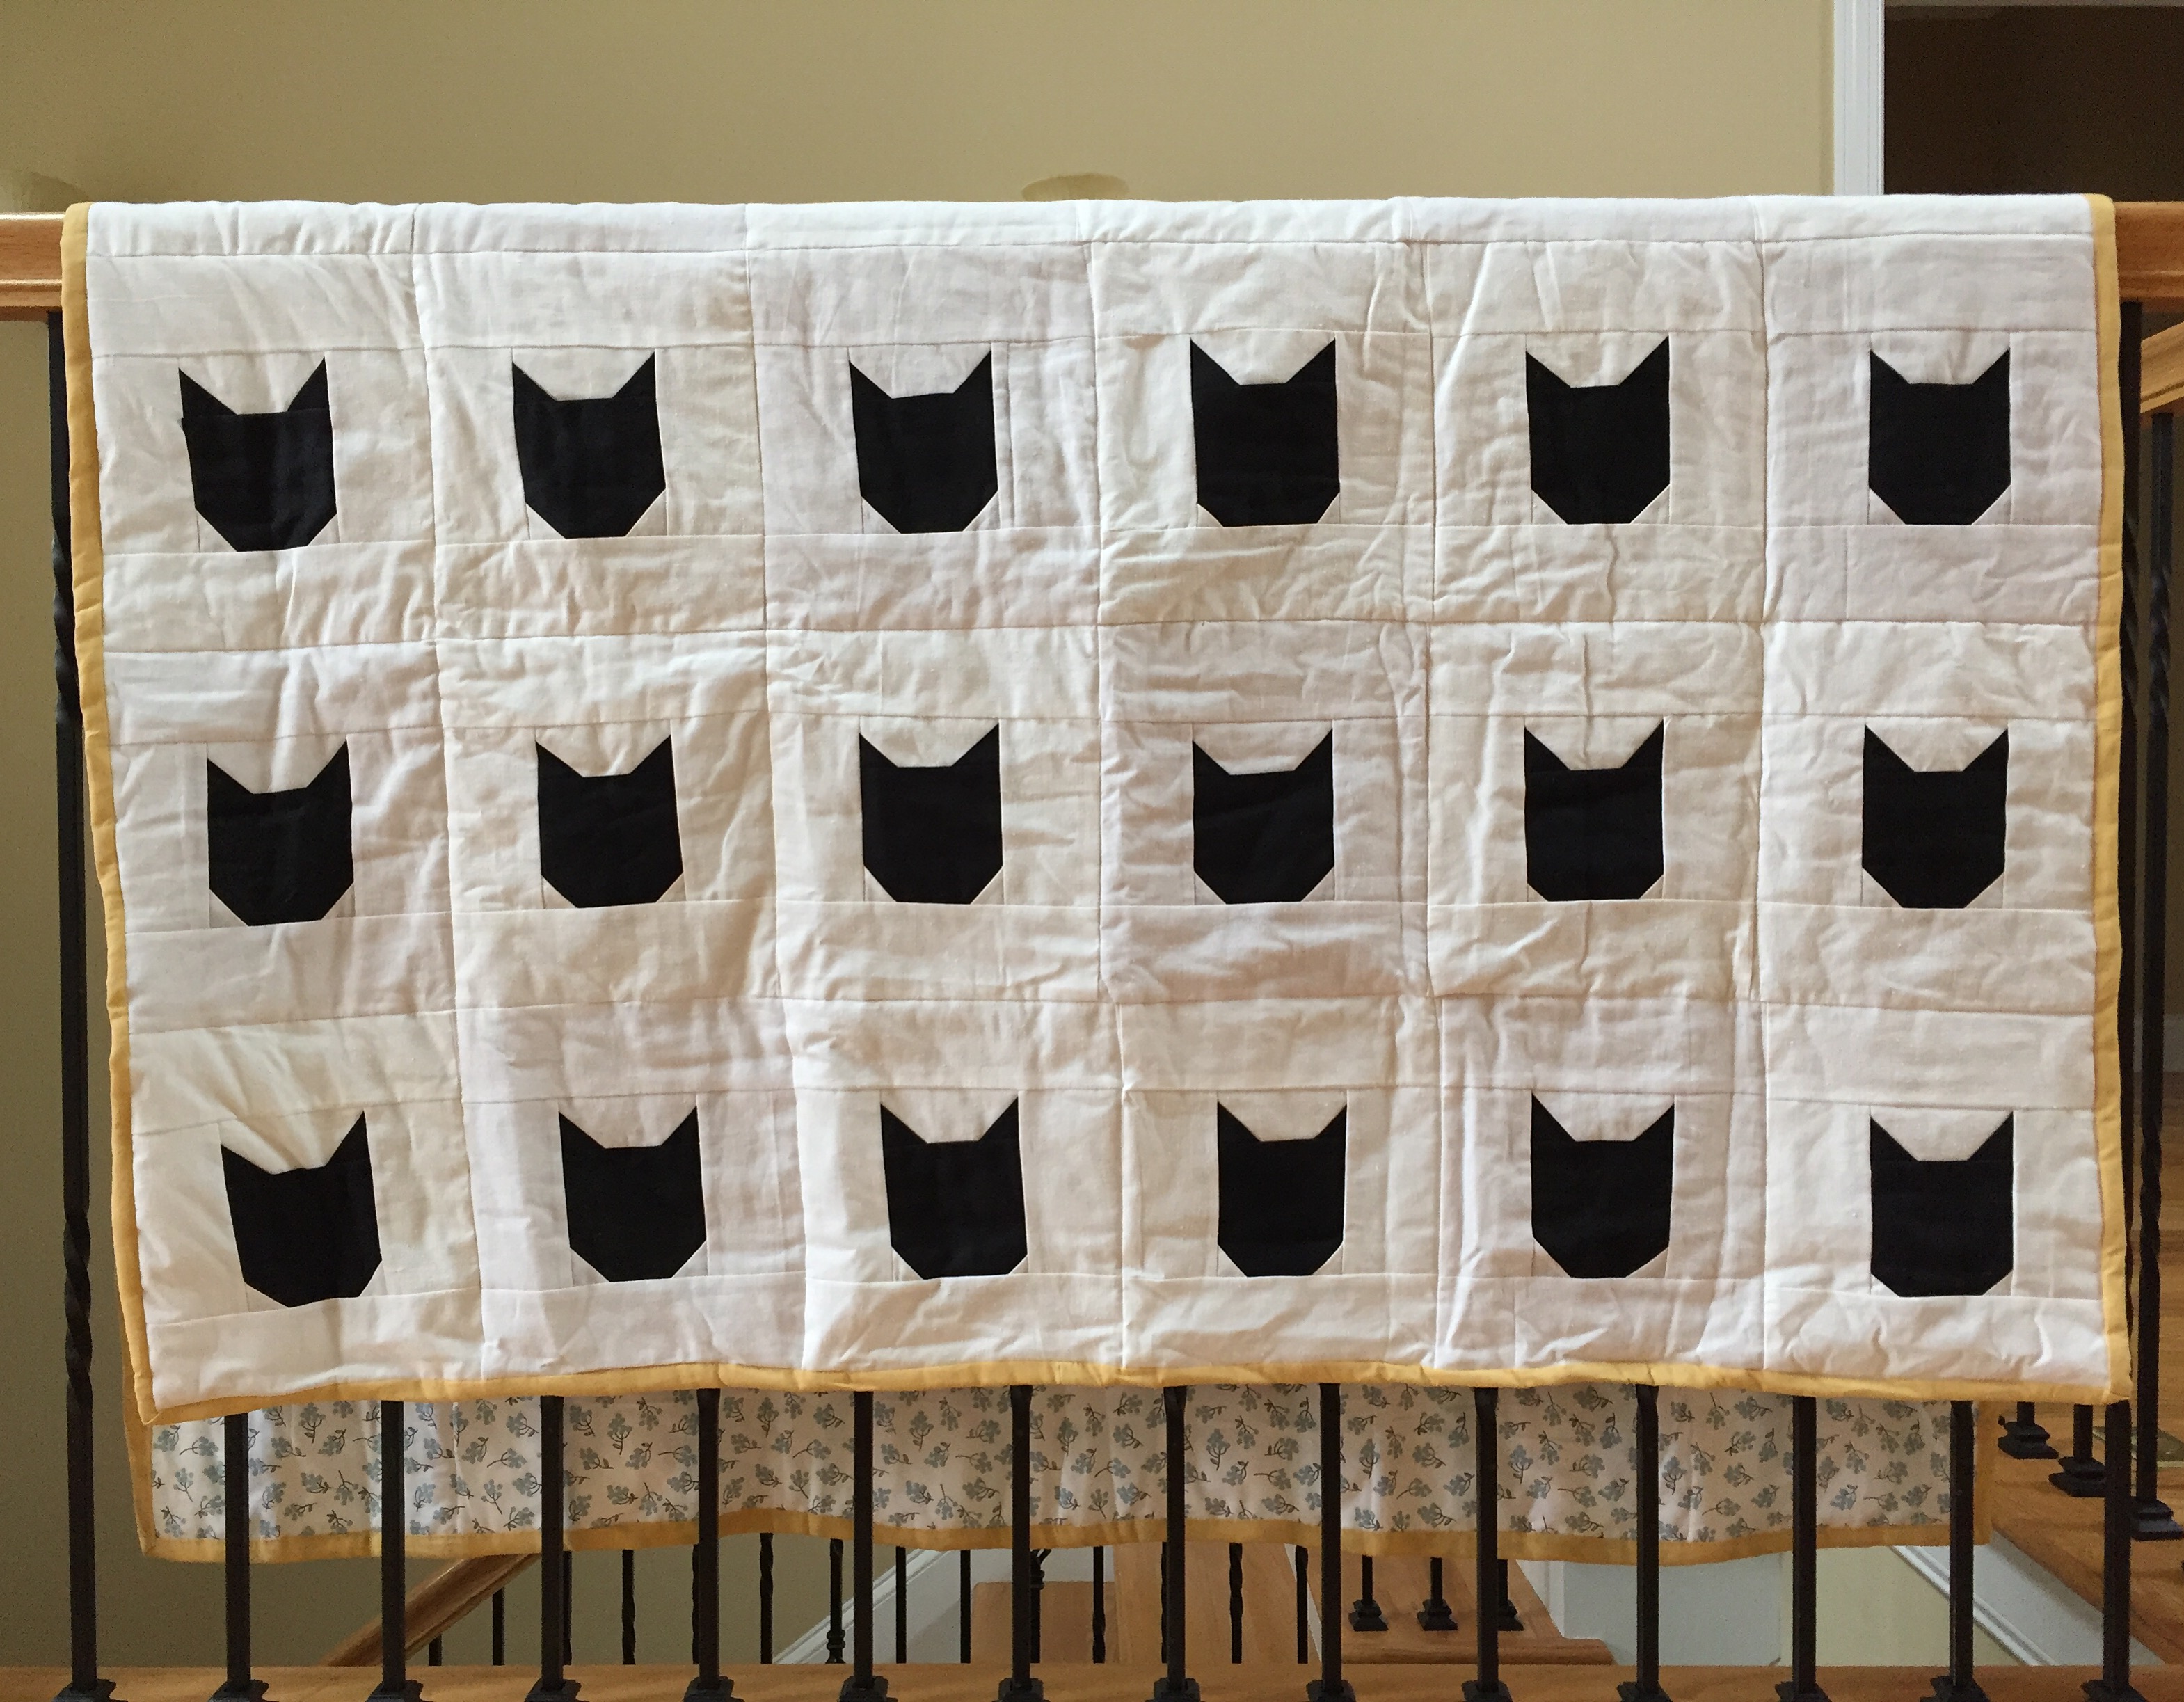
I did run out of the white fabric mid-way through. I was using scrap fabric that was this cool, stiff, linen texture, and I struggled to find a matching fabric at the store. So I bought the closest match I could find, and I purposefully spaced the blocks that used the new fabric so the change looked intentional. I think the difference is quite noticeable in the picture below, but with the finished quilt, you really only notice the change if I pointed it out.

IMG_1556

IMG_1618

I wanted to keep the quite light and bright, so I selected a simple pattern for the back piece, and I binded the quilt with a  yellow cotton fabric (my mom’s favorite color).

IMG_1609

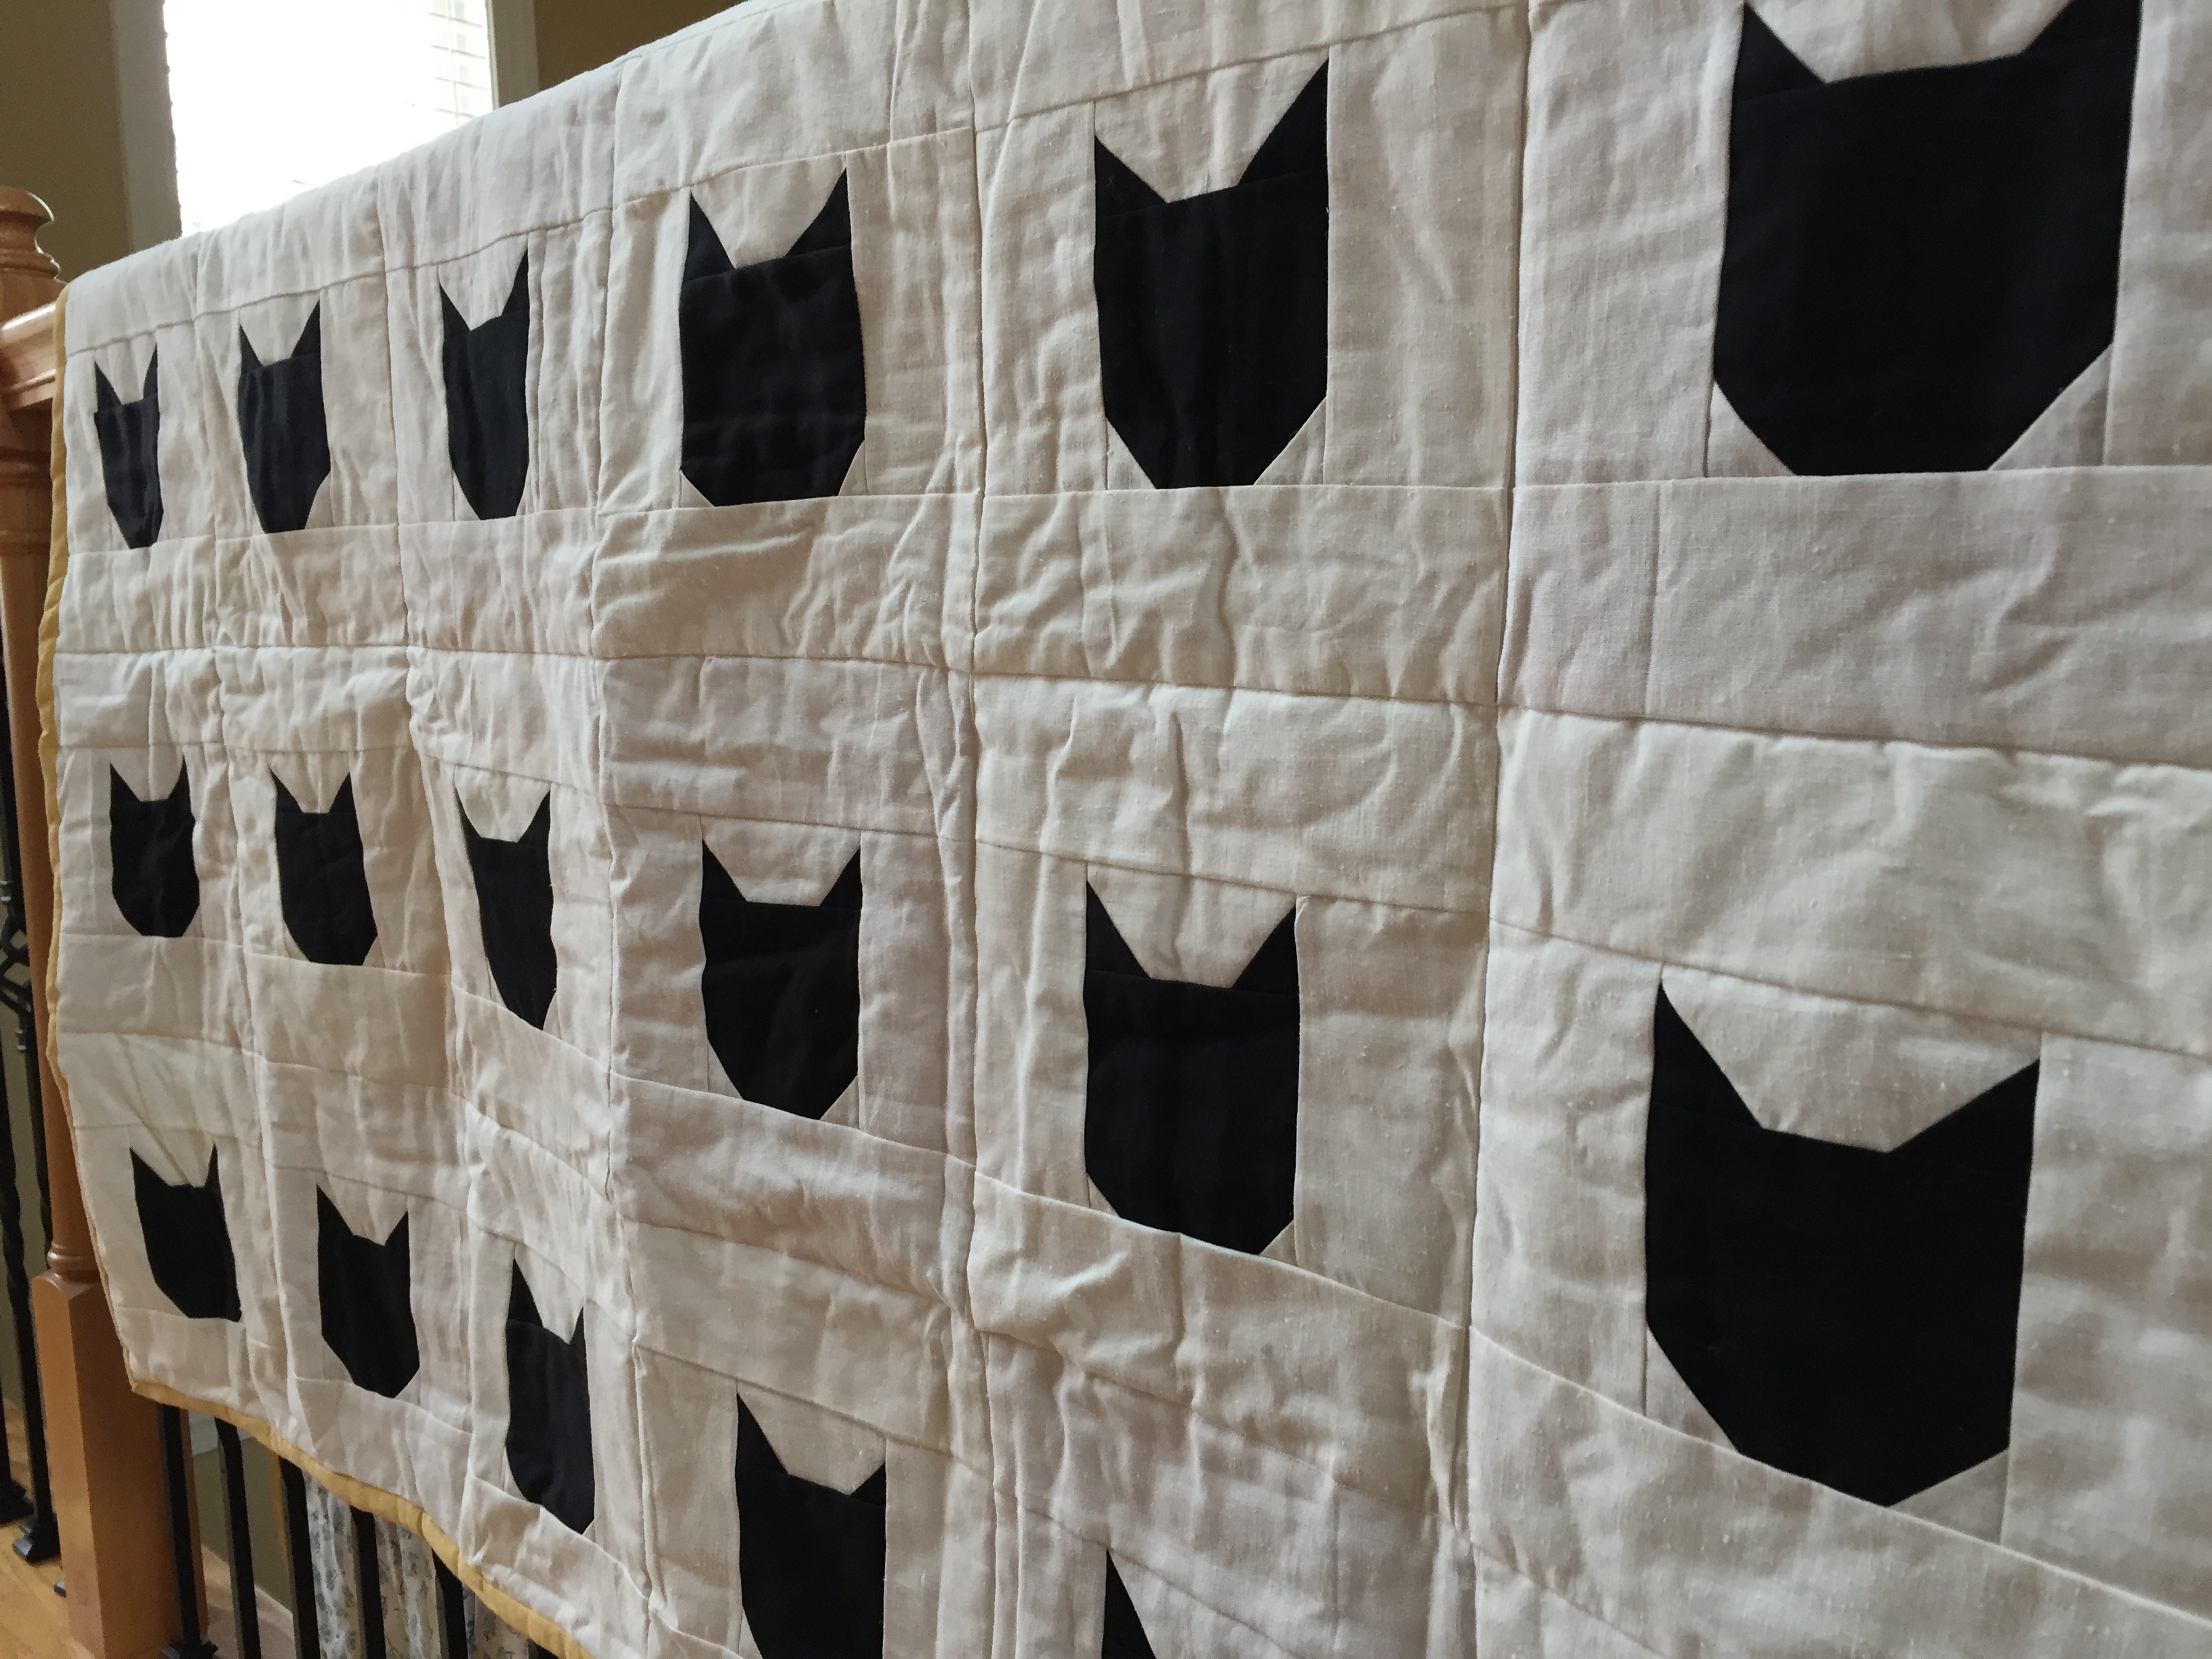
Excuse the wrinkles. The quilt got a little squished when I wrapped it up. But wrinkles aside, I love, love, love this pattern, and I was so happy to give this to my mother for her birthday.

Here Comes the Bride Banner

I assure you, my hiatus from blogging was unintentional. I’ll keep my excuse short: I started a new job, and it took up a lot of time and energy. But I am officially on Christmas vacation, and work does not start back until Jan. 4. So let the blogging begin again!

To kick things back off, here is a project that I made with my friend Katelyn for her wedding this September. Together, we made this beautiful banner and two pillows for a “ring passing” ceremony.

Way back in June, Katelyn came over and we made this banner together. We used a linen fabric for the banner and a black cotton fabric for the letters. Katelyn found two fonts that she liked, and we used Heat ‘n Bond to cut out and adhere the letters  with an iron to the banner. We decided to not sewing over the letters – though it would have secured the letters in place. We figured if a letter fell off between then and the wedding, Katelyn could cut out another letter and iron it on. Luckily, everything stayed in place, and the banner looked stunning on the day of the wedding.

12307584_10153164806960636_6622902106841286664_o

Instead of flowers, Katelyn had her flower girls carry the banner  right before she walked down the aisle. (The above and below photos are by W&E Photographie.)

12339477_10153164807030636_3097469999794739498_o

I especially loved how during the reception, the banner decorated the gift table. We also made two little pillows for a “ring passing” ceremony. The pillows were very simple, but by using lace, I feel like they really became something special. We also attached little satin ribbons that they used to tie down the rings.

IMG_1065

A little freehand stitching

IMG_0381

One night, I decided to do a little freehand stitching, not really knowing what I wanted the final piece to be. I started by creating the bowl, and then the different succulents started to take shape. Sewing can have a lot of rules, and I love – from time to time – to take a break from straight lines and even stitches to do something more spontaneous. The final product was the perfect addition to a care package a sent to a dear friend.

Felt fruit for a berry bowl display

icm_fullxfull.68542278_k4vbx0dnyxsgo8g0k0kw

Oftentimes, people ask me, “What is the purpose of felt food? What do people do with it?” My answer is simple: I make felt food with the intention of it being toys for children and pretend play. But then occasionally, I’ll meet a customer who buys them for other reasons.

Recently, a customer told me they purchased my felt strawberries to help display her handcrafted “berry bowls” at craft fairs. I loved this idea, and I freaked out a little when she sent me this beautiful picture. You should check her out: Rebecca with Willow Avenue Pottery.

A Simple, Floral Wedding Embroidery Hoop

IMG_0373

Another wedding, another embroidery hoop. But I think this one is my favorite so far. I’ve been following a few artists who use very small embroidery stitches to create these precious floral arrangements with thread, and I was inspired to try to here. I love how how the flowers turned out.

IMG_0375

Homemade invitations for a pineapple-themed dinner party


IMG_0888

I firmly believe that one’s 25th birthday should be celebrated in a big way.  Not only does 25 years mark a quarter of a century, but I see it as an important mile marker in the transition into “adult.” Postgrad life can be tough learning how to handle big-time jobs, real-life bills and grown up relationships. By turning 25, you have a couple of these years under your belt, and you’re no longer considered a rookie.

So when I made plans to visit my best friend in Florida for her birthday celebration weekend, I knew a party had to be planned. First stop, the invitations!

IMG_0870

I wanted to pick a theme for the party – mainly for the decorations – that was simple. The party is going to be a casual event with friends: dinner, cake and a few games. I wouldn’t be surprised if after dinner we simply sit around, tell stories and laugh. So I decided to pick a simple icon that would stand as the theme of the party, and I selected the pineapple.

For the invitations, I made flat, felt pineapples to place like a letterhead. I cut out the two pieces of felt by hand, and then using black thread, I stitched the design (as well as attached the two pieces together). Once complete, I used Elmer’s glue to glue the felt piece to the card stock.

IMG_0892

I bought the card stock at Paper Source, and simply wrote out the information by hand. I’m so happy with how it all turned out. Now with these in the mail, it’s time to plan a party!

IMG_0885