Woodland [Felt] Creature Mobile

img_2561

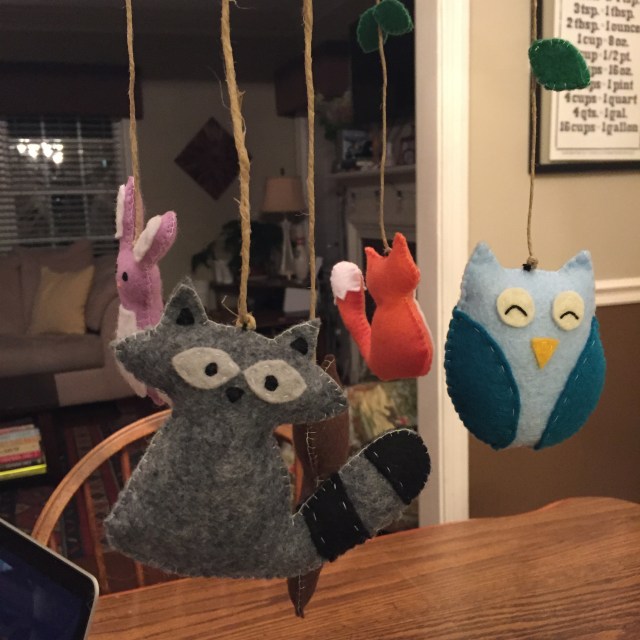
Felt and woodland creatures are a pretty adorable combo! I created this sweet baby mobile for friend preparing a nursery for her son. The theme: animals.

img_2556

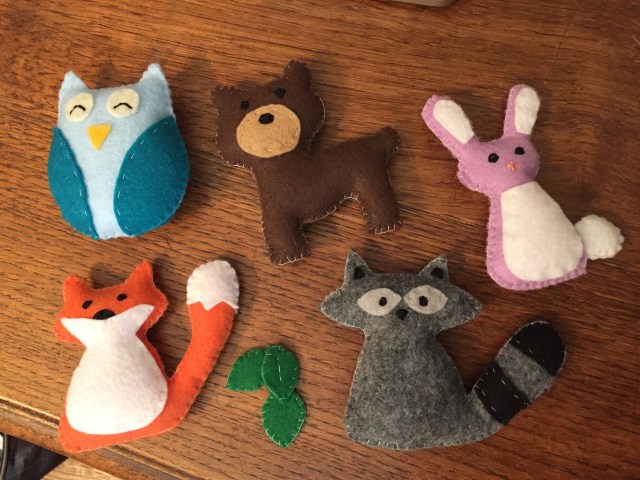
I’m pretty proud of this project because I created the animals without templates. It took me a couple tries to get the right look, especially for the raccoon, but that’s why we sketch things out.

img_2559

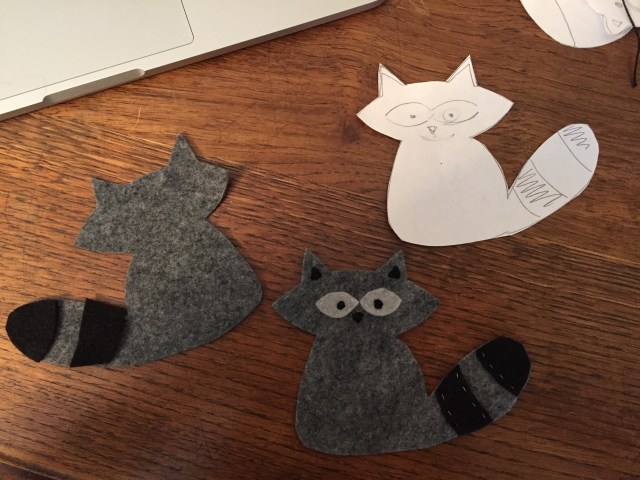
Once I was happy with the sketches, I used them as a template to cut out the felt. Working with a front and back piece for each animal, I added details, sewed the pieces (right sides) together and used fiberfill to make them slightly plush.

IMG_2587

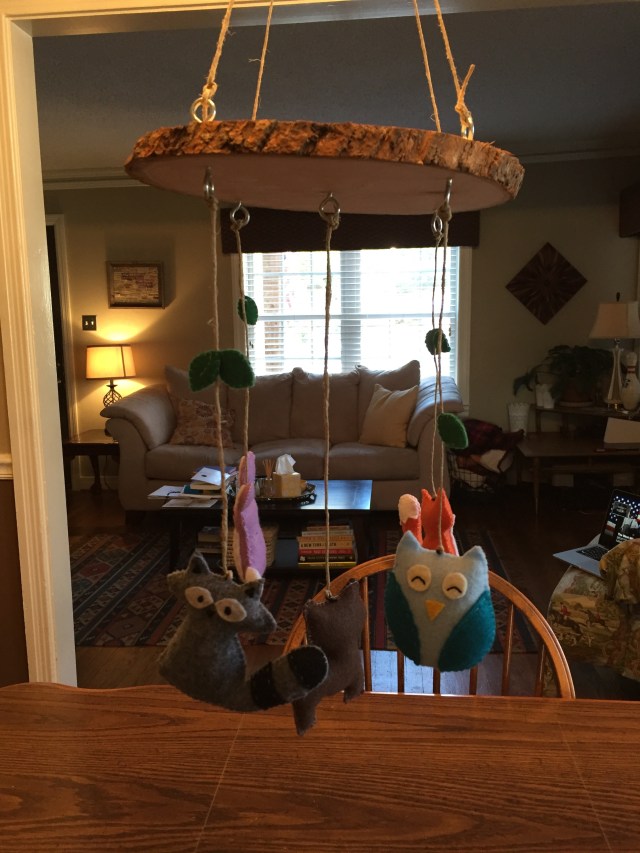
To create the mobile, I initially thought I would use an embroidery hoop for the structure. But then I found this piece of wood at JoAnn Fabrics, and I thought it really added to the “woodland” theme.

IMG_2593

I forgot the technical name of the hooks I used, but they screwed into the wood board really easily. I used twine to hang the animals. I even added a few felt leaves as an final  touch.

IMG_2594

Advertisement

Stages of the [Felt] Moon

FullSizeRender 5.jpg

Oftentimes, when an idea pops into my head, I question its originality. People say there’s no such things as an original idea anymore… right?

After finishing this project, I have seen so many references to the moon phases in others’ craft projects and art pieces. Original… maybe. But the truth is, we all influence each other.

To be fair, I have always had a love of space (as several posts on this blog can prove.)

FullSizeRender 4.jpg

After the idea came to me, it only took 30 minutes to complete this simple project. I had circle of wood that I mounted the felt to with Mod Podge, and I used tape to attached the circles on the string. (My 8th grade science teacher should be proud that I remembered the moon phases without having to reference the Internet.)

IMG_2569.JPG

Embroidery on a Snow Day in Alabama

When I walked into my apartment after a rather insane day of snow and ice in Alabama, I put on comfortable clothes, made some tea and pulled out the embroidery floss. My snow day was going to be a relaxing one.

DSC_0543

“Come Thou Fount” might be my favorite song of all time. After finding this fabric amongst my scraps, this verse instantly came to mind.

DSC_0550

Since I used a smaller hoop (only 6 inches in diameter), I have to use smaller text to make it all fit. I made “Hello Friend” a couple of months ago and decided to mimic its font for this hoop.

DSC_0551

The finish touch to all this is a piece of felt to cover the back. I added the heart just because I wanted to, but I’m thinking it might be a nice signature touch for all of my future projects. Maybe it could turn into some sort of logo.

DSC_0545

Flags of Spring

I stand by the fact that the easiest decorations for a party/event are flags. Last week was THE Samford event I have been planning since the beginning of this year – Spring Fling. It is basically a week full of free food and activities for Samford students to enjoy. And being one of the people in charge or planning and executing the event, I will admit, I made sure it had my signature on it.

The project was really simple. At Walmart, I purchased packs of spring colored cotton fabric. I cut them into squares, trying to keep the sizes consistent. Once cut out, I used the overcast stitch around the edges, simply to make sure the fabric wouldn’t unravel in the wind.

Then I took basic twine, purchased again from Walmart, and sewed the flag and the twine in place using my zipper foot.

I was lucky enough to work on this project mostly at home – where my work space is much more spacious, but this project is simple enough that I could have easily pulled it off in the small confines of my dorm room.

Simple and beautiful!

Barrette flashback

I was digging through some stuff when I stumble across these fabric flowers I had made a long time ago. It got me thinking – I had seen this article in the Wall Street Journal about how barrettes are now back in fashion. So I pulled out some adhesive glue and a barrette and got to work.

First, to make the flowers, I cut out circles in the white, cotton fabric I had (but really any fabric works. I once made the same thing out of toile and it turned out great!)

Then I folded the circle in half, and then in half again (see picture above). Then I took a needle and thread and sewed the bottom point in place.

Repeat that step, sewing each new piece to the others. Pay attention to how each piece is arranged because sometime it can just look like a stack of fabric and not really a flower.

Finally, I used my adhesive glue to attach the flowers to the barrette. The whole thing gives me a flashback to the 90s  – scrunchies, tights and outrageous hair bows – but it looks cutes nonetheless.

DIY: Cloth Napkins

What’s fancier than having a cloth napkin? Think about it, have you ever been to a nice restaurant that sets the table with paper napkins and plastic silverware? No, of course not. So I have decided that even though the college lifestyle has been defined by paper plates and plastic cups in the past, we are a generation with more of a refined taste. (Or we should try to be at least).

On a college budget, purchasing these napkins could be a little pricing (depending on where you go), so of course, I highly suggest the option of making them for yourself.

I chose to make 16″ squares for my napkins, so with the patterned fabric, I measured and cut a 17″ square. Then with the solid fabric, I measured and cut a 16″ square. I laid out the two fabrics with the patterned side on the bottom and wrong sides together.

I then took an iron and pressed up the sides of the patterned fabric, pinning the fabric in place for the moment.

Once sitting down at the sewing machine, I folded the edge under again so the frayed edges was not visible. Then I simply straight stitched the edge.

It’s as simple as that. Now nothing is stopping you from living a life free of paper napkins and plastic forks!

Note: I used 1.5 yards of each fabric to create 5 napkins.

For your Sweetheart: A Valentine’s Garland

I simply adore Valentine’s Day! Not for the romantic element, but for the fact that it is socially acceptable to go over the top with heart-inspired decorations. This project is the first dorm room project of the spring semester, and I am completely obsessed with it!

I gathered my supplies – red, pink and white fleece squares (I know, I’m usually all about felt, but I thought the fleece had softer colors), embroidery floss, some leftover quilt backing and a heart stencil I cut out myself.

The whole thing is pretty simple. I first cut out the backing using the paper stencil I made. Then using the backing, I cut out the fleece, making the hearts slightly larger.

Once the hearts were cut out, I used the floss to embroider on the cute saying one would find in a Sweetheart candy box. I stuck to the more classic sayings. Though I did find one on google images that said “Tweet Me,” I held back and stuck with the ones I could remember from my childhood. “U R GR8” might be my favorite!

After that, I placed the backing inside the hearts. I chose to use yarn as my string that would holds the garland together, and once everything was in place, I pinned it all together.

And as you can see, the sewing machine was pulled out to stitch it all in place. The final result is simply adorable, and adds an element of cuteness that our common room needed.

For a Cozier Bed: Knitted Pillows

Returning to my dorm room this past weekend was a little bittersweet. The holidays are officially over, and as you can see by my lack of posts, the busyiness of school has begun. Though one of the many positives, like reuniting with friends and the start of Step Sing, is returning to a room full of finished projects I can show off during the busy times.

Take for example the knitted pillows on my bed.

This was the project that made me fall in love with knitting all over again. The pillow is basically a rectangle knitted in garter stitch, and then stitched together with a white ribbon.

Since this was before I had a sewing machine, I bought a basic pillow from a craft store, and I was able to use the pillow as the mold for the size of my knitting. And as a final touch, I embroidered (in a kind-of made up style) a flower onto the pink pillow.

For you super fast knitters, this project could be completed in a weekend, but for me, this took me about 2 and a half weeks. But its simplicity makes it the perfect project for watching a movie on a lazy afternoon.

A hair bow for all seasons

The other day I was looking through an old suitcase that my mom stores ribbons and buttons in, and I stumble upon a how-to booklet containing this cute/horrifying picture.

Funny story is, my mom actually made that bow for me when I was younger, but I bet the bow was not the first thing your eyes went to. (I think it’s the glasses that make her eyes looks so huge!) But weird picture aside, the book inspired me. And with some ribbon, an obsession was formed.

I can see how my Mom had so much fun making bows to match my outfits. And though I don’t think you’ll be seeing me wear a bow to class, Samford has this thing called Step Sing and I’m thinking a different bow for each day’s practice! And then, while I had the glue gun out, I made a simple barrette with buttons. It was a good craft day!

Knitting a Hot Pad

If you have an hour to spare, you can totally make this knitting project – a simple hot pad. And this is not the hot pad you made in 3rd grade. You are going to be knitting with two threads, so the first step is creating a second ball of yarn (about 25 grams). Then with the two threads, cast on 21 to 27 stitches  (depending on the thickness of the yarn), but always cast on an odd number. Then use the seed stitch (knit 1, purl 1) until you have knitted a square. The important thing to know about seed stitch is you need to start and end the row with a knit stitch.

Once you have finished knitting the square, cut a square of fabric and press (meaning pull our your ironing board) down the hem allowances. Then all you have to do is whip stitch the fabric to the knitting.