Growing Carrots in a 5-Gallon Bucket


Since I graduated from college three weeks ago, my new roommate says I have taken on a new obsession to help with the transition: gardening. (A little bit of dirt is good for the soul.) A few years ago, I heard of a neighbor growing carrots in a 5-gallon bucket, and finally, I decided to try it out for myself.
IMG_2711

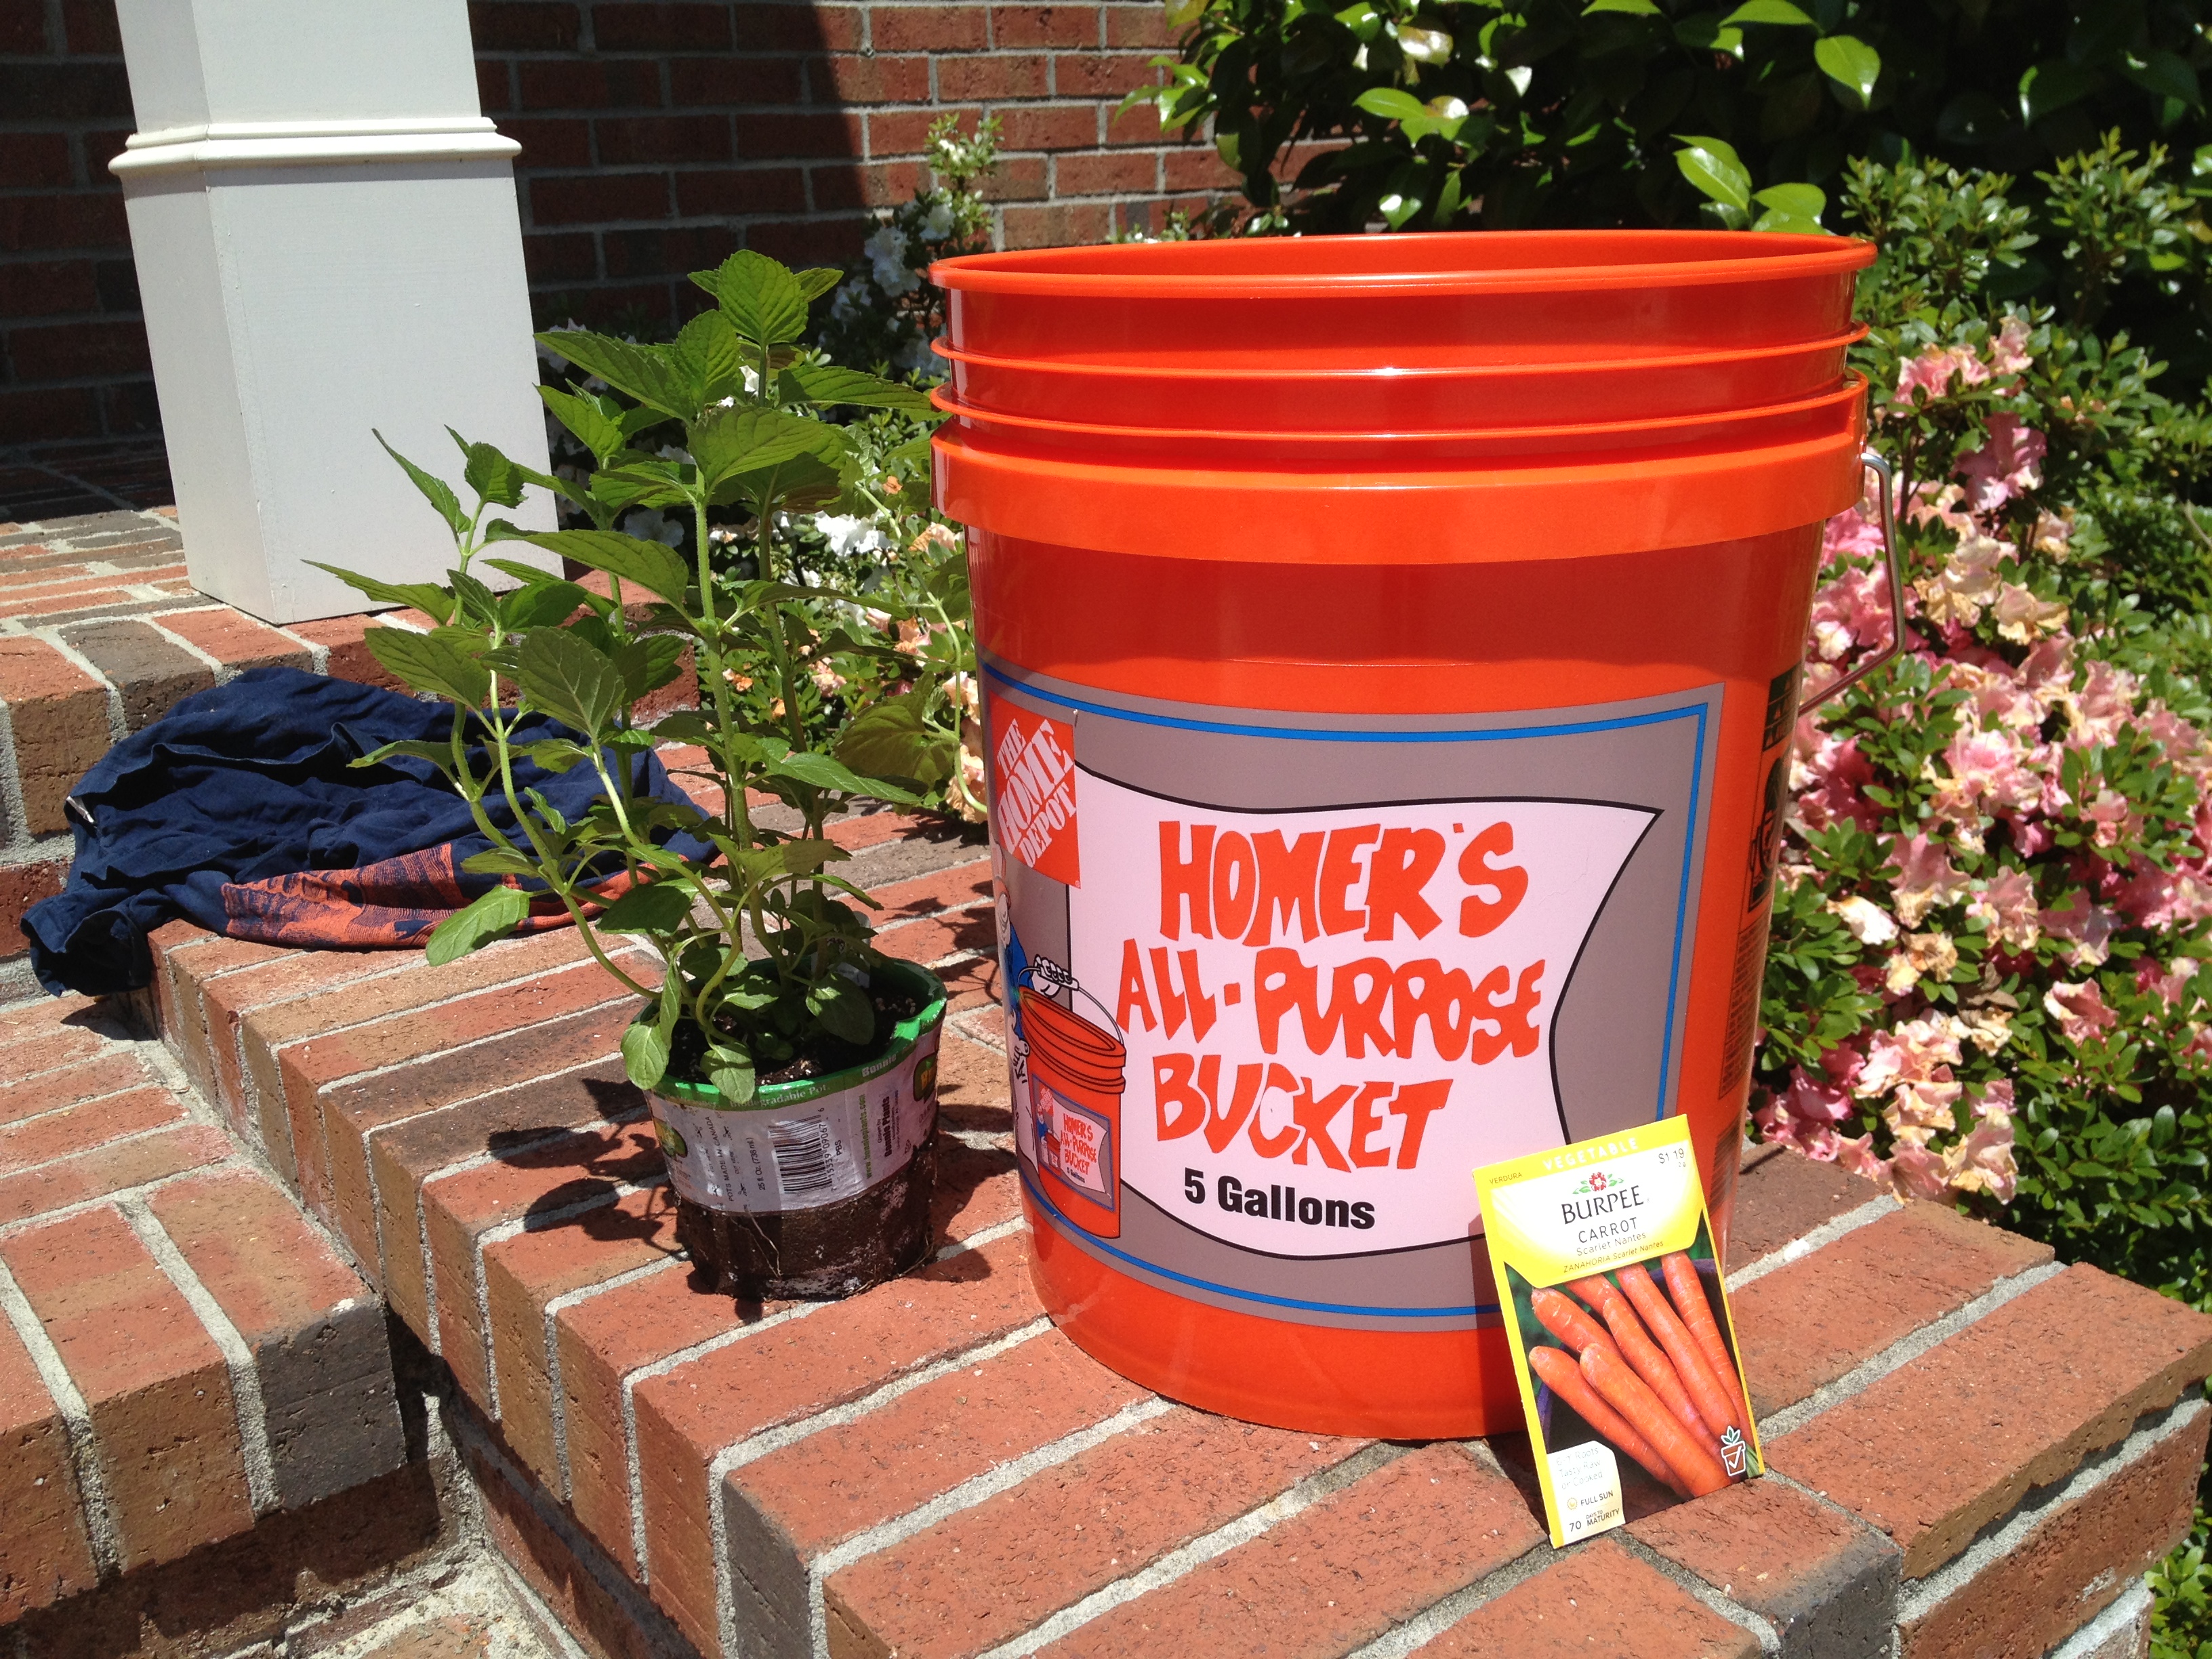
This project began at my parent’s house (because they have tools and I do not). First step was buying the list below:

  • 5-gallon bucket (The Home Depot had them on sale at the end of each aisle. A bucket cost about $2)
  • A bag of rocks
  • Potting soil
  • Carrot seeds 

I also needed things I found in at my parent’s house

  • Hammer
  • Screw driver

IMG_2712

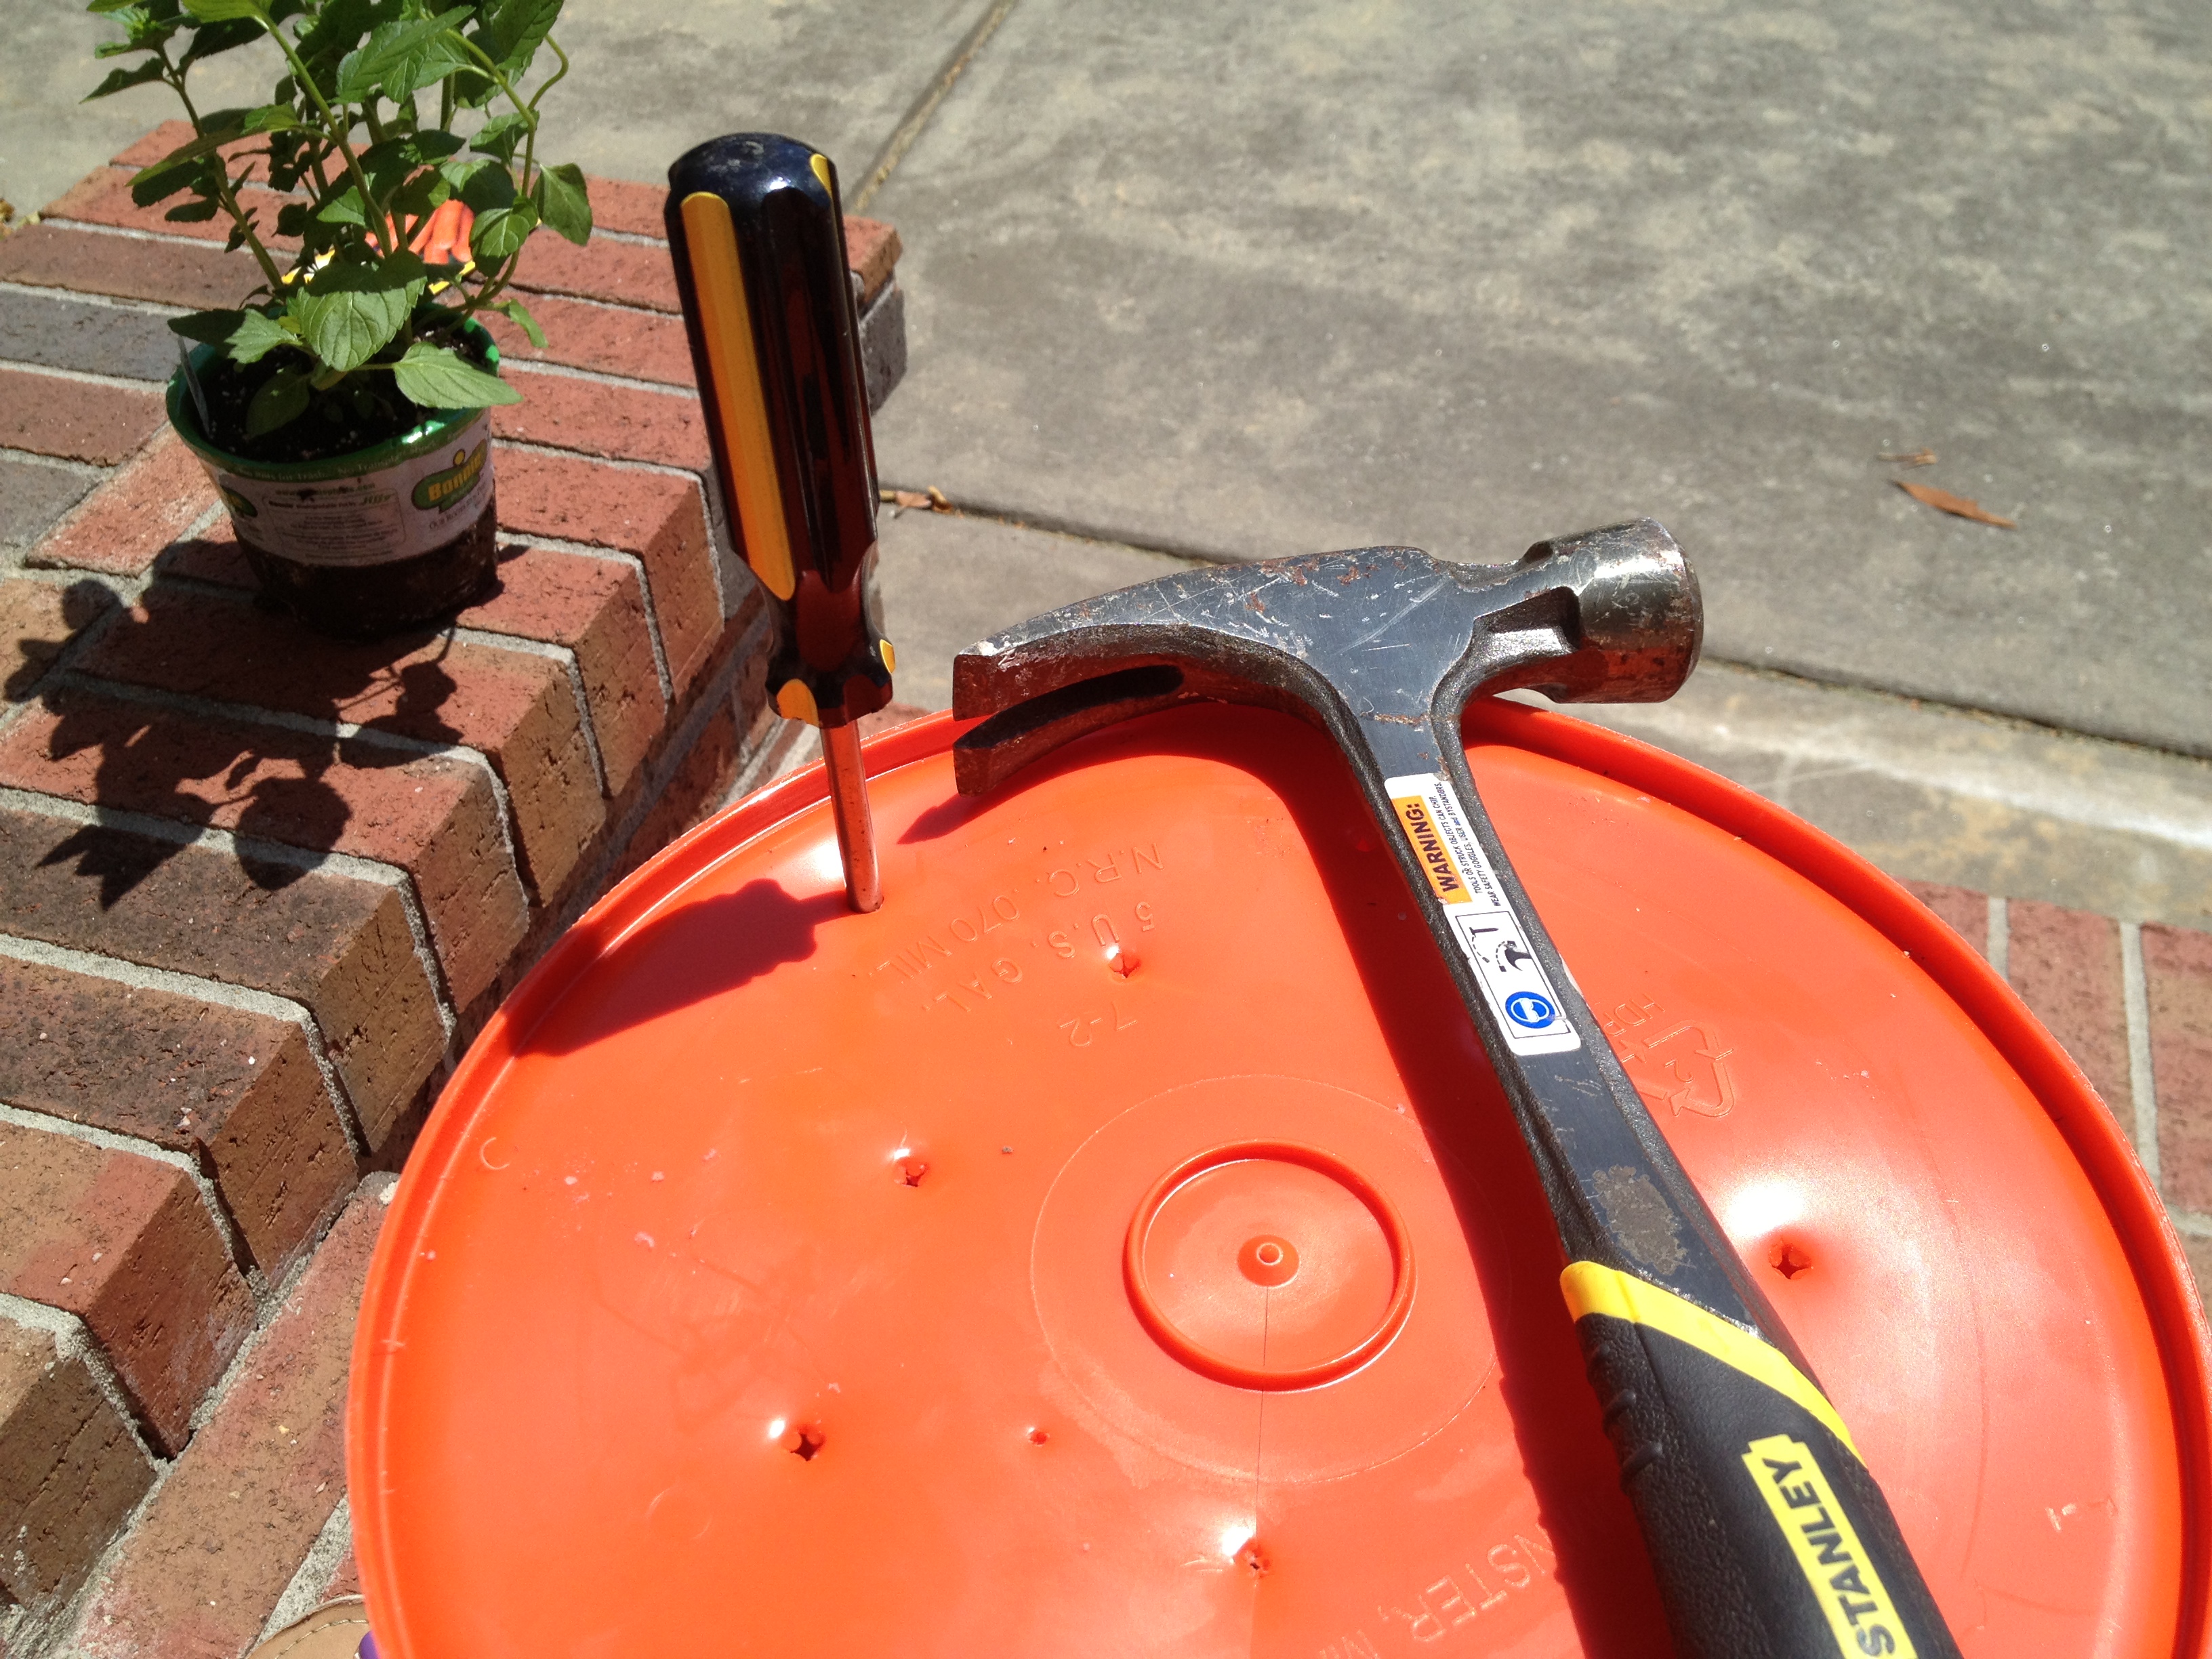
Before I can pour in the dirt, I prepared the bucket by poking holes in the bottom using a hammer and screwdriver. I found that the holes I made near the center of the bucket caused cracks (which I did not want). So, just beware that can happen. IMG_2713

With holes finished, I put a 3-inch layer of rocks at the bottom of the bucket. I purchased river pebbles, but if I was to do it again, I probably would have used larger rocks.
IMG_2714

Next, I filled the bucket up with dirt. IMG_2715

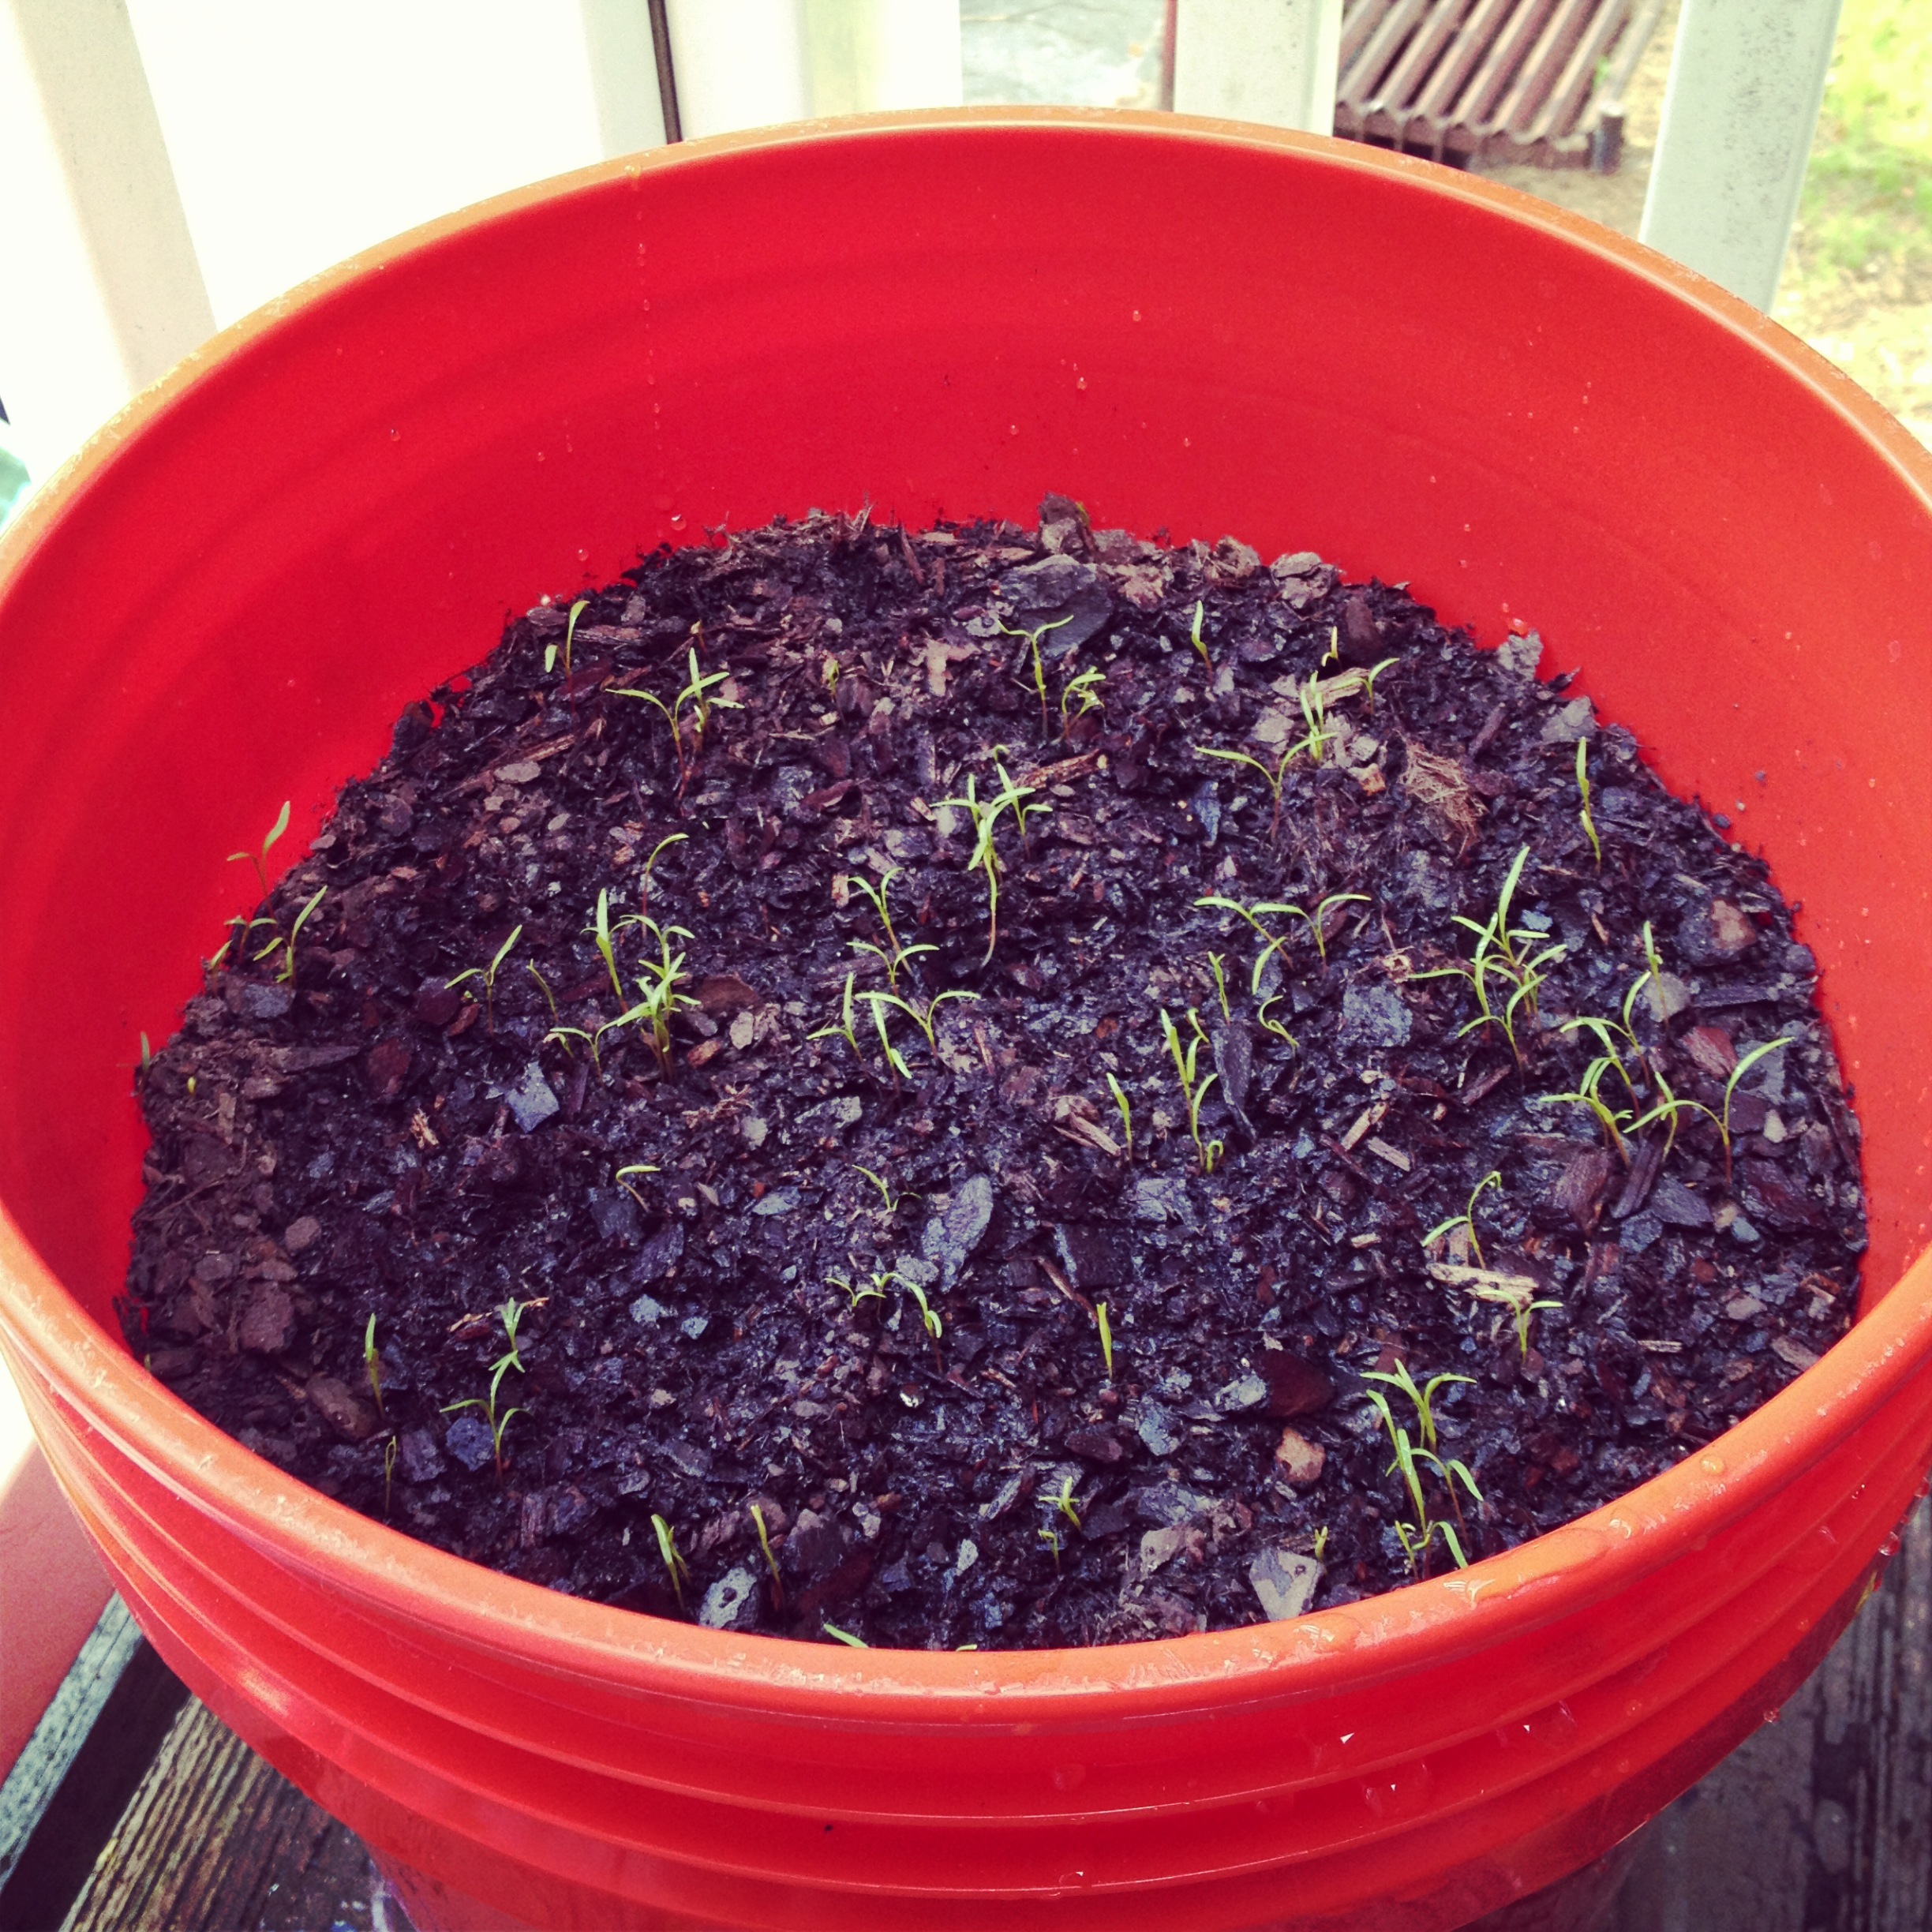
I read online that carrot seeds should be sown in about 1-inch deep of dirt. And that I could sew a good amount of seeds (like 40-60). So I did. (This is the point of the project where you should know that I am 100% a novice gardener. I can tell you what I did, but I do not know if this is correct.)IMG_2718

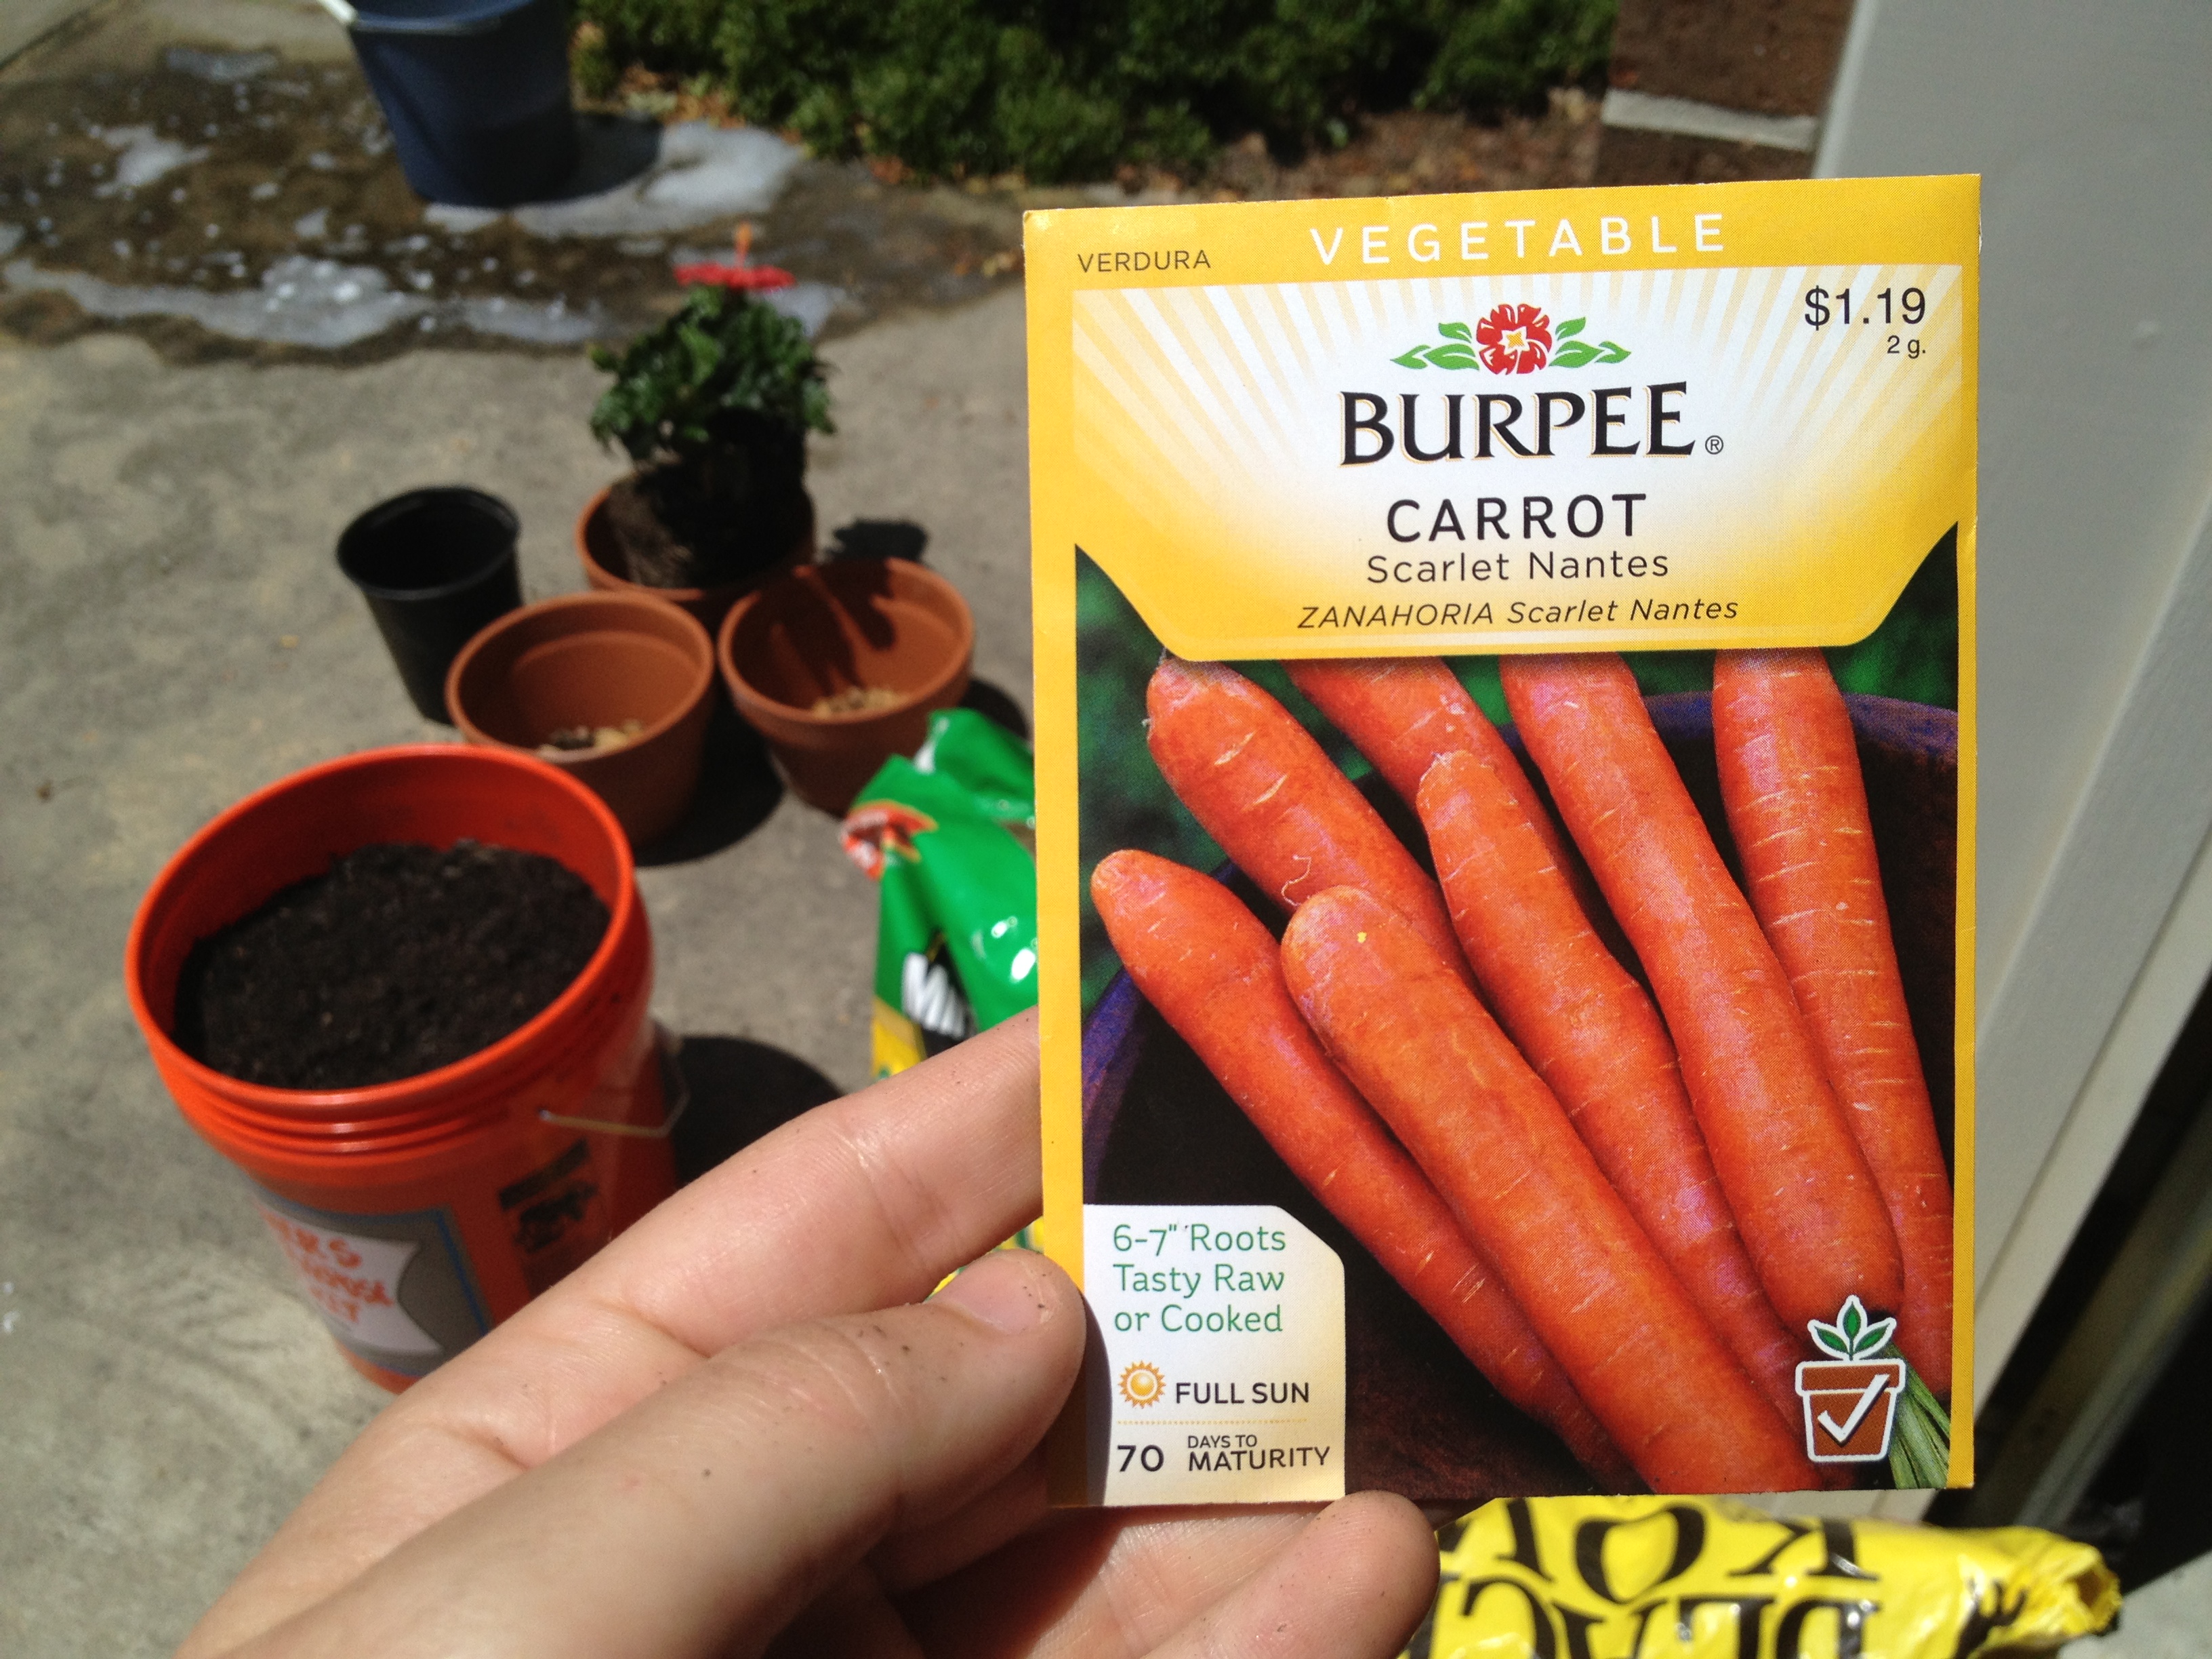
But with that being said, after a week of being in full-sun and being watered everyday, I had sprouts! I am not sure how long this growing process will take, but I will need you updated. The lesson to be learned – If I can do it, so can you!IMG_2791

My heart’s on a string

IMG_2020

If you have been reading this blog from the beginning, you’ll notice that I have made this garland before (See the first one and a Valentine’s Day version). After living in my house for several months, I just couldn’t get over how plain our mantel looked. I wanted to bring it to life, so naturally, I thought to make this.

IMG_1996I used felt, polyester fill and some embroidery floss. I cut out the hearts by hand and then sewn two pieces together, leaving a hole to stuff it with filling. Once it had some shape, I sewed the hole closed. With six hearts made, I took the embroidery floss and stringed the hearts together.

IMG_2022Once it was complete, I tied the garland to nails on our mantel. The project took me less than an hour to make. (I actually made it impulsively when a friend called one afternoon and told me she was running an hour late.)


A Stately Touch

IMG_2138As a gift for a friend who lives abroad, I made her some customized tea towels that would help remind her of home. The project is simple and cheap to make. I purchased the towels at Target for less than $3, and I used scrap fabric and Heat n’ Bond adhesive to make the appliqué.

IMG_2135To use the Heat n’ Bond, I traced my chosen state (Georgia) off my iPad. I then traced the reverse image on the back side of the Heat n’ Bond paper. Using an iron, I attached the paper and then cut out the shape. I then ironed on the fabric to the towel and used my sewing machine to secure it in place.

IMG_2140

And then, because it is so darn trendy, I added a small heart. (Don’t we always say, the home is where the heart is?) I also made a towel for the country she currently lives in.

Voila – a simple, easy gift for a new home.


Knitting in Circles

I may be a little late to this fashion trend, but I adore infinity scarves. Yet the crafter inside of me cannot rationalize the price of some of these scarves, so naturally, I made one myself.

DSC_0318

My favorite knit: the double seed

Using size 13 needles, I casted on 22 stitches:

Row 1: Knit one, purl one, repeat
Row 2: Repeat row 1
Row 3: Purl one, knit one, repeat
Row 4: Repeat row 2

Repeat rows 1 – 4.

DSC_0319Once I finished, I whip-stitched the two ends together with yarn to make it an infinity scarf.

All is Well

Somedays, you have to let yourself improv with your creativity. I found this yellow chevron-print fabric in the scrap section of the fabric store, and I decided it needed to be a background for something. Yellow is not my go-to color, but occasionally, I try to bring some bright colors into my life. To compliment it, I went to the default: felt.

IMG_2019

I knew I wanted to use the phrase, but the idea for the flowers just came to me. I played around with cutting out different sizes and using different colors, but I think I was smart to keep it simple and use two different flowers.

Once the felt was sewn on, I mounted the fabric to a flat canvas. Using clear packaging tape, I wrapped the fabric around the board and taped it down on the back.

IMG_1945

Chai Tea Cake

I find that time spent at home means time spent completing every Pinterest recipe I have pinned over the course of a semester. The idea of a chai tea cake naturally caught my attention months ago – I love a good chai latte!

IMG_1946

The recipe actually calls for six chai tea bags, steeped in milk and added into the cake mix. Yum!

IMG_1947

Chai Cake with Honey Ginger Cream

For the cake:

1 and 1/3 cups of milk
6 chai tea bags
4 whole eggs
2 egg yolks
2 teaspoons of vanilla extract
2 cups of sugar
4 and 1/2 teaspoons of baking powder
3/4 teaspoon of ground cinnamon
1/2 teaspoon of ground cardamom
1/2 teaspoon of salt
8 oz of unsalted butter at room temperature

Preheat the oven to 350 degrees. Grease two 9-inch cake pans.

In a small saucepan, bring the milk to a simmer over medium-low heat. Add the tea bags. Remove from heat and allow the tea to steep for five minutes. Remove the teabags and squeeze out the milk. Let the chai milk cool completely.

In a medium bowl mix the eggs, egg yolks, vanilla and 1/3 cups of chai milk. Whisk together.

Combine the flour, sugar, baking powder, cinnamon, cardamon and salt in the bowl. Mix together. Add the butter and the remaining chai milk. Beat with mixer.

Raise the speed to medium and beat until light and fluffy. Add the egg mixture. Mix well and divide the batter evenly among the two pans.

Bake the cakes for 26 to 28 minutes. Allow the cakes to cool for 10 minutes. Remove cakes from pans and let them cool completely.

IMG_1948

For the Icing:

1 and 1/2 cups of confectioners sugar
9 oz of cream cheese at room temperature
6 tablespoons of unsalted butter at room temperature
1/2 cup of honey
1 and 1/2 tablespoons finely minced crystalized ginger

Place all the ingredients in a mixer. Mix well.

IMG_1949

DIY Cloth Books

I have dedicated the month of January to finishing the project I have purchased materials for. Two summers ago, my grandparents took my cousin and I to Amish country in Ohio. In an adorable quilt shop, I found this fabric that had a tutorial to make a cloth children’s book. Naturally, I purchased a fabric set of Benjamin Bunny and Peter Rabbit.

DSC_0298

Now, I wish I purchased 3 more sets of fabric. The pages were laid out over a yard of fabric. Where I needed to cut was marked by dotted lines, and the instructions were listed at the bottom.

DSC_0293

DSC_0295

The book is made up of three sets of two panels each. To make a page, I basted a layer of filling (cut to the same size of the panel) to the wrong side of one of the panels. Then pin the corresponding panel to the other – right sides together. I used a 1/4 inch sewing allowance, leaving space to flip the book right-side-out. To finish, whipstitch the hole together, and press with an iron.

DSC_0299

Repeat this with the next 2 pages. Once the three pages are finished, simply layer then in order, with the cover on the bottom, and sew a seam down the middle of the book. And that’s it – you have yourself a book.

DSC_0301

My book is not perfect, which I love. It is definitely homemade!

DSC_0306

DSC_0311

DSC_0314

A World View

DSC_0338

Another quilt, another day. My mother purchased this fabric for me months ago, asking me to make a quilt for her. At the time, we just had heard the news of our my coming nephew, and I was all into quilt making! Little did I know it would take me forever to finish it (mainly because my crafting leave-of-absence over the summer.)

I started with the fabric. The map piece was a yard, so I purchased a coordinating yard of fabric for the back. Basting it together with a layer of batting, I purchased a ton of black embroidery floss for the next step: quilting.

DSC03323

DSC_0343

I traced each contient. Europe would have killed me if I traced each country. And I will tell you this, the process takes a long time (as hand-sewing does), but I think it is totally worth it.

DSC_0331

I did not hide the knots on the back, My initial thought was the quilt would be cute hung on the wall, so hiding the knots wouldn’t matter. By now I wish I took the extra time and did it anyways.

IMG_1875

IMG_1876

Once I finished quilting, I cut down the border to prepare for the binding. I only wanted an 1/2 inch edge.

DSC_0339

For the binding, I cut 2-inch wide strips. See how I finish quilts here.