Embroidery Hoop for a Wedding

I love, love, love this idea for a wedding shower gift. (So much that this my second time to use the idea.) An embroidery hoop with the couple’s names or initials along with the date of the big day creates a personal (and colorful) gift. And I like to think that if I give it to the bride at a shower, she might use it to decorate her reception.

DSC_0425

I kind-of lucked out with the initials of the bride and groom. I debated for a few hours if I should use their names (Wes & Meg), but I finally settled on use their initials. I’m obsessed with the symmetry.

DSC_0427

A image on Pinterest inspired me to try the branches, and I think it turned out great. I had very little of the brown thread,  so I decided to have two different branches: one with brown thread and medium green leaves and the other with golden yellow thread and dark green leaves.

DSC_0430

Finally – the all important wedding date! I used French knots to separate the numbers.

DSC_0431

To hide the backside of the stitches, I hot glued a circle of felt – with a felt heart – to the back.

DSC_0432

I figure why hide this beautiful creature with wrapping paper, so instead of wrapping the hoop, I decided to use it as a gift tag. By threading the string through clasp, the hoop will stay in place.

DSC_0435


DIY: Candy Buffet

At the bridal shower previously mentioned (see here), my friends gave me the task of creating a candy buffet. It was a causal request via text, but you know me, I naturally took it as a challenge to create the cutest thing possible.

DSC_0120

Choosing your containers: Every website I went to when researching candy buffets said the same thing: pick you container first. And in my experience, I completely agree. Before you take a step into a candy aisle, know how many containers you have and their sizes. (A game plan helps make shopping feel less overwhelming.)

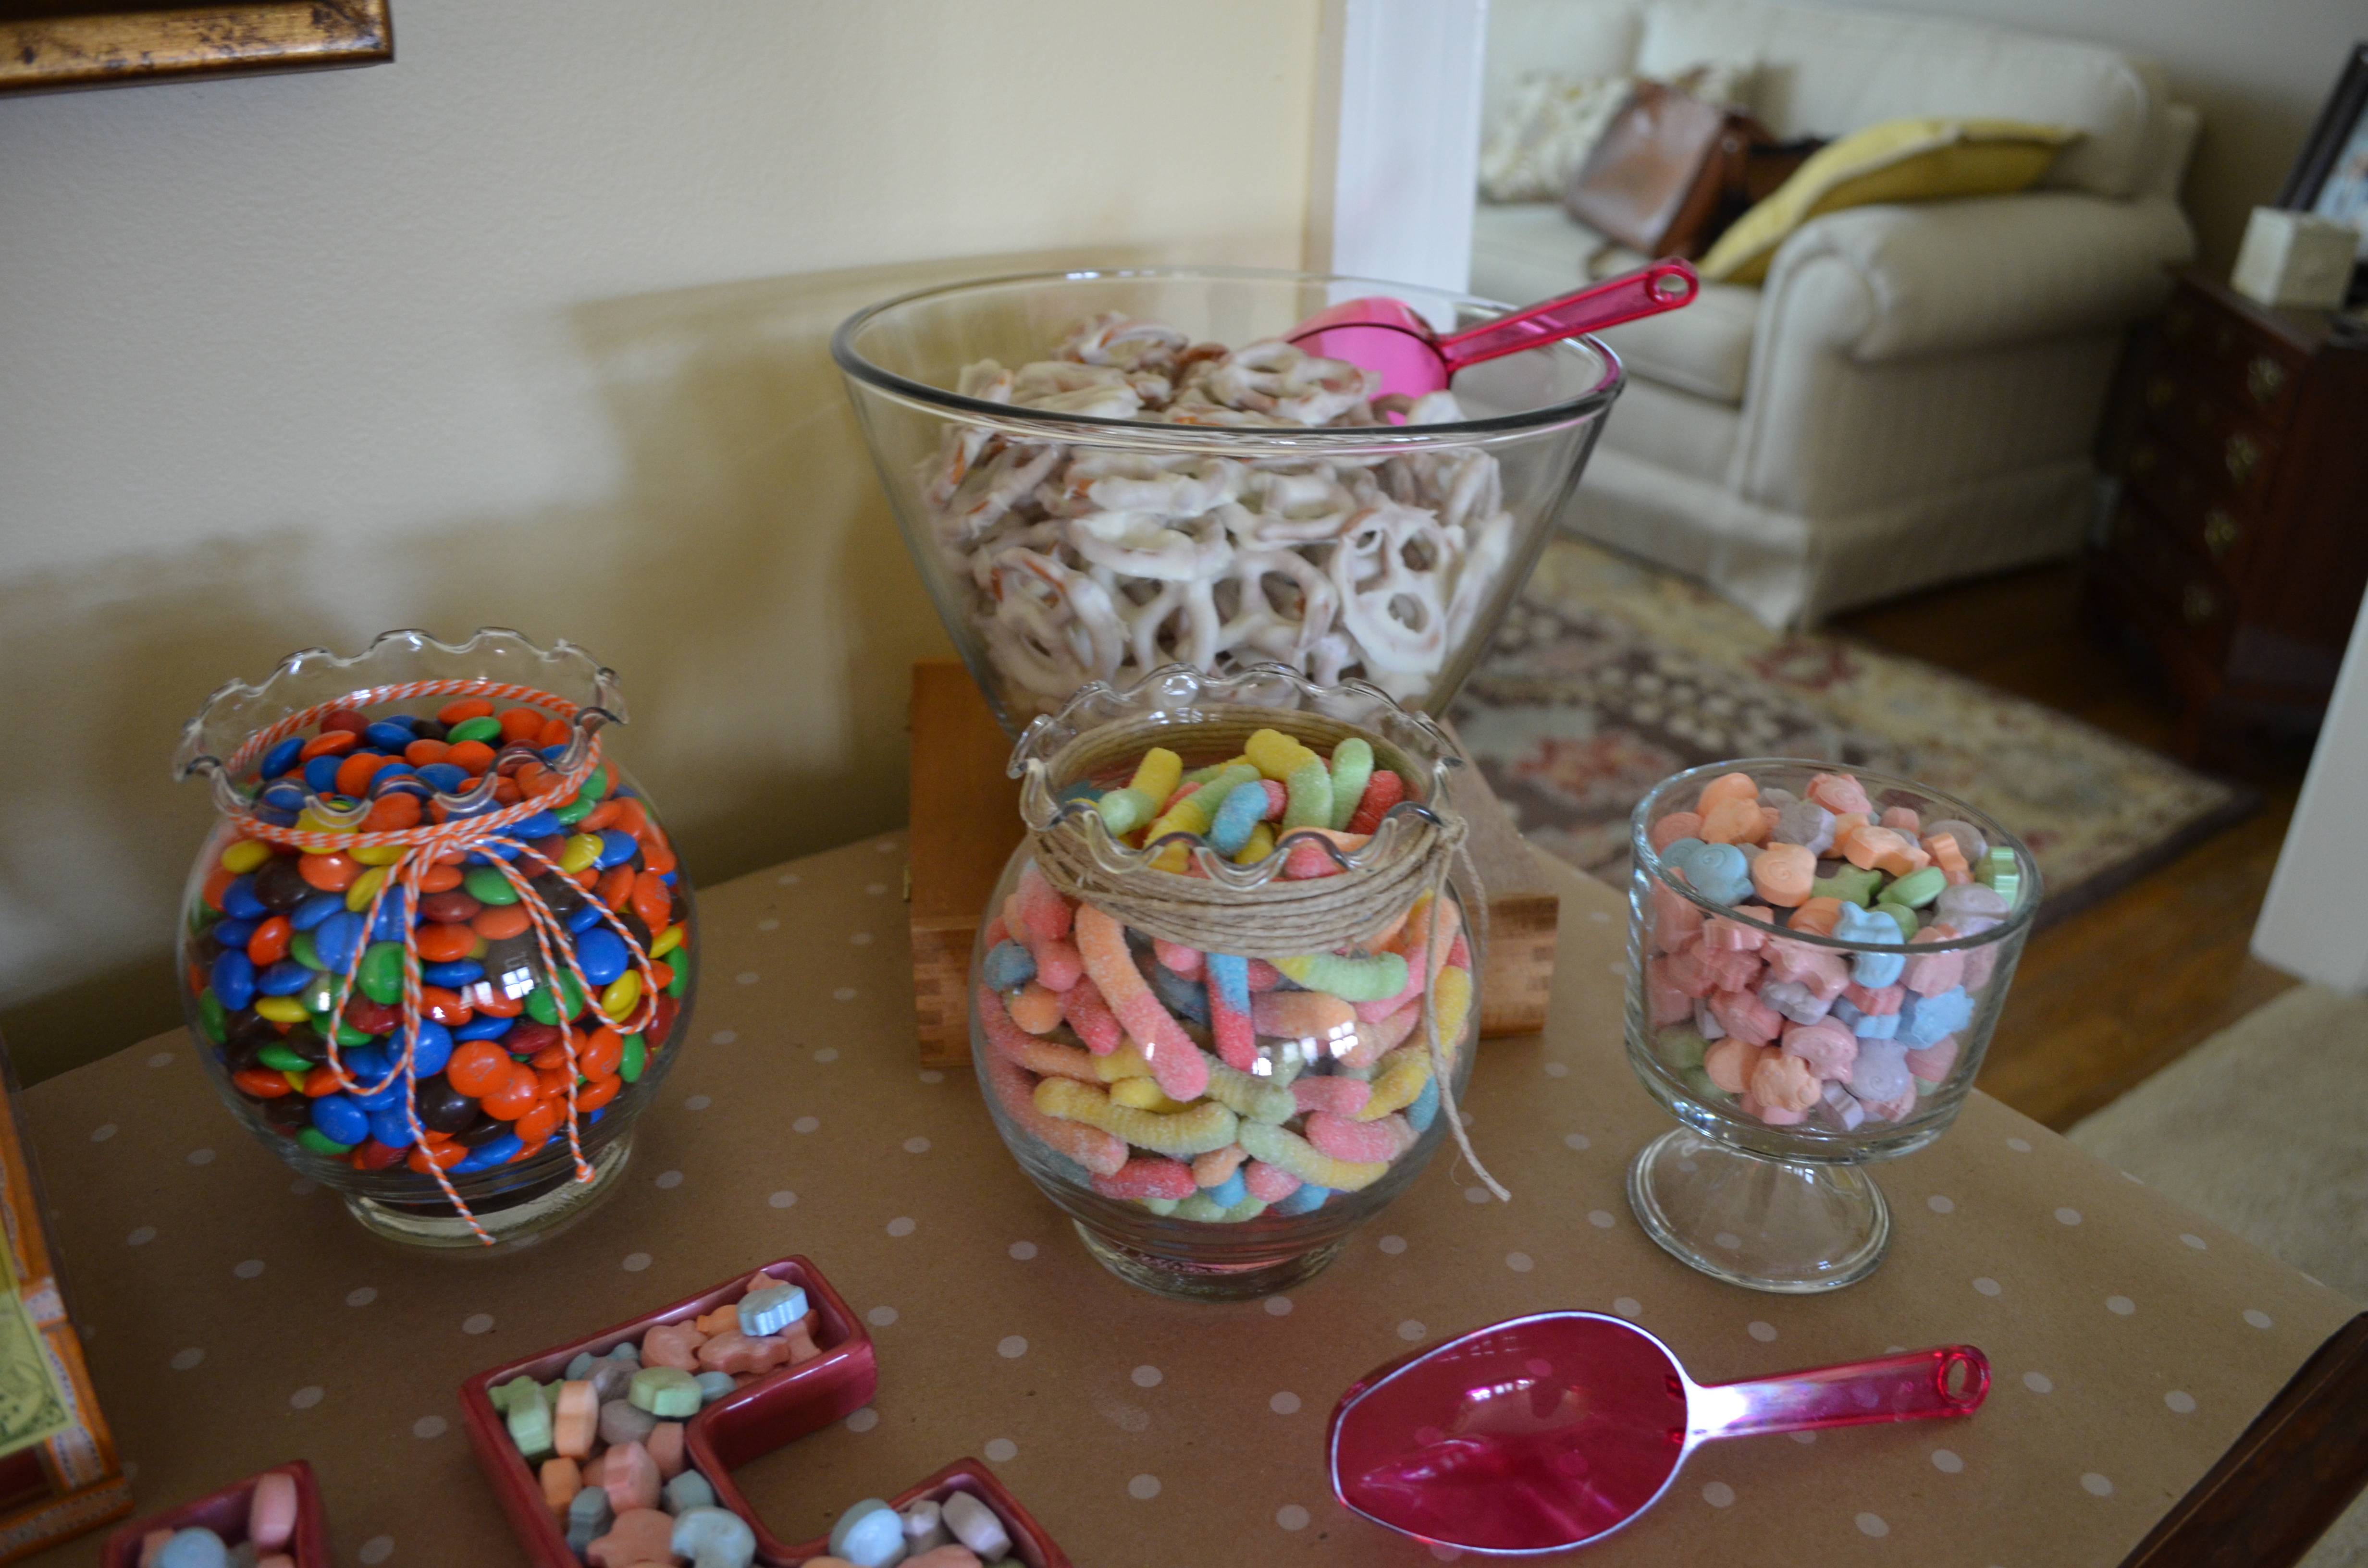
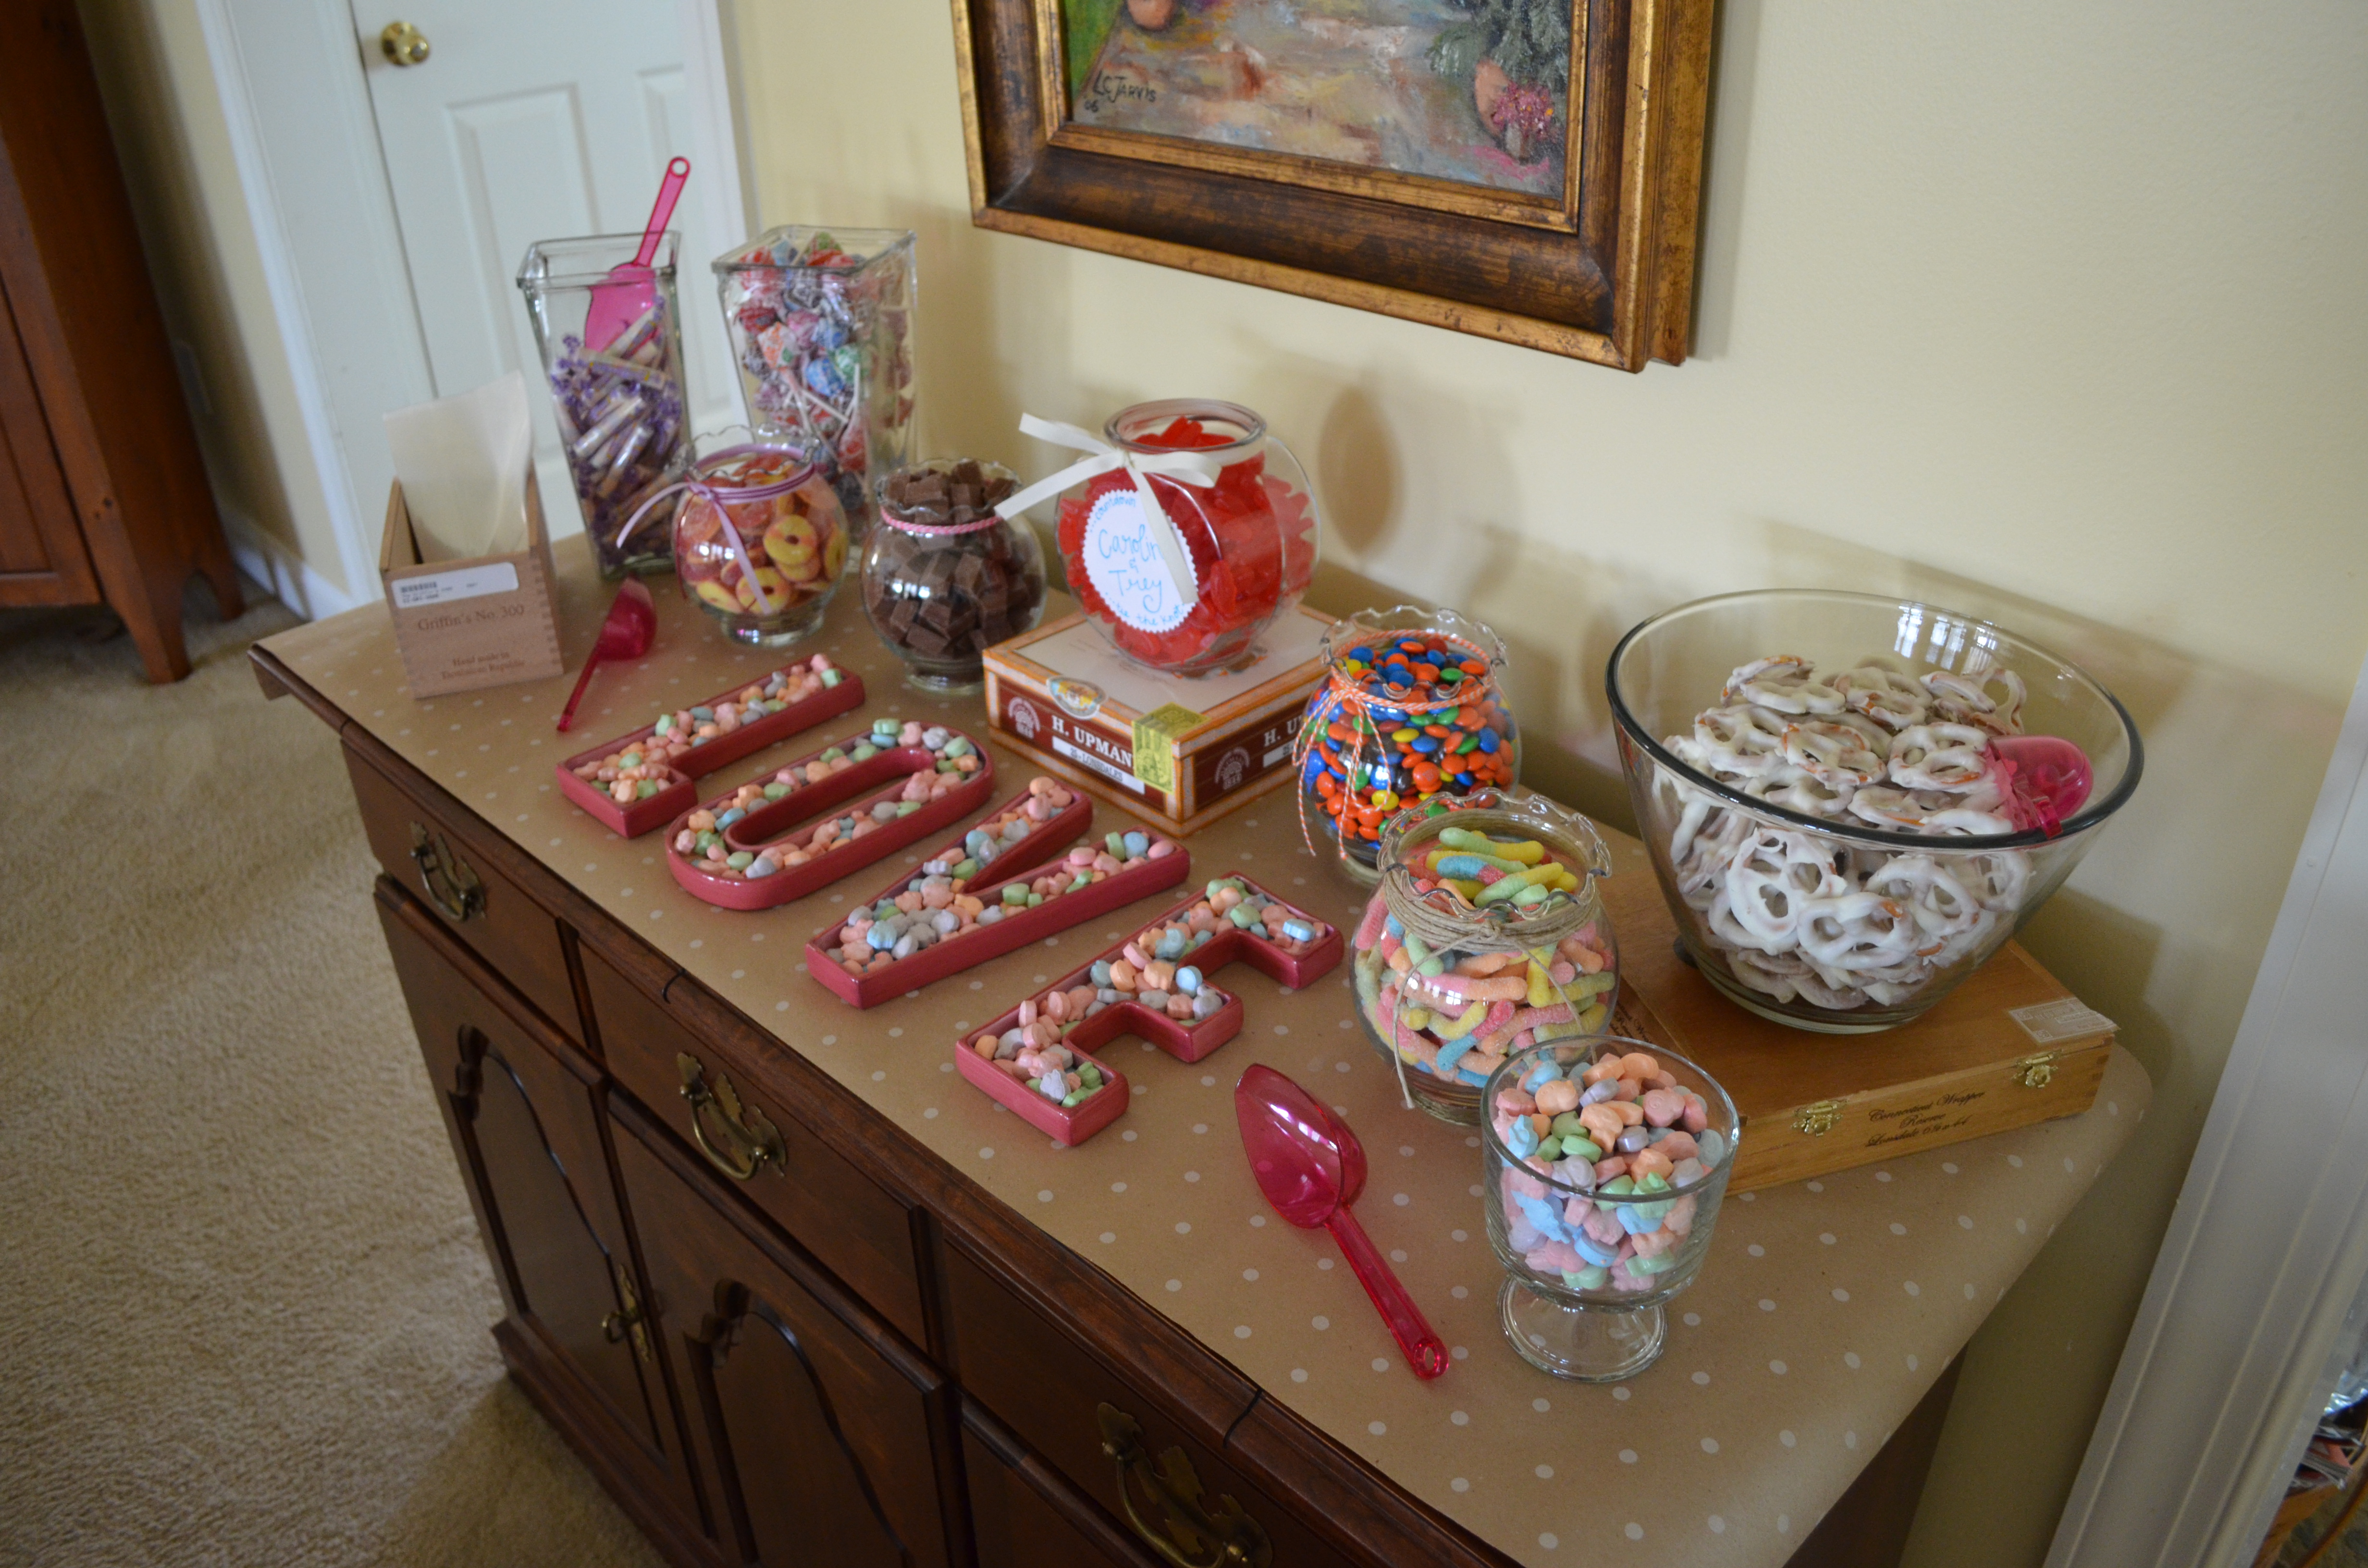
And do not buy containers. Even if you don’t own them, ask around and borrow them. I went home and raided my mom’s collection of glassware. She had several of the round vases from my brother’s wedding. My grandmother gave me taller vases. And the bowl of pretzels is a salad bowl I use almost everyday.

DSC_0128

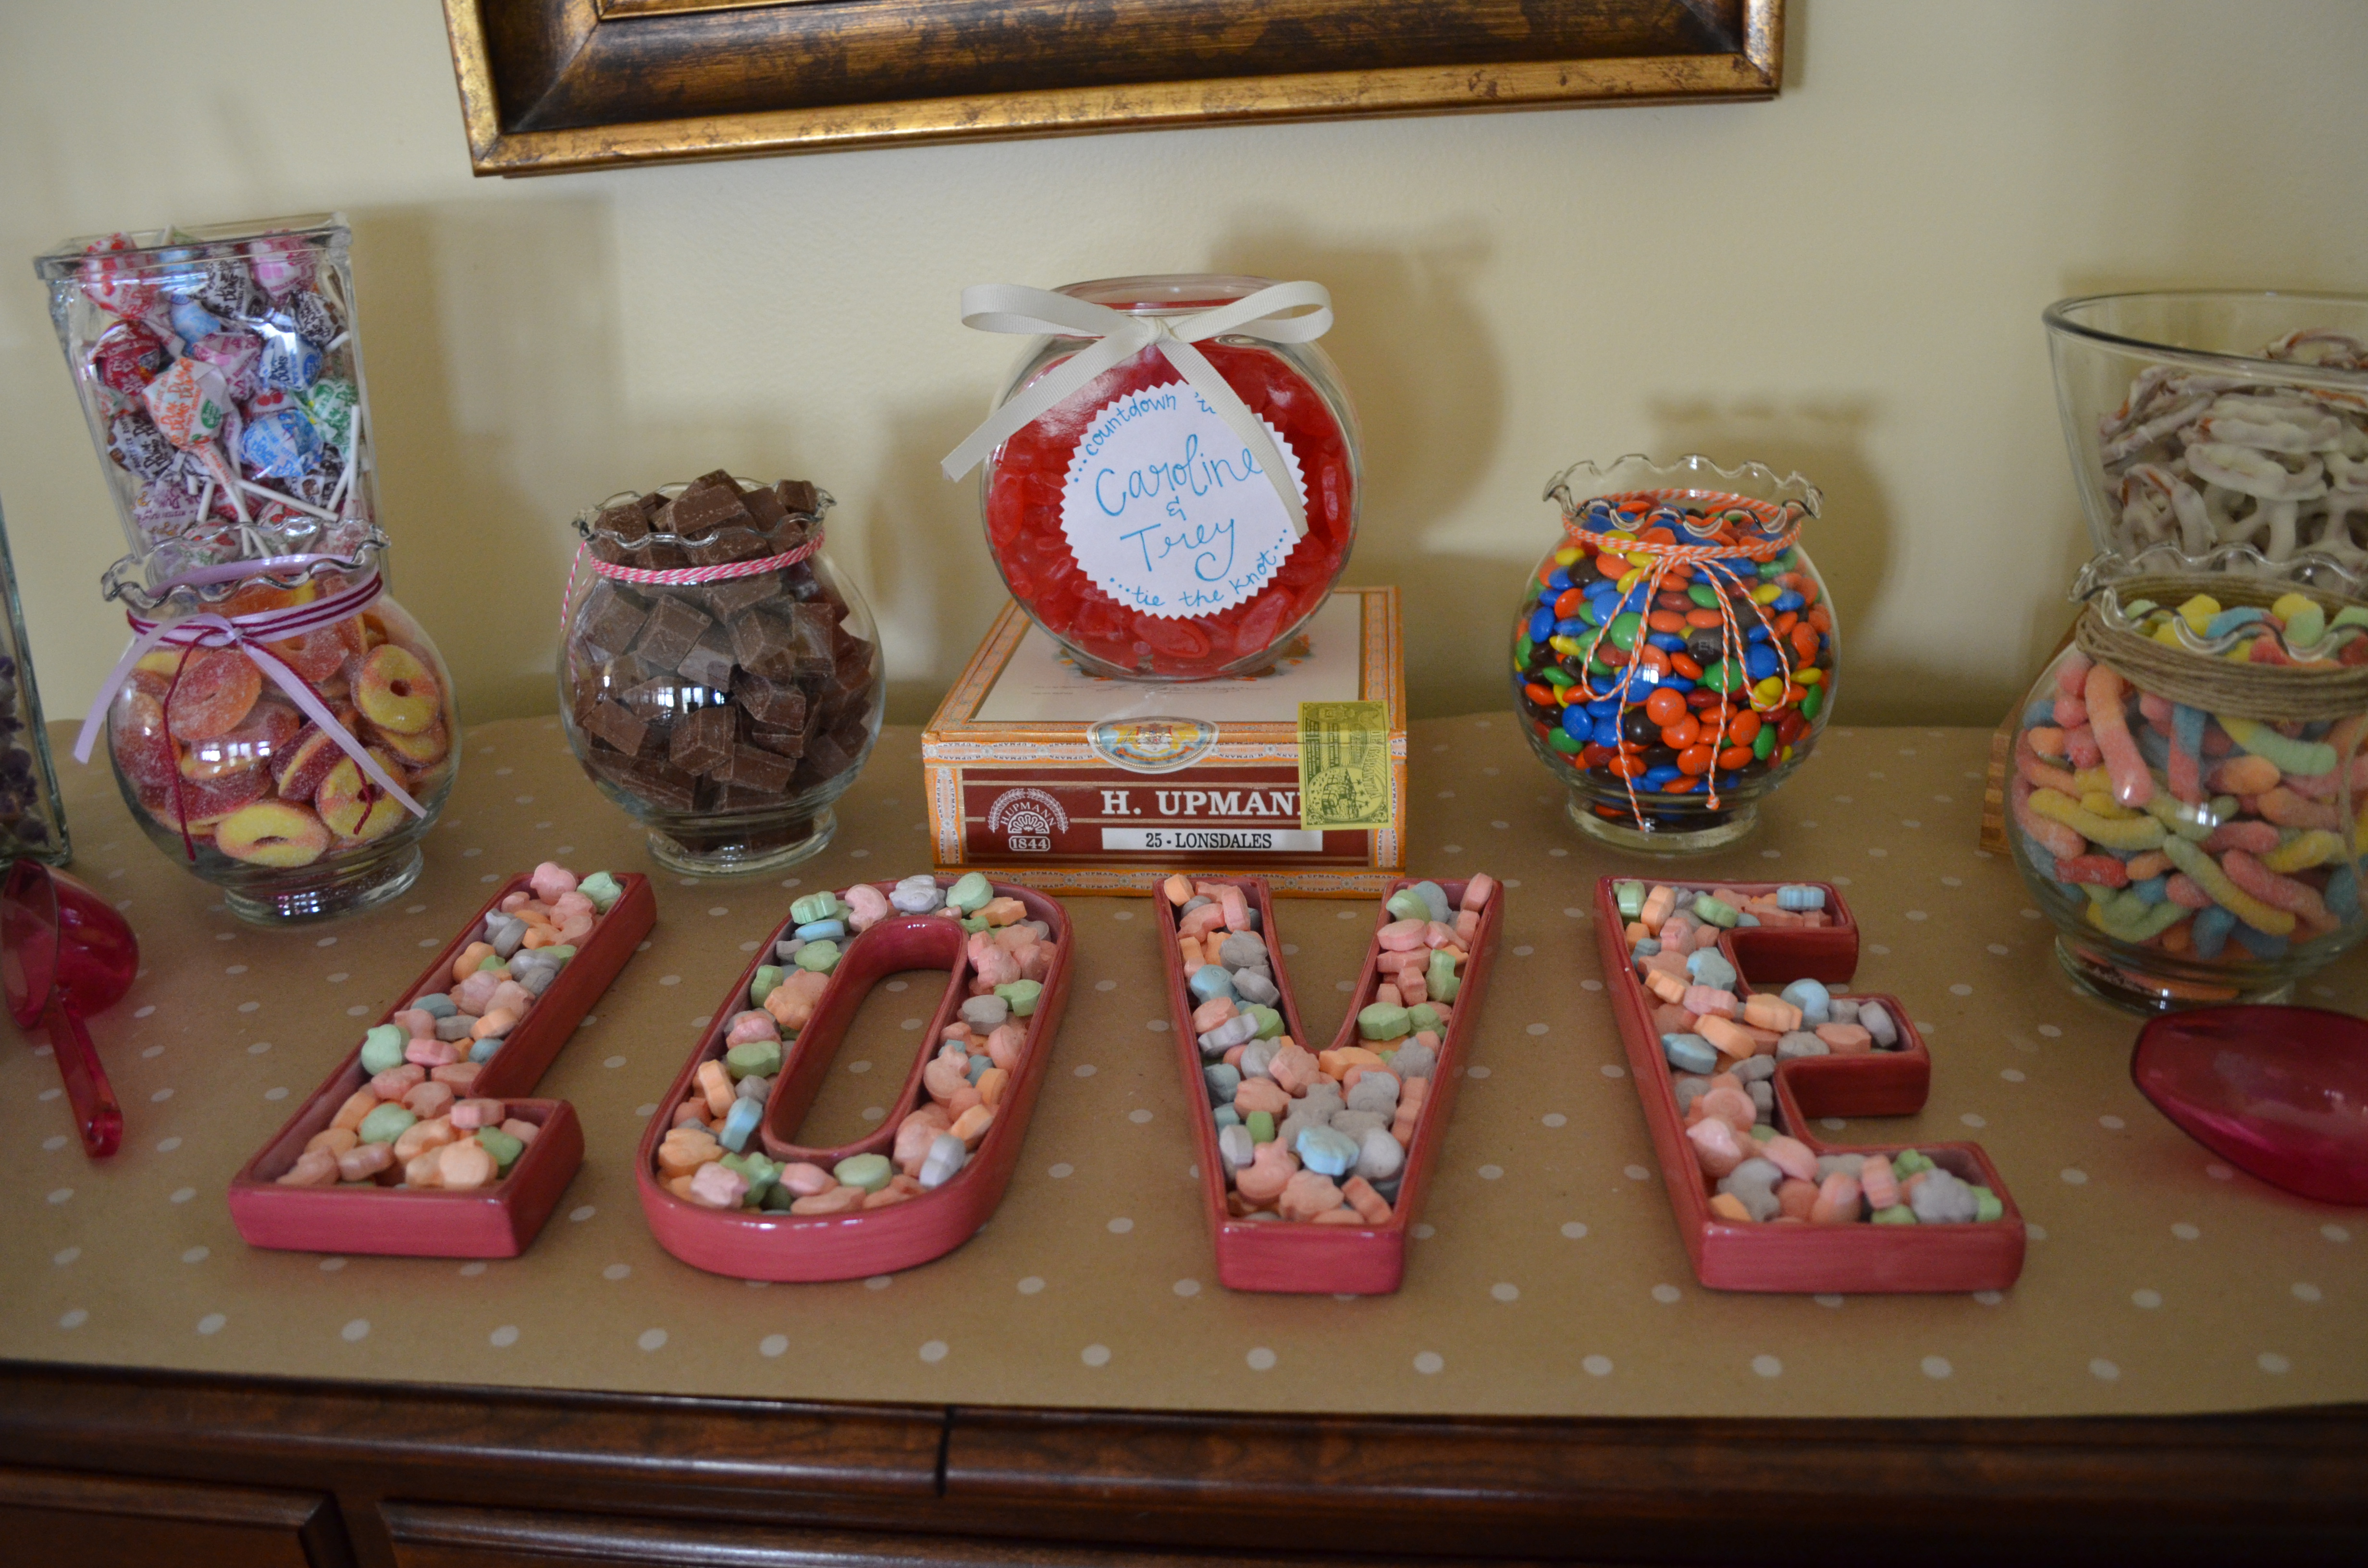
My mom also had these adorable letters from Valentine’s Day with ridges perfect for holding candy. And it was her idea to put the Swedish Fish in a glass fish bowl.

DSC_0121

Picking the candy: My initial problem was figuring out how much candy to get. I set a budget of $35 (though I did end up going over it), and we were planning on having 30 to 40 people in attendance. I avoided the candy at Sam’s. It was more candy than I needed, and each bag cost around $10. So I decided to pick a mix of name brand candy and cheap generic candy. M&M’s, Swedish Fish, Smarties, Sweet Tarts and Kit-Kat Bites covered the name brands. Gummy worms, Peach rings and lollipops were cheap and helped fill in the gaps. Plus, I decided to make chocolate-covered pretzels, which ended up being the most popular treat.

DSC_0129

Decorative touches: With your containers selected and the candy purchased, the rest is in the details. I found rolls of polka-dot brown wrapping paper at Target for only $1 that I used as the table covering. And then using string that I had around my apartment, I tried to decorate each vase to add touches of color. I found the candy scoops at Party City. I didn’t purchase a scoop for each container of candy. I figure since it was a relatively small party, people could share.

DSC_0130

To go bags: The candy buffet was set up in the middle of the party. So as the afternoon progressed, everyone came around for a handful of candy here and a few chocolate-covered pretzels there. But you could see it in everyone’s eye that they were hoping to take some home. For to-go bags, I found these cheap favor bags at Hobby Lobby. After buying them, I realized that they did not come with twist ties, so I set out of roll of washi tape to help secure the bags.

If you haven’t already noticed, my candy buffet uses several cigar boxes. Below, I used one to help store the bags and washi tape. Others were used to add a little height to some containers.

DSC_0125

Come with a plan: The day before the party, I mocked up the candy buffet to see what it would look like. I filled each container with its respected candy to make sure I had enough, but more importantly, I was able to think things through and play with different placement options. I’m so glad that I did this because when I showed up to help set up the next day, it was a little chaotic. People were running around everywhere, but since I knew what I wanted to do, I was able to set everything up in 10 minutes.

Plus, I made sure to bring my own essentials – scissors, tape and a sharpie – just in case. Since the party was not at my house, I was able to set up the buffet without having to search for these things. I just threw everything in a box and brought it to the party.

DSC_0118

Some people want their candy buffets to be themed in specific colors. Obviously, I didn’t go that route. I love how my candy buffet turned out so colorful and sweet. And it was so fun to pull it all together for an event celebrating such a close friend.

DSC_0126

A Simple Arrangement of Sunflowers

This past weekend, my friends and I threw a bridal shower for my friend Caroline. And though the entire shower could be described with words like adorable, sweet and beautiful, this idea for displaying sunflowers, I think, took the cake.

DSC_0133

I am obsessed with how simple the arrangement is. The trick is owning 11 bud vases that can support the weight of a sunflower. If you’re like me and do not, I’m thinking about investing in a dozen of these from Ikea. (only $1.99 each)

DSC_0135

A Ring of Another Sort

Wedding registries overwhelm me. I know they are meant to make gift buying easier for wedding guests, but I just see a list with way too many options. Plus, if I’m going to buy a gift, I want it to be something more special than a muffin pan.  So my crafty natural kicks in, and I embrace a homemade gift. For my most recent shower: a wedding embroidery hoop.

IMG_3650

My dear friend Caroline is getting married in May, giving me a great excuse to create this project I’ve seen all over Pinterest. I decided to keep the colors simple. Caroline is a very colorful person, and by using a neutral colors, I figured it would match whatever colors she decides to accompany it.

IMG_3657

I could probably learn a more “official” style of stitching. My embroidery skills are self-taught, but I think in this case, it turned out quite adorable!

Pack Yourself a [Felt] Lunch

DSC_0100

Just when I thought the felt pancakes and fried eggs were the cutest things I had made in awhile, I decided to make a felt lunch, complete with a sandwich with all the toppings, a bag of chips and a bright red apple.

DSC_0104

Thanks to Pinterest, I found the idea to make a bag of felt chips. After cutting out two ovals of yellow felt, I used my sewing machine to create ridges. I sewed rows of straight lines and then an additional line that outlined the whole thing. I also found an idea for tortilla chips, using off-white felt cut into triangles.

DSC_0106

The felt chip bag took less than 10 minutes to make. After cutting out two rectangles, I used my pinking scissors to create the zigzagged edge. Then taking one of the rectangles, I sewed the strip of light blue felt to the right side of the fabric. Next, I hand stitched the the yellow sun (again, cut out with my pinking scissors).  Finally, I put the right sides of the two rectangle pieces together and sewed along the edge (you don’t need a large seam allowance with felt). Flipped it right side out and voila!

DSC_0101

The felt apple was a little trickier. I found this tutorial online that I used as my guide. Basically, you need 6 pieces of red. (I just eye-balled the shape based on the tutorials’s template.) Putting rights sides together, I blanket-stitched the sections together. As you can see, this made it so you could see the red stitches. You can hide the stitches by using a sewing machine, but I think I prefer the exposed look.

DSC_0108

The felt sandwich is made up of several layers, each adding a pop of color.

DSC_0113

Starting with felt lettuce, I cut out a leaf-type shape out of green felt. Then, using my sewing machine, I stitch short lines to create veins.

DSC_0110

For the felt tomato, I used three pieces of felt: two round pieces of bright red felt with sections cut out and and one round piece of the dark red felt, sandwiched between the other two. I used white thread to stitch seeds, and then I hand stitched everything together. The felt onions were made with a piece of purple felt and a piece of white felt.

DSC_0115

I spent an hour or so trying to come up with the right meat. Using pink felt seemed strange, but then an epiphany hit. If I blanket stitch the edge with red thread, I can create felt bologna. (And yes, I did just sing the Oscar Myer’s song to help me remember how to spell bologna.) The felt cheese was much easier. I simply cut out a few holes to make it look more distinct.

DSC_0114

After making a version of the bread by blanket stitching two pieces of felt together, I decided that felt bread needed some dimension. It needed to seem more prominent than everything else. So I added some volume by creating a border of light brown felt and stuffing it with polyfill.

DSC_0107

I simply adore how colorful the sandwich turned out to be. Plus, when combined with the breakfast items already made, you have even more possibilities for the type of sandwich your child could create. BLT, anyone?

A [Felt] Breakfast of Champions

DSC_0087

When my sister-in-law told me that my 19-month-old nephew loved to “cook,” I figured I could chip in a few ingredients. And while Ikea has supplied him with my the basic fruits and vegetables, I thought I would provide a whole meal: felt fried eggs, felt bacon and a stack of felt pancakes.

DSC_0081

The easiest of the 3 items is the felt fried eggs because you really can’t go wrong. I used two pieces of the white felt (cut in any shape) and one circle of yellow felt for the yoke. Once I attached the yoke to one piece of the white felt, I blanket stitched the two pieces of white felt together (using two pieces hides the back stitch from the attaching the yoke and it adds some thickness).

DSC_0083

I created the felt bacon strips next. Again, using two pieces of brown felt to add thickness. I added the line of “fat” using light brown felt.

DSC_0079

For the felt pancakes, I cut two circles of light brown felt as well as “syrup” with dark brown felt and “butter” with yellow felt. I attached the “syrup” and “butter” to one of the circles, and then using a blanket stitch, I attached the second circle, leaving a small hole to stuff the pancakes with batting before sewing it closed.

I don’t know what what could be more adorable. Well, then there’s lunch…

Valentine’s Day Cards with Felt Hearts

As you very well know, I love Valentine’s Day – probably because it gives me an excuse to make heart-shaped pillows, eat lots of chocolate and send out hand-written notes. And though the pun-filled Valentines one can find at Target are adorable, I decided to make my own stationary this year with items I had around my apartment, and I was able to do it in 3 easy steps.

20140213-144715.jpg

Step 1: Cut hearts out of pink and red felt. (I used pinking scissors when cutting out mine, but the beauty of these notes is that you can do whatever you want.)

20140213-144740.jpg

Step 2: Attached the felt to the notecard using a needle and some thread. (It is remarkably easy to sew through card stock!)

20140213-144729.jpg

Step 3: Write a heart-felt note, like…

Dear friend,

To echo the words of Paul, “I pray that you, being rooted and established in love, may have power, together with all the Lord’s holy people, to grasp how wide and long and high and deep is the love of Christ, and to know this love that surpasses knowledge—that you may be filled to the measure of all the fullness of God.” (Ephesians 3:17-19).

Happy Valentine’s Day!

Love, Sarah

Vintage-Inspired Felt Heart Pillow

IMG_3614

I’ve said it once, and I’ll say it again. Felt hearts are wonderful! And this pillow might be the cutest thing I have made in awhile. The vintage-patterned fabric (made up of tiny pink and red heart-shaped flowers) serves as the perfect compliment to a big, red heart!

IMG_3571

And to add an even sweeter touch, I used pink yarn to stitch a border of smaller hearts, attaching the felt to the fabric.

IMG_3621

I know I made these pillows in preparation for Valentine’s Day. But I’m already convinced I need these all year long. It’s currently on my Etsy shop, but if you want it, I would buy it fast. I might decided to keep it for myself.

Embroidery on a Snow Day in Alabama

When I walked into my apartment after a rather insane day of snow and ice in Alabama, I put on comfortable clothes, made some tea and pulled out the embroidery floss. My snow day was going to be a relaxing one.

DSC_0543

“Come Thou Fount” might be my favorite song of all time. After finding this fabric amongst my scraps, this verse instantly came to mind.

DSC_0550

Since I used a smaller hoop (only 6 inches in diameter), I have to use smaller text to make it all fit. I made “Hello Friend” a couple of months ago and decided to mimic its font for this hoop.

DSC_0551

The finish touch to all this is a piece of felt to cover the back. I added the heart just because I wanted to, but I’m thinking it might be a nice signature touch for all of my future projects. Maybe it could turn into some sort of logo.

DSC_0545